
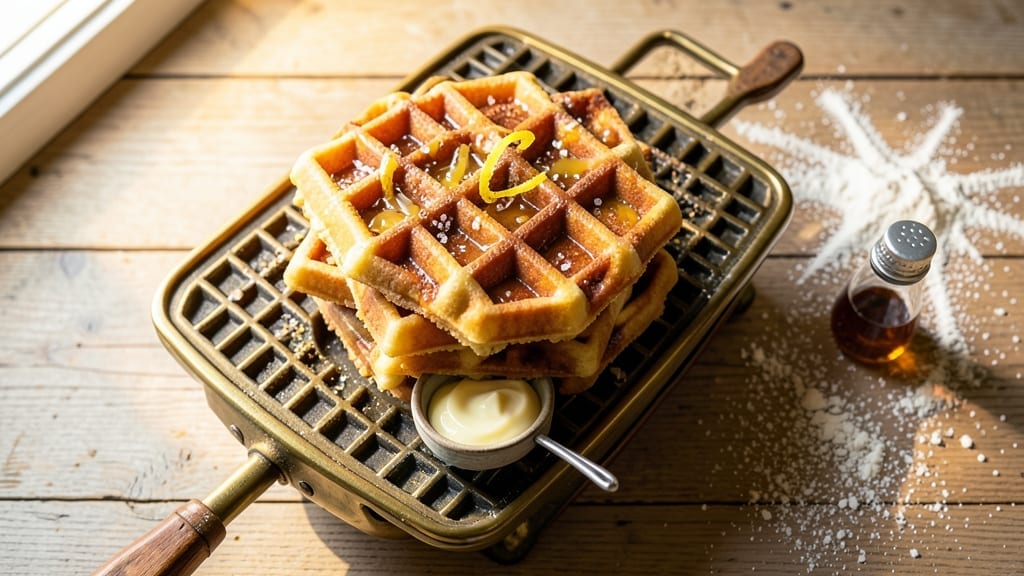
This 2-egg waffle recipe delivers crispy edges and fluffy centers in just 10 minutes—no bulky batter, no wasted ingredients, and no waiting for a crowded waffle iron. The secret lies in the precise egg-to-flour ratio and a foolproof technique that ensures every waffle turns out perfectly light, never gummy.
I developed this recipe after years of testing variations, and it consistently delivers restaurant-quality results at home with minimal effort.
The beauty of this method is its simplicity: 5 basic ingredients combine to create waffles that are both satisfying and versatile. Unlike traditional recipes that call for multiple eggs or excessive flour, this version uses exactly 2 eggs per waffle, reducing waste while maintaining structure.
The batter comes together in under 2 minutes, and with a preheated waffle iron, you’ll have golden, crispy waffles ready in 5 minutes—ideal for busy mornings or weekend breakfasts.
What sets these waffles apart is their textural perfection: the exterior stays delightfully crisp while the interior remains tender and airy, almost like a cloud. This balance is achieved through proper batter consistency and precise cooking time.
Whether you’re serving them with fresh berries, whipped cream, or a drizzle of maple syrup, these waffles will become a weekday staple—quick, efficient, and always impressive.
For those who love customization, this recipe scales effortlessly. Double the batter for a crowd, or adjust the toppings to suit any mood—savory options like scrambled eggs and cheese work just as well as sweet ones.
The key is maintaining the egg-to-flour ratio, which ensures consistent results every time. Let’s get started on making your next breakfast effortless and delicious.
Ingredients for 2 egg waffle
Five simple ingredients craft waffles with restaurant-quality texture in minutes.
| Ingredient | Amount | Notes |
|---|---|---|
| Large Eggs 🥚 | 2 whole | Room temperature for even cooking |
| All-Purpose Flour 🌾 | ½ cup | Sifted for light texture |
| Granulated White Sugar 🍚 | 1 tbsp | Adjust for sweetness preference |
| Unsalted Butter 🧈 | 2 tbsp | Melted and cooled slightly |
| Vanilla Extract 🌿 | ½ tsp | Pure extract preferred |
| Salt 🧂 | ¼ tsp | Fine sea salt preferred |
| Whole Milk 🥛 | ¼ cup | Room temperature for smooth batter |
| Baking Powder 🍞 | ¼ tsp | Freshly opened for best rise |
The eggs are the foundation—room temperature ensures even cooking and prevents gumminess. Bob’s Red Mill all-purpose flour is my go-to for consistent results, but any high-quality brand works. The sugar isn’t just for sweetness; it helps create that perfect crispy edge. For the butter, Land O’Lakes unsalted melts beautifully without altering flavor balance. If you’re using salted butter, reduce the added salt to 0.125 tsp. The milk should be room temperature—cold milk makes the batter lumpy, and that ruins the delicate texture. For extra fluffiness, I recommend Bob’s Red Mill baking powder—it’s aluminum-free and gives a reliable rise.
No vanilla extract? Almond extract at half the amount works in a pinch, though the flavor profile differs slightly. Short on milk? Unsweetened almond milk keeps the batter light, but you may need to add an extra 0.5 tbsp flour for proper consistency. The eggs can be separated if you prefer egg whites for a lighter texture, though the yolks contribute richness. For a savory twist, omit the sugar and add 1 tbsp nutritional yeast plus a pinch of onion powder. The waffle iron should be preheated to medium-high—too low and the edges won’t crisp properly.
Batter keeps for 24 hours in the fridge, covered tightly. For longer storage, freeze portions in ice cube trays—thaw overnight in the fridge before reheating. The waffles reheat best in a toaster or toaster oven for 1-2 minutes until crisp again. Avoid microwaving—it makes them soggy. For meal prep, assemble toppings separately (like fresh berries or whipped cream) and store components separately to maintain freshness. The batter can be doubled, but use within 4 hours for best texture.
Why You’ll Love This Recipe
- Just Five Ingredients: I swear, that’s it—eggs, flour, sugar, butter, and vanilla. No measuring cups to eyeball, no weird substitutions. Honestly, I keep this recipe on my fridge because it’s the kind of simple that makes me feel like I actually cooked something.
- Golden Crisp Magic: The butter and sugar combo gives these waffles that perfect golden edge while keeping the inside tender. That vanilla? It’s the secret weapon—subtle but ridiculously good when you fold in peanut butter or dust with powdered sugar.
- Breakfast or Dessert: Serve them warm with maple syrup for a lazy weekend morning, or freeze them for a quick after-school snack. Between us, I’ve even used them as a base for mini grilled cheese sandwiches—crispy, buttery, and perfect every time.
- Zero Waste, Maximum Value: Two eggs stretch further than you’d think, and the batter keeps for days in the fridge. I’ll be real: I make a batch on Sundays, freeze half, and still have leftovers by Thursday. Budget-friendly? Absolutely. Reliable? Even more so.
Step-by-step instructions for light and airy waffles
Master this technique and you’ll achieve restaurant-quality waffles with crisp edges and fluffy interiors every time.
Melt and Cool the Butter
Place the 2 tablespoons unsalted butter in a microwave-safe bowl and melt it in 30-second intervals on high power, stirring between each interval. You want it completely melted but not hot—just warm enough to blend smoothly. Let it cool for 5 minutes until it reaches a temperature where you can comfortably touch it without burning your fingers. This cooling step prevents the butter from cooking the eggs immediately when mixed, which helps create that signature light texture.
I always test the butter’s temperature by gently pressing a drop onto the back of my hand. If it feels warm but not hot, it’s ready. The reason we cool it slightly is that room-temperature butter would create a denser batter, while warm butter helps incorporate air more effectively during mixing. This is the foundation of those airy pockets we’re after.
Whisk Eggs, Milk and Sweetener
In a medium bowl, whisk together the 2 whole large eggs, ½ cup whole milk, 1 tablespoon granulated white sugar, ½ teaspoon vanilla extract, and ¼ teaspoon salt until completely combined and smooth. You should hear a faint swishing sound and see no streaks of egg white remaining. This step creates a homogeneous base that will distribute evenly throughout the batter.
Whisk for about 1 minute until the mixture is uniform in color and texture. The eggs should be fully emulsified with the milk, creating a pale yellow liquid. This is where the structure of your waffles begins—properly whisked eggs create stable air bubbles that will expand in the hot waffle iron. Don’t rush this step; thorough mixing prevents dense spots in your final waffles.
Combine Dry Ingredients
In a separate bowl, sift together the ½ cup all-purpose flour and ¼ teaspoon baking powder. The sifting process aerates the flour, which helps create that light, fluffy texture. Make a well in the center of the dry ingredients and pour in the melted butter. Using a spatula, gently fold the dry ingredients into the wet mixture until just combined—you should still see some flour streaks.
Overmixing at this stage develops gluten, which leads to tough waffles. We want just enough incorporation to create a smooth batter without activating too much gluten. The batter should have a thick, pancake-like consistency that holds its shape when you lift the spatula. If it’s too thin, your waffles will be cakey rather than crisp and fluffy.
Preheat and Cook the Waffles
Preheat your waffle iron to medium-high heat (around 375°F) and allow it to heat for 5 minutes. Lightly grease the plates with butter or cooking spray if your waffle iron isn’t non-stick. Pour about ½ cup of batter onto the center of the preheated iron. The heat should immediately start creating steam and small bubbles on the surface.
Close the lid and cook for 3-4 minutes until the waffles are golden brown and the edges pull away from the iron. You’ll know they’re ready when the top has a crisp texture and the bottom releases easily with a spatula. The key is to listen for that satisfying sizzle and watch for the telltale golden color—this indicates proper browning without burning. If you see steam escaping from the sides, your iron is hot enough.
Serve Immediately for Maximum Freshness
Transfer the waffles to a wire rack and let them cool for 1-2 minutes before serving. This brief resting period allows any excess steam to escape, preventing sogginess. Serve warm with your favorite toppings—maple syrup, fresh berries, whipped cream, or a dusting of powdered sugar all pair beautifully with these light waffles.
The secret to their airy texture lies in the proper balance of ingredients and cooking technique. The melted butter creates moisture while the baking powder provides lift, and the careful whisking incorporates air that expands in the heat. Each waffle should have crisp edges that give way to a tender, fluffy interior. If you follow these steps precisely, you’ll achieve waffles that are light enough to eat with a fork but sturdy enough to hold toppings without falling apart.
Pro Tips For Making 2 Egg Waffle
- Whisk Eggs Aggressively: I used to just crack and stir the eggs, but these waffles turned out dense and flat. Now I beat them hard for 30 seconds with a fork—just until the yolks and whites blend completely. The extra air makes the texture light, even with just two eggs.
- Melt Butter First: Dumping cold butter into the batter makes lumps that ruin the texture. Melt it first, then let it cool slightly before mixing—just warm enough to coat your fingers but not hot. This keeps the batter smooth without breaking the eggs.
- Skip Overmixing Flour: I learned this the hard way—tough waffles mean I overworked the batter. Once the flour and sugar are combined, mix them into the wet ingredients just until combined. A few small lumps are fine; overdoing it makes them chewy instead of crisp.
- Preheat Iron Longer: Two eggs mean a thinner batter, so the iron needs to be really hot. Let it heat for 5 minutes after turning it on—test with a drop of water that sizzles immediately. A cool iron means soggy centers, and nobody wants that.
Essential equipment for this recipe
Waffle Iron Essentials
You don’t need a fancy waffle maker—any non-stick waffle iron will work, but I recommend the Cuisinart Grill Master for its even heat distribution. For budget-friendly options, the Hamilton Beach 26030 delivers consistent results.
Always preheat for 5 minutes at medium-high (375°F) before cooking to ensure proper browning and crisp edges. 🔥
Batter Prep Tools
A medium mixing bowl and whisk are your best friends for creating smooth batter. I use a stainless steel whisk from OXO because it handles both delicate whisking and thorough mixing.
For sifting flour, a fine-mesh sifter ensures proper aeration—Norpro’s 8-cup sifter is my go-to. A small spatula helps gently fold dry ingredients without overmixing.
Butter Melting Hack
Melt butter in 30-second microwave bursts to avoid overheating. I use a glass microwave-safe bowl because it heats evenly. After melting, let it cool for 5 minutes—test by touching a drop to your wrist.
If it’s warm but not hot, it’s ready. This step prevents butter from cooking the eggs too quickly, which keeps waffles light and airy.
Optional Extras
For non-stick convenience, keep butter-flavored cooking spray nearby—just a quick spritz prevents sticking. A wire cooling rack keeps waffles crisp instead of soggy. For serving, I love a small syrup bottle (like Mrs. Dash’s squeeze bottle) to drizzle fresh maple syrup neatly.
These tools make the process smoother and more enjoyable. ✨
Budget-Friendly Swaps
No fancy tools? Use a fork instead of a whisk for mixing—just stir vigorously for 1 minute. A sieve works for sifting flour if you don’t have a sifter.
For melting butter, a small saucepan on low heat works perfectly. The key is proper technique, not expensive gadgets—these swaps keep the recipe accessible for everyone.
Nutrition facts
Frequently asked questions
Why does this recipe use only 2 eggs?
This recipe uses exactly 2 eggs to create a perfectly balanced waffle with crisp edges and a fluffy interior without excess richness. Two eggs provide enough structure and moisture while keeping the batter light—ideal for a quick breakfast that isn’t overly heavy. The secret lies in the precise egg-to-flour ratio and proper whisking technique, which creates stable air bubbles that expand beautifully in the waffle iron.
Can I make these waffles without a waffle iron?
Yes! You can use a non-stick skillet on medium-low heat to make mini waffles. Pour small circles of batter and cook for 2-3 minutes per side until golden. For a more traditional shape, try a waffle maker pan (available at kitchen stores) that fits in a standard skillet. The key is keeping heat consistent—too hot and they’ll burn before cooking through.
How do I fix waffles that turn out too dense?
Dense waffles usually mean overmixing or cold ingredients. First, ensure your eggs and milk are room temperature. Second, whisk just until combined—stop when you see a few flour streaks when folding in dry ingredients. Finally, preheat your waffle iron for 5 minutes at medium-high heat (375°F) before cooking. If it’s too cool, the batter won’t set properly.
Can I add chocolate chips or fruit to the batter?
Fold in ¼ cup chocolate chips or ½ cup diced fruit (like strawberries or blueberries) after combining wet and dry ingredients. For fruit, pat it dry first to prevent excess moisture. Keep additions to ½ cup total to maintain the waffles’ light texture. If using chocolate, use semi-sweet chips—they melt beautifully without making the batter too sweet.
How long can I store leftover waffles?
Store waffles in an airtight container at room temperature for up to 2 days or freeze for 1 month. To reheat, place in a toaster or toaster oven for 1-2 minutes until crisp. Avoid microwaving—it makes them soggy. For freezing, wrap individually in plastic wrap and place in a freezer bag to prevent sticking. Thaw overnight in the fridge before reheating.

- 77 Texas BBQ Taco Sauce Recipe: Smoky Chipotle Heat With Caramelized Depth - October 19, 2026
- 1930’s Chocolate Cake Recipe: Vintage Richness With Vanilla Bean Swirls - October 19, 2026
- 6 Ingredient Bread Recipe: No-Knead Wonder With Pantry Staples - October 19, 2026