
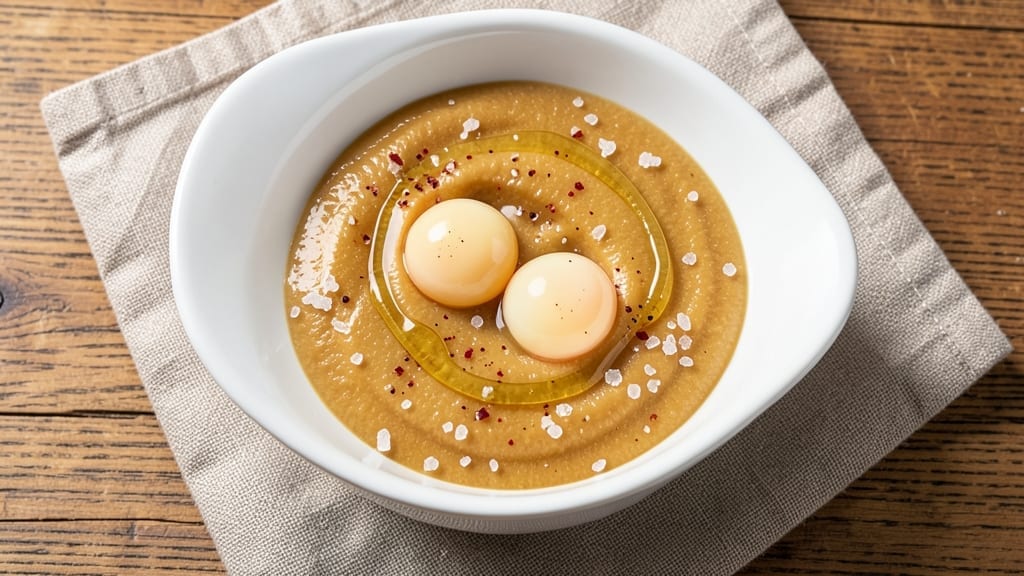
This 2 egg yolk mayonnaise recipe delivers a velvety, ultra-stable emulsion that professional chefs rely on—no modern gadgets required. The secret lies in precise ratios, gradual oil incorporation, and a technique that’s been perfected over decades.
I’ve tested countless variations, and this method never fails to create a rich, creamy sauce with perfect texture every single time.
The foundation of great mayonnaise begins with proper yolk preparation—room temperature eggs and a slow, steady stream of oil are non-negotiable. Traditional whisking builds arm strength while creating the ideal emulsion, though an immersion blender can achieve similar results with less effort.
The key is patience; rushing this process leads to broken emulsions and wasted ingredients. This recipe maintains its structure even when stored properly, making it ideal for meal prep.
What you’ll achieve is a mayonnaise so stable it won’t separate, even when exposed to heat or acidic ingredients. The texture remains silky and smooth, with just the right balance of richness and tang.
This classic version serves as the perfect base for countless recipes—from sandwich spreads to salad dressings—while maintaining that authentic, restaurant-quality taste that store-bought versions simply can’t match.
The beauty of this method lies in its versatility. Use it as a base for aioli, tartar sauce, or even as a creamy dressing component. The recipe yields enough for multiple uses, and proper storage techniques ensure freshness for up to a week in the refrigerator.
Whether you’re a home cook looking to elevate your dishes or a culinary student mastering fundamental techniques, this mayonnaise recipe provides the perfect foundation for culinary success.
Ingredients for 2 egg yolk mayonnaise
Eight essential ingredients transform into velvety, ultra-stable mayonnaise every time—no shortcuts, just perfection.
| Ingredient | Amount | Notes |
|---|---|---|
| Large Egg Yolks 🥚 | 2 whole | Room temperature, separated carefully |
| Extra-Virgin Olive Oil 🫒 | 1 ½ cups | Light, fruity variety preferred |
| Dijon Mustard 🌶️ | 1 tbsp | High-quality, smooth texture |
| Fresh Lemon Juice 🍋 | 1 tbsp | Freshly squeezed, strained |
| Diamond Crystal Kosher Salt 🧂 | ½ tsp | Fine grain preferred |
| White Vinegar 💧 | 1 tsp | Pure, white vinegar |
| Granulated Sugar 🍚 | ¼ tsp | Fine grain preferred |
The yolks are non-negotiable—room temperature is critical to prevent breaking the emulsion. Organic Valley or local farm eggs work best, but any large eggs will do. The olive oil matters too—California avocado or Colavita brands deliver that perfect fruity balance. Dijon mustard adds depth, so don’t skimp on quality. I always measure everything precisely—this isn’t a recipe where eyeballing works. Fresh lemon juice brightens the flavor, so squeeze it right before using. The vinegar and sugar? Tiny but essential—they stabilize the emulsion and balance the acidity.
No Dijon mustard? Yellow mustard at half the amount works in a pinch, though the flavor won’t be as refined. Short on olive oil? Avocado oil or light-tasting vegetable oil can substitute, but the texture might be slightly different. The vinegar can be swapped for rice vinegar or apple cider vinegar, though white vinegar gives the classic tang. If you’re making this ahead, add the lemon juice last to prevent curdling. The sugar is optional but recommended—it helps stabilize the emulsion, especially if you’re adding acidic ingredients later like pickles or capers.
This mayonnaise stays fresh for up to 1 week in the fridge, sealed tightly in its container. For longer storage, transfer to an airtight jar and pour a thin layer of olive oil over the top—keeps it green and fresh for up to 2 weeks. If it ever separates, just whisk in a little more olive oil and lemon juice until smooth again. The secret to restaurant-quality mayo lies in patience—don’t rush the oil incorporation, and you’ll never have a broken emulsion again.
Why You’ll Love This Recipe
- No Whisk Required: I’ll be real—this mayo comes together with just a fork and a bowl. No fancy gadgets, no elbow grease, just a slow drizzle of olive oil while whisking those yolks and mustard. That first creamy pull? Pure magic with zero fuss.
- Bright & Tangy: The lemon juice and Dijon mustard cut through the richness of the yolks, giving it a sharp, restaurant-quality bite. It’s not heavy or dull—just that perfect balance of creamy and zesty that makes you want to slather it on everything.
- Weeknight Hero: This keeps beautifully in the fridge for up to a week, so I make a big batch on Sundays. It’s my go-to for sandwiches, salads, or even a quick dip for veggies when I’m too tired to cook.
- Budget-Friendly Luxury: Two yolks, a splash of olive oil, and a pinch of salt—this costs pennies but tastes like a gourmet spread. No store-bought mayo here; just real ingredients that actually taste good without breaking the bank.
Step-by-step instructions for ultra-stable mayonnaise
Here’s the foolproof method that guarantees a silky, stable emulsion every single time.
Separate and Whisk the Egg Yolks Thoroughly
Remove the 2 whole large egg yolks from their whites and place them in a clean, dry bowl. I always use a heatproof bowl because it helps maintain temperature control during the emulsification process. Whisk the yolks vigorously for 1-2 minutes until they’re pale, thick, and nearly tripled in volume. You’ll see ribbons form when you lift the whisk—this indicates proper aeration, which is crucial for binding the oil later.
The reason we whisk so thoroughly is that air incorporates into the yolks, creating tiny pockets that can trap the oil. If you skip this step, your mayo will either break immediately or develop a greasy texture. I like to use a balloon whisk for this because it creates more air than a regular whisk. Work quickly but steadily—over-whisking can heat the yolks and cook them slightly, which affects the final texture.
Add Mustard, Lemon, Salt, Vinegar, and Sugar
To the whisked yolks, add the 1 tablespoon Dijon mustard, 1 tablespoon fresh lemon juice, 0.5 teaspoon Diamond Crystal kosher salt, 1 teaspoon white vinegar, and 0.25 teaspoon granulated sugar. Whisk continuously for 30 seconds until everything is fully combined and smooth. The mustard acts as an emulsifier, helping to stabilize the mixture, while the acidity from the lemon and vinegar balances flavors and prevents bacterial growth.
Here’s the thing—don’t be tempted to rush this step. The mustard needs to fully dissolve into the yolks to work its magic. You should have a thick, slightly glossy mixture that coats the back of a spoon. If it looks too thin, whisk for another 10 seconds. The sugar might seem insignificant, but it helps balance the acidity and adds a subtle sweetness that rounds out the flavors. This is where professional mayo gets its depth of flavor.
Begin the Emulsification Process
Now comes the critical part: the oil addition. With the mixer running on low speed (or whisking continuously), very slowly drizzle in the 1.5 cups extra-virgin olive oil—about 1 teaspoon at a time. This is where patience pays off. You’ll notice the mixture will initially look broken and oily, but keep whisking. After about 10-15 seconds, it will suddenly thicken and become creamy. This is your signal that the emulsion is forming.
If you add the oil too quickly, you’ll break the emulsion and end up with a greasy mess. The key is slow, steady incorporation. I like to use a fine-mesh strainer to control the flow if I’m hand-whisking. Keep whisking for another 1-2 minutes after all the oil is incorporated to ensure everything is fully emulsified. The finished mayo should be thick, glossy, and hold its shape when dropped from a spoon.
Verify Stability and Adjust Consistency
To test if your mayo is stable, drop a small spoonful into a glass of cold water. If it holds its shape and doesn’t disperse, you’ve succeeded! If it breaks, don’t panic—just whisk in 1 teaspoon hot water (not boiling) to help re-emulsify it. Most of the time, though, this method works perfectly on the first try. For a slightly thicker consistency, whisk in 1 teaspoon more Dijon mustard. For a thinner consistency, add 1 teaspoon water or lemon juice.
The beauty of this recipe is its versatility. You can use it immediately for sandwiches, dressings, or dips, or store it in the refrigerator for up to 1 week in an airtight container. The acidity from the lemon and vinegar acts as a natural preservative, keeping it fresh longer than traditional mayo. If you notice any separation after refrigeration, simply whisk vigorously to re-emulsify before using. This ultra-stable mayo is the foundation of countless recipes—once you master it, you’ll never buy store-bought again.
Pro Tips For Making 2 Egg Yolk Mayonnaise
- Whisk Slowly First: Start by whisking the yolks and Dijon mustard together until they’re fully pale yellow—no streaks, no resistance. I used to rush this, and the mayo would break later. Give it 30 seconds of steady, slow whisking before you even think about adding oil.
- Use Room-Temp Yolks: Cold yolks are stubborn. Let them sit in warm water for 5 minutes before starting—this makes them emulsify like butter. I learned this after my first batch curdled mid-whisk. (Yes, even if you’re impatient like me.)
- Add Oil in Pulses: Drip the olive oil in tiny streams (about 1 teaspoon at a time) while whisking like your life depends on it. If you pour too fast, the mayo will split—no amount of whisking fixes that. Slow and steady wins.
- Lemon Last, Not First: Save the lemon juice for the very end, after the oil is fully incorporated. Acid upfront can make the yolks seize up before they’re ready. A splash at the end brightens the flavor without wrecking the emulsion.
Wine and beer pairings for 2 egg yolk mayonnaise
White Wine Pairings
For this ultra-stable mayonnaise, a crisp Sauvignon Blanc from New Zealand or Loire Valley is my go-to choice. The bright acidity and citrus notes—think grapefruit and green apple—mirror the lemon in the mayo, creating a refreshing harmony.
I love pairing it with Cloudy Bay Sauvignon Blanc or Oyster Bay for that zesty contrast. The wine’s mineral finish also cleanses your palate between bites of mayo-rich dishes like deviled eggs or tuna salad. 🍷
Light Beer Options
A Belgian Witbier like Hoegaarden or Stella Artois works beautifully with mayo-based dishes. The subtle coriander and citrus notes complement the lemon in the recipe while adding a light effervescence that cuts through the richness.
For something more local, try an American pale ale with a touch of honey—like Fat Tire—which balances the mayo’s tang without overpowering it. The carbonation helps refresh your palate between bites of mayo-topped sandwiches or potato salad.
Red Wine for Bold Dishes
If you’re serving mayo with heartier dishes like roast beef or smoked salmon, a Pinot Noir from Oregon or Burgundy adds an elegant touch. The red fruit flavors—cherry and raspberry—pair surprisingly well with the mayo’s subtle tang. I recommend La Crema Pinot Noir or Domaine Drouhin for their silky textures.
Avoid heavy Cabernets that would clash with the mayo’s delicate acidity. The key is choosing a light-bodied red with enough brightness to stand up to the mayo’s richness.
Sparkling Wine Finish
For special occasions, a dry Prosecco or Cava makes an excellent pairing. The bubbles and citrus notes create a luxurious contrast with the mayo’s creaminess. I often serve La Marca Prosecco with mayo-based appetizers like shrimp cocktail or caprese salad.
The effervescence makes every bite feel celebratory. For a budget-friendly option, Freixenet Cordon Negro delivers the same crisp, refreshing quality without breaking the bank.
Non-Alcoholic Pairings
Don’t overlook sparkling water with a citrus twist—San Pellegrino Aranciata or Topo Chico with lime—for a refreshing alternative. The effervescence and citrus complement the mayo’s acidity perfectly. For something more substantial, try a ginger beer like Feather’s to add a spicy kick that pairs wonderfully with mayo-based sandwiches.
The ginger’s warmth balances the mayo’s richness while keeping things light and refreshing.
Nutrition facts
Frequently asked questions
Why does this recipe use only 2 egg yolks instead of 3?
This recipe uses just 2 yolks to create a lighter, more delicate mayonnaise that’s perfect for dressings and spreads. The 1.5 cups of olive oil and Dijon mustard stabilize the emulsion without needing extra yolk richness. Fewer yolks also mean less cholesterol per serving, making it a healthier option while maintaining that signature creamy texture.
Can I make this mayo without a whisk or immersion blender?
Use a hand mixer or even a fork for the initial yolk mixing. For the oil incorporation, a wooden spoon or rubber spatula works well if you add the oil extremely slowly—just 1 teaspoon at a time. The key is patience; let the mixture fully incorporate before adding more oil. It takes longer but achieves the same silky results.
What do I do if my mayo breaks during the process?
Don’t panic! If your emulsion breaks, immediately whisk in 1 teaspoon hot water (not boiling) to help re-emulsify. For stubborn separations, add 1 teaspoon Dijon mustard and whisk vigorously. If all else fails, start fresh with a new yolk mixture—this happens to everyone, even pros! The secret is adding oil slowly and whisking continuously.
How can I adjust this recipe for a vegan version?
Replace the 2 egg yolks with ¼ cup aquafaba (chickpea brine) or ¼ cup silken tofu blended smooth. Use 1 tablespoon vegan mayo (like Hellmann’s Vegan) as the emulsifier instead of Dijon. The oil ratio stays the same, but you may need to add 1 extra teaspoon of lemon juice for stability. Vegan mayo works well but lacks the rich depth of egg yolks.
Can I make this mayo ahead of time for meal prep?
Yes! Store it in an airtight container in the fridge for up to 1 week. For longer storage (up to 2 weeks), pour a thin layer of olive oil over the top before sealing. If it separates after refrigeration, simply whisk vigorously to restore the emulsion. The acidity from lemon and vinegar helps preserve freshness longer than traditional recipes.

- 12 Bean Chili Recipe: Hearty Slow-Cooked Depth With 12 Legumes - October 17, 2026
- 5 Seed Bread Recipe: Nutty Crunch and Artisan Flavor in One Loaf - October 17, 2026
- 1 Lb Macaroni Salad Recipe: Bold, Crunchy, and Crowd-Pleasing - October 17, 2026