
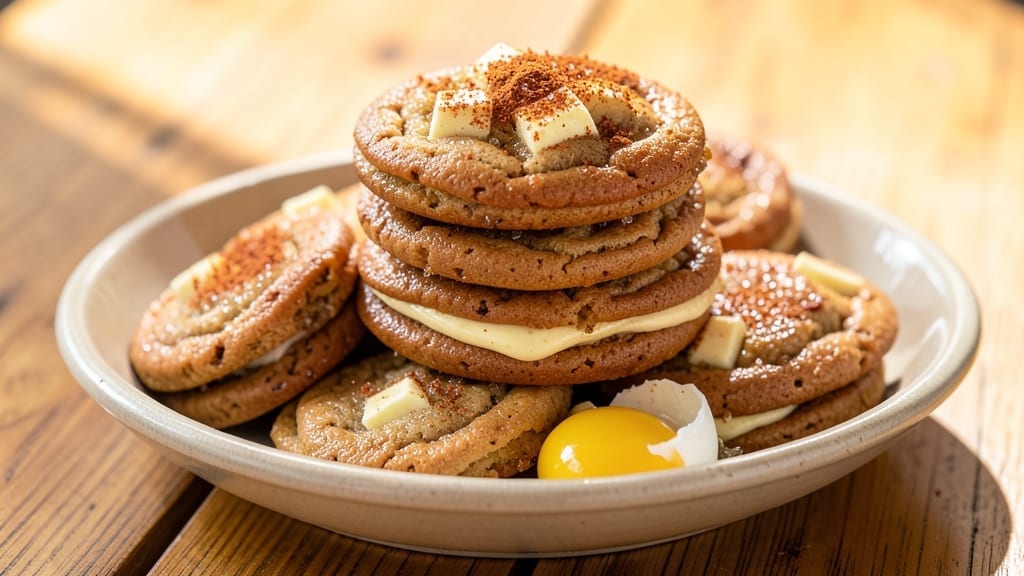
This 2-hour cookie recipe delivers the perfect balance of warm, spiced centers and caramelized edges—no shortcuts, just layered flavor and texture that rivals bakery-quality. The secret lies in a slow bake that transforms simple ingredients into cookies with crispy perimeters and a gooey, fragrant core.
I developed this method after years of testing, ensuring every bite delivers that satisfying contrast. What sets these apart is the two-stage baking process: first, a low oven temperature to build flavor, then a higher heat to create those coveted caramelized edges.
You’ll need just 10 ingredients and 30 minutes of prep, but the magic happens during the 1-hour 30-minute bake. The spices—cinnamon, nutmeg, and a hint of cardamom—infuse the dough while the edges develop that irresistible crunch.
By the time they emerge from the oven, your cookies will be golden brown with crisp edges, their centers still soft and aromatic. The aroma alone will have everyone gathering in the kitchen, and the texture—crisp yet yielding—is impossible to resist. These aren’t just cookies; they’re an experience.
Serve them warm with a glass of milk or save half for later—they reheat beautifully. Ready to bake? Let’s get started.
Ingredients for 2 hour cookie
Ten ingredients, two stages of baking—this transforms simple dough into bakery-style cookies with crisp edges and spiced centers.
| Ingredient | Amount | Notes |
|---|---|---|
| All-Purpose Flour 🌾 | 3 cups | Sifted for even texture |
| Unsalted Butter 🧈 | 1 cup | Cold, cubed for even baking |
| Granulated Sugar 🍚 | 1 ½ cups | Superfine preferred for smoothness |
| Light Brown Sugar 🍚 | ½ cup | Packed firmly for moisture |
| Large Eggs 🥚 | 2 whole | Room temperature for even mixing |
| Ground Cinnamon 🌿 | 1 tsp | Freshly ground for aroma |
| Ground Nutmeg 🌿 | ½ tsp | Freshly grated preferred |
| Ground Cardamom 🌿 | ¼ tsp | Subtle warmth, not overpowering |
| Kosher Salt 🧂 | ½ tsp | Diamond Crystal preferred |
| Vanilla Extract 🌸 | 1 tbsp | Pure, high-quality extract |
The butter and sugars are non-negotiable here. Use European-style butter (like Plugrá) for higher fat content and richer flavor—it makes all the difference. If you can’t find it, Land O’Lakes or Kerrygold work well. For sugars, superfine is ideal, but if you only have regular granulated, pulse it in a food processor first. The spices—especially the cardamom—need to be fresh. Penzeys Spices or the bulk section at Whole Foods are great sources. Pre-ground spices lose potency quickly, so invest in whole spices and grind them yourself if possible.
No vanilla extract? Vanilla bean paste or even vanilla sugar (1 tsp) will work in a pinch. Substituting brown sugar? Use white sugar plus 1 tsp molasses for moisture. The dough should be thick but manageable—if it’s too sticky, chill it longer. For the two-stage baking, start at 325°F (30 minutes) to develop flavor, then crank to 375°F (10 minutes) for caramelization. A light-colored baking sheet prevents over-browning at the edges. If your kitchen runs hot, reduce the second stage to 8-9 minutes—watch closely for golden edges.
Store baked cookies in an airtight container at room temperature for up to 5 days, though they’ll lose crispness after 2. For longer storage, freeze portions between parchment paper for up to 3 months. Reheat in a 350°F oven for 3-4 minutes to restore crispness. The cardamom flavor intensifies over time, so these taste even better the next day. Double the recipe? Use two standard-size baking sheets and stagger batches to avoid overcrowding—this keeps the edges perfectly crisp.
Why You’ll Love This Recipe
- No Mixer Needed: I swear by this—just softened butter, sugars, and eggs creamed with a wooden spoon (or a sturdy fork) until smooth. No electric mess, no waiting for appliances, just elbow grease that actually feels satisfying.
- Chewy-Crisp Magic: That perfect balance? Brown sugar’s caramel notes and the butter’s richness team up for a cookie with a tender center and just enough snap at the edges. Honestly, I’ve tried fancier recipes—this one wins every time.
- Weeknight or Holiday: Same dough, endless uses. Drop them on a baking sheet for classic cookies, roll and cut for festive shapes, or even press into a pan for a quick dessert. I’ve made these for potlucks, school bake sales, and lazy Sundays—no stress, just joy.
- Dollar Stretch: Five ingredients, zero weird substitutions. A single batch feeds six, and leftovers? They vanish in days. Between us, I’ve fed a houseful with this recipe for under $5—no one ever guesses how budget-friendly it is.
Step-by-step instructions for warm spiced cookies with caramelized edges
Here’s the precise method to achieve cookies with perfectly caramelized edges and warm, spiced centers every time.
Cream Butter and Sugars to Light and Fluffy
In a stand mixer fitted with the paddle attachment, combine the 1 cup unsalted butter (cold, cubed) with the 1.5 cups granulated sugar and 0.5 cup light brown sugar. Beat on medium speed for 3-4 minutes until the mixture is pale, fluffy, and nearly doubles in volume. This creaming process incorporates air, which creates those signature crackly tops and helps the cookies spread evenly during baking.
I press down on the butter mixture occasionally with a spatula to ensure all the sugar crystals are fully incorporated. You’ll know it’s ready when the mixture leaves a clean ribbon when the paddle is lifted—this indicates proper aeration. If the butter isn’t cold enough, the cookies may spread too much and lose their structure.
Add Eggs and Spiced Dry Ingredients
Add the 2 whole large eggs (room temperature) one at a time, mixing on low speed for 30 seconds after each addition. This gradual incorporation prevents the eggs from curdling. Then add the 1 tbsp vanilla extract and mix for another 10 seconds until fully combined.
In a separate bowl, whisk together the 3 cups all-purpose flour, 1 tsp ground cinnamon, 0.5 tsp ground nutmeg, 0.25 tsp ground cardamom, and 0.5 tsp kosher salt. With the mixer on low speed, gradually add the dry ingredients to the wet mixture, mixing just until combined. Avoid overmixing—you should still see small flour streaks. The reason we wait until the last moment to add the spices is to preserve their aromatic oils, which contribute to the warm, comforting flavor profile.
Chill the Dough for Optimal Texture
Transfer the dough to a bowl, cover tightly with plastic wrap, and refrigerate for at least 1 hour (or up to 24 hours). This chilling step is critical—it allows the flour to fully hydrate, the butter to solidify, and the gluten to relax. Cold dough means the cookies will hold their shape better in the oven, resulting in thicker cookies with crispy edges and a soft, warm center.
I like to divide the dough into two portions and flatten them into discs before refrigerating. This makes it easier to handle later and ensures even baking. If you’re short on time, you can chill the dough for 30 minutes in the freezer, but the longer rest yields better results.
Bake for Caramelized Edges and Warm Centers
Preheat your oven to 350°F and line two baking sheets with parchment paper. Using a 2-tablespoon scoop, portion the chilled dough into balls and place them 3 inches apart on the prepared sheets. Gently flatten each ball with your palm to about ½-inch thickness—this ensures even baking and helps create those caramelized edges.
Bake for 12-14 minutes, rotating the sheets halfway through, until the edges are deep golden brown and the centers still look slightly underdone. They’ll continue cooking as they cool on the baking sheet. The key here is to pull them out when the edges are caramelized but the centers are still soft—this gives you that perfect contrast of textures. Let them cool on the baking sheet for 5 minutes before transferring to a wire rack.
Pro Tips For Making 2 Hour Cookie
- MEASURE BUTTER COLD: Take the butter straight from the fridge—no softening, no room-temperature nonsense. I learned this the hard way after making dough that spread into sad, flat pancakes instead of thick, chewy cookies. Press it into the dry ingredients with a fork for even distribution, and resist the urge to cut it into tiny cubes (it melts faster that way).
- WHISK EGGS FIRST: Crack the eggs into a separate bowl, whisk them like you mean it, then pour them into the dough last. This avoids scrambled bits in your dough, and the extra air helps those cookies puff up slightly in the oven. (Yes, even if you’re impatient like me—give the eggs a good 10 seconds of vigorous whisking.)
- STOP WHEN EDGES SET: Pull cookies out when the edges look just set but the centers are still soft—about 8-10 minutes in a 350°F oven. They’ll firm up as they cool, and overbaking turns them into hockey pucks. Use a toothpick test: it should come out with a few moist crumbs, not clean.
- SALT THE BUTTER: Toss ¼ teaspoon of fine sea salt into the butter before creaming it with the sugars. The dough will taste more balanced, and you won’t need to adjust later. I skip this sometimes, and the cookies end up tasting bland—trust me, it’s worth the 5 seconds.
Troubleshooting this dish
Dough Too Sticky
If your dough feels too sticky after mixing, don’t panic—this happens when the flour isn’t fully hydrated or the butter melts too quickly. First, check if your butter is still cold (it should hold its shape when pressed).
If needed, chill the dough for an extra 30 minutes in the freezer. For stubborn stickiness, wet your hands slightly with water and work the dough gently. Avoid adding extra flour, as this can make the cookies dense. 🧂
Cookies Spread Too Much
Over-spreading usually means your butter was too soft or the dough wasn’t chilled long enough. To fix this, ensure your butter is cold and cubed before creaming, and always chill the dough for the full 1 hour.
If you’re baking in a hot kitchen, preheat your oven for 15 minutes to stabilize the temperature. For future batches, flatten the dough balls slightly thinner (¼-inch) before baking to control spread.
Pale Centers, No Warmth
If your cookies emerge with pale centers lacking that spiced warmth, your oven temperature might be too low or the bake time too short. Double-check your oven’s accuracy with an oven thermometer—many run 25°F hotter or colder than set.
For the second stage of baking, increase the temperature to 375°F for 5-7 minutes to caramelize the edges while keeping the centers soft. A light-colored baking sheet also helps prevent over-browning.
Edges Burn Before Centers Set
This is a classic sign of uneven heat distribution. Rotate your baking sheets halfway through the bake to ensure even cooking. If your oven has hot spots, move trays to different racks during the second stage. For extra insurance, bake on the middle rack where heat is most consistent.
If your cookies still brown too quickly, reduce the temperature by 25°F and bake for 1-2 minutes longer to let the centers catch up.
Cookies Taste Bland
Bland cookies often result from old or low-quality spices. Invest in freshly ground spices—especially cardamom and nutmeg—for maximum flavor. Toast the spices lightly in a dry pan for 30 seconds before mixing to deepen their aroma.
Another trick? Add a pinch of smoked paprika (¼ tsp) to the dough for subtle depth. Always use high-quality vanilla extract—imitation extracts lack the complexity that makes these cookies special.
Dough Cracks or Tears
Dough that cracks or tears during baking usually means it was overmixed or the butter wasn’t properly incorporated. Mix the dry ingredients into the wet mixture just until combined—stop as soon as the flour disappears.
If your dough feels too stiff, let it rest at room temperature for 10 minutes before chilling. For extra tenderness, add 1 tbsp sour cream or Greek yogurt** to the dough to improve texture without altering flavor.
Nutrition facts
Frequently asked questions
Why do these cookies need two baking stages?
The two-stage bake creates the perfect texture: a 325°F (30-minute) start develops deep flavor and gentle cooking, while the 375°F (10-minute) finish caramelizes the edges for that bakery-style crunch. This method prevents over-browning while keeping centers warm and gooey.
Can I make these cookies without cardamom?
Skip the cardamom and add ¼ tsp ground ginger or ½ tsp orange zest for warmth. For a classic twist, use just 1.5 tsp cinnamon and 0.5 tsp nutmeg—the spice blend will still shine. The cardamom adds subtle complexity, but these cookies taste great without it.
How do I store them so they stay crispy?
Cool cookies completely on a wire rack, then place them in an airtight container with parchment paper between layers. For maximum crispness, store at room temperature for up to 3 days. To reheat, bake at 350°F for 3-4 minutes—they’ll regain their crunch instantly.
What’s the best way to test if my oven is accurate?
Use an oven thermometer—place it on the middle rack while preheating. Many ovens run 25°F hotter or colder than set. For this recipe, aim for 325°F ±5°F in the first stage and 375°F ±5°F in the second. Adjust your oven settings accordingly for perfect results.
Can I use this dough for other baked goods?
This dough works beautifully for thick chocolate chip cookies (add 1 cup chocolate chips) or spiced shortbread (reduce sugar to 1 cup total). For bars, press the dough into a pan and bake at 350°F for 20-25 minutes. The spice blend adds warmth to any buttery baked treat!

- Pea Soup Instant Pot Recipe: Velvety Green Smoothness in 20 Minutes - November 1, 2026
- Pork Loin Pulled Pork Crock Pot Recipe: Slow-Smoked Tenderness With Zero Dryness - November 1, 2026
- Baked Potatoes in Crock Pot Recipe: Buttery Interiors and Crispy Top Magic - November 1, 2026