
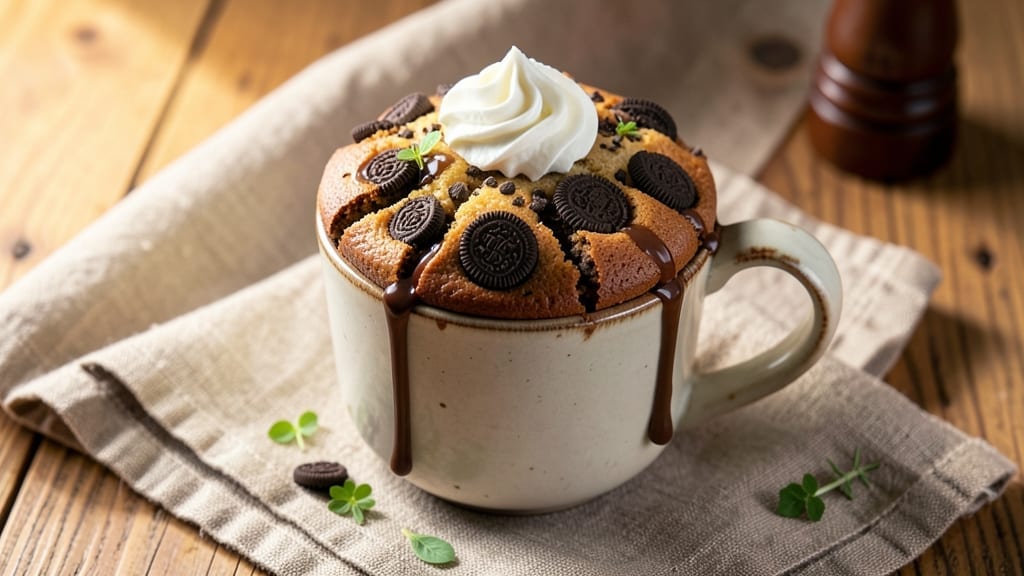
This 2 ingredient Oreo mug cake recipe delivers restaurant-quality dessert in 90 seconds flat—no mixing bowls, no oven, just microwave magic. 💛 The secret lies in crushing Oreos to create a crumbly base that transforms into a fudgy, chocolatey cake with a crispy exterior when microwaved.
I perfected this recipe during a particularly busy week when I needed a dessert fix without the fuss, and it’s become my go-to for satisfying chocolate cravings in minutes.
The beauty of this recipe is its simplicity: just Oreos and eggs (or milk, depending on your preference). The crushed cookies form the foundation, while the egg binds everything together, creating a texture that’s both rich and airy.
No measuring cups, no complicated steps—just grab what you need, mix in a mug, and microwave. It’s the perfect solution for when you’re craving something sweet but don’t have time to bake.
What you’ll end up with is a single-serving mug cake that’s warm, gooey, and dripping with chocolate flavor. The edges get slightly crispy while the center remains soft and fudgy, just like a classic Oreo cake but made in a fraction of the time.
It’s the kind of dessert that feels indulgent without requiring any effort, making it ideal for busy weeknights or spontaneous cravings.
Top it with whipped cream, extra crushed Oreos, or a drizzle of chocolate sauce for added decadence. This recipe is foolproof, so even if you’re not much of a baker, you’ll achieve perfect results every time. Let’s make this mug cake!
Ingredients for 2 ingredient oreo mug cake
Four servings of chocolatey magic—just crush, mix, and microwave for instant dessert satisfaction.
| Ingredient | Amount | Notes |
|---|---|---|
| Oreos (Original Flavor) 🍪 | 24 whole | Crushed into fine crumbs |
| Large Eggs 🥚 | 2 whole | Room temperature preferred |
| Unsalted Butter 🧈 | 1 tbsp | Optional for richness |
| Milk (2% or Whole) 🥛 | 1 tbsp | Substitute for egg if needed |
| Vanilla Extract 🌸 | ¼ tsp | Pure vanilla for flavor |
| Granulated Sugar 🍚 | 1 tbsp | For extra sweetness |
| Microwave-Safe Mug ☕ | 1 whole | 12-16 oz capacity |
Oreos are the star here, so grab the original flavor—none of that white chocolate nonsense. I always use Nabisco Original Oreos because they’re the most widely available and crush perfectly. If you’re short on time, pre-crush them in a ziplock bag with a rolling pin—no food processor needed. The butter is totally optional, but if you’re using it, soften it first so it mixes smoothly. Milk or egg? Both work—eggs give a richer texture, milk makes it more cake-like. I keep both on hand for flexibility.
No eggs? Milk works 1:1, though the texture will be slightly lighter. Short on Oreos? Crush any chocolate sandwich cookie—even those fancy European ones—but expect a different flavor profile. Vanilla extract is key for that classic Oreo taste, but if you’re out, a pinch of cinnamon adds warmth. The sugar is optional, but if you’re using it, packed brown sugar2 tbsp applesauce or flax egg. Pro tip: Use a microwave-safe mug with a handle—the ones with measurements make it easy to eyeball the mix.
This cake is best served immediately, but if you must prep ahead, store the dry crumbs in an airtight container for up to 1 week. The egg or milk should be added fresh before microwaving. Leftovers? Crust the cake into a jar and store in the fridge for up to 3 days—perfect for a quick breakfast treat. Freezing isn’t recommended as the texture gets gummy. For extra decadence, top with whipped cream or extra crushed Oreos right before serving—trust me, it’s worth the extra 30 seconds.
Why You’ll Love This Recipe
- Mug in Minutes: I swear by this for when I’m staring at a half-empty pantry at 9 PM. Crack an egg, melt butter, crush Oreos—boom. No mixer, no measuring cups, just a microwave and your favorite mug.
- Crunchy-Creamy Magic: That first bite? The crispy Oreo crumbs on the outside, the tender milk-chocolatey center—it’s like dessert got a personality upgrade. Honestly, I’ve made it for guests who think they’re too fancy for Oreos, and they still ask for seconds.
- Party Trick Ready: Birthday? Date night? Brunch with friends? Line up mugs, let everyone customize their own (add chocolate chips, swap milk for cream), and watch them think you slaved away. Between us, it’s the easiest crowd-pleaser I know.
- Budget Dessert Win: I buy Oreos in bulk, use eggs from my fridge, and this recipe costs me pennies per serving. Leftovers? Freeze the batter in a bag—just zap a mug when you’re craving something sweet without breaking the bank.
Step-by-step instructions for microwave mug cake magic
Here’s how to transform simple pantry staples into decadent dessert in record time.
👨🍳 Step 1: Crush Oreos to Perfect Crumb Texture
Place all 24 whole Oreos (Original Flavor) between two sheets of parchment paper. Use a rolling pin or heavy pan to crush them into fine, even crumbs. You want a texture that’s powdery but not dusty—think of it like wet sand. If you see any large chunks, pulse them in a food processor or crush them further by hand. This ensures your cake has that signature Oreo crunch throughout, not just on top.
Transfer the crushed Oreos to a small bowl and set aside. I like to use a fork to break up any remaining clumps at this stage. The finer the crumbs, the more evenly they’ll distribute in your mug cake, creating that perfect balance of texture in every bite. Pro tip: If you’re short on time, you can even place Oreos in a sealed bag and crush them with a wine bottle or rolling pin directly in the bag.
🍳 Step 2: Whisk Wet Ingredients to Smooth Perfection
In a medium bowl, crack the 2 whole Large Eggs and let them come to room temperature if they’re cold from the fridge. Add the 1 tbsp Unsalted Butter (if using), 1 tbsp Milk (2% or Whole), 0.25 tsp Vanilla Extract, and 1 tbsp Granulated Sugar. Use a whisk to combine everything until smooth and fully incorporated. You should see no streaks of egg white or butter—this ensures your cake will be tender rather than dense.
For best results, I recommend using room temperature eggs as they blend more smoothly. If your butter is solid, microwave it for 10-15 seconds to soften it before adding to the mixture. The butter adds incredible richness to this cake, but if you’re watching calories, you can omit it without sacrificing much flavor. Give the mixture one final stir before moving to the next step—this prevents any separation when you combine it with the dry ingredients.
🥘 Step 3: Combine Wet and Dry Mixtures
Pour the crushed Oreos into your microwave-safe mug (12-16 oz capacity) and create a well in the center. Slowly pour the wet ingredient mixture into the well, then use a spoon to gently fold everything together. You want to distribute the wet ingredients evenly throughout the dry crumbs without overmixing. The batter should be thick and crumbly—almost like wet sandcastle mix. If it seems too dry, add an extra ½ teaspoon of milk to help bind everything together.
This is where the magic happens: the wet ingredients will start to dissolve the Oreo crumbs, creating a thick, cake-like batter. Press down gently on the mixture to help it settle into the mug. The more evenly you distribute the ingredients, the more consistent your cake’s texture will be. Don’t worry if it looks messy—it’s supposed to be thick and uneven at this stage. The microwave will work its magic to transform this into a perfectly baked cake.
⏰ Step 4: Microwave to Golden Perfection
Place the mug in the microwave and cook on high power for 60 seconds. Immediately after, open the microwave and let the cake rest for 10 seconds. Then microwave for another 30 seconds. This two-stage approach prevents the cake from becoming rubbery in the center while ensuring the top browns beautifully. You’re looking for a cake that’s just set but still slightly jiggly in the middle—it should look domed with a golden brown top that’s slightly crispy to the touch.
Here’s the thing about microwave mug cakes: they continue cooking slightly after you remove them from the microwave. That’s why it’s better to slightly undercook them rather than overcook. If your microwave is particularly powerful, you might need to reduce the time slightly. The cake should be warm throughout but still have a slight give when you press the center gently with a fork. Let it cool for 1 minute before serving—this helps it set properly and makes it easier to eat without burning your mouth.
Pro Tips For Making 2 Ingredient Oreo Mug Cake
- CRUSH THE OREOS RIGHT: Don’t just dump in random crumbs—use a food processor or strong zip-top bag and rolling pin to make a fine, even powder. Lumpy bits sink to the bottom of your mug cake, leaving you with a cake that’s half cookie, half sad sediment.
- MELT THE BUTTER FIRST: Microwave the butter in 10-second bursts until just liquid, then let it cool for 30 seconds before mixing. Hot butter cooks the egg too fast, turning your cake into a rubbery brick instead of a gooey delight.
- SKIP THE OVERMIXING: Stir the batter just until the Oreos dissolve—about 15 seconds max. Overmixing introduces air bubbles that collapse in the microwave, leaving you with a dense, flat cake instead of a light, airy one.
- USE ROOM-TEMP EGG: Cold eggs from the fridge won’t blend smoothly and can make your batter separate. Let the egg sit in warm water for 2 minutes before cracking it in—this ensures a silky texture and no weird streaks in your cake.
Perfect pairings for this 2 ingredient oreo mug cake
Creamy Toppings
Whipped cream is my go-to topping for this mug cake—just whip ¼ cup heavy cream with ½ teaspoon vanilla extract and a pinch of powdered sugar until soft peaks form. Dollop it right on top and watch it melt into the warm cake.
For extra decadence, I sometimes add 1 tablespoon Nutella or melted chocolate chips for a fudgy contrast. 🥛
Crunchy Garnishes
Extra crushed Oreos add that satisfying crunch you crave. Sprinkle 1 tablespoon of finely crushed Oreos on top right after microwaving while the cake is still warm. If you’re feeling fancy, try chopped toasted pecans or crushed pretzels for a salty-sweet combo that balances the richness.
I keep a small bag of crushed Oreos in my freezer for quick access.
Sauce Drizzles
Warm chocolate sauce elevates this dessert instantly. Heat ¼ cup semi-sweet chocolate chips with 2 tablespoons heavy cream in the microwave for 20 seconds, then drizzle over the cake.
For a caramel twist, make a quick sauce with 2 tablespoons brown sugar and 1 tablespoon butter, simmered for 3 minutes until bubbly. The contrast of warm sauce and warm cake is pure magic. 🍫
Fruit Accents
Fresh berries add a bright, tangy contrast to the rich chocolate. I like raspberries or strawberries sliced in half and placed on top—just a few pieces per cake. For a tropical vibe, try diced mango or pineapple, which pairs surprisingly well with the Oreo flavor.
The acidity cuts through the sweetness and makes each bite more vibrant.
Boozy Upgrades
For an adult twist, add ½ teaspoon vanilla extract + ½ teaspoon bourbon or coffee liqueur to the wet ingredients. The alcohol burns off during microwaving, leaving behind deep, warm flavors.
Top with a sprinkle of cocoa powder or crushed candy canes (seasonal!) for extra flair. I love this version when I’m craving dessert but want a little something extra. 🍸
Texture Boosters
For a cookie-like texture, press ½ teaspoon of mini chocolate chips into the top of the cake before microwaving. They’ll melt slightly and create pockets of gooey chocolate throughout.
Another fun option is crushed candy bars like Reese’s or Snickers—just sprinkle them on top after microwaving. The contrast of textures makes every bite exciting. 🍫
Nutrition facts
Frequently asked questions
Can I make this mug cake without eggs?
Yes! Swap the 2 eggs for 2 tablespoons of milk or 2 tablespoons of applesauce for a vegan version. The texture will be slightly lighter but still delicious. For best results, use room temperature milk to help bind the crumbs properly.
Why did my mug cake turn out rubbery?
Overcooking is the most common cause. Microwave times vary by appliance—start with 60 seconds then 30 seconds (with a 10-second rest in between) and adjust based on your microwave’s power. Also, make sure your mug isn’t too large (12-16 oz capacity works best).
How many servings does this recipe actually make?
This recipe makes 1 generous mug cake (about 1 cup of batter). For 4 servings, you’ll need to quadruple the ingredients and use individual mugs. The original recipe is designed for single-serving convenience—perfect for satisfying one person’s craving quickly!
Can I use any type of cookie instead of Oreos?
While you can substitute, Oreos are ideal because their texture and flavor work perfectly. For best results, use chocolate sandwich cookies (like Chocolate Wafer or Chocolate Chip Cookies). The cake will have a different flavor profile, but it’ll still be delicious. Just crush them extra fine for even distribution.
How do I make this mug cake extra fudgy?
Add 1 tablespoon of melted butter or 1 tablespoon of cocoa powder to the dry ingredients. Also, slightly undercook it by 5-10 seconds—the center should be warm and jiggly when you check it. The residual heat will help it set into a fudgy texture while staying moist.

- Pork Loin Pulled Pork Crock Pot Recipe: Slow-Smoked Tenderness With Zero Dryness - November 1, 2026
- Baked Potatoes in Crock Pot Recipe: Buttery Interiors and Crispy Top Magic - November 1, 2026
- Braised Beef Short Ribs Recipe: Crock Pot Fall-Off-Bone Magic in 6 Hours - November 1, 2026