
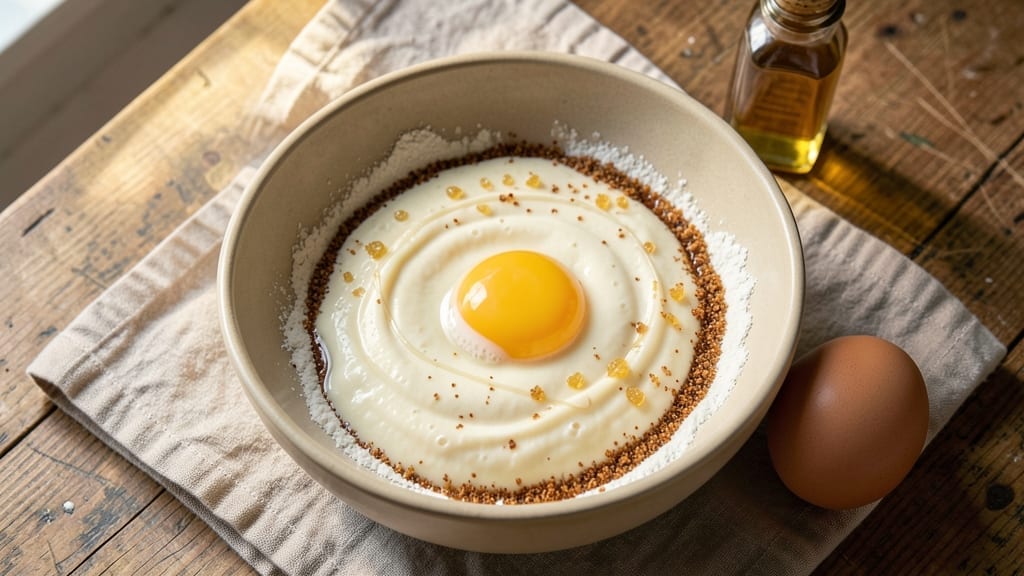
This 2 large cookies recipe proves that baking just two can feel like a triumph—when you’re making restaurant-sized treats in a single, decadent bake. The secret lies in scaling up the dough while controlling spread, so you get two monster cookies with crisp edges and a gooey center.
I perfected this after years of burning through cookie sheets, and it never fails to impress.
This isn’t your average cookie recipe—it’s designed for foolproof large-scale baking, using a mix of brown and white sugar for caramel depth while keeping the texture tender. The dough rests for 30 minutes (critical for flavor development), and we use a lightly chilled approach before baking to prevent over-spreading.
No special tools required, just patience and a hot oven.
By the time they emerge from the oven, you’ll have two golden, crackly-edged cookies with a soft, fudgy center—each big enough to share (or not). The aroma alone will have everyone gathering in the kitchen, and the first bite delivers that perfect balance of sweetness and buttery richness.
This is the kind of cookie that makes baking worthwhile.
Perfect for special occasions, gift-giving, or when you simply want to indulge without the hassle of batch baking. The recipe scales down easily too, so you can make one giant cookie if you’re feeling ambitious. Let’s get baking—your kitchen (and taste buds) will thank you.
Ingredients for 2 large cookies
Butter, sugar, and patience—your secret weapons for two showstopper cookies.
| Ingredient | Amount | Notes |
|---|---|---|
| Unsalted Butter 🧈 | 1 cup | Cold, cubed for even baking |
| Granulated White Sugar 🍚 | 1 cup | For crisp edges and sweetness |
| Packed Brown Sugar 🍚 | 1 cup | Light or dark, for caramel depth |
| Large Eggs 🥚 | 2 whole | Room temperature for smooth dough |
| Vanilla Extract 🌿 | 2 tsp | Pure extract, not imitation |
| All-Purpose Flour 🌾 | 2 ½ cups | Spooning and leveling for accuracy |
| Baking Soda 🧂 | ½ tsp | For lift and texture |
| Salt 🧂 | ½ tsp | Fine sea salt preferred |
| Chocolate Chips 🍫 | 2 cups | Semi-sweet, not milk chocolate |
| Chopped Walnuts 🥜 | ½ cup | Toasted for nutty flavor |
| Flaky Sea Salt 🧂 | 1 tbsp | For finishing before baking |
The butter needs to be cold—cut it into cubes and refrigerate until the dough comes together. Land O’Lakes unsalted or European-style butter works best for that rich, creamy texture. Sugar matters too: the mix of white and brown gives you that perfect caramelized edge while keeping the center fudgy. I always grab the domino all-purpose flour from the grocery store—it’s reliable and gives the best texture. For chocolate chips, Ghirardelli semi-sweet is my go-to, but any quality brand works. Walnuts? Toast them in a dry pan for 3-4 minutes until fragrant—trust me, it makes all the difference.
No vanilla extract? Vanilla bean paste at half the amount works in a pinch. Short on walnuts? Swap for pecans or even more chocolate chips. The baking soda is non-negotiable—it’s what gives these cookies that signature lift. If your chocolate chips are old and dry, toss them in a bowl with a little cornstarch to revive them. For the sea salt, Maldon flaky salt is ideal, but any flaky salt will do. And if you’re feeling fancy, sprinkle a little extra on top after baking for that gourmet touch.
The dough needs that 30-minute rest—don’t skip it. It keeps the cookies from spreading too much and lets the flavors meld. Store any leftover dough in the fridge for up to 3 days, wrapped tightly in plastic. Once baked, these cookies stay fresh on the counter for 5 days or in an airtight container for 1 week. Freeze them for up to 3 months—just let them cool completely and wrap them individually in plastic wrap before freezing. They’re even better the next day, so make them ahead if you can.
Why You’ll Love This Recipe
- No Mixing Madness: I swear by this dough—just cream butter and sugars until light, then fold in eggs and vanilla. No food processor, no stress, just a sturdy spoon and 5 minutes of elbow grease. (Yes, even on a Tuesday night.)
- Buttery-Sweet Magic: That perfect balance of white and brown sugar? It’s what makes these cookies caramelize just right—crisp edges, soft centers, and a flavor so rich you’ll want to eat them straight from the dough. Honestly, the vanilla ties it all together like a warm hug.
- Double-Duty Batches: Make two giant cookies and you’ve got a snack, dessert, or even a breakfast treat covered. Split one into squares for a picnic, freeze the other for late-night cravings, or serve them whole to impress guests. Versatile enough to handle anything.
- Pantry Staple Power: Butter, sugar, eggs, vanilla—these are ingredients you already own. No weird substitutions or last-minute grocery runs. Between us, this is the kind of recipe that turns a $5 bill into something that tastes like it cost $20. Budget-friendly doesn’t get much better.
Step-by-step instructions for double-batch decadent cookies
Here’s how to make two massive, bakery-style cookies in one go—crisp edges, gooey centers, and all the good stuff.
Cream the Butter and Sugars Together
In a large mixing bowl, combine the 1 cup unsalted butter, 1 cup granulated white sugar, and 1 cup packed brown sugar. Using a hand mixer or stand mixer with the paddle attachment, beat on medium speed for 3-4 minutes until the mixture is light, fluffy, and nearly doubles in volume. You’ll see it turn pale and airy—this is what creates those crackly tops.
Here’s the thing—I like to scrape down the sides of the bowl every minute or so to make sure everything gets incorporated evenly. The butter should be completely smooth with no lumps, and it should leave a trail when you lift the paddle. If it feels too warm, chill the bowl in the fridge for 5 minutes before proceeding.
Add Eggs and Vanilla for a Smooth Dough
Add the 2 whole large eggs, one at a time, mixing on low speed after each addition. Then stir in the 2 teaspoons vanilla extract. The mixture will look slightly curdled at first, but don’t worry—it’ll come together when we add the dry ingredients. I always use room-temperature eggs for a smoother dough that mixes better.
This is where the magic happens. The eggs bind everything together while the vanilla adds that warm, comforting flavor. If your dough seems too thick, let it sit at room temperature for 10 minutes before moving forward—this helps with mixing later.
Mix in Dry Ingredients and Fold in Chocolate
In a separate bowl, whisk together the 2.5 cups all-purpose flour, 0.5 teaspoon baking soda, and 0.5 teaspoon salt. Gradually add this mixture to the wet ingredients, mixing on low speed just until combined. You’ll still see some flour streaks, and that’s perfect—overmixing develops gluten and makes cookies tough.
Remove the bowl from the mixer and gently fold in the 2 cups chocolate chips and 0.5 cup chopped walnuts using a silicone spatula. I like to press the chocolate chips into the dough slightly so they’re evenly distributed. The walnuts add a nice crunch that balances the softness of the cookies.
Shape and Chill the Dough
Divide the dough into two equal portions. On a lightly floured surface, shape each portion into a 12-inch round log (about 2 inches thick). Place both logs on a parchment-lined baking sheet, cover with plastic wrap, and refrigerate for at least 1 hour—this step is non-negotiable. Chilling prevents excessive spreading and helps the cookies hold their shape.
While the dough chills, preheat your oven to 350°F. The longer you chill the dough, the better the texture—up to 24 hours works great if you’re planning ahead. Just make sure it’s fully chilled before baking.
Bake to Golden Perfection
Remove the dough logs from the fridge and place them on the preheated baking sheet. Sprinkle each log generously with the 1 tablespoon flaky sea salt—this adds a beautiful contrast to the sweetness. Bake for 18-22 minutes until the edges are deep golden brown and the tops look set but still slightly soft in the center.
Here’s the trick: Rotate the baking sheet halfway through baking for even cooking. When you remove them from the oven, let them cool on the baking sheet for 10 minutes before transferring to a wire rack. The centers should still be gooey when you cut into them—this is what makes them irresistible!
Pro Tips For Making 2 Large Cookies
- Cream Butter Slowly: I learned this the hard way—dumping cold butter into sugar and whipping it all at once leaves you with a dough that’s lumpy and fights you. Instead, soften the butter to room temp (it should dent when pressed), then mix it into the sugars in 3 batches, letting each incorporate fully before adding more. Your dough will be smooth and spreadable, not a greasy mess.
- Pack Brown Sugar Tight: The recipe calls for packed brown sugar, and I used to eyeball it—big mistake. Brown sugar holds moisture, so scooping it loosely means your cookies end up denser and stickier. Press it firmly into the measuring cup and level it off. Trust me, your cookies will thank you with that perfect chewy center.
- Chill Dough Fully: Skipping the fridge is how I ended up with flat, sad cookies that spread into pancakes. Wrap the dough in plastic and refrigerate it for at least 2 hours—overnight is even better. The cold firms up the butter and prevents over-spreading, so you get those thick, bakery-style cookies you actually want.
- Use Room-Temp Eggs: Cold eggs make your dough fight you when mixing, and they can cause the cookies to spread unevenly. Take the eggs out of the fridge 15-20 minutes before using—just enough to warm them to room temp. Your dough will come together like butter, and the cookies will hold their shape better. (Yes, even if you’re impatient like me.)
Storing and reheating this recipe
Room-Temp Revival
If your cookies have lost their freshness, bring them back to life by placing them in a 350°F oven for 5-7 minutes. This gentle reheat warms the chocolate and softens the edges without drying them out.
For extra indulgence, wrap the cooled cookies in a damp paper towel and microwave on low power for 10-15 seconds—just enough to melt the chocolate while keeping the texture tender. 🔥
Freezer Storage
These cookies freeze beautifully for up to 3 months—just wrap each one individually in plastic wrap, then place in a ziplock freezer bag with all the air squeezed out.
When ready to enjoy, thaw at room temperature for 1-2 hours or reheat directly from frozen in the oven at 300°F for 10-12 minutes. The cold helps preserve their texture, so no soggy surprises here. ❄️
Fridge Refresh
Store baked cookies in an airtight container at room temperature for up to 5 days, or refrigerate for 1 week if you live in a humid climate. To revive slightly stale cookies, sprinkle with 1 teaspoon milk or water, then microwave for 5 seconds.
The moisture reactivates the baking soda, bringing back that fresh-baked aroma and chew.
Portion Control
These are monster cookies—cut them into 8-12 wedges per cookie using a sharp serrated knife. For perfect slices, dip the knife in hot water between cuts to prevent crumbs.
Store wedges in a paper bag to keep them crisp longer. I like to portion them out right after baking so they stay fresh for snacking all week. 💫
Dough Prep Ahead
Make the dough 24 hours ahead and store it in the fridge for deeper flavor development. When ready to bake, let it sit at room temperature for 30 minutes before shaping. This extended rest time creates a more complex flavor profile—worth the wait for cookie lovers who plan ahead. 📅
Nutrition facts
Frequently asked questions
Can I make just one giant cookie instead of two?
Simply double the dough recipe and shape it into one 16-inch log (about 3 inches thick). Bake at 350°F for 22-25 minutes, checking for golden edges. The key is to chill the dough longer (2 hours) to prevent excessive spreading. For serving, slice into 12-16 wedges—perfect for sharing or a crowd!
Why does my dough keep spreading too much?
Overmixing or skipping the chill time are the most common culprits. Always mix dry ingredients just until combined (flour streaks are fine), and never skip the 1-hour chill. If your kitchen is warm, chill the dough 2 hours instead. Also, ensure your butter is cold—soft butter causes spreading. For extra control, shape the dough slightly thicker (2.5 inches) before baking.
Can I substitute ingredients for dietary needs?
Yes! For gluten-free, swap flour with a 1:1 GF blend (like Bob’s Red Mill) and reduce baking soda to 0.25 tsp. For vegan cookies, use vegan butter and flax eggs (replace 2 eggs with 2 tbsp ground flax + 6 tbsp water). Nut-free? Omit walnuts or use dried fruit like cherries. Just note texture may vary slightly—these cookies rely on butter and eggs for structure.
How do I tell when they’re done baking?
Look for deep golden brown edges and a slightly soft center that still jiggles when shaken gently. The tops should look set but not hard. A toothpick inserted should come out with a few moist crumbs (not wet batter). Overbaking = dry cookies, so err on the side of 1-2 minutes underdone—they’ll firm up as they cool. The gooey center is what makes them irresistible!
What’s the best way to cut these monster cookies?
Use a sharp serrated knife and dip it in hot water between cuts to prevent crumbs. For clean slices, cut into 8-12 wedges per cookie. For serving, arrange wedges on a platter with a dusting of powdered sugar or extra flaky salt. Pro tip: Let cookies cool 15 minutes first—they’ll hold their shape better when fully set.

- 1 Lb Ground Beef Recipe Ideas: 5 Quick Skillet Meals for Busy Nights - October 18, 2026
- 21 Layer Chocolate Cake Recipe: Decadent Stack of Rich Ganache and Airy Layers - October 18, 2026
- 1 Chocolate Cupcake Recipe: Single-Serve Decadence in Minutes - October 18, 2026