
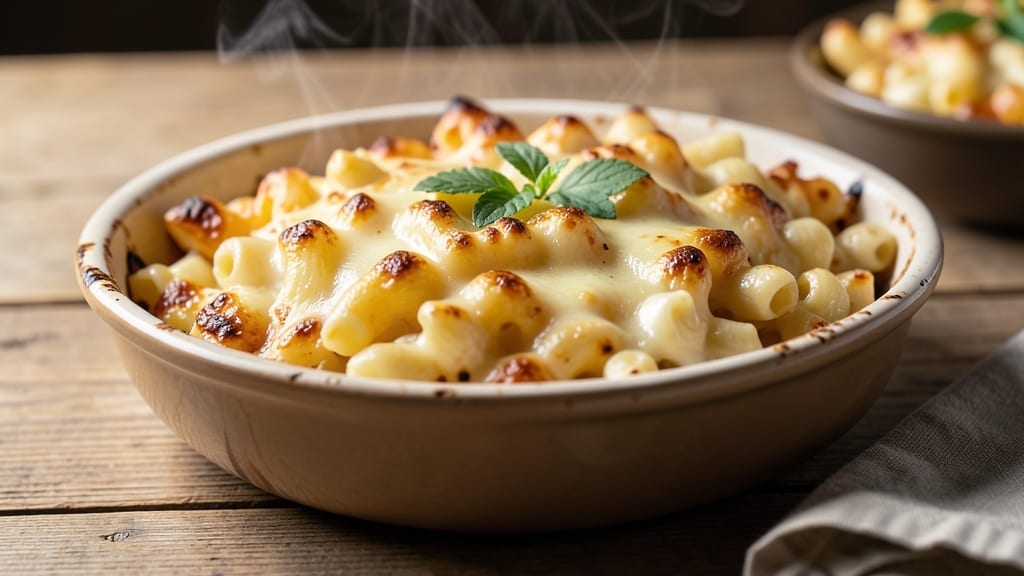
A 2-lb baked mac and cheese that delivers restaurant-quality gooeyness and pull-apart magic is exactly what you need for game day, potlucks, or cozy weeknight dinners. This recipe transforms simple ingredients into a creamy, cheesy masterpiece with a golden, bubbly top—no fancy techniques required.
The key lies in the perfect balance of cheeses and a foolproof layering method that ensures every bite is rich, tender, and irresistibly stretchy.
What sets this recipe apart is the three-cheese blend—sharp cheddar for flavor, Gruyère for nuttiness, and cream cheese for that signature creaminess.
We’ll cook the pasta al dente, mix the sauce to perfection, and layer it all in a buttered baking dish before baking until the top is golden and crispy. The result?
A crowd-pleasing dish that’s easier to make than you’d think, with minimal prep and maximum flavor payoff.
By the time it comes out of the oven, you’ll have a gooey, pull-apart masterpiece that looks as impressive as it tastes. The edges will be crispy, the center will be creamy and stretchy, and the aroma will have everyone gathering around the table.
This isn’t just mac and cheese—it’s a comfort food showstopper that’s perfect for feeding a crowd or saving for leftovers.
Ready to make it? We’ll walk you through every step, from boiling the pasta to achieving that perfectly golden crust. Let’s get started!
Ingredients for 2 lb baked mac and cheese
Here’s what you’ll need for a restaurant-quality 2-lb baked mac and cheese that’s gooey, crispy, and perfect for feeding a crowd.
| Ingredient | Amount | Notes |
|---|---|---|
| Elbow Macaroni 🍝 | 1 ½ lb | Dry, medium or jumbo size |
| Sharp White Cheddar Cheese 🧀 | 1 ½ cups | Shredded, block preferred |
| Gruyère Cheese 🧀 | 1 cup | Shredded, aged 12+ months |
| Cream Cheese 🧈 | 8 oz | Full-fat, room temperature |
| Heavy Whipping Cream 🥛 | 1 cup | Full-fat, cold |
| Unsalted Butter 🧈 | ½ cup | Cold, cubed |
| Whole Milk 🥛 | ½ cup | Room temperature |
| Diamond Crystal Kosher Salt 🧂 | 1 ½ tsp | For pasta water |
| Ground Black Pepper 🌶️ | ½ tsp | Freshly cracked |
| Garlic Powder 🧄 | ½ tsp | Freshly toasted preferred |
| Dried Mustard 🌶️ | ½ tsp | For depth of flavor |
| All-Purpose Flour 🌾 | 2 tbsp | For roux, all-purpose |
| Freshly Grated Nutmeg 🌿 | ¼ tsp | Microplane for freshness |
The cheese blend is where the magic happens. Sharp white cheddar gives that signature tang, but Gruyère is what takes it to restaurant-level richness—look for aged wheels at specialty shops or the cheese counter. Whole Foods or local creameries usually carry good options. Cream cheese adds that signature creaminess, but don’t use low-fat—full-fat is non-negotiable for that pull-apart texture. The macaroni should be medium or jumbo size—it holds up better to baking. I always grab the Barilla brand when I’m doing big batches, but any good-quality dry pasta works.
No Gruyère? Parmesan or fontina in a pinch, but it won’t be identical. The flour is just for thickening the sauce—if you’re watching carbs, you can reduce it by half, but the sauce might be slightly thinner. Freshly grated nutmeg makes all the difference, but if you only have pre-ground, toast it first to wake up the flavor. The garlic powder should be freshly toasted if possible—toast it in a dry pan for 30 seconds before adding to the sauce. And for the love of mac and cheese, don’t skip the mustard—it’s what gives that signature depth.
This makes enough for 8 generous servings, perfect for game day or potlucks. The pasta keeps 2 days in the fridge before baking, and the cheese sauce can be prepped 1 day ahead—just reheat gently before assembling. Once baked, it reheats beautifully—cover with foil and warm at 350°F for 15 minutes. For leftovers, I like to portion into individual ramekins—they’re perfect for reheating single servings.
Why You’ll Love This Recipe
- Here’s what sold me: the top gets golden and crispy while the middle stays rich and gooey. That sharp cheddar melts into the Gruyère’s earthiness, and the cream cheese ties it all together—like a hug in sauce form. (Yes, even on a Tuesday night.)
- One-Pot Magic: I swear by this recipe—just boil the pasta, mix in the cheeses (sharp cheddar + Gruyère for that nutty kick), stir in cream cheese and heavy cream, then bake. No straining, no extra bowls, no stress. The elbow macaroni stays al dente, and the sauce? It’s velvety perfection.
- Creamy Crispy Contrast: Here’s what sold me: the top gets golden and crispy while the middle stays rich and gooey. That sharp cheddar melts into the Gruyère’s earthiness, and the cream cheese ties it all together—like a hug in sauce form. (Yes, even on a Tuesday night.)
- Game for Any Gathering: Between us, this feeds a crowd without breaking the bank. Double it for parties, halve it for a cozy night in, or pack it for lunches—it reheats like a dream. My college-age kids still beg for leftovers, and honestly? So do I.
Step-by-step instructions for extra gooey baked mac and cheese
Here’s how to create that legendary pull-apart texture with a perfectly creamy interior.
Cook the Elbow Macaroni to Al Dente Perfection
Bring a large pot of water to a rolling boil and add 1.5 teaspoons Diamond Crystal Kosher Salt—it should taste like the ocean. Add the 1.5 lb Elbow Macaroni and cook until 1 minute shy of the package directions for al dente. This ensures the pasta finishes cooking in the oven while absorbing that rich cheese sauce.
Reserve 1 cup of pasta water before draining—this starchy liquid is pure gold for creating a silky sauce. Drain the pasta and return it to the pot, giving it a gentle toss with two forks to prevent clumping. The pasta should still have a slight bite; it’ll finish cooking in the oven while becoming tenderized by the cheese.
Create the Ultimate Cheese Sauce Base
In a large, heavy-bottomed skillet, melt the 0.5 cup Unsalted Butter over medium heat. Once foaming, whisk in the 2 tablespoons All-Purpose Flour to create a roux. Cook for 2-3 minutes until it turns a pale golden color and smells nutty—this removes the raw flour taste and thickens the sauce beautifully.
Gradually whisk in the 1 cup Heavy Whipping Cream and 0.5 cup Whole Milk, letting the mixture come to a gentle simmer. Reduce heat to low and stir constantly for 5 minutes until the sauce thickens enough to coat the back of a spoon. This step builds the foundation for that ultra-creamy texture we’re after.
Combine Cheeses for Maximum Flavor
Lower the heat to low and begin adding the cheeses in stages. First, stir in the 8 oz Cream Cheese until completely melted and smooth. Then add the 1.5 cups Sharp White Cheddar Cheese and 1 cup Gruyère Cheese, whisking vigorously until fully incorporated and melted.
Season with 0.5 teaspoon Garlic Powder, 0.5 teaspoon Dried Mustard, 0.5 teaspoon Ground Black Pepper, and 0.25 teaspoon Freshly Grated Nutmeg. The mustard adds depth, the nutmeg brings warmth, and the pepper provides just the right kick. If the sauce seems too thick, whisk in 2-3 tablespoons of the reserved pasta water until it reaches a velvety consistency.
Assemble and Bake to Pull-Apart Perfection
Transfer the cooked elbow macaroni to a 9×13-inch baking dish, spreading it evenly. Pour the cheese sauce over the pasta, using a spatula to distribute it completely. Press down gently to ensure the pasta is fully coated—this prevents dry spots and creates that signature pull-apart texture.
Bake at 375°F for 25-30 minutes until the top is deep golden brown and bubbling vigorously at the edges. The center should still be slightly soft—this ensures that gooey, stretchy texture when you pull it apart. If the top browns too quickly, tent loosely with aluminum foil for the last 10 minutes of baking.
Rest and Serve for Maximum Gooeyness
Remove from the oven and let the mac and cheese rest for 10 minutes before serving. This crucial step allows the cheese to set slightly and redistribute its moisture, resulting in that perfect balance of creamy and firm. The edges will pull away cleanly from the baking dish, and each bite will deliver that luxurious, melty goodness.
Garnish with an extra sprinkle of Sharp White Cheddar Cheese and Ground Black Pepper for a professional touch. Serve immediately with crusty bread or a simple green salad to soak up every last bit of that decadent sauce.
Pro Tips For Making 2 Lb Baked Mac And Cheese
- Cook pasta al dente: DESCRIPTION: I learned this the hard way—undercooked elbows turn mushy when they soak up all that creamy cheese sauce. Boil your 2 lbs of elbow macaroni in salted water until it’s just firm to the bite (about 1 minute less than package instructions), then drain and rinse with cold water. This stops the cooking and keeps the texture perfect when it bakes.
- Shred cheese aggressively: DESCRIPTION: Pre-shredded cheese is coated with anti-caking agents that make your mac and cheese grainy and dry. Use a box grater (or food processor) for the sharp cheddar and Gruyère—aim for shreds no wider than a pencil. For the cream cheese, cut it into cubes instead of shredding; it melts smoother that way.
- Bake uncovered first: DESCRIPTION: Skip the foil for the first 15 minutes at 375°F. This lets the top brown and develop that golden crust while the cheese melts evenly. Only cover with foil after that if you’re worried about over-browning—though I’ve never had that problem with this combo of cheeses.
- Whisk in the cream: DESCRIPTION: Don’t just dump the heavy cream into the cheese sauce—it’ll clump and look unappetizing. Warm the cream slightly first, then whisk it in slowly while the cheese sauce simmers. This ensures a silky texture instead of a lumpy mess. (Yes, even if you’re impatient like me.)
Flavor customization for this recipe
Spicy Kick
For a bold twist, stir in 1 teaspoon smoked paprika and ½ teaspoon cayenne pepper when adding the seasonings to the cheese sauce. I like to add ½ cup diced jalapeños (seeds removed) for heat and texture.
If you love spice, top with crumbled chorizo or crispy bacon bits before baking for an extra smoky depth. 🌶️
Smoky BBQ Twist
Swap the mustard for 1 tablespoon Dijon mustard and add ½ cup BBQ sauce (like Sweet Baby Ray’s Original) to the cheese mixture. Stir in ½ cup cooked pulled pork or crumbled bacon for a loaded baked mac and cheese that’s perfect for game day.
The smoky-sweet sauce pairs beautifully with the creamy texture.
Herb Garden Fresh
Brighten up the dish with 1 tablespoon fresh chives or 1 teaspoon dried thyme mixed into the cheese sauce. For extra freshness, top with chopped parsley or green onions after baking. This variation works especially well with a Gruyère and goat cheese blend for a lighter, herbaceous profile.
Breakfast-Inspired
Take your mac and cheese to breakfast level by adding ½ cup cooked breakfast sausage or crumbled bacon to the pasta before baking. Stir in 1 teaspoon maple syrup and a pinch of cinnamon for a sweet-savory twist.
Top with a fried egg right out of the oven for a decadent brunch dish. 🍳
Extra Crispy Top
For a restaurant-worthy texture, sprinkle a mix of ½ cup panko breadcrumbs and ¼ cup grated Parmesan cheese over the top before baking. Broil for 2-3 minutes at the end to get a golden, crispy crust that contrasts perfectly with the creamy interior.
This trick works especially well with a sharp cheddar and Gouda cheese blend.
Vegetable Loaded
Add 1 cup steamed broccoli florets, ½ cup sautéed mushrooms, or ½ cup roasted bell peppers to the pasta before baking. For extra richness, stir in 2 tablespoons cream cheese** into the veggies before mixing.
This variation is perfect for a lighter yet still indulgent mac and cheese that sneaks in extra veggies. 🥦
Nutrition facts
Frequently asked questions
Why does my baked mac and cheese get watery after baking?
Watery mac and cheese usually means the sauce was too thin or the pasta was overcooked. Always cook pasta just 1 minute shy of package instructions and use the starchy pasta water to thicken the sauce if needed. Also, make sure your baking dish isn’t too large—this recipe is designed for a 9×13-inch dish to maintain proper heat distribution.
Can I make this recipe ahead of time?
Cook the pasta and prepare the cheese sauce separately up to 1 day ahead. Store them in airtight containers in the fridge. When ready to bake, assemble the dish and bake as directed. For best results, let it sit at room temperature for 30 minutes before baking to ensure even cooking.
What’s the secret to that perfect crispy top?
The golden, bubbly crust comes from baking at 375°F until the edges are deeply browned. For extra crispiness, broil for 2-3 minutes at the end or sprinkle ½ cup panko breadcrumbs mixed with ¼ cup Parmesan on top before baking. Just watch it closely—broiling can happen fast!
Can I substitute any of the cheeses?
Gruyère is ideal for that nutty depth, but you can swap it with fontina or Parmesan in a pinch. For cream cheese, use full-fat only—low-fat versions won’t give that signature stretch. Sharp cheddar is non-negotiable for that classic tang, but if you’re out, Monterey Jack works in a bind. Always use a mix of cheeses for the best texture!
How do I make this recipe vegetarian?
This recipe is already vegetarian-friendly! Just ensure your butter and cream are dairy-free if needed. For extra richness, add ½ cup vegan cream cheese** and use a plant-based milk substitute (like oat milk) in the roux. The flavor and texture will be just as decadent—promise!

- 6 Oz Chocolate Chip Cookie Recipe: Perfectly Balanced Crispy Edges and Chewy Hearts - September 25, 2026
- 6-Inch Coffee Cake Recipe: Vanilla Bean Swirls and Buttery Streusel Topping - September 25, 2026
- 1 Hour Soup Recipe: Velvety Richness Without the Wait - September 25, 2026