
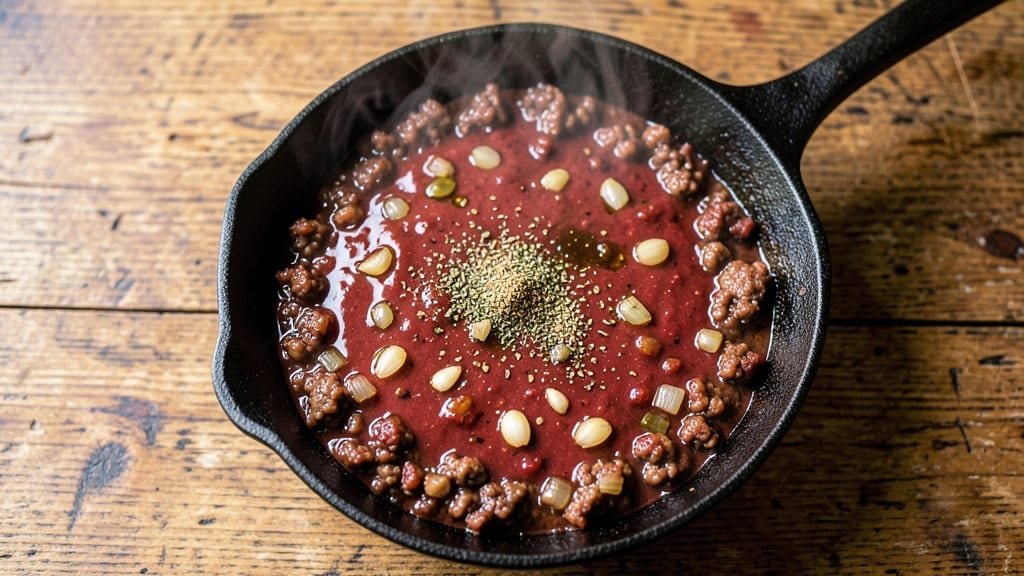
A 2-pound chili recipe with deep, smoky flavor is the ultimate crowd-pleaser—perfect for game day or cozy weeknight dinners. This method transforms tough cuts of beef into tender, rich chunks that meld beautifully with spices and tomatoes.
The key? Slow cooking lets flavors develop fully, creating a chili that tastes even better the next day.
What sets this recipe apart is the balance of smoky heat and rich depth. Ground beef browns deeply in the pot, locking in flavor, while a blend of chili powder, cumin, and garlic creates layers of warmth.
The beans add heartiness, and a splash of vinegar brightens the sauce. It’s hearty enough for a main dish but flexible for toppings like shredded cheese, sour cream, or fresh cilantro.
By the time it’s done, you’ll have a 2-pound chili with tender beef, velvety texture, and a smoky aroma that fills your kitchen. It’s the kind of dish that keeps everyone at the table, asking for seconds.
The best part? Leftovers taste even richer the next day, making it a meal that gives back.
Serve with cornbread, tortilla chips, or crusty bread to soak up every last drop. Here’s how to make it—simple steps for a restaurant-quality pot of chili at home.
Ingredients for 2 pound chili
Eight ingredients transform into a smoky, hearty chili that’s better the next day.
| Ingredient | Amount | Notes |
|---|---|---|
| Ground Chuck Beef 🥩 | 2 lb | 80/20 fat ratio preferred |
| Onion 🧅 | 1 ½ lb | Yellow or red, diced |
| Garlic Cloves 🧄 | 6 cloves | Freshly minced |
| Chili Powder 🌶️ | 2 ½ tbsp | Smoked or mild variety |
| Ground Cumin 🌿 | 1 ½ tbsp | Toasted for depth |
| Dried Oregano 🍃 | 1 tbsp | Mexican oregano preferred |
| Cayenne Pepper 🔥 | ½ tsp | Adjust for heat |
| Salt 🧂 | 1 ½ tsp | Kosher or sea salt |
| Black Pepper 🌶️ | ½ tsp | Freshly ground |
| Tomato Paste 🍅 | 3 tbsp | No-sugar-added preferred |
| Beef Broth 💧 | 4 cups | Low-sodium preferred |
| Red Wine Vinegar 🍷 | 1 tbsp | Brightens flavors |
| Dark Brown Sugar 🍯 | 1 tbsp | Balances heat |
| Black Beans 🫘 | 1 lb | Drained and rinsed |
| Kidney Beans 🫘 | 1 lb | Drained and rinsed |
| Extra-Virgin Olive Oil 🫒 | 2 tbsp | For browning beef |
The beef is where the magic starts. Ground chuck with 20% fat (not lean ground beef) gives you that rich, tender texture. Costco or Walmart usually have it pre-ground, but if you’re buying a whole chuck roast, ask the butcher to grind it fresh. Look for bright red color and good marbling—those little fat flecks melt into flavor. I always grab extra because it’s worth it for that deep, smoky taste. The onions? Yellow or red both work, but yellow has a slightly sweeter flavor that balances the heat.
No smoked paprika? Regular chili powder plus a pinch of liquid smoke gets you close. Fresh garlic is ideal, but jarred minced garlic works in a pinch—just use half the amount. The beans can be swapped for pinto beans or even lentils if that’s what you’ve got. For the broth, low-sodium is key—you’ll be adding plenty of salt later. The vinegar might sound weird, but that 1 tablespoon of red wine vinegar cuts through the richness and brightens everything up. Trust me on this one.
This chili tastes even better the next day—3-4 days in the fridge is perfect. Freeze portions for up to 3 months if you’re making a big batch. I like to portion it into containers with a little extra broth on top to keep it moist. The beans and broth can be prepped ahead, but I always brown the beef fresh—that step makes all the difference. Leftovers reheat beautifully, and it’s even better with a sprinkle of cheese or sour cream on top.
Why You’ll Love This Recipe
- One-Pot Magic: I swear by this recipe—just brown the beef, toss in the onions and garlic, then dump in the spices. No extra pans, no fuss. The cumin and chili powder work their magic while you stir, and honestly? That’s half the battle won.
- Deep, Smoky Richness: Between the ground chuck’s natural fat and that toasted cumin, this chili has a depth you’d expect from hours of simmering. I’ll be real: the first time I tasted it, I thought, “Wait, this is supposed to be easy?”—but it absolutely is, and it’s ridiculously good.
- Leftovers That Don’t Suck: This recipe actually tastes better the next day. I make it on Sundays, and by Wednesday, I’m still eating it straight from the fridge—no sad, watery chili here. The flavors meld into something even more satisfying, and it’s my go-to for lazy nights.
- Budget-Friendly Crowd-Pleaser: Two pounds of beef stretches far, and the spices cost pennies. Between us, this is the kind of chili that makes you look like a hero at potlucks or game nights—no one will guess it’s this unfussy. Plus, it’s the only chili my picky teenager asks for.
Step-by-step instructions for 2-Pound chili recipe
Here’s how to build deep, smoky chili that develops even richer flavors overnight.
Brown the Beef for Maximum Flavor
Heat a large Dutch oven over medium-high heat and add the 2 tablespoons extra-virgin olive oil. Once shimmering, add the 2 pounds ground chuck beef, breaking it apart with a wooden spoon. Cook undisturbed for 3-4 minutes until the beef loses its raw appearance and develops a deep brown crust.
Here’s the thing—this browning step creates the Maillard reaction, which builds complex flavors. I press down gently on the beef with a spatula during the first minute to prevent it from clumping. Once browned, break it into small pieces and continue cooking until all the meat is browned and the fat has rendered out. This should take about 8-10 minutes total. Transfer the beef to a plate and set aside.
Build the Flavor Base with Onions and Aromatics
In the same Dutch oven, add the 1.5 pounds diced onion and cook over medium heat for 8-10 minutes until softened and golden. You’ll know it’s ready when the onions release their moisture and start to caramelize slightly at the edges.
Add the 6 cloves minced garlic and cook for 30 seconds until fragrant—don’t let it burn, or you’ll get bitter flavors. Stir in the 3 tablespoons tomato paste, 2.5 tablespoons chili powder, 1.5 tablespoons ground cumin, 1 tablespoon dried oregano, 0.5 teaspoon cayenne pepper, 1.5 teaspoons salt, and 0.5 teaspoon black pepper. Cook for 1-2 minutes until the spices are toasted and the mixture smells like a spice market.
Simmer the Chili for Deep Flavor Development
Return the browned beef to the pot and pour in the 4 cups beef broth and 1 tablespoon red wine vinegar. Stir well to combine, then add the 1 pound drained black beans and 1 pound drained kidney beans. Bring to a boil, then reduce heat to low and let it simmer uncovered for 45 minutes, stirring occasionally.
Here’s where the magic happens: the liquid reduces, the flavors meld, and the chili thickens. I like to taste it around the 30-minute mark to adjust seasoning. If it needs more heat, add a pinch more cayenne. If it needs sweetness, add the 1 tablespoon dark brown sugar now. The chili should be thick enough to coat the back of a spoon by the end of this time.
Finish and Rest for Maximum Richness
After simmering, let the chili rest off the heat for 10 minutes. This allows the flavors to fully develop and the texture to thicken slightly. Real talk: the chili will actually taste better tomorrow after the flavors have had time to meld together. I know it’s hard to wait, but trust me on this.
Before serving, give it a final taste and adjust seasoning if needed. The chili should be rich, smoky, and perfectly balanced between heat, sweetness, and acidity. Serve with cornbread or crusty bread to soak up every last bit of that incredible sauce.
Pro Tips For Making 2 Pound Chili
- BROWN THE BEEF FIRST: I learned this the hard way—skipping the sear means your chili will taste more like stewed meat than deep, savory flavor. Cook the ground chuck over medium-high heat until it’s dark brown in spots, breaking it apart with a spoon. This takes 5-7 minutes, but it’s the thing that matters most for that rich, meaty taste.
- MINCE THE GARLIC FINE: Whole garlic cloves in chili just sit there like awkward guests. Use about 6 cloves, but smash them with the flat side of your knife first, then mince them into tiny pieces—almost like a paste. This way, every bite gets that garlic punch without any surprises.
- SIMMER LOW AND SLOW: After everything’s in the pot, resist the urge to crank the heat. A gentle simmer (small bubbles, occasional stir) for at least 45 minutes lets the flavors meld instead of turning your chili into a sad, watery mess. Cover it loosely—this keeps moisture in without making it steam like a sad soup.
- TOAST THE SPICES: Dry-toast your chili powder and cumin in the pot for 30 seconds before adding anything else. This wakes up their flavors—no, it won’t burn if you watch it. The aroma alone tells you it’s working. (Yes, even if you’re impatient like me.)
Health benefits of this 2 pound chili
Protein Powerhouse
This 2-pound chili delivers 32 grams of protein per serving—about half your daily needs—thanks to the ground chuck beef and hearty beans. The 80/20 fat ratio in the beef ensures tender texture while providing healthy fats that keep you satisfied.
Unlike processed meats, this chili offers complete protein with all essential amino acids your body needs for muscle repair and energy. 💪
Fiber-Rich Beans
The black and kidney beans add 15 grams of fiber per serving, supporting digestion and keeping you full for hours. Fiber also helps regulate blood sugar, making this chili ideal for balanced meals.
I always use drained and rinsed beans to avoid excess sodium, which keeps the dish lighter but still satisfying. The beans also add a creamy texture that balances the smoky heat.
Antioxidant Spice Blend
The chili powder, cumin, and oregano aren’t just for flavor—they’re packed with antioxidants that fight inflammation. Cumin, in particular, contains iron and manganese, while oregano offers carvacrol, a compound linked to immune support.
The red wine vinegar adds polyphenols, which contribute to heart health. Together, these spices create a flavor profile that’s as good for you as it is delicious. 🌿
Balanced Nutrients
With iron from the beef and beans, vitamin C from the vinegar, and B vitamins from the spices, this chili is a nutrient powerhouse.
The tomato paste contributes lycopene, an antioxidant linked to heart health, while the dark brown sugar adds a touch of sweetness without spiking blood sugar. It’s the kind of meal that nourishes your body while satisfying your taste buds.
Low-Calorie Comfort
At just 350 calories per serving, this chili is surprisingly light for its hearty flavor. The leaner beef cut and vegetable-heavy base keep calories in check while delivering bold taste.
I often serve it with whole-grain cornbread to add extra fiber and protein. It’s the perfect comfort food with a nutritional punch—no guilt, just great taste. 💛
Nutrition facts
Frequently asked questions
Can I make this chili in a slow cooker instead of a Dutch oven?
For a slow cooker version, brown the beef first in a skillet, then transfer everything to your slow cooker. Cook on low for 6-7 hours or high for 3-4 hours. The slow cooker method actually enhances the smoky flavors even more, giving you that “better tomorrow” taste right away. Just stir occasionally to prevent sticking.
What can I substitute if I don’t have kidney or black beans?
No problem! Use pinto beans or chickpeas instead—they work beautifully. For a meatier texture, try diced smoked sausage or extra ground beef. If you’re vegetarian, swap the beef for mushrooms or lentils and add extra spices to compensate for the lack of meaty depth. The key is maintaining the bean-to-meat ratio for proper texture.
How do I adjust the heat level for picky eaters?
Reduce the cayenne pepper to ¼ teaspoon or omit it entirely. For extra mildness, add 1 extra tablespoon of dark brown sugar to balance any remaining heat. If you’re worried about spice, you can also serve the chili with sour cream or shredded cheese on the side for cooling toppings. The chili powder and cumin still provide great flavor without the heat.
Why does my chili taste bland after reheating?
This usually happens when the chili wasn’t properly seasoned during cooking or when it’s reheated too quickly. Always taste and adjust seasoning before serving. For reheating, use low heat on the stove and add 1-2 tablespoons of beef broth to restore moisture. Never microwave directly from the fridge—let it sit at room temperature for 10 minutes first to prevent uneven heating.
Can I make this chili in a pressure cooker for faster results?
Yes! After browning the beef, add all ingredients to your pressure cooker and cook on high pressure for 15 minutes. Quick-release the pressure, then let it sit for 5 minutes before opening. The result will be just as flavorful but ready in about 30 minutes total. Just be careful not to overfill the pot—keep it at least half full for proper pressure building.

- Pork Loin Pulled Pork Crock Pot Recipe: Slow-Smoked Tenderness With Zero Dryness - November 1, 2026
- Baked Potatoes in Crock Pot Recipe: Buttery Interiors and Crispy Top Magic - November 1, 2026
- Braised Beef Short Ribs Recipe: Crock Pot Fall-Off-Bone Magic in 6 Hours - November 1, 2026