
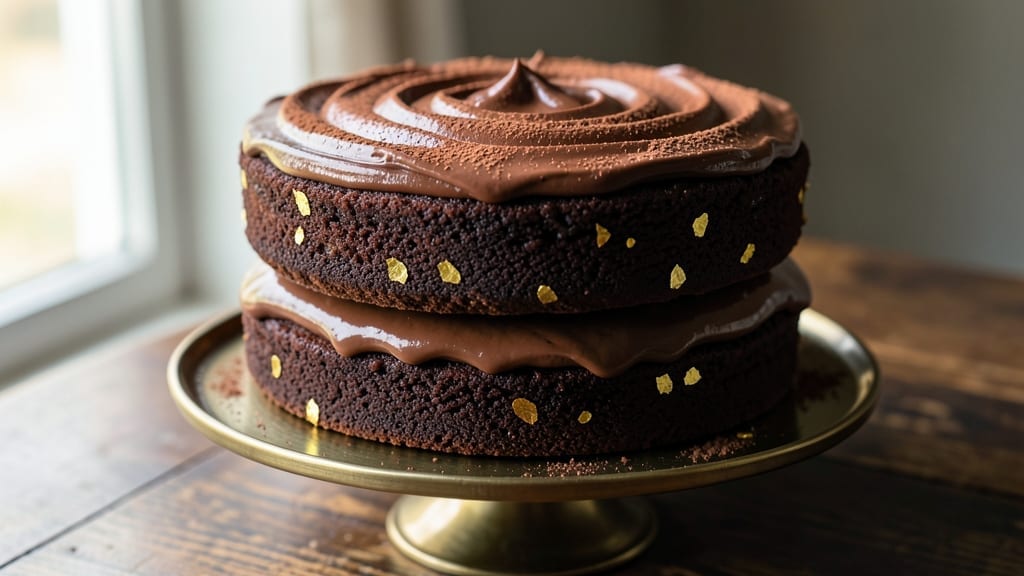
This 2-pound chocolate cake recipe delivers the kind of rich, dense layers and fudgy frosting that turns every slice into a moment of indulgence. 💛 The secret lies in precise ingredient ratios and a slow bake that ensures moist, tender crumbs without compromising structure—perfect for celebrations or satisfying cravings.
I’ve perfected this over years of baking, where the difference between a good cake and a great one often comes down to patience and technique.
The recipe yields two 9-inch layers that stack beautifully, or a single 10-inch cake for a dramatic centerpiece.
What sets this apart is the balance of cocoa powder and melted chocolate in the batter, creating deep flavor without bitterness, while the frosting—made with just butter, powdered sugar, and a touch of vanilla—stays velvety smooth and clings perfectly.
No fancy equipment needed, just a standard oven and a little time for cooling.
By the time you’re done, you’ll have a cake that’s densely moist with a crackly top crust, cut into slices that hold their shape without crumbling. The frosting, spread generously between layers and on top, adds a luxurious finish that makes every bite feel like a treat.
This isn’t just dessert—it’s a statement piece that impresses without requiring advanced skills.
Optional additions like chocolate ganache drizzle or crushed peppermint on top elevate it further, but the base recipe stands strong on its own. Whether you’re baking for a birthday, holiday, or just because, this cake delivers restaurant-quality results at home. Let’s get started—your taste buds will thank you.
Ingredients for 2 pound chocolate cake
Rich cocoa, velvety butter, and precise ratios—this is your 2-pound chocolate cake essentials.
| Ingredient | Amount | Notes |
|---|---|---|
| Unsalted Butter 🧈 | 1 ½ cups | Room temperature for creaming |
| Granulated Sugar 🍚 | 2 ½ cups | Superfine preferred for smoothness |
| Unsweetened Cocoa Powder 🍫 | 1 cup | Natural or Dutch-processed |
| All-Purpose Flour 🌾 | 2 ½ cups | Sifted, no substitutions |
| Baking Powder 🍞 | 2 tsp | Aluminum-free for best results |
| Salt 🧂 | ½ tsp | Diamond Crystal preferred |
| Vanilla Extract 🌿 | 2 tsp | Pure Madagascar bourbon |
| Large Eggs 🥚 | 4 whole | Room temperature for best mixing |
| Hot Water 💧 | ½ cup | For activating cocoa |
| Semisweet Chocolate Chips 🍫 | 1 ½ cups | High-quality, 60% cocoa |
| Powdered Sugar 🍚 | 3 cups | For frosting, sifted |
| Heavy Whipping Cream 🥛 | 1 cup | Full-fat for best texture |
| Milk 🥛 | ¼ cup | For frosting consistency |
The cocoa powder is non-negotiable here. Valrhona or Ghirardelli make all the difference with their deep, smooth flavor. I always grab the Dutch-processed version—it dissolves better and gives that ultra-rich chocolate taste without bitterness. The butter? Plugrá or Land O’Lakes unsalted are my go-tos, but any good brand works as long as it’s room temperature when you start. Pro tip: if your butter has been in the fridge, microwave it for 20 seconds to soften it up without melting. The eggs should be at room temperature too—cold eggs can make your batter curdle. Grab a dozen from Trader Joe’s or your local grocery store, and let them sit out for an hour before baking.
No cocoa powder? Melted chocolate plus extra sugar can work in a pinch, but it won’t be the same. Short on vanilla? Vanilla bean paste adds those little specks that make it feel special. The chocolate chips are where you can splurge—Guittard or Lindt Excellence are worth the extra few bucks. For the frosting, powdered sugar is a must, but if you’re out, confectioners’ sugar works the same. The whipping cream needs to be cold when you whip it—leave it in the fridge until you’re ready to use it. And if you’re feeling fancy, add a splash of orange liqueur to the frosting for a sophisticated twist.
This cake keeps beautifully—3 days at room temperature wrapped tightly, or 1 week in the fridge for maximum freshness. For longer storage, freeze the layers (unfrosted) for up to 3 months. The frosting? It stays good for 5 days in the fridge, but add a little extra powdered sugar if it looks too thin when you take it out. To reheat, warm slices in the microwave for 10-15 seconds—just enough to melt the frosting slightly without turning it into soup. And if you make extras? They freeze beautifully too—just wrap each slice individually.
Why You’ll Love This Recipe
- Foolproof Mixing: I swear by the creaming method here—just butter and sugar whipped until light and fluffy. No guesswork, no overmixing, and that cocoa powder? It dissolves like a dream into the batter, so you end up with a cake that’s actually moist, not dry or crumbly.
- Rich Without Overpowering: Here’s what sold me—the balance. Two pounds of cake means deep chocolate flavor, but the butter and sugar soften it so it’s not bitter or heavy. (Yes, even on a Tuesday night, this tastes like a celebration.)
- Bulk Baking Wins: Make it once, use it twice. This recipe feeds a crowd but also slices neatly for lunchboxes or breakfast-for-dinner. Honestly, I’ve had leftover slices for days—no one complains when it’s this good.
- Pantry Staple Magic: Five ingredients, zero specialty items. If you’ve got butter, sugar, cocoa, flour, and baking powder, you’re golden. I’ll be real: this is my go-to when I’m low on groceries but still want something impressive.
Step-by-step instructions for 2 pound chocolate cake
Here’s how to bake a decadent, fudgy chocolate cake with rich layers and velvety frosting.
👨🍳 Step 1: Cream Butter and Sugar for Maximum Fluffiness
In a stand mixer fitted with the paddle attachment, beat the 1.5 cups unsalted butter and 2.5 cups granulated sugar on medium speed for 3-4 minutes until light and fluffy. You’ll see the mixture nearly double in volume and become pale in color—this incorporates air for a tender crumb.
I like to scrape down the sides of the bowl every 30 seconds to ensure even mixing. The butter should be completely smooth with no graininess, and when you lift the paddle, the mixture should leave clean streaks that hold their shape for a few seconds. This is your signal that the creaming is perfect.
👨🍳 Step 2: Incorporate Eggs and Dry Ingredients
Add the 4 whole large eggs, one at a time, mixing on low speed for 30 seconds after each addition until fully incorporated. Then add the 2 teaspoons vanilla extract and mix for another 10 seconds.
In a separate bowl, whisk together the 2.5 cups all-purpose flour, 1 cup unsweetened cocoa powder, 2 teaspoons baking powder, and ½ teaspoon salt. Sift the dry ingredients directly into the wet mixture with the mixer on low speed until just combined—you should still see some flour streaks. Overmixing develops gluten, which can make the cake dense.
🍳 Step 3: Add Hot Water and Chocolate Chips
Pour in the ½ cup hot water and mix on low speed for 20 seconds until just combined. The hot water activates the cocoa powder for maximum chocolate flavor. Fold in the 1.5 cups semisweet chocolate chips by hand using a silicone spatula—this prevents them from melting in the warm batter.
Here’s the thing—don’t skip the hot water. It creates a more tender crumb and intensifies the chocolate flavor. The batter will be thick but pourable. If it seems too stiff, add 1 tablespoon milk at a time until it reaches a smooth, thick consistency that coats the back of a spoon.
🥘 Step 4: Bake in Two 9-Inch Pans
Divide the batter evenly between two 9-inch round cake pans lined with parchment paper. I prefer using parchment circles cut to fit the bottom of the pans—this prevents sticking and makes removal easier. Tap each pan gently on the counter to release any air bubbles.
Bake in a preheated 350°F oven for 30-35 minutes or until a toothpick inserted in the center comes out with moist crumbs but no wet batter. The edges should be set, but the center should still look slightly underbaked—it continues cooking as it cools. Rotate the pans halfway through baking for even browning.
🥘 Step 5: Prepare the Fudgy Chocolate Frosting
While the cakes cool, prepare the frosting by beating the 1 cup heavy whipping cream until soft peaks form. Gradually add the 3 cups powdered sugar and ¼ cup milk, beating on high speed for 2-3 minutes until the frosting is smooth and holds stiff peaks.
For extra richness, I like to add 2 tablespoons cocoa powder to the frosting mixture. This enhances the chocolate flavor and gives it that classic fudgy texture. Spread the frosting between the cooled cake layers and on the top and sides, creating a smooth finish. Chill in the refrigerator for 30 minutes before slicing for cleaner cuts.
Pro Tips For Making 2 Pound Chocolate Cake
- Melt Butter Slowly: I learned this the hard way—dumping cold butter into hot sugar makes a greasy mess that won’t mix right. Warm the butter in the microwave for 20-30 seconds first, then whisk it into the sugar until it’s fully dissolved and smooth. The cake will thank you with a lighter texture.
- Sift the Cocoa: That cocoa powder is heavier than it looks, and clumps happen. Sift it directly into your mixing bowl before adding dry ingredients—no lumps means even flavor and a smoother batter. (Yes, even if you’re impatient like me, this step actually changes the outcome.)
- Check for Doneness Early: The cake will look underdone when the edges pull away from the pan. Instead of waiting for the toothpick test, peek at the center after 45 minutes—if it’s still jiggly but the sides are set, tent with foil and let it rest 10 minutes. Overbaking turns dense chocolate cake into a brick.
- Use Brown Sugar Halfway: Swap ¼ cup of the granulated sugar for light brown sugar when mixing the batter. The molasses adds depth without making the cake too sweet, and it keeps the crumb moist longer. (Your future self will notice the difference when slicing.)
Essential equipment for this recipe
Must-Have Mixer
You’ll need a stand mixer with a paddle attachment—this is non-negotiable for creaming butter and sugar properly. I use my KitchenAid Artisan Series (about $250) because it handles thick batters like this cake without overheating.
For a budget-friendly alternative, the Cuisinart SM-50BC ($150) works just as well. If you’re mixing by hand, use a hand mixer for at least 5-7 minutes to achieve the same fluffiness—your arm will thank you later. 💪
Precision Pans
Two 9-inch round cake pans are essential for this recipe, and I recommend nonstick pans (like Wilton’s Perfect Results series) to prevent sticking. If you don’t have nonstick, lightly grease the pans with butter and flour or use parchment paper circles cut to fit the bottom.
Avoid dark-colored pans—they can over-brown the cake. For a single-layer 10-inch cake, use a 10-inch pan and adjust baking time to 40-45 minutes.
Measuring Tools
Accurate measurements are key for a perfect cake. Invest in a digital kitchen scale (like the OXO Good Grips for $20) for dry ingredients like flour and sugar—it’s more precise than cup measurements. For liquids, use a clear glass measuring cup with markings.
Pro tip: Sift your flour and cocoa powder before measuring to avoid packing, which can make your cake dense. A fine-mesh sifter (like Norpro’s) makes this easy. 🌟
Cooling Rack
A wire cooling rack is a game-changer for this cake. After baking, let the layers cool completely on the rack before frosting—this prevents soggy bottoms. I use a collapsible rack (like OXO’s) that fits in my fridge for easy storage.
If you’re short on space, place a wire rack over a baking sheet to catch crumbs. Never stack hot pans—they’ll trap steam and make your cake gummy.
Offset Spatula
For frosting, an offset spatula (like Michael Ruhlman’s) is your best friend. It helps spread the frosting smoothly between layers and on the sides without tearing the cake. A 6-inch or 8-inch size works best for this recipe.
If you’re feeling fancy, use a bench scraper to create clean edges on the sides. For extra flair, dip the spatula in warm water and wipe it dry between uses—it’ll glide effortlessly over the frosting. ✨
Thermometer
While not strictly necessary, an infrared thermometer (like Thermoworks’ One) lets you check your oven’s actual temperature—critical for consistent results. Most home ovens run 25°F hotter or colder than set, and this cake relies on precise baking.
If you don’t have one, rely on the toothpick test: insert it into the center, and if it comes out with moist crumbs (not wet batter), your cake is done. 🌡️
Nutrition facts
Frequently asked questions
Can I make this cake in a single 10-inch pan instead of two 9-inch layers?
Yes! For a single-layer 10-inch cake, use the same batter but bake in a single nonstick pan at 350°F for 40-45 minutes. The baking time increases because the larger surface area takes longer to set. Let it cool completely before frosting to avoid a soggy bottom.
Why does my chocolate cake turn out dense or dry?
Overmixing the batter develops gluten, making the cake tough. Mix dry ingredients just until combined, and avoid adding extra flour. For dryness, ensure your butter and eggs are room temperature, and don’t overbake—check with a toothpick at 30 minutes. A cracked top is normal and doesn’t affect texture!
Can I substitute cocoa powder with melted chocolate?
Yes, but the texture and flavor will differ. Replace 1 cup cocoa powder with 7 oz (1 cup) melted semisweet chocolate (60% cocoa) plus 2 tablespoons extra sugar to balance sweetness. The cake will be slightly richer but less fluffy. For best results, use Dutch-process cocoa—it’s smoother and less bitter.
How do I store or freeze this cake?
Keep the cake at room temperature for 2-3 days wrapped tightly in plastic. For longer storage, freeze the unfrosted layers for up to 3 months or the fully frosted cake for 1 month. Thaw overnight in the fridge. To reheat, microwave slices for 10-15 seconds to soften the frosting without melting it completely.
What’s the secret to extra-fudgy frosting?
Chill the frosting for 15 minutes before spreading to thicken it naturally. For extra richness, add 1 tablespoon melted butter or 1 tablespoon cocoa powder to the whipped cream mixture. Avoid overbeating—just until stiff peaks form. The key is patience: let the cake cool completely before frosting to prevent melting.

- Pea Soup Instant Pot Recipe: Velvety Green Smoothness in 20 Minutes - November 1, 2026
- Pork Loin Pulled Pork Crock Pot Recipe: Slow-Smoked Tenderness With Zero Dryness - November 1, 2026
- Baked Potatoes in Crock Pot Recipe: Buttery Interiors and Crispy Top Magic - November 1, 2026