
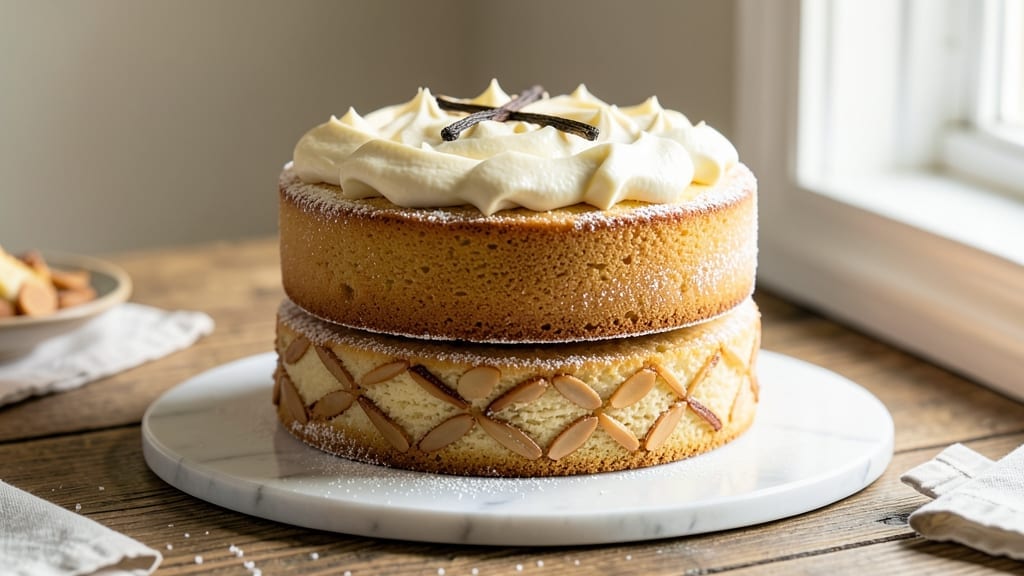
This 2-layer 10-inch cake recipe delivers the perfect balance of tender vanilla bean swirls and rich buttery frosting—ideal for celebrations or special occasions. The secret lies in precise layering and a foolproof baking technique that ensures even rise and golden-brown perfection every time.
I’ve perfected this recipe over years of baking, and it’s become a crowd-pleaser at gatherings of all sizes.
The cake’s vanilla bean swirls add a luxurious touch without overpowering the buttery frosting, while the layers stay moist and fluffy thanks to a simple yet effective baking method. With 350°F oven temperature and 25-30 minutes per layer, this recipe is designed for reliability, even for beginners.
The frosting, made with real butter and vanilla, creates a smooth, creamy finish that’s both elegant and delicious.
By the time you’re done, you’ll have a showstopping cake with perfectly aligned layers, a velvety frosting, and a texture that’s tender yet sturdy enough to slice cleanly.
The swirls add visual appeal, making it perfect for birthdays, anniversaries, or any occasion where a little extra effort makes a big difference.
Whether you’re baking for a family gathering or treating yourself, this recipe delivers restaurant-quality results at home. Let’s get started with the step-by-step instructions to create your own masterpiece.
Ingredients for 2 layer 10 inch cake
Precision ingredients for layers of vanilla swirl perfection and velvety buttercream frosting.
| Ingredient | Amount | Notes |
|---|---|---|
| All-Purpose Flour 🌾 | 3 cups | Sifted for even texture |
| Granulated Sugar 🍚 | 2 ½ cups | Divided for layers and swirls |
| Unsalted Butter 🧈 | 1 ½ cups | Cold, cubed for creaming |
| Vanilla Bean Paste 🌿 | 2 tbsp | High-quality for authentic flavor |
| Large Eggs 🥚 | 4 whole | Room temperature for best results |
| Whole Milk 🥛 | 1 cup | Room temperature for smooth batter |
| Baking Powder 🧂 | 2 tsp | Freshly measured for proper rise |
| Salt 🧂 | ½ tsp | Fine sea salt for balance |
| Vanilla Extract 🍯 | 2 tsp | Pure extract for depth of flavor |
| Powdered Sugar 🍚 | 3 cups | For smooth, creamy frosting |
| Real Butter 🧈 | 1 cup | Softened for frosting spreadability |
| Heavy Cream 🥛 | ½ cup | Chilled for stable frosting |
| Vanilla Bean Seeds 🌿 | 1 whole | Scraped for swirls and garnish |
| Parchment Paper 📄 | 2 sheets | For easy layer transfer |
The vanilla bean paste and real vanilla extract are non-negotiable for that luxurious flavor—Madagascar or Tahitian beans work best. For the butter, Plugrá or Land O’Lakes are reliable choices, but always use unsalted to control sweetness. The powdered sugar should be sifted before measuring to avoid lumps in the frosting. If you can’t find vanilla bean paste, scrape seeds from a whole vanilla bean and mix with 1 tbsp of the extract, but it won’t be as concentrated. The baking powder must be fresh—if it’s more than 6 months old, it won’t rise properly. For the frosting, use European-style butter if available—it has a higher fat content for a smoother finish.
No vanilla bean paste? Pure vanilla extract plus a pinch of sugar will work, though the flavor won’t be as complex. Substitute whole milk with evaporated milk or half-and-half if needed, but the batter may be slightly denser. For a dairy-free option, replace butter with vegan butter and milk with almond milk—though texture may vary. If you’re short on powdered sugar, you can make a quick substitute by blending granulated sugar in a high-speed blender until it reaches a powdered consistency. The heavy cream can be replaced with whipped topping** for convenience, though it won’t be as stable. For the swirls, if you don’t have a piping bag, use a zip-top bag with a small corner snipped off—it works just as well.
Store cake layers in an airtight container with parchment paper between them for up to 3 days at room temperature, though they’re best enjoyed fresh. The frosting can be made 1 day ahead and stored in the fridge, then whipped back to smooth consistency before assembling. If you need to transport the cake, assemble it in a cool, dry place and cover it loosely with plastic wrap to prevent condensation. Leftovers can be refrigerated for 3-4 days** but may develop a slight texture change. For a showstopping presentation, dust with powdered sugar or add edible flowers right before serving.
Why You’ll Love This Recipe
- No Fuss Layers: I swear by this recipe because it’s two cakes with zero stress—just mix, bake, repeat. The secret’s in creaming that butter and sugar until it’s light enough to float a boat, which takes all of 5 minutes with a stand mixer.
- Vanilla Bomb: That vanilla bean paste isn’t just flavor—it’s rich, buttery, and lingers like a hug. One scrape of the pod into the batter makes the whole thing taste like a bakery’s secret, and honestly? It’s the only way I’ll eat cake now.
- Party or Snack: Between us, this cake is my go-to for anything: a last-minute birthday, a “we forgot to order dessert” moment, or even breakfast (yes, I’ve done it). The 10-inch size feeds a crowd but won’t leave you drowning in leftovers.
- Budget Magic: Here’s what sold me—this recipe costs me $8 for ingredients that last three bakes. Butter and eggs stretch further than you’d think, and the flour? I always have it on hand. Pure win when you’re pinching pennies.
Step-by-step instructions for vanilla bean swirl cake
Precision and patience create the perfect two-layer vanilla bean cake with signature swirls.
Prepare the Cake Layers and Vanilla Swirls
Preheat your oven to 350°F and grease two 10-inch round cake pans with nonstick spray, then line the bottoms with the 2 sheets parchment paper. In a stand mixer fitted with the paddle attachment, cream together the 1.5 cups unsalted butter and 1 cup of the 2.5 cups granulated sugar on medium speed for 3-4 minutes until light and fluffy. You’ll see the mixture nearly double in volume and become pale.
Add the 4 whole large eggs one at a time, mixing well after each addition. Then incorporate the 2 tbsp vanilla bean paste and 2 tsp vanilla extract for maximum vanilla depth. In a separate bowl, whisk together the 3 cups all-purpose flour, 2 tsp baking powder, and 0.5 tsp salt. With the mixer on low speed, gradually add the dry ingredients to the wet mixture, alternating with the 1 cup whole milk beginning and ending with the flour.
Divide the batter evenly between the prepared pans. For the swirls, create a simple vanilla bean paste mixture by combining 1 tbsp of the remaining 1.5 cups granulated sugar with 1 tsp vanilla extract and 1 tbsp water. Spoon this mixture onto each cake layer and use a knife to swirl it through the batter in circular motions. This creates those beautiful vanilla streaks throughout each layer.
Bake the Layers Until Perfectly Set
Bake the cakes for 25-30 minutes, or until a toothpick inserted into the center comes out clean. The edges should be golden brown while the top remains slightly domed. Rotate the pans halfway through baking to ensure even heat distribution. I like to tap the sides of the pans gently after 20 minutes—if the cake springs back slowly, it’s ready.
Remove the cakes from the oven and let them cool in the pans for 10 minutes before transferring to a wire rack to cool completely. This gradual cooling prevents cracking. While the cakes cool, prepare your work surface by placing one cake layer on a cake board or plate.
Prepare the Buttery Vanilla Frosting
In a separate bowl, beat the 1 cup real butter (softened) and the 3 cups powdered sugar together until light and fluffy, about 3-4 minutes on medium speed. Add the 0.5 cup heavy cream and 1 tsp vanilla extract, then scrape the seeds from the 1 whole vanilla bean and add them to the mixture for extra flavor. Beat until smooth and creamy, about 2 more minutes.
This frosting should be thick enough to hold its shape but still spreadable. If it’s too stiff, add 1-2 teaspoons milk at a time until it reaches the perfect consistency. The frosting should be cool but not cold when you apply it—this ensures clean, professional-looking layers.
Assemble and Frost the Cake
Once both cake layers are completely cool, level the tops if needed using a serrated knife. Place the first layer on your cake board and spread a thin layer of frosting (about ¼ inch) over the top. This “crumb coat” prevents crumbs from getting into the final frosting layer. Chill the cake for 15 minutes in the refrigerator.
After chilling, apply the remaining frosting to the top of the first layer, then place the second layer on top. Press gently to adhere, then frost the sides of the cake smoothly. Use a spatula to create clean, straight edges. For the signature swirls, pipe additional frosting in a circular motion around the top of the cake, then drag a knife through the frosting to create decorative patterns.
Garnish and Serve
For final presentation, pipe small rosettes or swirls around the base of the cake using the remaining frosting. Scatter the remaining vanilla bean seeds on top for a professional touch. The cake should be served at room temperature for the best texture and flavor. Store leftovers in an airtight container in the refrigerator for up to 3 days, bringing to room temperature before serving.
Pro Tips For Making 2 Layer 10 Inch Cake
- Chill the Butter First: DESCRIPTION: Take your unsalted butter straight from the fridge—yes, even if it’s summer—and cut it into cubes before measuring. I learned this after fighting with overmixed batters; cold butter blends smoother and creates lighter layers. (And no, room temp isn’t worth the struggle.)
- Weigh Your Flour: DESCRIPTION: Scooping flour from the bag packs in air, and that’s how you end up with a dense cake. Use a kitchen scale for precise measurements—250g of flour makes a difference. I was skeptical until I compared the two; the scaled version actually rises better.
- Don’t Overbake the Layers: DESCRIPTION: A toothpick with moist crumbs is better than a clean one—overbaking dries out the cake before you add frosting. Pull yours when the center is just set (about 2-3 minutes before the recipe says). Trust me, your frosting will thank you.
- Scrape the Vanilla: DESCRIPTION: Vanilla bean paste isn’t just seeds—scrape the gooey insides into your batter for real flavor. I used to just drop in the pod and wonder why my cake tasted flat. (And skip the seeds if you’re lazy, but you’ll notice the difference.)
Make-ahead tips for leftovers
Prep Ahead
Mix the cake batter up to 24 hours in advance and store it in the fridge in an airtight container. The flavors develop beautifully overnight, and the batter will be perfectly chilled when you’re ready to bake.
For the frosting, whip it together 1 day ahead and refrigerate in a sealed container. When you’re ready to assemble, simply beat it back to smooth consistency with a hand mixer. This saves you time on the day of your event! 💫
Layer Storage
Bake the cake layers 1 day ahead and store them in an airtight container between layers of parchment paper at room temperature. This prevents them from drying out while keeping their moisture intact.
When you’re ready to assemble, simply level the tops if needed and proceed with the frosting. The layers will be perfectly fresh and ready for decorating. 🍰
Frosting Prep
Prepare the frosting 2 days ahead and store it in the fridge. When you’re ready to use it, let it sit at room temperature for 30-45 minutes to soften slightly.
This makes it easier to spread and pipe, giving you that smooth, professional finish. If the frosting hardens too much, microwave it in 10-second intervals until it’s spreadable. 🧈
Transport Tips
If you need to transport the assembled cake, wrap it tightly in plastic wrap and place it in a sturdy cake box. Keep it in a cool, dry place (like a car with the AC on) for up to 4 hours before serving.
Avoid temperature fluctuations, which can cause the frosting to melt or the cake to become too warm. For longer transport, freeze the cake (unfrosted) for up to 1 month and thaw it overnight in the fridge before decorating. ❄️
Make-Ahead Mistakes
Avoid storing cake layers in the fridge longer than 3 days—they can dry out or develop a stale flavor. Never refrigerate the assembled cake with frosting for more than 24 hours, as condensation can make the frosting soggy.
If you’re prepping for a party, keep the cake at room temperature and cover it loosely with a cake dome to protect it from dust and moisture. 💡
Nutrition facts
Frequently asked questions
Can I bake this cake in smaller pans to make individual servings?
This recipe works perfectly in 6-inch pans for mini cakes or 8-inch pans for smaller portions. Just adjust baking time—6-inch layers take about 20-25 minutes at 350°F. Reduce frosting proportionally (use 1.5 cups for 6-inch layers). The swirl technique remains the same for any size!
Why does my cake sink in the middle after baking?
This usually happens from overmixing the batter or opening the oven too soon. Mix until just combined (about 1 minute after all ingredients are added), and avoid peeking until 20 minutes in. Also ensure your oven is fully preheated—350°F is critical. A toothpick test (clean when inserted) confirms doneness.
How do I make this cake gluten-free?
Replace the 3 cups all-purpose flour with 2.5 cups gluten-free 1:1 baking flour (like Bob’s Red Mill) plus 0.5 cup cornstarch. Add 1 tsp xanthan gum if your blend doesn’t contain it. Chill the batter 30 minutes before baking for better texture. Frosting stays the same—just ensure your butter is gluten-free.
Can I use this recipe for a 3-layer cake?
Yes! For a 3-layer 10-inch cake, reduce each batter batch by 1/3 cup flour and 1 tbsp milk per layer. Bake the third layer in a third pan. Frosting quantity stays the same (3 cups total), but you’ll need 2 extra minutes to pipe all layers smoothly. The swirl technique works the same for all layers!
What’s the best way to level uneven cake tops?
Use a serrated knife or cake leveler at a 45-degree angle—press gently and pull toward you. For stubborn domes, place a thin plate on top and press down firmly. Never use a sawing motion—it creates crumbs. Level just before frosting to prevent crumbs from getting trapped.

- Crock Pot Peanut Clusters Recipe: Warm, Gooey Bites in 2 Hours - November 1, 2026
- Pea Soup Instant Pot Recipe: Velvety Green Smoothness in 20 Minutes - November 1, 2026
- Pork Loin Pulled Pork Crock Pot Recipe: Slow-Smoked Tenderness With Zero Dryness - November 1, 2026