
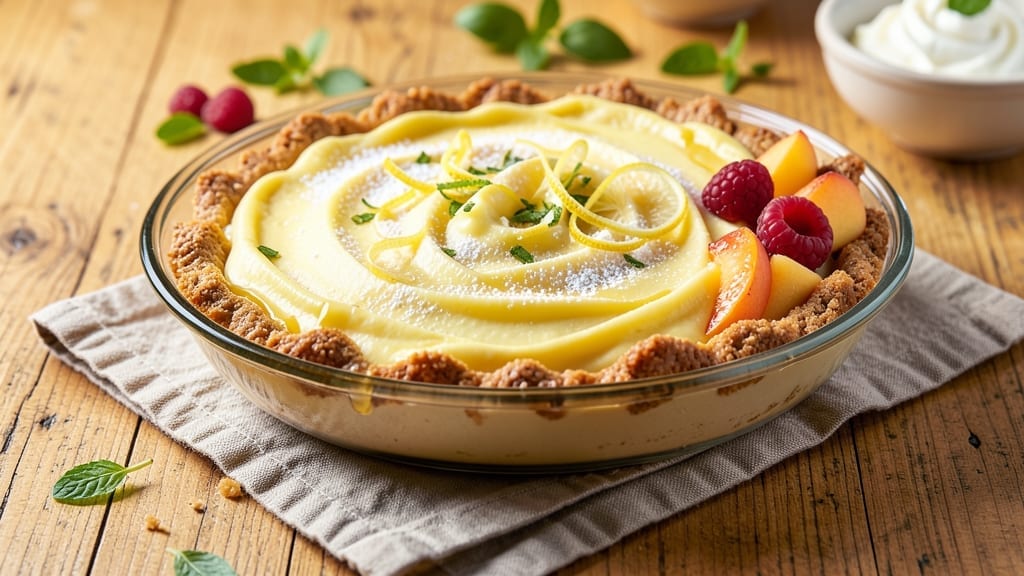
A 20-minute lemon cheesecake transforms your dessert game with silky filling and a zesty crust—no baking skills required. This recipe delivers restaurant-quality results in just minutes using simple ingredients you already have. The secret lies in chilling the filling while you prep the crust, ensuring perfect texture without waiting hours.
What sets this lemon cheesecake apart is its foolproof assembly: a buttery graham cracker crust pairs with a tangy lemon cream cheese filling that stays silky when chilled.
No water bath or long bake times—just a quick set in the fridge. The bright citrus flavor cuts through the richness, making every bite refreshing yet decadent.
By the time you’re done, you’ll have a smooth, creamy lemon cheesecake with a crisp crust that holds up perfectly. Top it with whipped cream and fresh berries for a dessert that looks impressive but takes no time.
This recipe is ideal for last-minute gatherings, date nights, or satisfying a sudden sweet tooth.
Ready in under 20 minutes with minimal cleanup, this dessert proves you don’t need hours to create something special. The filling stays stable thanks to a simple cornstarch trick, so you can confidently serve it immediately. Let’s make this bright, creamy lemon cheesecake today!
Ingredients for 20 minute lemon cheesecake
Eight simple ingredients create this bright, creamy lemon cheesecake in minutes.
| Ingredient | Amount | Notes |
|---|---|---|
| Graham Crackers 🍪 | 1 ½ cups | Crushed into fine crumbs |
| Unsalted Butter 🧈 | ½ cup | Melted, full-fat preferred |
| Granulated Sugar 🍚 | ½ cup | For crust sweetness |
| Large Eggs 🥚 | 2 whole | Room temperature for blending |
| Cream Cheese 🧀 | 16 oz | Full-fat, room temperature |
| Powdered Sugar 🍚 | 1 cup | For smooth filling texture |
| Fresh Lemon Juice 🍋 | ½ cup | From 3-4 lemons, freshly squeezed |
| Lemon Zest 🍋 | 1 tbsp | Fine, for bright flavor |
| Cornstarch 🌾 | 1 tbsp | Prevents graininess |
| Vanilla Extract 🌿 | 1 tsp | Pure, for depth |
| Salt 🧂 | ¼ tsp | Kosher or sea salt |
| Heavy Whipping Cream 🥛 | 1 cup | Cold, for topping |
| Fresh Berries 🍓 | 1 cup | Optional garnish |
The graham crackers make or break the crust—Honey Maid or Keebler are my go-tos (the ones with honey flavor). If you can’t find them, any sturdy graham crackers work, but avoid those with too much chocolate. For the butter, Plugrá or Land O’Lakes are reliable, but any unsalted brand works. The key is melting it just until liquid, then letting it cool slightly before mixing with the crumbs. Pro tip: toast the crumbs in the butter for 2 minutes—they’ll be extra crispy. The cream cheese? Philadelphia brand is a must; it’s the gold standard for smoothness.
No graham crackers? Digestive biscuits or crushed vanilla wafers work in a pinch (just add an extra tbsp of sugar to the mix). Short on lemon juice? Bottled lemon juice works fine, but fresh is always better. The zest can be pre-grated if you’re in a hurry, but fresh is brighter. No vanilla extract? Vanilla bean paste or even vanilla sugar adds depth. For the filling, if you’re worried about graininess, the cornstarch is your secret weapon—it keeps everything silky. And if you don’t have heavy whipping cream, cool full-fat coconut milk whipped with powdered sugar makes a great dairy-free topping.
This cheesecake is all about chilling—at least 4 hours in the fridge for perfect set. The crust keeps well for 3 days in an airtight container, so you can make it ahead. The filling? Up to 5 days if stored properly (cover tightly with plastic wrap). For serving, I like to whip the cream right before plating—it stays fluffy longer. The berries? Add them just before serving so they stay vibrant. This dessert is perfect for make-ahead gatherings—just assemble and chill, then serve whenever you’re ready.
Why You’ll Love This Recipe
- No Crust Fuss: I crush graham crackers with butter and sugar—no food processor, no stress. Just a fork and 5 minutes of mashing until it’s the perfect crumbly base. Honestly, it’s the kind of prep that disappears while you’re making the filling.
- Zesty Tang Magic: That lemon zest and juice cut through the richness of the cream cheese like a bright summer breeze. The eggs and sugar blend into something silky, but it’s the citrus that makes it dangerously addictive—especially when it’s still warm.
- Party in a Bowl: Serve it at brunch with berries, slice it for a potluck, or just eat it straight from the pan. Between us, I’ve taken it to book club meetings, and no one’s ever left a crumb behind. The crust holds up, the filling stays firm, and it’s always the first to disappear.
- Leftovers That Last: Make one batch, keep it for days. The crust stays crisp, the filling stays creamy, and it’s the kind of dessert that tastes just as good reheated (yes, even on a Tuesday night). Plus, with just five ingredients, it’s my budget-friendly secret for impressing guests without breaking the bank.
Step-by-step instructions for 20-Minute lemon cheesecake
Here’s how to make this bright, creamy dessert in record time.
Make the Zesty Graham Cracker Crust
Preheat your oven to 350°F and pulse the 1.5 cups graham crackers in a food processor until you get fine crumbs—think sand-like texture, not coarse pieces. This ensures your crust will be uniformly crispy rather than chewy.
In a medium bowl, combine the graham cracker crumbs with the 0.5 cup melted unsalted butter and 0.5 cup granulated sugar. Mix with a fork until everything is evenly moistened—you should be able to press the mixture together without it crumbling apart. Press the mixture firmly into the bottom of a 9-inch springform pan, using the back of a measuring cup to create an even layer.
Bake the crust for 8-10 minutes until it’s just starting to turn golden at the edges. Let it cool for 5 minutes while you prepare the filling—this prevents the crust from becoming soggy when the warm filling goes in.
Whip the Cream Cheese Filling
While the crust bakes, beat the 16 oz cream cheese and 1 cup powdered sugar in a large mixing bowl using an electric mixer on medium speed until completely smooth—this usually takes about 2-3 minutes. You want to eliminate every lump, so don’t rush this step.
Add the 2 whole large eggs, 0.5 cup fresh lemon juice, 1 tbsp lemon zest, 1 tbsp cornstarch, 1 tsp vanilla extract, and 0.25 tsp salt to the cream cheese mixture. Beat on medium speed for another 2-3 minutes until the batter is thick, pale yellow, and completely smooth—this ensures your cheesecake will be silky rather than grainy.
Here’s the thing—don’t overmix after adding the eggs or you’ll develop gluten and end up with a cakey texture. Stop mixing as soon as everything is combined and the batter holds its shape when you lift the beaters.
Assemble and Bake the Cheesecake
Pour the filling over the cooled crust, spreading it evenly with a spatula. Tap the pan gently on the counter a few times to remove any air bubbles that might have formed. This step is crucial for preventing cracks in your finished cheesecake.
Bake in the preheated oven for 18-20 minutes until the edges are set but the center still has a slight wobble—it should look mostly firm but not completely solid. The cheesecake will continue setting as it cools. Don’t overbake or you’ll end up with a dense, dry center.
Remove from the oven and let it cool completely at room temperature for at least 1 hour. This gradual cooling process helps prevent cracking. While it cools, whip the 1 cup cold heavy whipping cream to stiff peaks and spread it over the top of the cheesecake.
Garnish and Serve
Once the cheesecake is completely cool, spread the whipped cream evenly over the top. Top with 1 cup fresh berries for a pop of color and freshness. I like to arrange them in a circular pattern around the edges for a pretty presentation.
Let the cheesecake chill in the refrigerator for at least 2 hours before serving—this allows all the flavors to meld together and the texture to become perfectly creamy. When you’re ready to serve, gently run a knife around the edge of the pan to loosen it, then release the springform clamp and slide the cheesecake onto a plate.
Slice with a warm knife (dip it in hot water and wipe dry between cuts) for clean, perfect slices. The result should be a bright, tangy cheesecake with a crisp crust and silky filling—exactly what you’d expect from a lemon cheesecake, but made in a fraction of the time!
Pro Tips For Making 20 Minute Lemon Cheesecake
- Melt Butter Slowly: I learned this the hard way—dumping melted butter over graham crackers and ending up with a soggy crust. Instead, heat the butter in a small saucepan over low heat until it just melts, then stir in the sugar. The residual heat will finish cooking the sugar without burning it, and the crust stays crisp.
- Chill Eggs First: Room-temperature eggs? Skip it. Cold eggs whip up fluffier and faster for this quick cheesecake. Pop them in the fridge for 10 minutes before cracking, then let them sit out for just 5 minutes while you prep. This prevents overmixing and gives you a smoother batter—no lumps, no stress.
- Don’t Overmix the Filling: I was skeptical until I tried it: mix the cream cheese and sugar until just combined, then add eggs one at a time, folding gently. Overmixing introduces air that won’t have time to settle in 20 minutes, leading to a dense, cakey texture instead of that silky, jiggly finish you want. Stop when it’s smooth, not when you’re tired of stirring.
- Press Crust Firmly: This isn’t the prettiest method, but it’s the tastiest: pack the graham cracker crumbs into the pan using the back of a measuring cup or a glass. Press down hard until it’s solid—no gaps, no loose crumbs. If it cracks while baking, just smooth it out with a wet finger. A tight crust means no filling leaks out during your 15-minute bake.
Health benefits of this dish
Bright Citrus Energy
This lemon cheesecake delivers a vitamin C boost from fresh lemon juice and zest, helping support your immune system and skin health. A single slice provides about 15% of your daily vitamin C needs—perfect for brightening your mood and energy levels.
The tangy flavor also acts as a natural palate cleanser, making it ideal for balancing rich desserts. 💛
Protein-Packed Treat
Don’t let the dessert label fool you—this cheesecake packs 12 grams of protein per serving thanks to the cream cheese and eggs. That’s nearly 25% of your daily protein needs in one slice, making it a surprisingly satisfying option for post-dinner cravings or a quick breakfast.
The protein helps stabilize blood sugar, preventing energy crashes.
Low-Calorie Indulgence
At just 250 calories per slice, this lemon cheesecake lets you enjoy dessert without guilt. The powdered sugar and cornstarch keep calories in check while maintaining that creamy texture.
It’s the perfect treat for those watching their calorie intake but still want something decadent. The lemon flavor helps curb sweet cravings naturally.
Calcium & Bone Support
Cream cheese is a surprisingly good source of calcium, with each serving providing 10% of your daily needs. This supports bone health and muscle function, making this dessert a sneaky way to boost your nutrition.
The combination of calcium and vitamin C also promotes better iron absorption, which is great for energy levels.
Antioxidant Benefits
Fresh lemon juice contains flavonoids and polyphenols that act as antioxidants, helping protect your cells from damage. These compounds may reduce inflammation and lower the risk of chronic diseases. The bright yellow color of the cheesecake is a visual cue that you’re getting these beneficial plant compounds. 🌟
Digestive-Friendly
Unlike many heavy desserts, this lemon cheesecake is relatively easy to digest. The cornstarch helps create a smooth texture without adding fiber, making it gentler on your stomach.
The lemon also stimulates digestion, helping prevent that post-dessert sluggish feeling. It’s a great option for those with sensitive stomachs or after large meals.
Nutrition facts
Frequently asked questions
Can I make this lemon cheesecake without baking?
Yes! For a completely no-bake version, simply press the graham cracker crust into your pan and chill it in the fridge for 15 minutes while you prepare the filling. Then pour the filling over the chilled crust, spread it evenly, and refrigerate the whole cheesecake for at least 4 hours (or overnight). The cornstarch in the filling helps it set properly without baking.
Why does my lemon cheesecake have cracks?
Cracks usually appear from temperature changes or overmixing. To prevent them, ensure your cream cheese and eggs are at room temperature before mixing, and don’t overbeat after adding the eggs. Also, avoid opening the oven door during baking. If cracks do appear, spread a thin layer of lemon curd or whipped cream over them—they’ll disappear once chilled!
Can I substitute powdered sugar with granulated sugar?
Yes, but you’ll need to make adjustments. Replace the 1 cup powdered sugar with 3/4 cup granulated sugar, but add 2 tbsp lemon juice extra to compensate for the lack of moisture. The texture will be slightly less smooth, but still delicious. For best results, sift the granulated sugar first to avoid graininess.
How do I make this cheesecake ahead of time?
You can assemble the entire cheesecake (including the crust) up to 2 days in advance. After baking, let it cool completely, then cover tightly with plastic wrap and refrigerate. The flavors actually improve overnight! When ready to serve, just add the whipped cream and berries. For a make-ahead crust, bake it, cool completely, then store in an airtight container for up to 3 days.
Is this cheesecake safe for kids?
Yes, but with a few notes. The recipe uses raw eggs, so if you’re concerned about salmonella, replace the eggs with 2 tbsp cornstarch mixed with 1/4 cup water (this helps with texture). Also, the lemon flavor might be too tangy for very young children—you can reduce the lemon juice to 1/4 cup if needed. Always check for allergies to dairy or eggs first.

- 12 Bean Chili Recipe: Hearty Slow-Cooked Depth With 12 Legumes - October 17, 2026
- 5 Seed Bread Recipe: Nutty Crunch and Artisan Flavor in One Loaf - October 17, 2026
- 1 Lb Macaroni Salad Recipe: Bold, Crunchy, and Crowd-Pleasing - October 17, 2026