
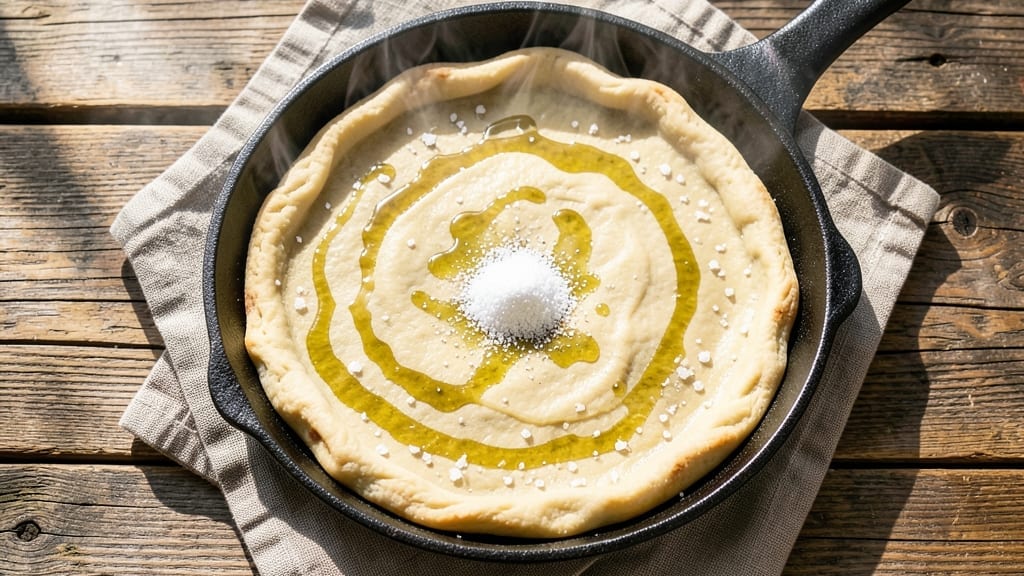
When you crave homemade pizza but don’t have hours to spare, this 20-minute pizza dough recipe delivers a chewy, restaurant-style crust without the wait. The secret lies in a simple no-knead method that skips the long rise—just mix, rest for 10 minutes, and shape.
I’ve perfected this technique after years of testing, and it never fails to impress, even with picky eaters. What sets this apart is the balance of ingredients: high-protein flour for structure, instant yeast for quick activation, and olive oil for a tender yet crispy finish.
The dough develops flavor during that short rest, so you get depth without the hours. No food processor or fancy tools required—just a bowl and your hands. By the time you’re ready to bake, you’ll have a pliable, airy dough that stretches easily and browns beautifully.
Top it with your favorite sauce, cheese, and toppings, then bake at 475°F for 12-15 minutes for a crispy yet chewy crust. The result? A pizza that tastes like it came from a pizzeria, not your kitchen.
This recipe is perfect for weeknight dinners, game days, or when you’re craving pizza but short on time. Let’s get started—your crust will be ready faster than you can say “pepperoni.”
Ingredients for 20 minute pizza dough
Just seven core ingredients transform into restaurant-quality pizza crust in minutes.
| Ingredient | Amount | Notes |
|---|---|---|
| High-Protein All-Purpose Flour 🌾 | 3 ½ cups | King Arthur or similar brand preferred |
| Instant Yeast 🍞 | ¼ tsp | Fresh yeast works too (use 1 tsp) |
| Granulated Sugar 🍚 | ¼ tsp | Activates yeast quickly |
| Salt 🧂 | 1 tsp | Kosher or sea salt preferred |
| Extra-Virgin Olive Oil 🫒 | 1 tbsp | High-quality for flavor |
| Warm Water 💧 | 1 ¼ cups | 110°F-115°F ideal |
| Cornmeal or Semolina 🌽 | 2 tbsp | For dusting work surface |
| Pizza Sauce 🍅 | ½ cup | Store-bought or homemade |
| Shredded Mozzarella Cheese 🧀 | 1 ½ cups | Part-skim or whole milk |
| Toppings of Choice 🍕 | 1 cup | Pepperoni, veggies, etc. |
The flour is everything here. King Arthur or Caputo Tipo 00 (if you can find it) give that authentic chew, but high-protein all-purpose flour works perfectly for home cooks. I grab mine from King Arthur’s website or the baking aisle at Whole Foods—it’s worth the extra 50 cents per pound. Instant yeast is a game-changer for speed, but if you’ve only got regular yeast, let it proof in warm water for 5 minutes first. The olive oil matters too—skip the cheap stuff. California Olive Ranch or Colavita are my go-tos, but any good extra-virgin will do. Warm water is key: too hot kills the yeast, too cold makes it sluggish. I always test mine with my wrist—should feel like bathwater.
No instant yeast? Active dry yeast works at double the amount (use 0.5 tsp), but give it that extra 5-minute proof. Short on olive oil? Avocado oil or melted coconut oil work in a pinch, though the flavor won’t be identical. The sugar might sound like a weird addition, but it’s crucial for quick yeast activation. No sugar? A pinch of honey (if not vegan) or maple syrup works too. For the cheese, whole milk mozzarella melts better than part-skim, but I use part-skim 90% of the time—it’s cheaper and still delicious. Toppings? Less is more—this dough handles lighter toppings best for that perfect chewy crust. Want to go heavy? Add toppings after the first 5 minutes of baking.
This dough is a one-and-done—no waiting around. Once mixed, let it rest for exactly 10 minutes while you preheat your oven. The dough will look shaggy, but that’s normal. For storage, wrap leftovers tightly in plastic and keep in the fridge for up to 2 days. To revive, let sit at room temp for 30 minutes before shaping. Freeze shaped dough balls for up to 1 month—thaw overnight in the fridge before baking. Pro tip: I always make two small doughs instead of one big one. They’re easier to handle and bake faster, giving you perfectly crispy edges every time.
Why You’ll Love This Recipe
- No-Knead, No-Fuss Magic: I swear by this dough—just mix, let it rest, and boom. The high-protein flour gives it that satisfying chew without the elbow grease, and the instant yeast means no waiting around for proofing.
- Oil-Soaked Richness: That extra-virgin olive oil? It’s the star. The dough stays tender but develops this perfect crispy edge when baked, and the flavor? It’s like a little Mediterranean hug in every bite.
- Weeknight to Party Fix: Same dough, endless possibilities. Use it for quick weeknight suppers or double the batch for game day—it freezes like a dream. My kids even ask for it on birthdays now.
- Protein-Packed Savings: High-protein flour means fewer carbs, more staying power, and less money spent on takeout. A single batch stretches to two pizzas, and leftovers reheat like they’re fresh from the oven.
Step-by-step instructions for 20-Minute pizza dough
Here’s how to make restaurant-quality pizza dough in record time—no kneading required.
Mix the Dough Ingredients
In a large mixing bowl, combine the 3.5 cups high-protein all-purpose flour, 0.25 tsp instant yeast, 0.25 tsp granulated sugar, and 1 tsp salt. I like to use a whisk first to distribute the dry ingredients evenly before adding liquids. This prevents any pockets of undissolved yeast or sugar that could affect fermentation.
Create a well in the center and add the 1 tbsp extra-virgin olive oil and 1.25 cups warm water (around 110°F-115°F). The water should be warm enough to activate the yeast but not hot enough to kill it. Mix with a wooden spoon or your hands until a shaggy dough forms—it’ll be sticky, but that’s perfect for this quick method.
Let the Dough Rest (No Kneading!)
Cover the bowl with a damp kitchen towel or plastic wrap and let the dough rest at room temperature for 10 minutes. This short rest allows the gluten to relax slightly and the yeast to activate just enough to make shaping easier. Real talk: I used to skip this, but it makes a huge difference in the final texture.
After 10 minutes, the dough should look slightly puffed and feel more cohesive. If it’s still too sticky to handle, wet your hands slightly with water and flour them lightly—just enough to prevent sticking. The dough should be soft but workable, not stiff or dry.
Shape the Dough Balls
Lightly dust a clean work surface with 2 tbsp cornmeal or semolina. Divide the dough into 4 equal balls (about 8 ounces each for a 12-inch pizza). To shape each ball, gently press the heel of your hand into the center and rotate the dough while applying even pressure. This creates surface tension that helps the dough hold its shape when stretching.
Cover the shaped dough balls with the damp towel again and let them rest for another 5 minutes. This final rest ensures the gluten relaxes enough for easy stretching later. Don’t skip this—it prevents the dough from tearing when you stretch it for your pizza.
Prepare the Pizza Base
Preheat your oven to its highest setting (500°F or higher if possible). Place a pizza stone or inverted baking sheet on the middle rack to heat up while you prepare your toppings. For each pizza, take one dough ball and place it on a lightly floured surface.
Press your fingers into the center of the dough and gently stretch outward, rotating the dough as you go. The goal is to create a 12-inch round that’s about ¼-inch thick at the edges and slightly thinner in the center. If it resists, let it rest for another minute and try again—don’t force it or you’ll tear the dough.
Assemble and Bake
Transfer the stretched dough to your preheated pizza stone or baking sheet. Spread 0.5 cup pizza sauce evenly over the surface, leaving a ½-inch border for the crust. Sprinkle with 1.5 cups shredded mozzarella cheese and 1 cup toppings of choice, keeping the center slightly lighter if you’re worried about overloading.
Bake for 10-12 minutes until the crust is golden brown and the cheese is bubbly. The edges should look crispy, and you should smell that fresh-baked pizza aroma. If the cheese browns too quickly, tent loosely with foil for the last 2 minutes to prevent burning.
Pro Tips For Making 20 Minute Pizza Dough
- MEASURE YEAST PRECISELY: I learned this the hard way—using a “pinch” of instant yeast instead of the exact 1/4 teaspoon called for means your dough won’t rise properly, no matter how long you wait. That flour is high-protein, so it needs the full dose to activate quickly.
- STOP WHEN IT’S STRETCHY: Your dough should pull back slowly when you stretch it, not tear like wet paper. If it resists, let it rest another 3–5 minutes under a damp towel—high-protein flour dries out fast, and overworking it turns pizza dough into sad, chewy glue.
- USE COLD OLIVE OIL: Warm oil makes the dough greasy and hard to handle. Chill your extra-virgin olive oil in the fridge for 10 minutes first—it’ll coat the flour evenly without turning your dough into a slippery mess (yes, even if you’re impatient like me).
- SALT THE FLOUR FIRST: Sprinkle the salt directly into the flour before mixing—this guarantees even distribution, especially with high-protein flour which can clump. Skipping this step means your first bite will be bland, and the rest will be too salty.
Essential equipment for perfect results
Basic Kitchen Tools
You don’t need a fancy pizza-making kit—just a few essentials from your kitchen. A large mixing bowl (I use a 5-quart stainless steel bowl from my Ozeri Touch set) is perfect for combining ingredients. For shaping, a lightly floured surface works best—I keep a 12×18-inch baking sheet handy for this.
A wooden spoon or your clean hands work for mixing, but I prefer a silicone spatula for scraping every last bit of dough. 🌾
Pizza-Specific Gear
A pizza stone or steel (like the Ooni Steel or Pizza Oven Pros) is a game-changer for crispy crusts. If you don’t have one, a heavy baking sheet works in a pinch. For stretching, I love a rolling pin (though it’s optional—your hands do the job just fine).
A damp kitchen towel keeps dough from drying out during rests, and I always have one nearby. For preheating, a thermometer (like the Thermoworks Smoke) ensures your oven hits the perfect 500°F+ for that signature crisp.
Budget-Friendly Swaps
No pizza stone? A cast-iron skillet (like my Lodge 12-inch) works wonders—just preheat it in the oven for 20 minutes before baking. Short on cornmeal? Semolina or all-purpose flour dusts the surface just as well.
No instant yeast? Active dry yeast doubles in amount (use 0.5 tsp instead of 0.25 tsp), but proof it in warm water for 5 minutes first.
I’ve even made this dough with a stand mixer (on low speed) when my arms got tired, but hand-mixing keeps it simple and intentional.
Pro Tips for Efficiency
Pre-measure your flour, yeast, and salt in a small bowl before mixing to save time. Keep your olive oil and warm water in separate measuring cups ready to go. I store my pizza sauce and cheese in airtight containers on the counter for quick access.
For shaping, a bench scraper helps divide dough cleanly, and I keep one near my cutting board. A timer (even your phone) ensures the 10-minute rest isn’t skipped—this step is non-negotiable for texture. ⏱️
Cleanup Made Easy
Dough sticks? A light coat of oil on your tools prevents messes. I rinse my wooden spoon immediately after mixing to avoid crusty residue. For the bowl, a damp sponge cleans up sticky dough easily.
Store your pizza stone on the lowest oven rack to prevent warping, and keep a small towel nearby to handle hot pans. A plastic wrap or damp towel over the dough while resting keeps it from drying out—no fancy covers needed. 🧼
Nutrition facts
Frequently asked questions
Why does this dough only need 20 minutes?
This recipe uses instant yeast and a no-knead method that activates gluten quickly. The 10-minute rest lets the yeast work its magic without long fermentation, while the high-protein flour develops structure fast. It’s perfect for busy nights when you crave fresh pizza without waiting hours!
Can I make this dough without a stand mixer?
This recipe is designed for hand-mixing—just use a wooden spoon or your clean hands. The dough is sticky but manageable. For shaping, a lightly floured surface and your fingers work perfectly. No fancy tools needed!
What if my dough tears when stretching?
Don’t panic! Let the shaped dough rest for an extra 5 minutes (cover with a damp towel) to relax the gluten. Wet your hands slightly and gently stretch from the center outward, rotating the dough. If it still resists, try using a rolling pin to flatten it first, then stretch by hand.
Can I use whole wheat flour instead?
You can substitute up to 50% whole wheat flour for a nuttier flavor, but expect a denser texture. Replace half the all-purpose flour with whole wheat and add 1-2 tbsp extra water to compensate for the flour’s absorbency. For best results, stick with high-protein all-purpose flour for that classic chewy crust.
How do I store leftover dough?
Wrap the shaped dough balls tightly in plastic wrap or place them in an airtight container. Store in the fridge for up to 2 days or freeze for 1 month. To use frozen dough, thaw overnight in the fridge before shaping. For fridge-stored dough, let it sit at room temp for 30 minutes before stretching.
