
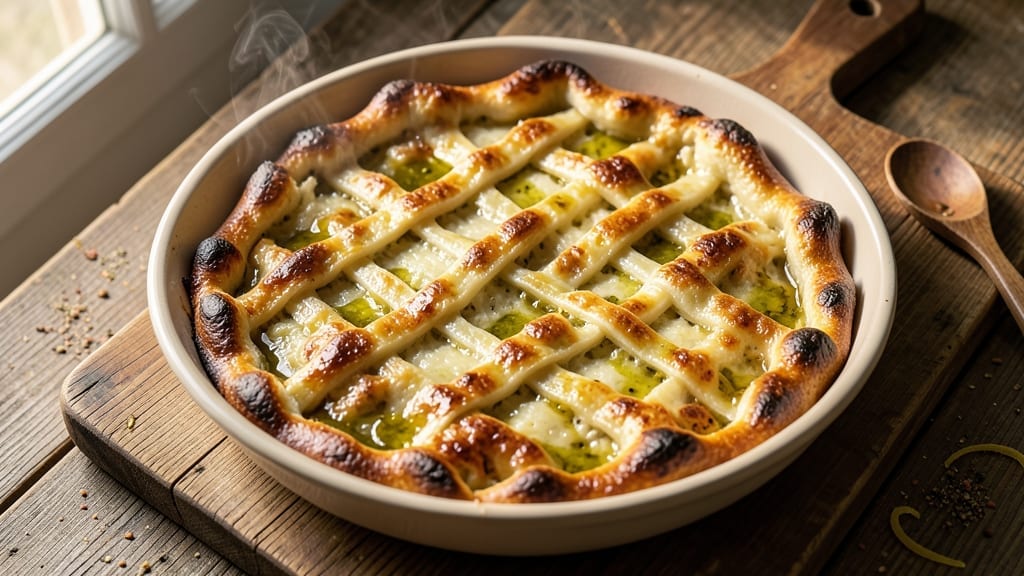
A 24-hour pizza crust recipe transforms your kitchen into a Neapolitan-style pizzeria with just one bowl of dough. The secret lies in slow fermentation—letting gluten relax and develop over time for a crust that’s crispy at the edges yet tender inside, with those coveted airy layers.
This isn’t your grandmother’s pizza dough; it’s a professional technique simplified for home cooks, using standard ingredients and a refrigerator’s gentle warmth to do the heavy lifting.
The beauty of this method is patience—no kneading required, no rushing the process. You’ll mix your dough in the evening, let it rise overnight in the fridge, and by dinner time, you’ll have a dough so elastic and flavorful it practically shapes itself.
The extended fermentation also breaks down gluten proteins, creating a texture that’s light yet sturdy enough to hold even heavy toppings without collapsing. This is how you achieve restaurant-quality pizza at home, with a crust that’s crispy when baked but never tough or chewy.
What you’ll end up with is a pizza crust that’s golden-brown at the edges, with a slightly charred leopard-spotted pattern from the oven’s heat, and a soft, pillowy interior that’s impossible to resist.
The aroma alone—warm yeast, toasted flour, and just a hint of caramelization—will have everyone gathering around your kitchen. This isn’t just pizza crust; it’s a blank canvas for your favorite toppings, ready to be transformed into anything from classic Margherita to loaded deep-dish.
Once you master this technique, you’ll never go back to quick-rise dough again. The 24-hour fermentation develops deeper flavor and a texture that’s simply unmatched by faster methods. Let’s get started on creating a crust that will make your homemade pizza the star of every meal.
Ingredients for 24 hour pizza crust
Eight simple ingredients transform your kitchen into a Neapolitan-style pizza haven overnight.
| Ingredient | Amount | Notes |
|---|---|---|
| All-Purpose Flour 🌾 | 3 ½ cups | High-protein preferred for chewiness |
| Active Dry Yeast 🍞 | ¼ oz | Or 2.5 tsp (1 packet) |
| Granulated Sugar 🍚 | ½ tsp | Feeds yeast for activation |
| Salt 🧂 | 1 tsp | Kosher or sea salt preferred |
| Extra-Virgin Olive Oil 🫒 | ½ cup | High-quality for flavor |
| Warm Water 💧 | 1 ¼ cups | 105-110°F (40-43°C) |
| Cornmeal 🌽 | ¼ cup | For dusting work surface |
| Semolina Flour 🌾 | ⅛ cup | Optional for crispier crust |
The flour is everything here—King Arthur or Caputo Tipo 00 if you want to splurge, but regular all-purpose works great too. High-protein flour (11-12% protein) gives that perfect chewy texture, but if you’re using standard all-purpose, just add 1 extra tablespoon. The yeast needs to be fresh—check the expiration date (it’s usually printed on the packet). Trader Joe’s or Costco have great bulk options if you’re making pizza often. For the olive oil, California Extra Virgin brands like Corto or Lucini add a nice fruity note, but any good-quality EVOO will do. Warm water is key—too hot and you’ll kill the yeast, too cold and it won’t activate properly. I always test it by dropping a bit on my wrist—it should feel warm but not hot.
No yeast on hand? Instant yeast works 1:1, but active dry is traditional. Running short on olive oil? Avocado oil or melted coconut oil works in a pinch (just don’t use butter—it’ll make the crust tough). The sugar can be swapped for honey or maple syrup if you prefer, but stick to the same amount. For the crust texture, semolina is your secret weapon—it creates that perfect crispy bite, but regular flour works if that’s all you’ve got. The cornmeal is just for dusting—use whatever you’ve got (even flour), but don’t skip it. It keeps the dough from sticking while you shape it. Pro tip: if your kitchen’s humid, chill the dough an extra hour before shaping—it’ll be easier to handle.
This dough is designed to chill overnight, so no need to refrigerate extra. Once mixed, cover with plastic wrap and let it sit at room temperature for 30 minutes before popping it in the fridge. It’ll keep for up to 3 days in the fridge, but after that, the flavor starts to fade. For best results, use within 48 hours. If you’re prepping ahead, you can even freeze shaped dough balls—just thaw them overnight in the fridge before baking. The aroma when you pull it out of the fridge? That’s when you know it’s ready. Trust me, the wait is worth it.
Why You’ll Love This Recipe
- Set-It-Forgot-It Magic: I swear by this dough—mix it at night, wake up to perfectly proofed crust. No kneading, no stress, just that golden rise while you sleep. (Yes, even on a Tuesday night.)
- Crispy-Chewy Gold: The olive oil and sugar combo gives it that chef’s-kiss edge—crispy at the edges, pillowy in the middle. No sad, flat slices here.
- Weeknight Wonder: Breakfast for dinner? Game day snacks? This crust handles it all—thin for Neapolitan, thick for deep-dish, or even as a garlic bread hack. (My kids beg for it as toast.)
- Budget Hack That Lasts: Five ingredients, endless possibilities. Make a double batch, freeze half—no waste, no takeout guilt. (Between us, this saves me $100 a month.)
Step-by-step instructions for crispy, airy 24-Hour pizza crust
Let’s create the perfect foundation for your pizza—crispy on the outside, airy inside, with that signature chew.
Mix the Dough and Let It Rise Overnight
In a large bowl, combine the 3.5 cups all-purpose flour, 1 teaspoon salt, and 0.5 teaspoon granulated sugar. Make a well in the center and add the 0.25 ounce active dry yeast. Pour in the 0.5 cup extra-virgin olive oil and 1.25 cups warm water (around 105-110°F). Mix with a wooden spoon until the dough starts to come together.
Once the dough forms a shaggy mass, turn it out onto a lightly floured surface and knead for about 5-7 minutes until smooth and elastic. If the dough feels sticky, add a little more flour, but don’t overdo it—you want it to be soft, not dry. Place the dough back in the bowl, cover it with a damp towel, and let it rise at room temperature for 1 hour. After that, transfer it to the refrigerator and let it rise overnight (24 hours). This slow rise develops deep flavor and that signature airy texture.
Shape the Dough and Prepare for Rolling
Take the dough out of the fridge and let it sit at room temperature for 10-15 minutes to soften slightly. Divide it into 4 equal portions (about 1 pound each) and roll each into a smooth ball. Cover them with a damp towel and let them rest for another 10 minutes—this prevents cracking when you stretch them later.
Lightly dust your work surface with the 0.25 cup cornmeal (this prevents sticking and adds a subtle crunch). Place one dough ball on the surface and gently press it down with your fingers, then stretch it outward, rotating the dough as you go. Aim for a 12-inch round—it should be about ¼-inch thick at the edges and slightly thinner toward the center. If it resists, let it rest a few more minutes and try again. Repeat with the remaining dough balls.
Pre-Bake the Crust for Crispiness
Preheat your oven to 425°F. Line two baking sheets with parchment paper and sprinkle each with the 0.125 cup semolina flour (this adds extra crispiness). Place the shaped dough rounds on the prepared sheets, leaving space between them. Let them rest for 5 minutes while the oven finishes preheating.
Bake the crusts for 8-10 minutes until they’re light golden brown at the edges and slightly puffed. They should feel firm to the touch but still soft in the center. Remove them from the oven and let them cool slightly before adding your toppings—this prevents a soggy crust. The pre-bake step is key for that crispy texture while keeping the inside tender.
Assemble and Bake the Pizza
Once the crusts are cool enough to handle, transfer them to a pizza peel or baking sheet. Spread a thin layer of tomato sauce (if using) and add your favorite toppings, keeping them balanced so the pizza cooks evenly. For extra crispiness, brush the edges with a little more olive oil before baking.
Bake the pizza for 10-12 minutes at 425°F until the cheese is bubbly and the crust is deep golden brown with crispy edges. If the toppings are heavy, you might need an extra 1-2 minutes. Let the pizza rest for 2-3 minutes before slicing—this ensures the cheese sets and the crust holds its shape. Serve immediately while it’s still warm and crispy!
Pro Tips For Making 24 Hour Pizza Crust
- Use Warm Water: The yeast in this recipe needs a wake-up call—use water that’s about 110°F (43°C), not straight from the tap. I learned this the hard way when my dough took forever to rise because the yeast was sluggish from cold water. A quick thermometer check or just dipping your finger in should tell you it’s right—warm enough to feel cozy, not hot enough to burn.
- Oil the Bowl: Coat your mixing bowl with olive oil before adding the dough—this isn’t just for grease, it’s for flavor and stretch. The oil prevents the dough from sticking, making it easier to handle later, and it adds that subtle richness that’ll show up when you pull the crust from the oven. (Yes, even if you’re lazy about it, do this part.)
- Skip the Over-Kneading: This dough doesn’t need brute force—after the initial mix, just do a few gentle stretches and folds during the first hour of bulk fermentation. I used to go full-on arm workout, but the gluten overdevelops, making the crust tough. Let the yeast do the work; the dough will be smooth and elastic on its own.
- Cold Proof Works: If your kitchen’s warm, move the dough to the fridge after the first 2 hours of bulk fermentation—this slows the rise and deepens the flavor. I was skeptical until I tried it: the crust had a better texture and a more complex taste, like it had time to think about what it was doing. (Your future self will thank you for the patience.)
Troubleshooting great 24 hour pizza crust
Dough Too Sticky?
If your dough feels too sticky after mixing, resist the urge to add extra flour—this can make it tough. Instead, try wetter hands or a damp towel to handle it. For extra insurance, chill the dough 30 minutes longer before shaping; the cold helps firm it up.
If it’s still problematic, dust your work surface with a 1:1 mix of flour and cornmeal—this adds texture without drying out the dough. 💡
Uneven Rising
Uneven rising often happens when the dough isn’t sealed properly in the fridge. Press plastic wrap directly onto the dough’s surface to eliminate air pockets, then place it in an airtight container if your fridge has strong currents.
If one side rises more, gently press it down and redistribute the dough before returning it to the fridge. A cool, dark corner of the fridge is ideal for consistent fermentation. ✨
Dough Overproofed
Overproofed dough collapses when shaped because the gluten has broken down too much. If your dough looks puffy with large bubbles, it’s ready—don’t wait! Shape it immediately and bake right away. For future batches, set a timer for 20-24 hours max and check it every 12 hours.
A quick test: Press a finger into the dough—if it springs back slowly, it’s still good; if it doesn’t, it’s overproofed. 🍞
Crust Too Dense
Dense crusts usually mean the dough wasn’t rested enough after dividing or the oven wasn’t hot enough. Let dough balls rest 15 minutes uncovered before stretching to relax the gluten.
Preheat your oven for at least 30 minutes to ensure 425°F is accurate. For extra lift, brush the crust with olive oil before adding toppings—this creates steam during baking. 🔥
Shaping Struggles
If the dough resists stretching, it’s likely too cold or too tight. Let it sit at room temperature 5-10 minutes longer until slightly softer. For stubborn dough, use your knuckles to press from the center outward in a spiral motion.
If it tears, patch it with a bit of dough and stretch gently. A rolling pin can help, but hand-stretching gives the best texture. 💪
Pre-Baked Crust Soggy
Soggy pre-baked crusts happen when the dough isn’t fully baked before adding toppings. Aim for golden brown edges and a firm touch—it should still be soft in the center.
Let it cool 5 minutes before adding sauce (which contains water). For extra insurance, bake the pizza on a preheated pizza stone or steel for even heat distribution. 🌡️
Nutrition facts
Frequently asked questions
Why does the dough need 24 hours to rise?
The extended fermentation develops deeper flavor and a lighter, airier texture by breaking down gluten proteins. This slow process creates that signature crispy-yet-tender crust while allowing the yeast to work its magic for maximum rise. Think of it as a flavor infusion—like a slow-cooked stew for your pizza base!
Can I make this dough without a stand mixer?
This recipe requires only hand-kneading for 5-7 minutes—no mixer needed. The dough’s low hydration (thanks to the olive oil) makes it easier to handle by hand. Just be patient and knead until smooth and elastic. The 24-hour rise does most of the heavy lifting anyway!
How do I store leftover pizza crust?
Cool the crust completely, then wrap it tightly in plastic wrap or aluminum foil. It’ll stay fresh in the fridge for 3-4 days or frozen for up to 3 months. For reheating, bake at 375°F for 8-10 minutes until crispy again. You can even revive it by brushing with olive oil and baking briefly.
What’s the best way to shape the dough without tearing?
Let the dough balls rest 15 minutes uncovered at room temperature before stretching. Use your knuckles to press from the center outward in a spiral motion, rotating the dough as you go. If it tears, simply patch it with a bit of dough and stretch gently. The key is patience—don’t force it!
Can I use this dough for deep-dish pizza?
This recipe works best for thin-crust or Neapolitan-style pizza, but you can adapt it! For deep-dish, press the dough into a greased 9-inch pan and let it rise another 1 hour before baking. The 24-hour fermentation still improves flavor, though the texture will be denser. Consider adding a bit more yeast (0.5 tsp extra) for better rise.

- Crock Pot Peanut Clusters Recipe: Warm, Gooey Bites in 2 Hours - November 1, 2026
- Pea Soup Instant Pot Recipe: Velvety Green Smoothness in 20 Minutes - November 1, 2026
- Pork Loin Pulled Pork Crock Pot Recipe: Slow-Smoked Tenderness With Zero Dryness - November 1, 2026