
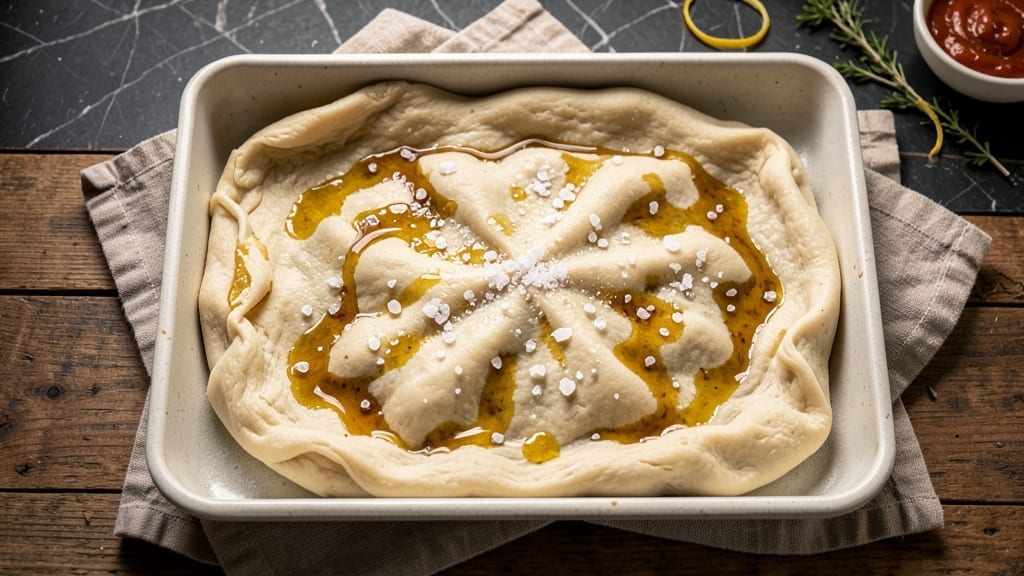
A 24-hour cold rise transforms pizza dough from ordinary to extraordinary—yielding a chewy, airy crust with deep flavor and improved digestibility. This method lets gluten develop slowly in the fridge, creating a texture that store-bought dough can’t match.
I’ve perfected it through years of testing, and the results speak for themselves: a crust that’s crisp at the edges yet tender inside, with that signature open crumb you crave.
The beauty of this recipe lies in its simplicity: just five ingredients and minimal effort upfront. After mixing, the dough rests in the fridge overnight, where cold temperatures slow fermentation and enhance flavor complexity.
No need for a stand mixer or fancy equipment—just your hands, a bowl, and patience. The long rise also makes the dough easier to digest, which is a game-changer for those sensitive to gluten.
By the time you pull it from the fridge, your dough will be ready to shape and bake, promising a pizza with a golden, blistered crust and a light, airy interior.
The cold fermentation also improves oven spring, ensuring your pizza rises beautifully in the oven. Whether you’re making classic Margherita or loaded deep-dish, this dough delivers professional-quality results every time.
This method works equally well for thin-crust, thick-crust, or even focaccia—just adjust your shaping technique. The dough keeps in the fridge for up to 48 hours, so you can prep ahead for stress-free pizza nights. Let’s get started on mastering this foolproof technique.
Ingredients for 24 hr pizza dough
Five simple ingredients transform into the perfect pizza dough with just 24 hours of patience.
| Ingredient | Amount | Notes |
|---|---|---|
| All-Purpose Flour 🌾 | 4 cups | King Arthur or similar high-gluten preferred |
| Active Dry Yeast 🍞 | ¼ tsp | Ensure expiration date is fresh |
| Diamond Crystal Kosher Salt 🧂 | 1 ½ tsp | Adjust to taste after initial rise |
| Extra-Virgin Olive Oil 🫒 | 1 tbsp | High-quality, fruity variety |
| Granulated Sugar 🍚 | 1 tsp | Optional for yeast activation |
| Warm Water 💧 | 1 ¼ cups | 105-110°F for optimal yeast activation |
The flour is everything here—King Arthur or similar high-gluten flour gives that signature chewy texture. I grab mine from King Arthur Flour’s website or the bulk section at Whole Foods. If you’re using regular all-purpose, add an extra 1/2 cup for better structure. The yeast? Check the expiration date—old yeast won’t activate properly. Store it in the freezer if you’re not using it often. For the olive oil, California avocado oil works too, but olive oil adds that authentic Italian touch.
No yeast on hand? Instant yeast works 1:1, but active dry needs to proof first in warm water. Short on sugar? Honey or maple syrup at half the amount works beautifully. The water temperature is critical—too hot kills the yeast, too cold slows it down. 105-110°F is ideal. If you don’t have a thermometer, test by dropping a bit in your palm—it should feel warm but not hot. For a gluten-free version, King Arthur’s gluten-free flour blend works well (just add 1 tbsp xanthan gum).
This dough keeps in the fridge for up to 48 hours, so you can prep it days ahead. Wrap tightly in plastic wrap or a damp towel to prevent drying. For best results, let it sit at room temperature for 30-60 minutes before shaping. The dough doubles in size during the cold rise—don’t panic when you see it expand. Portion into 16 oz balls for perfect single-serving pizzas, or keep as one big batch for a family feast.
Why You’ll Love This Recipe
- No-Knead Nightmare Solved: Mix five ingredients, let it rest—done. I swear, the yeast and sugar team up to do all the work while I scroll through my phone. No standing, no stretching, just a bowl, a lid, and patience (the 24-hour kind).
- Crispy-Chewy Magic: That olive oil bloom? Heaven. The kosher salt cuts through the sweetness just enough to make the crust sing—crisp on the edges, pillowy in the middle. It’s the kind of dough that makes you forget takeout exists.
- Weeknight Superhero: Stuff it with whatever’s in your fridge: leftover roasted veggies, jarred marinara, or that sad half-pound of pepperoni. Even my picky teenagers don’t argue when this hits the table. (Yes, even on a Tuesday night.)
- Dollar Stretch Wonder: Flour, yeast, oil—all pantry staples that don’t break the bank. One batch feeds four, and the leftovers? Freeze half for lazy days. I’ve made 12 pizzas from a single dough ball without blinking.
Step-by-step instructions for 24 hour pizza dough
This method transforms simple ingredients into a chewy, airy crust with minimal effort.
Mix the Dough for Maximum Flavor Development
In a large mixing bowl, combine the 4 cups all-purpose flour and 1.5 teaspoons diamond crystal kosher salt, whisking to distribute evenly. Create a well in the center and add the 0.25 teaspoon active dry yeast and 1 teaspoon granulated sugar. This sugar isn’t for sweetness—it’s to jumpstart the yeast activity.
Pour in the 1.25 cups warm water (between 105-110°F) and 1 tablespoon extra-virgin olive oil into the well. Using a wooden spoon, gently mix the ingredients until a shaggy dough forms. Avoid overmixing at this stage—you’re not developing gluten yet, just combining components. The dough will be sticky, but that’s perfect for the long fermentation.
Knead by Hand for Optimal Texture
Turn the dough onto a lightly floured surface and knead for 8-10 minutes using the “push and fold” method. Push the dough away from you with your knuckles, then fold it over itself. Rotate the dough and repeat. This technique builds gluten more gently than punching, which can overwork the dough and make it tough.
You’ll know you’re done when the dough becomes smooth and slightly springy to the touch. It should no longer stick excessively to your hands or surface. If it feels too sticky, add just enough flour to make handling easier—but don’t go overboard, as too much flour can interfere with fermentation.
First Rise – The Critical 1-Hour Activation
Shape the dough into a loose ball and place it back in the mixing bowl. Cover tightly with plastic wrap or a damp towel to prevent drying. Let it rest at room temperature for 1 hour. This initial rise allows the yeast to activate and the gluten to relax slightly before the long cold fermentation.
After 30 minutes, you should see small bubbles forming on the surface and the dough beginning to expand. If you don’t see bubbles by the 1-hour mark, your yeast might be inactive (common if water was too hot or cold). In that case, start over with fresh yeast and properly warmed water.
Cold Fermentation – The Secret to Perfect Texture
After the first rise, transfer the dough to a clean, lightly oiled bowl. Cover again and refrigerate for 22-24 hours. This cold fermentation is what creates the signature chewy, airy texture of Neapolitan-style pizza dough. The slow fermentation allows flavors to develop deeply while controlling yeast activity.
During this time, the dough will rise gradually but won’t double in size. It might even deflate slightly. This is normal—what matters is the flavor development and gluten relaxation. For best results, pull the dough out 1 hour before shaping to bring it to room temperature, making it easier to work with.
Shape and Proof for Final Rise
Remove the dough from the refrigerator and let it sit at room temperature for 30-60 minutes to soften. Divide into 4 equal portions (about 8 ounces each) and shape into balls. To shape, press your thumb into the center of each ball, then gently stretch the dough outward while rotating it, keeping the surface taut. This creates surface tension that prevents shrinking during baking.
Place the shaped dough balls on a floured surface, cover, and let them proof at room temperature for 1-2 hours until they’ve puffed up about 50%. They should feel light and springy when pressed gently. The exact proofing time depends on your kitchen’s humidity—warmer environments will speed this up.
Pro Tips For Making 24 Hr Pizza Dough
- Use Lukewarm Water: The yeast needs a cozy bath, not a sauna or a freezer—aim for water that feels like a warm cup of tea (about 105–110°F). I learned this the hard way after killing yeast twice in a row with boiling water. If you’re unsure, dip your finger in; it should feel warm but not sweat-inducing.
- Salt the Flour First: Mix the kosher salt directly into the flour before adding yeast and water—this guarantees even distribution. I used to sprinkle it on top, and half the dough ended up bland. Diamond Crystal is less dense, so use 1.5 teaspoons per pound of flour (about 20% more than table salt).
- Avoid Over-Kneading: The dough will feel tough at first, but resist the urge to punch it like you’re mad at it. After 10 minutes of kneading by hand (or 5 in a stand mixer), it should be smooth but still slightly sticky. Overworking it develops gluten too early, making the crust dense—like eating a cracker instead of pizza.
- Oil the Bowl Properly: Coat the bowl and your hands with olive oil before shaping the dough—this prevents sticking and makes stretching later a breeze. I used to skip oiling my hands, and the dough would tear when I pulled it. A light layer of oil also keeps the surface from drying out during the 24-hour rise (yes, even if you’re impatient like me).
Flavor customization for this dish
Herb-Infused Variations
Elevate your pizza dough with fresh herbs like 2 tbsp chopped rosemary or 1 tbsp dried oregano mixed into the flour before adding water. For a Mediterranean twist, add 1 tsp crushed fennel seeds to the dough—it pairs beautifully with tomato sauce and mozzarella.
I love using fresh basil or thyme for a brighter flavor profile. 🌿
Spicy & Smoky Options
For heat lovers, mix 1 tsp red pepper flakes or ½ tsp cayenne pepper into the flour before kneading. For a smoky depth, add ½ tsp smoked paprika or a pinch of liquid smoke (just a few drops).
I recommend Penzeys Spices for high-quality smoked paprika. These additions work especially well with bold toppings like pepperoni or spicy sausage.
Cheesy & Savory Twists
Add ½ cup grated Parmesan cheese to the dough for an extra-cheesy crust. For a tangy kick, mix in 2 tbsp buttermilk (or plain yogurt) with the water.
This works wonderfully with toppings like caramelized onions or sun-dried tomatoes. I also love adding ½ cup ricotta cheese to the dough for a lighter, airier texture.
Sweet & Savory Fusion
Surprise your taste buds with a touch of sweetness—mix 1 tbsp honey or ½ tsp vanilla extract into the dough. This pairs perfectly with savory toppings like prosciutto and figs.
For a dessert pizza, add ¼ cup powdered sugar to the dough and top with cinnamon-sugar and fresh berries. The sweetness balances beautifully with tangy toppings.
Gluten-Free Adaptations
For a gluten-free version, use King Arthur gluten-free flour blend (plus 1 tbsp xanthan gum). Replace the 1 tbsp olive oil with 2 tbsp melted butter for better flavor.
The dough will be slightly denser, so proof it for 30-45 minutes at room temperature before baking. I recommend baking on a preheated 500°F stone for best results.
Regional Flavor Profiles
For a Neapolitan-style dough, reduce the olive oil to ½ tbsp and add 1 tsp cornmeal to the flour for a crispier crust. For New York-style, increase the olive oil to 2 tbsp and add ½ tsp garlic powder for extra depth.
A Chicago deep-dish version benefits from 1 tbsp cornmeal and a longer proofing time of 2-3 hours**. Each style brings its own unique texture and flavor! 🗺️
Nutrition facts
Frequently asked questions
Can I use this dough for other baked goods besides pizza?
This 24-hour cold-fermented dough works beautifully for focaccia, calzones, or even garlic bread. The long fermentation creates a tender, flavorful base that holds up well to different shapes. For focaccia, stretch the dough into a rectangle, dimple with your fingers, and bake with olive oil and herbs.
What if my dough didn’t rise properly after 24 hours?
Check your yeast first—it might be expired or inactive. If the dough is flat and dense, try adding ¼ tsp more yeast and letting it rise at room temperature for 1-2 hours before refrigerating again. Also ensure your fridge is at 4°C (39°F)—some fridges run warmer and slow fermentation too much.
How do I store leftover dough?
Wrap any unused dough tightly in plastic wrap or place it in an airtight container. It keeps in the fridge for up to 48 hours or can be frozen for 3 months. To use frozen dough, thaw it in the fridge overnight before shaping. Never refreeze thawed dough.
Why does cold fermentation make the dough better?
Cold fermentation slows yeast activity, allowing gluten to develop fully and flavors to deepen. This creates a lighter, more digestible crust with complex taste. The controlled environment also prevents overproofing, which can make dough tough. Plus, it gives you a hands-off method for perfect results!
Can I make this dough without a stand mixer?
Yes! This recipe is designed for hand mixing and kneading. The push-and-fold method works perfectly with just your hands. The dough’s sticky texture actually makes kneading easier—just wet your hands occasionally to prevent sticking. A wooden spoon helps with mixing before kneading.

- 12 Bean Chili Recipe: Hearty Slow-Cooked Depth With 12 Legumes - October 17, 2026
- 5 Seed Bread Recipe: Nutty Crunch and Artisan Flavor in One Loaf - October 17, 2026
- 1 Lb Macaroni Salad Recipe: Bold, Crunchy, and Crowd-Pleasing - October 17, 2026