
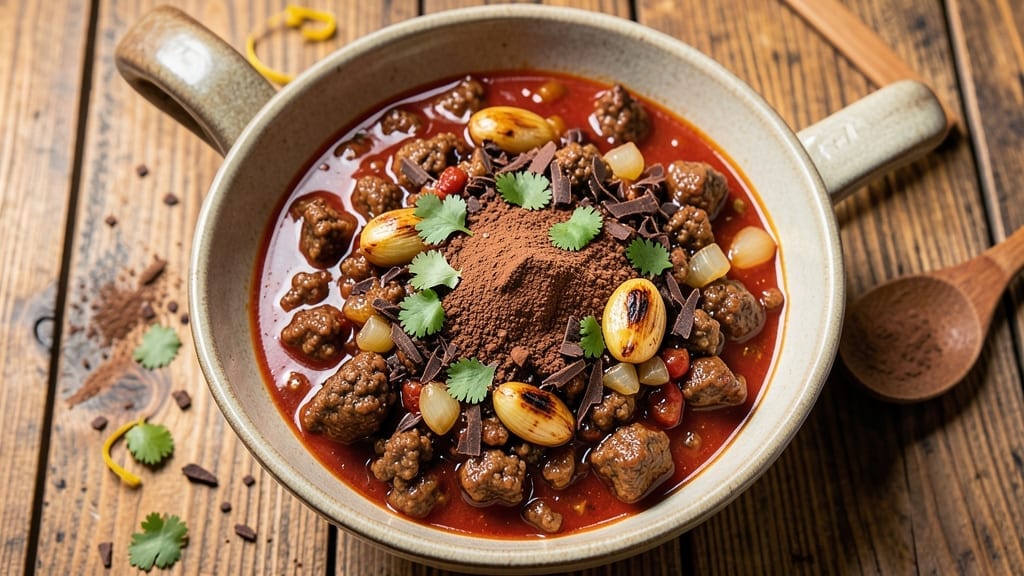
This 24th Street Cafe chili recipe delivers the same smoky, cocoa-infused heat that makes their famous chili legendary—deep, rich, and packed with layers of flavor that cling to your ribs long after the last bite.
The secret lies in slow-simmered beef, dark chocolate for depth, and a blend of spices that creates that signature warmth without overpowering. I’ve recreated their technique at home, ensuring every spoonful delivers that perfect balance of smoky, slightly sweet, and boldly spicy.
The beauty of this chili is in its foolproof method: browned ground beef forms the base, while cocoa powder and dark chocolate add that signature depth that sets it apart from traditional recipes.
A long simmer—at least 2 hours—allows the flavors to meld into a thick, velvety stew that’s heartier than any canned version. The spices are key: chili powder, cumin, and a touch of cinnamon create that familiar warmth, while a splash of vinegar brightens the finish.
By the time you serve it, you’ll have a restaurant-quality chili with a glossy sheen, tender beef, and a richness that comes from the cocoa and chocolate. The aroma alone will have everyone gathering around the table—smoky, slightly sweet, and undeniably comforting.
Serve it with shredded cheese, sour cream, and green onions for the full experience, or let it stand on its own as the star of the meal.
This recipe scales perfectly for a crowd, making it ideal for game day, potlucks, or cozy weeknight dinners. The leftovers taste even better the next day, as the flavors deepen with time. Here’s how to make it—just like the 24th Street Cafe, but in your own kitchen.
Ingredients for 24th street cafe chili
These 16 ingredients create the legendary smoky, cocoa-rich chili that’s worth every bite.
| Ingredient | Amount | Notes |
|---|---|---|
| Ground Beef (Chuck Roast) 🥩 | 2 lb | 80% lean, pre-cubed preferred |
| Yellow Onion 🧅 | 1 whole | Diced, medium size |
| Garlic Cloves 🧄 | 4 cloves | Minced, fresh preferred |
| Canned Tomato Sauce 🍅 | 2 cups | No salt added, crushed tomatoes |
| Unsweetened Cocoa Powder 🍫 | ½ cup | Natural, Dutch-processed works |
| Dark Chocolate (70% Cacao) 🍫 | 4 oz | Chopped, high-quality bar |
| Chili Powder 🌶️ | 2 tbsp | Smoked paprika preferred |
| Ground Cumin 🌿 | 1 tbsp | Toasted for deeper flavor |
| Ground Cinnamon 🌿 | ½ tsp | Freshly ground preferred |
| Apple Cider Vinegar 🍎 | 1 tbsp | For brightness, not distilled |
| Beef Broth 💧 | 2 cups | Low-sodium preferred |
| Black Beans 🫘 | 1 cup | Drained, rinsed, canned |
| Kidney Beans 🫘 | 1 cup | Drained, rinsed, canned |
| Salt 🧂 | 1 ½ tsp | Kosher or sea salt |
| Black Pepper 🌶️ | ½ tsp | Freshly ground preferred |
| Vegetable Oil 🫒 | 1 tbsp | For browning beef |
The beef is non-negotiable here—chuck roast gives that deep, meaty flavor you can’t get with leaner cuts. Costco or Walmart usually have pre-cubed chuck at a great price, but if you’re grabbing a whole roast, ask the butcher to cut it into 1/2-inch pieces. The cocoa powder and dark chocolate are where the magic happens—Ghirardelli or Hershey’s Special Dark work perfectly, but any 70% cacao bar will do. For the beans, I always grab Goya or Bush’s—they’re canned but still taste fresh. The spices? Penzeys or local spice shops have the best quality, but the grocery store stuff works fine if it’s fresh.
No cocoa powder? Melted dark chocolate at double the amount works in a pinch, though it’ll make the chili thicker. Running low on chili powder? Smoked paprika plus cayenne gets you close. The vinegar is key for brightness—apple cider or red wine vinegar both work, but don’t use white vinegar. For the beans, if you’ve got dried, soak them overnight and use 1.5 cups dry (they’ll expand). The tomato sauce can be fresh crushed tomatoes if you’re feeling fancy, but Rao’s or Muir Glen jarred versions save time without sacrificing flavor.
This chili tastes even better the next day—make a double batch if you can. It keeps for 5 days in the fridge, or 3 months frozen. I portion mine into containers with a layer of oil on top to preserve freshness. For serving, I always grab sharp cheddar and sour cream from the store—Boar’s Head or Tillamook are my go-tos. The aroma alone will have everyone gathering around the table, and the leftovers? Even more delicious.
Why You’ll Love This Recipe
- No Chopping Chaos: I swear by this recipe because you only need to dice one onion and mince three cloves of garlic—then it’s hands-off until the cocoa powder does its magic. That’s it. No small prep, no stress.
- Deep Chocolate Heat: The cocoa powder isn’t just an afterthought—it’s the secret weapon. Rich, slightly bitter, and warming, it balances the chuck roast’s savory depth while keeping the tomato sauce from tasting flat. Trust me, it’s the kind of chili that lingers.
- Game for Any Night: Serve it with cornbread for a Sunday brunch crowd, or crackers and sour cream when the football’s on. The same pot works for a lazy weeknight or a potluck where you want to bring the dish. Flexible like that.
- Budget-Friendly Feast: Ground chuck and canned tomato sauce stretch this into six bowls easy, and the cocoa powder adds luxury without breaking the bank. Leftovers? Even better—it tastes just as good reheated the next day, no takeout needed.
Step-by-step instructions for smoky cocoa-infused chili
Here’s how to build that legendary 24th Street Cafe chili—deep, rich, and packed with smoky cocoa heat.
Brown the Beef for Maximum Flavor
Heat a large Dutch oven over medium-high heat and add the 1 tablespoon vegetable oil. Once shimmering, add the 2 lb ground beef (chuck roast) broken into small pieces. Cook undisturbed for 3-4 minutes until the meat loses its raw color and begins to crisp at the edges.
This is where the magic happens—I stir occasionally to break up clumps, but let those browned bits form. They’re packed with flavor that’ll infuse the entire chili. Once the beef is fully browned and no longer pink, drain it into a colander, reserving 1 tablespoon of the rendered fat in the pot. Discard any excess fat if needed.
Build the Flavor Base with Aromatics
Return the Dutch oven to medium heat and add the reserved fat. Toss in the 1 whole yellow onion (diced) and cook for 5 minutes until softened and translucent. Add the 4 cloves garlic (minced) and cook for another 30 seconds until fragrant—don’t let it burn, or you’ll get bitter notes.
Here’s where the spices come in: Add the 2 tablespoons chili powder, 1 tablespoon ground cumin, and 0.5 teaspoon ground cinnamon. Stir constantly for 1 minute until the spices release their aromas and the pot smells like a spice market. This is your flavor foundation, so don’t rush it.
Develop the Deep, Chocolatey Base
Pour in the 2 cups canned tomato sauce, scraping up any browned bits from the bottom. Stir in the 0.5 cup unsweetened cocoa powder and 4 oz dark chocolate (chopped). The mixture will look thick and almost like a paste—this is normal. Cook on medium heat for 5 minutes, stirring constantly, until the chocolate melts completely and the mixture smooths out.
Add the 1 tablespoon apple cider vinegar and 2 cups beef broth, then bring everything to a gentle simmer. Let it cook uncovered for 10 minutes, stirring occasionally, until the liquid reduces slightly and the flavors meld. You’ll notice the cocoa and chocolate creating that signature deep, slightly bitter sweetness that makes this chili special.
Simmer with Beans for Hearty Texture
Return the browned beef to the pot and stir to combine. Add the 1 cup black beans (drained), 1 cup kidney beans (drained), 1.5 teaspoons salt, and 0.5 teaspoon black pepper. Bring the mixture to a full boil, then reduce heat to low and let it simmer uncovered for 30 minutes, stirring occasionally.
This simmering time is crucial—it allows all the flavors to develop and the beans to absorb the rich, smoky-chocolate broth. Taste after 20 minutes and adjust seasoning if needed. The chili should be thick but still spoonable, with a deep red color and visible chunks of beef and beans. If it’s too thick, add a splash of water or broth to reach your desired consistency.
Rest and Serve with Perfect Toppings
Remove from heat and let the chili rest for 10 minutes before serving. This resting period allows the flavors to fully meld and the texture to settle. I like to serve it with shredded cheddar cheese, sour cream, and chopped green onions—classic toppings that cut through the richness.
The chili will taste even better the next day as the flavors deepen. Store leftovers in the refrigerator for up to 5 days or freeze for 3 months. Each bowl should deliver that perfect balance of smoky, slightly sweet heat that makes this chili legendary. Enjoy with crusty bread or cornbread to soak up every last bit!
Pro Tips For Making 24th Street Cafe Chili
- CRANK THE HEAT FIRST: The chili’s depth starts with a screaming-hot pot—sear the ground chuck over medium-high until it’s deep brown in spots (not just pink). I used to rush this, and the cocoa powder never got that rich, toasty flavor it craves. Let the onions caramelize too, even if it means lingering a few minutes longer than you want.
- GRATE THAT GARLIC: Skip mincing—grate the cloves instead. It distributes flavor faster and avoids those stubborn garlic chunks that make your chili taste like you forgot half the recipe. (Yes, even if you’re impatient like me.) A microplane works best, and don’t skip the skin—it adds aroma.
- STIR THE COCOA WELL: Unsweetened cocoa powder is finicky—it clumps like a stubborn guest at a party. Whisk it into a small amount of hot liquid (like a splash of tomato sauce) first, then stir it into the pot. Otherwise, you’ll end up with cocoa islands that make your chili taste uneven.
- SALT THE BEFORE YOU SAUCE: Season the raw ground chuck before it hits the pot—about 1 teaspoon per pound. This keeps the meat juicy and lets the salt work its magic while the onions cook. I learned this the hard way after a batch turned out bland, even with all the cocoa and spices. Trust the process.
Common mistakes when making great 24th street cafe chili
Skipping the Brown
Never skip browning the beef—this is where the deep, meaty flavor develops through the Maillard reaction. I’ve seen beginners rush this step, adding raw beef directly to the pot, and the result is bland chili.
Take your time and let those browned bits form—they’re flavor bombs that’ll infuse the entire dish. 🔥
Overloading Chocolate
Too much chocolate or cocoa powder can make your chili taste bitter rather than rich. Stick to the 4 oz dark chocolate and ½ cup cocoa powder measurements. If you’re nervous, start with 3 oz chocolate and adjust to taste—you can always add more, but you can’t take it out.
Ignoring the Vinegar
The 1 tablespoon apple cider vinegar is non-negotiable—it brightens the deep, chocolatey flavors and cuts through the richness. Skipping it will leave your chili tasting flat and one-dimensional. Think of it as the secret ingredient that elevates everything else.
Rushing the Simmer
This chili needs time to develop its complex flavors. Don’t rush the 30-minute simmer—this is when the spices meld, the beans soften, and the cocoa-chocolate base deepens. If you’re short on time, simmer for at least 20 minutes, but you’ll sacrifice some depth.
Underseasoning
Taste as you go! Many home cooks hold back on salt and spices, assuming they can add more later. But once the chili is fully simmered, the flavors are locked in.
Start with the 1.5 tsp salt and 0.5 tsp pepper, then adjust during the 20-minute mark—you can’t un-salt chili!
Using the Wrong Beef
Don’t substitute lean ground beef or pre-ground chuck from the store—it lacks the fat and flavor needed for this recipe. Insist on 80% lean chuck roast, preferably pre-cubed for even cooking. The fat renders out during browning, creating a richer, more flavorful base. 💪
Nutrition facts
Frequently asked questions
Why does this chili recipe use cocoa powder and chocolate?
The cocoa and dark chocolate create that signature deep, slightly sweet flavor that sets this chili apart from traditional recipes. The cocoa powder adds richness while the chocolate provides a subtle bitterness that balances the spices. Together, they create the velvety texture and complex flavor profile that makes this chili legendary.
Can I make this chili in a slow cooker?
Brown the beef first in a skillet, then transfer everything to your slow cooker. Cook on low for 6-7 hours or high for 3-4 hours. The slow cooker method actually enhances the flavors even more, giving you that same rich, smoky taste without constant attention. Just stir occasionally to prevent sticking.
What’s the best way to reheat leftovers?
Reheat gently on the stove over medium-low heat, stirring frequently, until warmed through (10-15 minutes). Never microwave directly from the fridge—it can make the chili watery. For best results, transfer to a pot with a splash of broth or water to restore moisture. The flavors actually deepen overnight, making leftovers even more delicious!
How can I adjust the spice level?
For milder heat, reduce the chili powder to 1.5 tablespoons and omit the cayenne. For extra kick, add ½ teaspoon cayenne pepper or a pinch of red pepper flakes. Remember, you can always add more spice, but you can’t remove it! Taste as you go during the 20-minute simmer mark to adjust.
What makes this chili different from other recipes?
The combination of chuck roast, smoked chili powder, and the cocoa-chocolate base creates a unique flavor profile that’s richer and more complex than traditional chili. The long simmer time allows all these elements to meld together perfectly, resulting in that signature restaurant-style depth that’s hard to find in home recipes.

- 77 Texas BBQ Taco Sauce Recipe: Smoky Chipotle Heat With Caramelized Depth - October 19, 2026
- 1930’s Chocolate Cake Recipe: Vintage Richness With Vanilla Bean Swirls - October 19, 2026
- 6 Ingredient Bread Recipe: No-Knead Wonder With Pantry Staples - October 19, 2026