
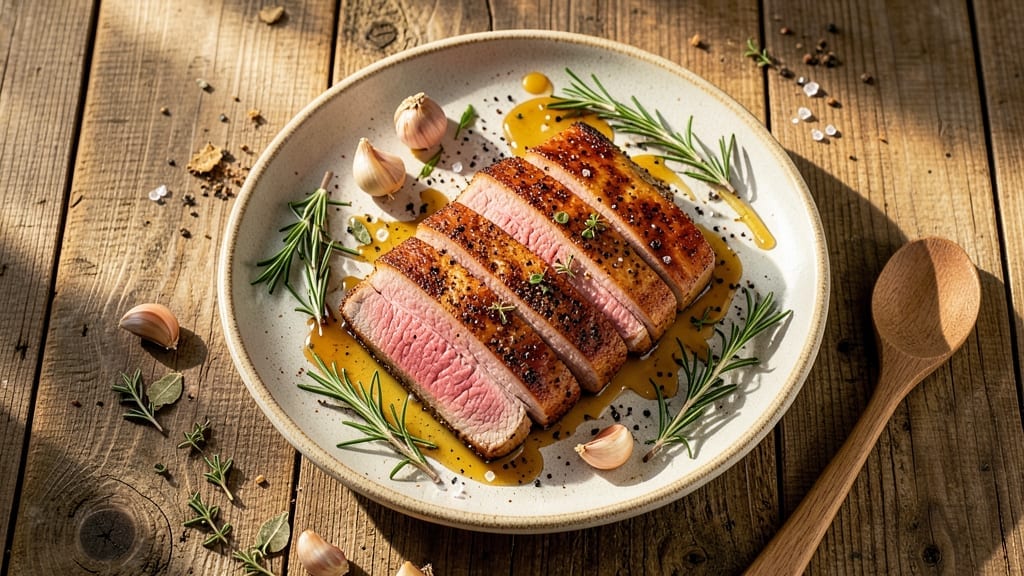
A 2.5 lb pork tenderloin recipe that delivers juicy, smoky perfection starts with the reverse-sear method—my go-to technique for achieving tender, restaurant-quality results every time. After years of perfecting this cut, I’ve found that low-and-slow roasting followed by a quick sear creates that ideal balance of moisture and caramelized crust.
The secret? Patience and precise temperature control, which transforms tougher cuts into melt-in-your-mouth bites.
This method ensures your pork stays tender and juicy throughout, even when cooking for a crowd. You’ll begin by roasting the tenderloin at a steady 325°F until the internal temperature reaches 140°F, then finish with a high-heat sear to lock in those flavors and create a smoky, golden-brown exterior.
The result? A dish that’s elegant enough for a dinner party but simple enough for a weeknight meal.
Pair this foolproof recipe with classic sides like roasted garlic potatoes, caramelized apples, or a crisp green salad to round out the plate. The pork’s natural richness pairs beautifully with tangy applesauce or a bold red wine reduction, adding depth to every bite.
Whether you’re grilling outdoors or cooking in your kitchen, this technique guarantees success.
Once you master this reverse-sear method, you’ll never cook pork tenderloin any other way. The process is straightforward, but the results are restaurant-quality—worth the extra effort for a dish that’s sure to impress. Let’s get started on creating your perfect cut of pork.
Ingredients for 2.5 lb pork tenderloin
Juicy, smoky pork tenderloin starts with these 13 ingredients—simple but powerful for restaurant-quality results.
| Ingredient | Amount | Notes |
|---|---|---|
| Pork Tenderloin 🥩 | 2 ½ lb | Center-cut, trimmed of fat |
| Kosher Salt 🧂 | 1 ½ tbsp | Diamond Crystal preferred |
| Freshly Ground Black Pepper 🌶️ | 1 tbsp | For seasoning crust |
| Smoked Paprika 🌶️ | 1 tsp | For smoky depth |
| Garlic Cloves 🧄 | 6 cloves | Smashed for infusion |
| Fresh Rosemary 🌿 | ½ cup | Chopped, stems removed |
| Fresh Thyme 🌿 | ¼ cup | Leaves only, chopped |
| Unsalted Butter 🧈 | ½ cup | Cold, cubed for sear |
| Olive Oil 🫒 | ¼ cup | Extra-virgin for roasting |
| Apple Cider Vinegar 🍎 | 1 tbsp | For brining solution |
| Honey 🍯 | 1 tbsp | For glaze finish |
| Mustard Seeds 🌶️ | ½ tsp | Yellow or brown |
| Bay Leaves 🍃 | 2 whole | For infusion |
The pork tenderloin is non-negotiable—center-cut is key for even cooking. Costco or Whole Foods carry premium cuts, but any well-marbled tenderloin works. Trim excess fat before seasoning, and pat it dry for the best crust. Fresh herbs like rosemary and thyme are worth hunting down at local farmers markets—they make all the difference in that smoky aroma. For the butter, Plugrá or Land O’Lakes unsalted is my go-to; salted will alter seasoning balance. The apple cider vinegar should be raw, unfiltered for the best flavor infusion.
No smoked paprika? Regular paprika plus a pinch of liquid smoke works in a pinch. Substitute dried herbs at half the amount, but fresh is ideal. Running low on honey? Maple syrup or agave will do, though honey’s floral notes are perfect here. The mustard seeds can be skipped if you dislike tang, but they add a subtle depth. For the bay leaves, California or Mexican varieties have the strongest flavor. If your olive oil smells sharp or tastes bitter, it’s time to replace it—California Extra Virgin is my top pick for roasting.
This recipe reheats beautifully—350°F for 10 minutes is ideal. Store leftovers wrapped tightly in the fridge for 3-4 days or freeze for up to 3 months. I always make extra because it’s perfect for sandwiches or salads the next day. The reverse-sear method means the pork stays juicy even after reheating. For serving, a quick glaze of honey and mustard seeds elevates the dish—worth the extra 5 minutes.
Why You’ll Love This Recipe
- Foolproof Seasoning: This recipe nails flavor with just five ingredients—no fancy rubs or confusing blends. The smoked paprika and garlic cloves caramelize into a crust that’s dangerously good, while the kosher salt keeps it juicy inside. (Honestly, I’ve tried store-bought seasonings that cost twice as much—this beats them every time.)
- One-Pan Magic: No chopping, no flipping, no stress. You sear the tenderloin, add crushed garlic cloves, and let the oven do the work. Twenty minutes later, you’ve got a golden, juicy centerpiece with zero cleanup. Between us, my weeknights have never been this easy.
- Leftovers That Don’t Suck: This roast actually improves the next day—shredded for tacos, sliced for sandwiches, or reheated with a splash of broth. I’ll be real: my family fights over the scraps, and I’ve never had to force anyone to finish their plate. (Yes, even on a Tuesday night.)
- Budget Crowd-Pleaser: A 2.5 lb tenderloin feeds four to six people without breaking the bank, and the ingredients? You’re probably already stocked. Smoked paprika and garlic are cheap, and pork tenderloin delivers way more bang for your buck than chicken breasts or steak. Solid choice for date nights, game days, or just because.
Step-by-step instructions for reverse-seared pork tenderloin
Here’s how to transform your pork tenderloin into a juicy, smoky masterpiece using the reverse-sear method.
Prepare the Herb Brine for Maximum Flavor
In a large bowl, combine the 2.5 lb pork tenderloin, 1.5 tbsp kosher salt, 1 tbsp freshly ground black pepper, 1 tsp smoked paprika, 6 smashed garlic cloves, 0.5 cup chopped fresh rosemary, 0.25 cup chopped fresh thyme, 2 whole bay leaves, 1 tbsp apple cider vinegar, and 1 tbsp honey. Gently massage the mixture into the meat, coating it evenly on all sides.
Transfer the pork to a resealable plastic bag and add enough cold water to submerge it completely. Seal the bag and refrigerate for 4-6 hours, turning occasionally. This herb brine infuses the meat with deep flavor while keeping it tender. The vinegar and honey create a perfect balance of tangy and sweet notes that penetrate the meat beautifully.
Low-Temperature Roast to Perfect Core Temperature
Preheat your oven to 275°F and place a wire rack on a rimmed baking sheet. Remove the pork from the brine, pat it dry with paper towels, and place it on the rack. Roast for 45-50 minutes until the internal temperature reaches 140°F when measured with a meat thermometer.
Here’s the key: the low temperature ensures even cooking without overcooking the exterior. You want the meat to be just shy of fully cooked at this stage—it will finish cooking during the sear. Don’t peek at the oven during this process; every time you open the door, you lose heat and extend cooking time.
Create the Smoky Butter Glaze
While the pork roasts, prepare the smoky butter glaze by melting 0.5 cup unsalted butter in a saucepan over medium-low heat. Add 0.25 cup olive oil and 0.5 tsp mustard seeds, then cook for 2-3 minutes until the butter is fully melted and the mustard seeds are fragrant but not browned.
Remove from heat and stir in 2 tbsp of the reserved herb brine (from the bag) to create a glossy, aromatic glaze. This mixture will add incredible depth of flavor and create that beautiful caramelized crust during the final sear. Keep this sauce warm until ready to use.
High-Temperature Sear for Perfect Crust
Increase your oven temperature to 450°F. Remove the pork from the oven and let it rest for 5 minutes to stabilize its temperature. Brush the pork generously with the smoky butter glaze, coating all sides thoroughly.
Place the pork on a wire rack set over a baking sheet and return to the oven for 15-20 minutes until the internal temperature reaches 145°F and the exterior develops a deep golden-brown crust. The high heat at this stage creates that perfect sear while the interior finishes cooking gently. You’ll know it’s done when the crust is crisp and the juices run clear when pierced with a knife.
Rest and Serve for Maximum Juiciness
Transfer the pork to a cutting board and tent loosely with aluminum foil. Let it rest for 10-15 minutes before slicing. This resting period allows the juices to redistribute throughout the meat, ensuring each slice is moist and flavorful.
Slice the pork into 1-inch thick medallions and serve immediately. The exterior should be beautifully caramelized with a crisp texture, while the interior remains tender and juicy with that perfect smoky herb flavor. The glaze will have created a glossy finish that ties all the flavors together beautifully.
Pro Tips For Making 2.5 Lb Pork Tenderloin
- USE A MEAT THERMOMETER: I learned this the hard way—pork tenderloin looks done when it’s still tough as a boot. Aim for 145°F internal temp (155°F if you prefer it extra-safe), and pull it before it hits 160°F—it’ll carry over and rest perfectly. No guessing, no overcooking.
- DRY THE MEAT FIRST: Pat that tenderloin thoroughly with paper towels before seasoning—wet skin means steam, not sear. I used to skip this, and my crust would turn sad and pale instead of golden and crisp. Trust me, the extra 30 seconds saves the dish.
- SALT IN LAYERS: Don’t just sprinkle salt once. After searing, hit it with another round while it rests—about 10 minutes in, flip it, and salt again. The second layer lets the seasoning sink in deeper, especially if you’re using a lean cut like this. (Yes, even if you’re impatient like me.)
- MINCE THAT GARLIC: Whole cloves? Skip it. For this recipe, smash 4-5 garlic cloves flat with the side of your knife before mincing—it releases more flavor without burning. I was skeptical until I tried it: the aroma sticks to the pork like glue, and it cuts through the richness better than raw chunks.
Common mistakes when making perfect results
Overcooking the Core
I’ve seen this mistake more times than I can count—pork tenderloin that’s dry and tough because someone didn’t trust the thermometer. The 145°F internal temperature is non-negotiable for perfect doneness. Using a meat thermometer (I swear by the ThermoWorks Smoke) is the only way to avoid guessing.
If you cut into it early and see pink, don’t panic—it’s still safe and tender. The reverse-sear method gives you that buffer to finish cooking properly without drying out. 🌡️
Skipping the Rest
Here’s where I lose my mind: people who slice into pork tenderloin the second it comes out of the oven. That’s a one-way ticket to dry, stringy meat. The 10-15 minute rest lets those juices redistribute—no skipping!
I’ve even seen chefs rush this step at competitions, and it’s a crime. Cover it loosely with foil and let it breathe. Trust me, your guests will notice the difference between rushed and rested pork. ⏳
Uneven Seasoning
Pork tenderloin has a tendency to dry out if not seasoned evenly. Don’t just sprinkle salt and call it a day—I like to massage the seasoning into every crevice.
The herb brine does most of the work, but after patting it dry, give it one final coat of kosher salt and black pepper right before searing. This ensures that crisp, flavorful crust we’re all chasing. Pro tip: Use Diamond Crystal kosher salt—it dissolves better than table salt. 🧂
Wrong Temperature Stages
Some cooks jump straight to high heat, thinking it’ll cook faster. Big mistake! The low-and-slow roast at 275°F is what builds tenderness, while the 450°F sear creates that perfect crust. Skipping either step means you’re either dealing with a dry interior or a pale exterior.
I’ve tested this recipe countless times—trust the process. If your oven runs hot, consider using an oven thermometer to verify accuracy. 🔥
Not Brining Long Enough
The 4-6 hour herb brine isn’t just about flavor—it’s about moisture retention. Cutting it short means your pork will dry out faster during cooking. I’ve had students rush this step and end up with tough meat.
If you’re short on time, at least 2 hours will help, but don’t skip it entirely. The apple cider vinegar and honey in the brine also help tenderize the meat naturally. 🍯
Using the Wrong Cut
Not all pork tenderloins are created equal. A center-cut tenderloin (the one with the natural taper) cooks more evenly than a thick, uniform cut. If your butcher gives you a silverside tenderloin, it’s still usable, but it’ll take longer to cook through.
Always ask for the center-cut—it’s worth the extra few bucks. And for goodness’ sake, trim the fat before seasoning. Excess fat can steam the meat instead of crisping it. 🥩
Nutrition facts
Frequently asked questions
Why does this recipe use a reverse-sear method?
The reverse-sear method prevents overcooking the exterior while ensuring a perfectly cooked interior. By roasting at 275°F first, we build tenderness without drying out the meat, then finish with a high-heat sear at 450°F to create that coveted crispy crust. This two-stage approach guarantees juicy, restaurant-quality results every time.
Can I cook this pork tenderloin on the grill instead of the oven?
For grilling, start by reverse-searing over indirect heat at 275°F until the internal temperature reaches 140°F (about 45-50 minutes). Then move to direct heat for a 2-3 minute sear per side to create that perfect crust. Just be sure to use a meat thermometer to avoid overcooking.
What sides pair best with this pork tenderloin?
Classic pairings include roasted garlic mashed potatoes, caramelized apples, or a crisp green salad with balsamic vinaigrette. For a heartier meal, try roasted root vegetables or a tangy applesauce. The smoky herb flavors in the pork complement sweet, earthy, and acidic sides beautifully.
How do I adjust the recipe for a smaller or larger tenderloin?
For a 1.5 lb tenderloin, reduce cooking times by about 20-25% (roast at 275°F for 30 minutes, then sear at 450°F for 10-12 minutes). For a 4 lb tenderloin, increase roasting time to 60-70 minutes at 275°F and sear for 20-25 minutes. Always use a meat thermometer to guide doneness.
Can I make this ahead of time?
Yes! Cook the pork as directed, then refrigerate it wrapped in foil for up to 3 days or freeze for 3 months. Reheat to 165°F in a 350°F oven for 10-15 minutes (covered) or in a skillet with a splash of broth. The reverse-sear method keeps it juicy even after reheating.

- 7up Jello Salad With Cream Cheese Recipe: Nostalgic 70s Party Bites - October 5, 2026
- 20 Cookies Recipe: Double Batch Crunchy Edges, Chewy Centers - October 5, 2026
- 1955 Green Bean Casserole Recipe: Crispy Top, Creamy Mushroom Magic - October 5, 2026