
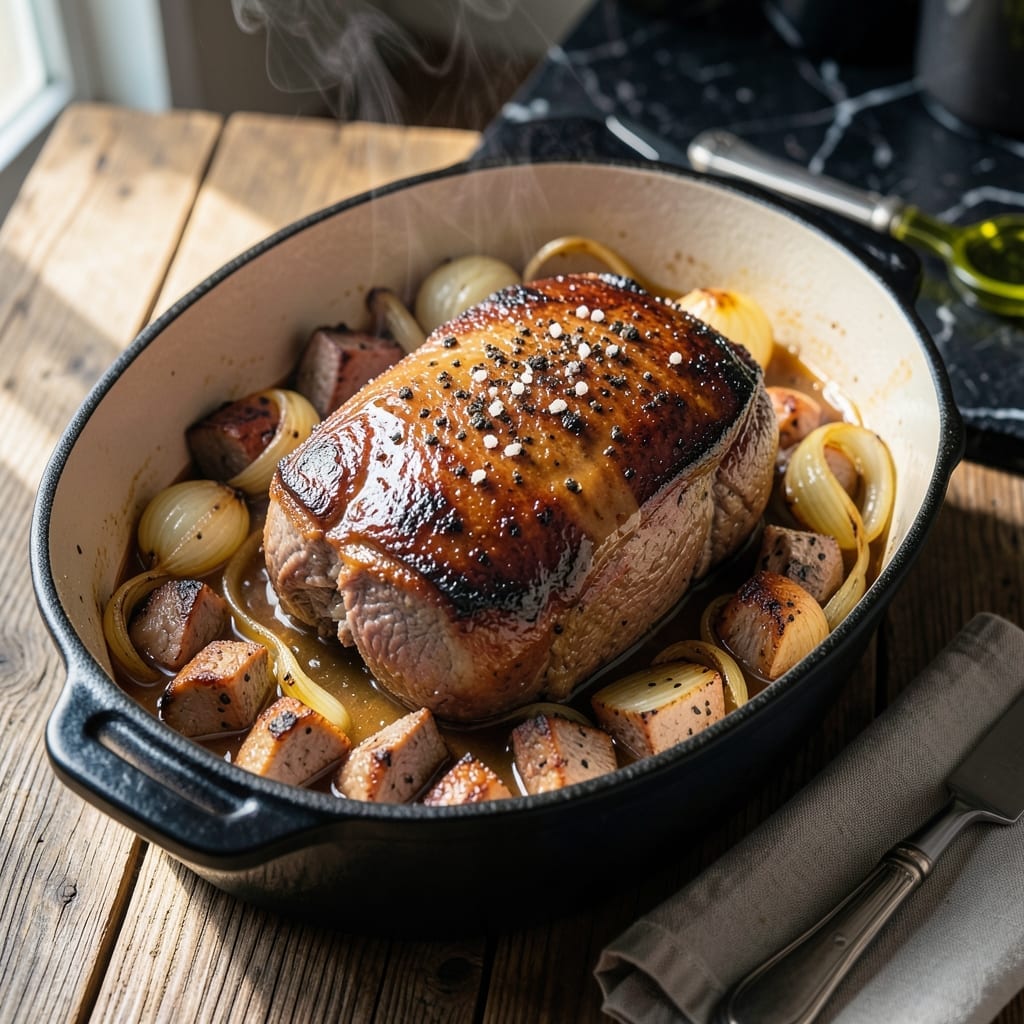
There’s a reason pot roast remains a Sunday dinner classic—it transforms affordable beef into something extraordinary through slow, gentle cooking. This method ensures a 2lb cut becomes fork-tender with rich, caramelized depth.
The secret lies in proper browning and patience. Searing the beef first builds a flavor foundation, while the long braise in liquid allows the meat to break down slowly. Caramelized onions add natural sweetness that balances the savory beef.
By the end, you’ll have tender, fall-apart beef swimming in a rich sauce with onions that have melted into silky sweetness. The aroma alone will have everyone gathering in the kitchen before it’s done.
Serve with mashed potatoes or crusty bread to soak up every last bit of that incredible sauce.
Ingredients for 2lb Pot Roast
Transform affordable beef into extraordinary with these carefully selected ingredients for slow-braised perfection.
| Ingredient | Amount | Notes |
|---|---|---|
| Beef Chuck Roast 🥩 | 2 lb | Well-marbled, boneless cut |
| Kosher Salt 🧂 | 1 ½ tsp | Diamond Crystal preferred |
| Freshly Ground Black Pepper 🌶️ | 1 tsp | Coarse grind ideal |
| All-Purpose Flour 🌾 | ¼ cup | For dredging beef |
| Olive Oil 🫒 | 2 tbsp | Divided for searing and onions |
| Yellow Onions 🧅 | 2 whole | Large, thinly sliced |
| Garlic Cloves 🧄 | 4 cloves | Minced finely |
| Beef Broth 💧 | 2 cups | Low-sodium preferred |
| Red Wine 🍷 | ½ cup | Dry variety like Cabernet |
| Tomato Paste 🍅 | 2 tbsp | For depth of flavor |
| Dried Thyme 🌿 | 1 tsp | Or 1 tbsp fresh |
| Bay Leaves 🍃 | 2 whole | For aromatic base |
| Carrots 🥕 | 3 whole | Cut into 2-inch pieces |
| Celery Stalks 🌿 | 2 whole | Cut into 2-inch pieces |
The beef is critical here. Chuck roast with good marbling ensures fork-tender results—avoid lean cuts like sirloin. Costco or Whole Foods offer quality options, but any supermarket with a decent butcher counter works. Look for deep red color and visible fat streaks. The flour for dredging should be all-purpose; no need for specialty types. Always pat the beef completely dry before searing to achieve that proper browning mentioned in the intro.
No red wine? Beef broth with a tablespoon of balsamic vinegar mimics the acidity and depth. Fresh thyme can replace dried at three times the amount. Tomato paste in a tube from Trader Joe’s prevents waste. Carrots and celery can be swapped for parsnips or turnips (the latter adds earthy sweetness). For a richer sauce, deglaze the pan with extra broth after searing the beef.
This dish tastes even better the next day—flavors deepen as it rests. Store leftovers in an airtight container in the fridge for up to 4 days or freeze for 3 months. Reheat gently on the stove with a splash of broth to maintain moisture. The onions will soften further upon reheating, enhancing their silky texture.
Why You’ll Love This Recipe
- Set and Forget: I sear the beef, toss it in the pot, and let the oven do the work for hours.
- Crispy, Tender Bite: That flour crust with the olive oil makes the edges irresistibly crisp while the inside falls apart.
- Feeds the Week: A 2lb chuck roast turns into sandwiches, tacos, or stew for days.
- Budget Hero: I get hearty, restaurant-quality meals for a fraction of the cost with just salt, pepper, and flour.
Step-by-Step Instructions for Slow-Braised Beef With Caramelized Onions
This method delivers melt-in-your-mouth beef with deeply caramelized vegetables every time.
Step 1: Season and Sear the Beef Chuck Roast
Pat the 2 lb Beef Chuck Roast dry with paper towels, then season generously on all sides with the 1.5 tsp Kosher Salt and 1 tsp Freshly Ground Black Pepper. The salt should form a visible crust—this is crucial for flavor development.
Dredge the roast in the 0.25 cup All-Purpose Flour, shaking off any excess. Heat 1 tbsp Olive Oil in a Dutch oven over medium-high heat until shimmering. Sear the beef for 4-5 minutes per side until deeply browned. This creates the fond that will build your sauce’s depth. Remove and set aside.
Step 2: Caramelize the Aromatic Vegetables
In the same Dutch oven, add the remaining 1 tbsp Olive Oil. Add the 2 whole Yellow Onions (thinly sliced) and cook over medium heat for 8-10 minutes, stirring occasionally, until they turn deep golden brown and sweet.
Add the 4 cloves Garlic Cloves (minced) and cook for 1 minute until fragrant. Stir in the 2 tbsp Tomato Paste and cook for 2 minutes to deepen its color. This step transforms the raw paste into a rich, caramelized base.
Step 3: Deglaze and Build the Braising Liquid
Pour in the 0.5 cup Red Wine and scrape the bottom of the pot to release all browned bits. Let it reduce by half, about 3-4 minutes. The alcohol should cook off, leaving concentrated flavor.
Add the 2 cups Beef Broth, 1 tsp Dried Thyme, and 2 whole Bay Leaves. Return the beef to the pot along with the 3 whole Carrots and 2 whole Celery Stalks. The liquid should come about halfway up the meat.
Step 4: Slow-Braise to Perfection
Bring the mixture to a gentle simmer, then cover and transfer to a 325°F oven. Braise for 2.5-3 hours, turning the beef halfway through, until it yields easily to a fork. The onions should be jammy and the vegetables fork-tender.
Check occasionally and add a splash of water if the liquid reduces too much. The ideal finish is a rich, thick sauce that clings to the beef and vegetables.
Remove the bay leaves before serving. The beef should pull apart with minimal resistance, and the carrots and celery should be perfectly tender.
Pro Tips For Making 2lb Pot Roast
- Sear It Hard: Use high heat and don’t move the roast for 3-4 minutes per side—this builds a deep, flavorful crust that makes the sauce richer later. I learned this the hard way after years of pale, sad pot roast.
- Dry the Meat First: Pat the chuck roast completely dry with paper towels before seasoning; even a little moisture prevents that perfect brown sear. Sounds tedious, but it actually changes the outcome.
- Don’t Crowd the Pan: If your pot is too small, sear the roast in batches or use a larger pan—steam from overcrowding turns the flour coating gummy instead of crisp.
- Rest Before Slicing: Give the roast a solid 15 minutes under foil after cooking—it reabsorbs the juices so it doesn’t dry out when you cut into it. My grandmother swore by this, and she was right.
Dietary Considerations for These Flavors
Gluten-Free Option
Swap the all-purpose flour for cornstarch or a gluten-free flour blend like King Arthur Measure for Measure. Use 2 tbsp of either for dredging the beef. The browning will be just as effective, and the sauce will thicken beautifully.
Dairy-Free Adaptation
This dish is naturally dairy-free, so no modifications are needed. Just ensure your beef broth is free from dairy derivatives—Better Than Bouillon makes a reliable option. The caramelized onions and rich beef create plenty of depth without any dairy.
Low-Carb Version
Skip the flour dredge entirely and pat the beef extra dry for a good sear. Replace carrots with radishes or turnips to reduce carbs. The onions and celery will still caramelize nicely, keeping the dish flavorful. 💪
Slow Cooker Method
Brown the beef and onions as directed, then transfer everything to a slow cooker. Cook on low for 8-10 hours or high for 5-6 hours. The results are just as tender, and it’s a hands-off approach for busy days.
Lower Sodium
Use low-sodium beef broth and reduce the kosher salt to 1 tsp. Boost flavor with extra herbs like rosemary or fresh thyme. The natural sweetness of the onions will still shine through.
Make It Ahead
This pot roast tastes even better the next day. Cool, cover, and refrigerate for up to 4 days. Reheat gently on the stove with a splash of broth to restore moisture. The flavors meld beautifully over time. 🔥
Nutrition Facts
Frequently Asked Questions
Can I use a different cut of beef?
Stick with well-marbled cuts like chuck for best results. Brisket or short ribs work too, but avoid lean cuts like sirloin—they won’t get as tender. The fat content is key for that fall-apart texture.
How do I know when it’s done?
The beef is ready when it pulls apart easily with a fork, usually after 2.5-3 hours at 325°F. If it resists, give it more time—this dish rewards patience.
Can I make this on the stovetop?
Yes! After searing and deglazing, cover and simmer on low heat for 3-4 hours. Check occasionally to ensure the liquid doesn’t evaporate.

- 4C Bread Crumbs Meatballs Recipe: Crispy Crust and Juicy Centers - September 25, 2026
- 6 Oz Chocolate Chip Cookie Recipe: Perfectly Balanced Crispy Edges and Chewy Hearts - September 25, 2026
- 6-Inch Coffee Cake Recipe: Vanilla Bean Swirls and Buttery Streusel Topping - September 25, 2026