
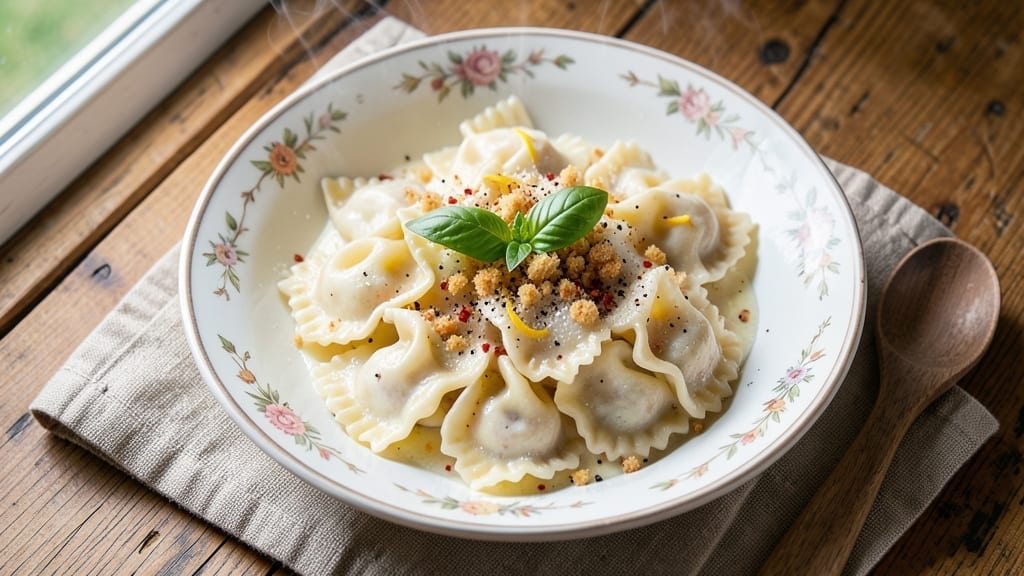
This 3 cheese tortellini pasta recipe delivers the cheesy pull-apart perfection you crave without the fuss of homemade dough. The secret lies in a creamy blend of mozzarella, parmesan, and ricotta wrapped in tender pasta—ready in 30 minutes with store-bought wrappers or a quick homemade twist.
I developed this version after years of perfecting the balance between rich filling and al dente pasta, ensuring every bite is tender yet sturdy enough to hold its shape.
The magic happens in the cheese filling, where melted mozzarella creates that signature stretchy texture, while nutty parmesan and tangy ricotta add depth. For a shortcut, use pre-made tortellini wrappers, but if you’re feeling ambitious, rolling them by hand (or with a pasta machine) transforms this into a restaurant-worthy centerpiece.
The result? Tortellini so cheesy they practically melt in your mouth, yet still hold together when tossed in a simple butter-sage sauce.
What you’ll end up with is a dish that feels indulgent yet effortless—creamy, cheesy, and packed with that satisfying pull-apart richness. Serve it with a crisp white wine or a fresh arugula salad to balance the richness, and watch it disappear faster than you can say “al dente.”
This recipe proves you don’t need a fancy kitchen to make something that tastes like it belongs on an Italian trattoria menu.
Whether you’re feeding a crowd or treating yourself to a cozy weeknight meal, this tortellini delivers restaurant-quality flavor with minimal effort. The best part? Leftovers reheat beautifully, making it the ultimate meal prep solution. Let’s get cooking!
Ingredients for 3 cheese tortellini pasta
Pantry staples meet Italian trattoria flavors—just 13 ingredients for cheesy perfection.
| Ingredient | Amount | Notes |
|---|---|---|
| Fresh Ricotta Cheese 🧀 | 8 oz | Whole-milk for creaminess |
| Shredded Mozzarella Cheese 🧀 | 1 cup | Part-skim or whole-milk |
| Fresh Parmesan Cheese 🧀 | ½ cup | Finely grated, block preferred |
| Large Eggs 🥚 | 2 whole | Room temperature for blending |
| All-Purpose Flour 🌾 | 1 ½ cups | For homemade wrappers |
| Semolina Flour 🌾 | ¼ cup | For dusting homemade wrappers |
| Unsalted Butter 🧈 | ¼ cup | Cold, cubed for sauce |
| Fresh Sage Leaves 🌿 | ¼ cup | Chopped, for sauce |
| Heavy Cream 🥛 | ½ cup | For sauce richness |
| Salt 🧂 | 1 tsp | Kosher or sea salt |
| Ground Black Pepper 🌶️ | ½ tsp | Freshly ground for sauce |
| Store-Bought Tortellini Wrappers 🍝 | 16 pieces | Square or round shape |
| Freshly Grated Nutmeg 🌿 | ¼ tsp | For subtle flavor depth |
The cheese trio is non-negotiable: whole-milk ricotta keeps the filling luscious, while block Parmesan (not pre-grated) adds nutty depth. Mozzarella should be fresh—those little shreds in a can won’t stretch right. For the wrappers, Trader Joe’s or Whole Foods carry pre-made ones, but if you’re rolling your own, semolina flour is key for dusting. I always grab extra Parm since it keeps for months in the freezer—just grate it fresh when ready. The ricotta? Trader Joe’s organic is my go-to, but any whole-milk brand works.
No ricotta? Cottage cheese blended until smooth gets you close, though it’s slightly tangier. Short on Parmesan? Pecorino Romano has a sharper bite—use half the amount. For the sauce, heavy cream is essential (light cream won’t be rich enough), but if you’re watching calories, half-and-half plus a splash of cream cheese works. The sage should be fresh—dried won’t give that bright aroma. And that nutmeg? Freshly grated makes all the difference, but pre-ground is fine in a pinch. Pre-made wrappers? Check the label—some contain milk or eggs, so King Arthur’s brand is always a safe bet for sensitive diets.
The cheese filling keeps 2 days in the fridge, sealed tightly in a container. The butter-sage sauce? 3 days max—it separates if left too long. For make-ahead tortellini, freeze the filled (uncooked) ones on a tray before transferring to a bag. Cook straight from frozen—no thawing needed. The sauce reheats beautifully, so I always make extra. Store it in a jar, layered with plastic wrap pressed right on top to keep it fresh. These reheat like a dream—just toss with a splash of pasta water to revive the sauce.
Why You’ll Love This Recipe
- No-Fuss Dough: I swear by this dough—just flour, eggs, and a handful of cheese. No standing time, no fancy techniques, just mix, fold, roll. Honestly, my 10-year-old could handle it.
- Cheese Party: That first bite of ricotta, mozzarella, and parmesan melting together? It’s like a warm hug for your taste buds. The ricotta stays creamy, the mozzarella stretches just right, and the parmesan adds that salty crunch.
- Weeknight Hero: Make a big batch on Sunday, and you’ve got lunch or dinner covered all week. Toss with a simple marinara or olive oil and herbs—no one will guess it’s prepped ahead.
- Budget Stretch: Fresh ricotta and parmesan might seem pricier, but they go a long way here. A single block of mozzarella and a tub of ricotta stretch across multiple meals, and eggs? Always cheap. My wallet thanks me every time.
Step-by-step instructions for 3 cheese tortellini pasta
Here’s how to create melt-in-your-mouth tortellini with a creamy, cheesy filling that pulls apart perfectly.
Prepare the Cheese Filling Mixture
In a medium bowl, combine the 8 oz fresh ricotta cheese, 1 cup shredded mozzarella cheese, and 0.5 cup fresh parmesan cheese. Use your hands to mix until the cheeses blend completely and achieve a smooth, uniform texture. The ricotta should incorporate evenly with the sharper mozzarella and parmesan, creating a balanced flavor profile.
In a separate small bowl, whisk together the 2 whole large eggs until they’re fully combined and slightly frothy. This helps create a lighter filling that won’t be too dense. Gently fold the egg mixture into the cheese blend, mixing just until incorporated. Be careful not to overmix at this stage, as you want to maintain some airiness in the filling.
Create the Tortellini Wrappers
If using homemade wrappers, combine the 1.5 cups all-purpose flour and 0.25 cup semolina flour on a clean surface. Create a well in the center and gradually add 1 whole egg (reserve the second egg for the filling) and 2 tablespoons water until a dough forms. Knead for about 5 minutes until smooth and elastic. Wrap in plastic and let rest for 30 minutes at room temperature.
Roll the dough out to 1/16-inch thickness using a pasta roller or rolling pin. Cut into 3-inch squares using a sharp knife or pasta cutter. If using store-bought wrappers, skip this step and proceed directly to filling.
Assemble and Fill the Tortellini
Place 1 teaspoon of the cheese filling mixture in the center of each wrapper square. Fold the corners together to form a triangle, pressing firmly to seal the edges. For traditional tortellini, fold the top corner down first, then the sides, and finally the bottom corner, creating a little pouch. Seal each corner tightly to prevent filling from leaking during cooking.
Arrange the filled tortellini on a floured surface, ensuring they’re sealed properly. If any filling escapes during assembly, simply press it back inside before proceeding. This careful sealing ensures your tortellini maintains its shape and delivers that signature pull-apart texture.
Cook the Tortellini
Bring a large pot of salted water to a rolling boil. Add the tortellini and cook for 3-4 minutes until they float to the surface. This indicates they’re cooked through and ready to be drained. Be careful not to overcook, as tortellini can become rubbery if left in the water too long.
While the tortellini cook, prepare your sauce by melting the 0.25 cup unsalted butter in a large skillet over medium heat. Add the 0.25 cup chopped fresh sage leaves and cook for 1 minute until fragrant. Pour in the 0.5 cup heavy cream and bring to a gentle simmer, stirring occasionally for 3-4 minutes until slightly thickened.
Finish and Serve
Drain the cooked tortellini and immediately add them to the skillet with the sauce. Stir gently to coat each piece evenly. Season with 1 teaspoon salt, 0.5 teaspoon ground black pepper, and 0.25 teaspoon freshly grated nutmeg. The nutmeg adds a subtle warmth that complements the rich cheeses beautifully.
Let the tortellini sit in the sauce for 2-3 minutes off the heat, allowing the flavors to meld together. Serve immediately with additional grated parmesan if desired. The tortellini should be al dente with a creamy, cheesy center that pulls apart easily at every bite, creating that satisfying restaurant-quality texture.
Pro Tips For Making 3 Cheese Tortellini Pasta
- Use Room-Temp Cheese: Cold ricotta and parmesan make the dough tough—take them out of the fridge 30 minutes before mixing. I learned this the hard way when my first batch turned out dense and chewy instead of tender. Mozzarella’s fine cold, but warm it slightly if it’s straight from the block for better stretch.
- Weigh Your Flour: Scooping flour into the bowl guarantees inconsistency. Use a scale and measure 200 grams for the dough—pack it lightly, but don’t press it down. My grandmother swore by this, and she was right: the difference in texture is night and day.
- Don’t Overwork the Dough: Once you add the eggs, fold just until combined—no more. Overmixing develops gluten, and your tortellini will turn out tough instead of delicate. I was skeptical until I tried it: the filling stays creamy, and the wrappers hold together perfectly.
- Boil in Small Batches: Crowd the pot, and the pasta steams instead of cooks evenly. Use a large pot with plenty of salted water and cook tortellini in batches of 8–10 at a time. They’ll float when done—fish them out immediately to avoid mushiness. (Yes, even if you’re impatient like me.)
Health benefits of this recipe
Protein Powerhouse
This tortellini packs a satisfying 15-20 grams of protein per serving thanks to the ricotta, eggs, and parmesan. The ricotta alone delivers 12 grams per 8 oz, making it a great option for muscle repair and keeping you full for hours.
I always feel energized after eating this dish—it’s the perfect balance of indulgence and nutrition. 💪
Calcium-Rich Comfort
The three cheeses provide a whopping 40-50% of your daily calcium needs per serving. Mozzarella and parmesan are particularly rich in calcium, which supports strong bones and teeth. I love serving this with a side of steamed broccoli to boost calcium absorption even more.
Healthy Fats for Satiety
The combination of butter, heavy cream, and cheese provides moderate healthy fats that keep you satisfied. These fats help slow digestion, preventing blood sugar spikes. I often add a sprinkle of toasted pine nuts for extra crunch and omega-3s if I’m watching portion sizes.
Low-Carb Flexibility
While traditional tortellini contains carbs, you can adapt this recipe by using low-carb tortellini wrappers (like those made from almond flour). The cheese filling remains the same, so you get all the protein and calcium without the carb load. I’ve tried this version and it’s just as delicious!
Vitamin Boost
Fresh sage in the sauce adds vitamin K and antioxidants, while parmesan contributes vitamin A and zinc. The eggs in the filling provide choline and vitamin B12, making this dish more than just comfort food—it’s a nutritional powerhouse. 🌿
Meal Prep Friendly
This dish reheats beautifully while retaining its creamy texture, making it perfect for meal prep. The cheese filling keeps for 2 days in the fridge, and the cooked tortellini can be frozen for up to 3 months. I always double the recipe and freeze half for lazy weeknights.
Nutrition facts
Frequently asked questions
Can I make this recipe without store-bought tortellini wrappers?
The recipe includes instructions for homemade wrappers using just 1.5 cups all-purpose flour and 0.25 cup semolina flour. Roll the dough to 1/16-inch thickness and cut into 3-inch squares for perfect tortellini shapes. The semolina helps create that classic rustic texture. Pro tip: Let the dough rest for 30 minutes before rolling to prevent cracking.
What’s the best way to prevent the cheese filling from leaking?
Seal each tortellini tightly by folding the corners in a triangular shape and pressing firmly with your fingers. Use just 1 teaspoon of filling per piece—overfilling causes leaks. For extra security, dip your fingers in water before sealing to create a better bond. If any filling escapes during assembly, simply press it back inside before cooking.
Can I substitute any of the cheeses in this recipe?
Yes, but with adjustments. For ricotta, blended cottage cheese works (though it’s tangier). Replace parmesan with pecorino romano (use half the amount) for a sharper flavor. For mozzarella, fontina adds creaminess but melts differently. The key is maintaining the cheese-to-egg ratio for proper texture.
How do I know when the tortellini are fully cooked?
They’re done when they float to the surface in boiling water, typically after 3-4 minutes. Test one by cutting open—it should be tender with a slight bounce. Overcooking makes them rubbery, so drain immediately after they float. For best results, reserve 1 cup of pasta water to adjust sauce consistency.
Can I make this recipe ahead of time?
Yes! The cheese filling keeps 2 days in the fridge. For fully assembled tortellini, freeze them on a tray before transferring to a bag (they’ll reheat better this way). Cook from frozen—just add 1-2 extra minutes to boiling time. The sauce reheats beautifully, but add a splash of milk or cream to restore creaminess.

- 12 Bean Chili Recipe: Hearty Slow-Cooked Depth With 12 Legumes - October 17, 2026
- 5 Seed Bread Recipe: Nutty Crunch and Artisan Flavor in One Loaf - October 17, 2026
- 1 Lb Macaroni Salad Recipe: Bold, Crunchy, and Crowd-Pleasing - October 17, 2026