
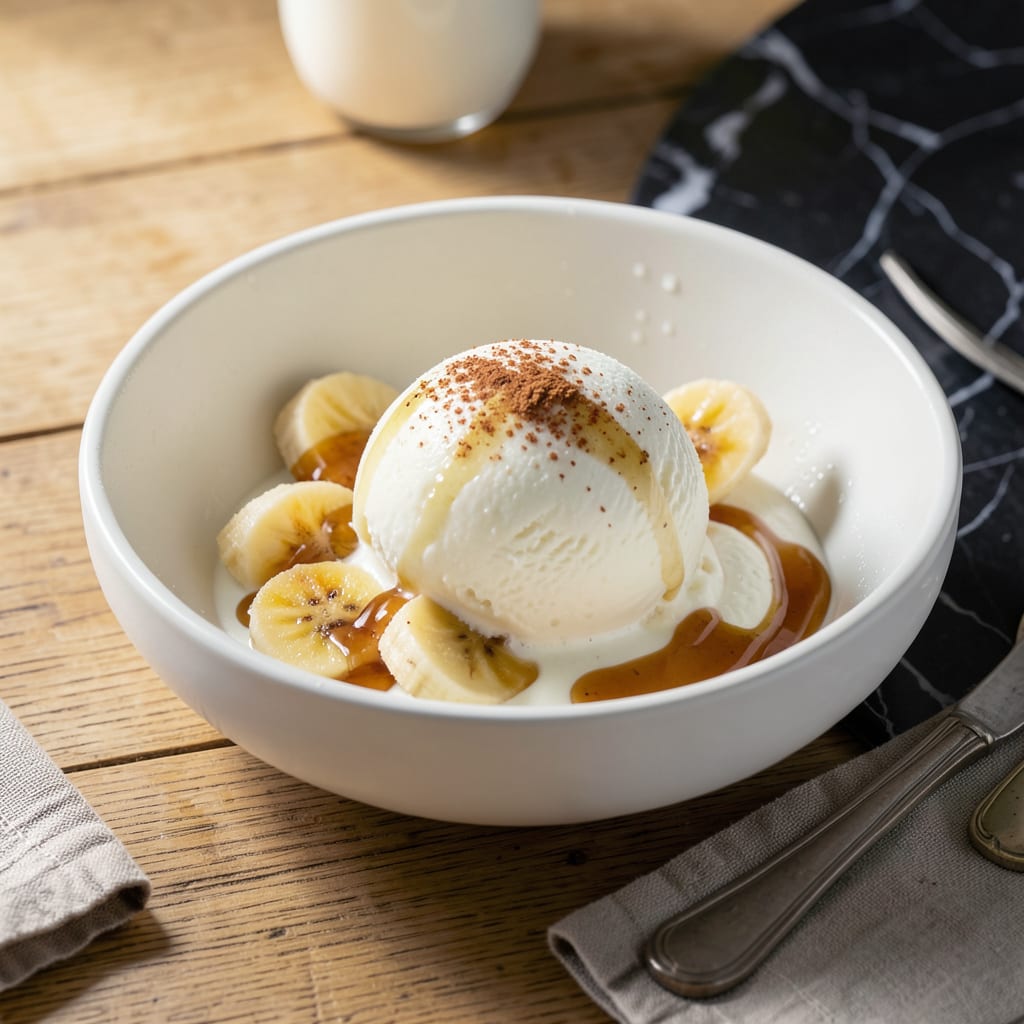
This recipe transforms humble low-fat cottage cheese into a luxuriously smooth frozen treat that defies expectations. The key lies in proper blending and a touch of sweetness to create a texture that rivals traditional ice cream.
With just a few simple ingredients and 5 minutes of prep, you’ll achieve a creamy dessert that satisfies without the guilt. The result is a light yet rich frozen delight that’s perfect for any occasion.
Ingredients for Low Fat Cottage Cheese Ice Cream
Transform humble cottage cheese into silky frozen perfection with these simple ingredients.
| Ingredient | Amount | Notes |
|---|---|---|
| Low-Fat Cottage Cheese 🥛 | 2 cups | Full-fat works too for richer texture |
| Frozen Bananas 🍌 | 2 whole | Sliced and frozen overnight |
| Pure Vanilla Extract 🌿 | 1 tsp | Use real vanilla for best flavor |
| Honey 🍯 | ¼ cup | Maple syrup for vegan option |
| Lemon Juice 🍋 | 1 tbsp | Freshly squeezed preferred |
| Heavy Cream 🥛 | ¼ cup | Optional for creamier texture |
| Salt 🧂 | 0.125 tsp | Enhances all flavors |
| Vanilla Protein Powder 💪 | 2 tbsp | Optional for extra protein boost |
| Cocoa Powder 🍫 | 1 tbsp | For chocolate variation |
| Fresh Berries 🍓 | 1 cup | For topping or mix-in |
| Chopped Nuts 🌰 | ¼ cup | Pecans or almonds recommended |
| Cinnamon 🌿 | ¼ tsp | Ground, for warmth |
The cottage cheese quality matters most here. Nancy’s or Good Culture brands offer the creamiest low-fat options (avoid watery versions). For the bananas, overripe ones work best—freeze them peeled and sliced for at least 6 hours. The vanilla extract should be pure, not imitation. Whole Foods and Trader Joe’s carry excellent options.
No honey? Maple syrup or agave work perfectly at the same amount. Skip the heavy cream if you want ultra-light—just add an extra frozen banana. For chocolate lovers, Dutch-process cocoa gives richer flavor. The berries can be fresh or frozen (thawed and drained first). Walnuts or cashews substitute well for the nuts.
Store leftovers in an airtight container with parchment paper pressed on the surface. Keeps 2-3 weeks in the freezer. Let sit at room temperature for 10 minutes before scooping for easiest serving. Best texture when eaten within the first week.
Why You’ll Love This Recipe
- Blender Magic: No cooking, no churning—just blend the cottage cheese, bananas, and a splash of lemon juice until silky smooth.
- Naturally Sweet: The honey and vanilla make it taste indulgent, but the bananas add a caramel-like depth that’s honestly surprising.
- Breakfast or Dessert: I make a big batch Sunday night and grab a scoop for breakfast or a late-night treat all week.
Step-by-Step Instructions for Low Fat Cottage Cheese Ice Cream
This method ensures a smooth, creamy texture without the guilt of traditional ice cream.
Step 1: Blend the Cottage Cheese Base
In a high-powered blender, combine the 2 cups Low-Fat Cottage Cheese, 2 whole Frozen Bananas, 1 tsp Pure Vanilla Extract, 0.25 cup Honey, and 1 tbsp Lemon Juice. Blend on high for 1-2 minutes until completely smooth and free of lumps.
The lemon juice brightens the flavor and helps balance the sweetness, while the frozen bananas add natural creaminess. Stop and scrape down the sides as needed—this ensures every component is fully incorporated. The mixture should look thick and silky, like a milkshake base.
Step 2: Incorporate the Cream and Seasonings
Add the 0.25 cup Heavy Cream, 0.125 tsp Salt, and 0.25 tsp Cinnamon to the blender. If using the chocolate variation, include the 1 tbsp Cocoa Powder and 2 tbsp Vanilla Protein Powder now. Blend again for 30-45 seconds until fully combined.
The heavy cream enriches the texture without overpowering the low-fat base, while the salt enhances all the other flavors. For the protein version, the powder should dissolve completely—no gritty texture should remain. Taste and adjust sweetness if needed, though the honey should provide sufficient sweetness.
Step 3: Chill the Mixture Thoroughly
Transfer the blended mixture to a lidded container and refrigerate for at least 2 hours, or until fully chilled. This step is critical—chilling the base ensures it freezes evenly in the next stage and prevents ice crystals from forming.
If you’re in a hurry, you can place the container in the freezer for 45-60 minutes, stirring every 15 minutes to prevent freezing at the edges. However, refrigerator chilling yields the best texture. The mixture should be cold to the touch and slightly thickened when ready.
Step 4: Freeze in an Ice Cream Maker
Pour the chilled base into your ice cream maker and churn according to the manufacturer’s instructions, typically 20-25 minutes. The mixture should thicken to the consistency of soft-serve ice cream, with a smooth, glossy appearance.
If you don’t have an ice cream maker, transfer the base to a shallow, freezer-safe container. Freeze for 1 hour, then vigorously whisk to break up any ice crystals. Repeat this process every 30 minutes for 3-4 hours until firm. This manual method requires more effort but delivers comparable results.
Step 5: Add Toppings and Serve
Once the ice cream reaches your desired consistency, transfer it to a serving dish or lidded container for storage. For serving, top with 1 cup Fresh Berries and 0.25 cup Chopped Nuts. The berries add a fresh, tangy contrast, while the nuts provide a satisfying crunch.
Let the ice cream sit at room temperature for 5-10 minutes before scooping if it’s too firm. This allows it to soften slightly for easier serving. Store any leftovers in an airtight container in the freezer for up to 1 week, though it’s best enjoyed fresh.
Pro Tips For Making Low Fat Cottage Cheese Ice Cream
- Blend Cottage Cheese First: Puree the cottage cheese alone for 30 seconds before adding other ingredients—this eliminates any lingering curds for a silky texture.
- Use Ripe Bananas: Freeze bananas when they’re heavily speckled; the extra sweetness means you can use less honey without sacrificing flavor.
- Chill Your Blender: I learned this the hard way—pop your blender jar in the freezer for 10 minutes first to keep the mixture cold and prevent a melty mess.
- Add Lemon Last: Stir in the lemon juice after blending; adding it too early can curdle the cottage cheese and give your ice cream a grainy texture.
Pro Cooking Tips for This Recipe
Blend Like a Pro
Use a high-powered blender like Vitamix or Ninja to break down curds completely. Blend the cottage cheese first for 30 seconds before adding other ingredients. This prevents lumps that can ruin the texture. 💡
Chill for Success
Don’t skip chilling the base—it’s non-negotiable. I place mine in the coldest part of the fridge for at least 2 hours. For extra insurance, I sometimes set the container in an ice bath for 20 minutes before freezing.
Ice Cream Maker Tips
Pre-freeze your ice cream maker bowl for 12-24 hours—this ensures proper freezing. I use the Cuisinart ICE-21 and find it consistently reliable. Don’t overfill; leave 1 inch at the top for expansion.
Manual Freezing Hack
No machine? Use a shallow metal pan for faster freezing. Whisk vigorously every 30 minutes for 3-4 hours. A hand mixer works even better to break up ice crystals and incorporate air for creaminess.
Sweetness Adjustment
Taste the base before freezing—cold dulls sweetness. If needed, add more honey in 1 tbsp increments. Remember, the bananas add natural sugar, so start conservative. I often add ½ tsp cinnamon for warmth.
Storage Secrets
Press parchment paper directly on the surface before sealing to prevent ice crystals. Use an airtight container—I prefer OXO’s pop containers. Eat within 1 week for peak texture. 🔥
Nutrition Facts
Frequently Asked Questions
Why use cottage cheese instead of heavy cream?
Cottage cheese provides protein and creaminess with far less fat. When blended smooth, it mimics the texture of full-fat dairy while keeping the treat light. The curds disappear completely in a high-powered blender.
Can I make this without an ice cream maker?
Yes! Freeze in a shallow pan, whisking every 30 minutes for 3-4 hours. This breaks up ice crystals for a smooth finish. A hand mixer makes it even creamier.
How do I prevent icy texture?
Chill the base for at least 2 hours before freezing. Use overripe bananas and blend until completely smooth. These steps ensure a silky result.

- 8 Bean Soup Recipe Crock Pot: Hearty Vegetable Medley in One Pot - September 25, 2026
- 4C Bread Crumbs Meatballs Recipe: Crispy Crust and Juicy Centers - September 25, 2026
- 6 Oz Chocolate Chip Cookie Recipe: Perfectly Balanced Crispy Edges and Chewy Hearts - September 25, 2026