
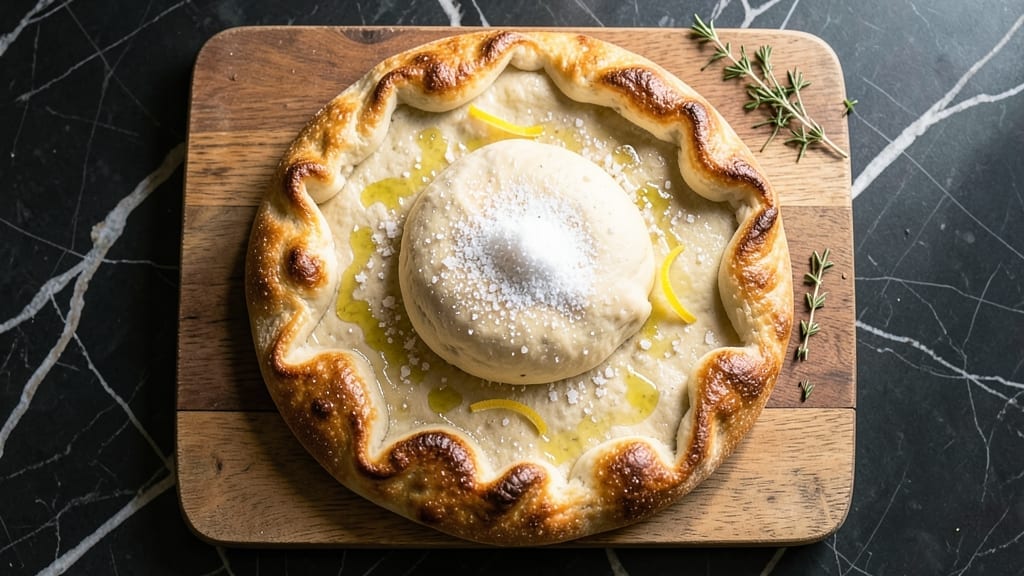
This 3-cup pizza dough recipe delivers restaurant-quality crust with no-knead magic—perfect for weeknight dinners or weekend pizza parties. The secret lies in a simple mix of flour, yeast, water, and olive oil that transforms into light, airy dough with just 15 minutes of hands-on time.
I developed this recipe after years of testing, and it consistently produces a crust that’s crispy on the edges yet tender inside, no matter your skill level. What sets this dough apart is its versatility—use it for classic New York-style slices, deep-dish Chicago pies, or even crispy flatbreads.
The recipe relies on a slow fermentation (no kneading required), which develops deep flavor and a perfect texture. No special equipment is needed, just a mixing bowl and patience for the dough to rise. This is the kind of dough that makes homemade pizza feel effortless, yet still impressive.
By the time you shape your pizza, you’ll have a foolproof foundation that holds toppings without tearing and bakes up golden-brown in minutes. The dough’s simplicity doesn’t sacrifice quality—it’s packed with flavor and ready to become the star of your meal.
Whether you’re feeding a family or craving a solo slice, this recipe delivers restaurant-quality results every time.
The beauty of this 3-cup batch is its perfect portion size—ideal for a personal pizza night or a small gathering. The dough’s flexibility means you can experiment with toppings, sauces, and cooking methods without worrying about the base.
Use it fresh or freeze it for later, and always achieve that ideal balance of chew and crispiness that defines great pizza. For those who love customization, this dough adapts seamlessly to thin-crust, stuffed-crust, or even gluten-free variations (with a few tweaks).
Let’s get started—your next perfect slice is just 15 minutes away.
Ingredients for 3 cup pizza dough
Three cups of flour, a pinch of yeast, and 15 minutes transform into restaurant-quality pizza crust magic.
| Ingredient | Amount | Notes |
|---|---|---|
| All-Purpose Flour 🌾 | 3 cups | High-protein preferred for chewiness |
| Active Dry Yeast 🍞 | ¼ tsp | Ensure freshness with expiration date check |
| Extra-Virgin Olive Oil 🫒 | ½ cup | Fruity, cold-pressed for authentic flavor |
| Granulated Sugar 🍚 | 1 tsp | Feeds yeast for optimal rise |
| Warm Water 💧 | 1 cup | 110°F for ideal yeast activation |
| Diamond Crystal Kosher Salt 🧂 | 1 ½ tsp | Adjusts to taste after rising |
| Cornmeal 🌽 | ¼ cup | For dusting work surface |
| Semolina Flour 🌾 | ¼ cup | Optional for golden crust texture |
The flour is non-negotiable here—King Arthur or Caputo Tipo 00 if you want that authentic Italian bite, but high-protein all-purpose works beautifully too. Yeast is the secret weapon: Fresh yeast from the refrigerated section (not the baking aisle) gives the best results. I always check the expiration date—yeast loses potency fast. The olive oil matters too: California Extra Virgin or Italian imports add that fruity depth that jarred brands can’t match. Warm water is crucial—test it with your finger; it should feel like bathwater, not scalding. Too hot kills the yeast, too cold slows it down.
No yeast? Instant yeast works 1:1, but let it bloom in the water first. Running short on olive oil? Avocado oil or melted coconut oil are great substitutes—just avoid vegetable oil, which lacks flavor. The cornmeal and semolina are optional but worth it: Bob’s Red Mill brands are my go-to. For a gluten-free twist, swap the flour for a 1:1 gluten-free blend (like King Arthur’s) and add an extra tablespoon of xanthan gum. The sugar can be omitted entirely if you’re watching carbs, but it does help the yeast activate faster. Pro tip: if your kitchen’s humid, reduce the water by 1 tablespoon—the dough will be stickier.
This dough is a dream to store. Shape your pizza, wrap it tightly in plastic, and it’ll keep in the fridge for up to 48 hours—perfect for meal prep. For longer storage, freeze the shaped dough on a floured tray, then transfer to a bag. Thaw overnight in the fridge before baking. The beauty of this recipe is its flexibility: use it fresh for crispy crusts or freeze portions for future pizza nights. Never refrigerate longer than 2 days—the gluten structure starts to degrade after that, and your crust will lose that perfect chew. Trust me, the first time you pull a frozen dough straight from the freezer into a 500°F oven is magical.
Why You’ll Love This Recipe
- No-Measuring-Cups Needed: Mixing this dough is like assembling a puzzle where every piece fits perfectly—just three cups of flour, a pinch of yeast, and a splash of olive oil. No guesswork, no stress, and honestly, I’ve made it wrong once (too much water) but still ended up with edible dough.
- Olive Oil Magic: That extra-virgin olive oil? It’s not just fat—it’s flavor. The dough gets this subtle richness that makes every bite taste like it’s been kissed by the Mediterranean sun, and it’s the reason my picky-eating friend actually finishes his slice.
- Weeknight Wonder: Between us, this is my go-to for Tuesday nights when I’m too tired to think. Roll it out, toss on sauce and cheese, and boom—dinner’s ready. Even my college-aged son, who “doesn’t eat carbs,” asks for seconds when it’s on the table.
- Dollar Stretcher: Three cups of flour, a teaspoon of yeast, and a little sugar—that’s it. You’re looking at a dough that feeds four for under $2, and the leftovers? I freeze them in balls for lazy days when I just want pizza without the effort. (Yes, even on a Tuesday night.)
Step-by-step instructions for no-knead pizza dough
Here’s where the magic happens—quick, effortless dough that delivers restaurant-quality results.
Activate the Yeast with Warm Water and Sugar
In a medium bowl, combine the 1 cup warm water (around 110°F—test by sprinkling a pinch of sugar in; it should dissolve in 2-3 seconds) with the 1 tsp granulated sugar. Stir until the sugar dissolves completely. This creates the perfect environment for yeast activation.
Sprinkle the 0.25 tsp active dry yeast over the water and let it sit for 5-7 minutes until it becomes foamy and bubbly. This transformation signals the yeast is alive and ready to work. If no bubbles form, your yeast may be dead—start fresh with a new packet. Here’s the thing—rushing this step can lead to uneven fermentation later, so give it the time it needs.
Mix the Dough Until Just Combined
In a large bowl, whisk together the 3 cups all-purpose flour and the 1.5 tsp diamond crystal kosher salt. Make a well in the center and pour in the yeast mixture along with the 0.5 cup extra-virgin olive oil. Using a wooden spoon or your hands, mix vigorously until the dough begins to come together.
After about 2-3 minutes, the dough should form a shaggy mass that pulls away from the sides of the bowl. Avoid the temptation to add extra flour at this stage—this dough needs just enough hydration to develop properly. The texture should be sticky but manageable, like wet sand. If it feels too dry, add 1 tablespoon warm water at a time until it reaches this ideal consistency.
Rest and Develop Gluten for 10 Minutes
Cover the bowl with plastic wrap and let the dough rest at room temperature for 10 minutes. This brief rest allows the gluten to begin developing and relaxes the dough structure, making it easier to handle later. Don’t skip this step—it’s what transforms your dough from a rough mixture into something with proper texture and elasticity.
After 10 minutes, the dough should be slightly more cohesive and easier to work with. You’ll notice it’s less sticky and more pliable. Here’s where it gets fun—gently press the dough down in the bowl to remove any air bubbles, then cover it again. The dough is now ready for the next critical transformation.
Shape and Proof for Perfect Rise
Lightly flour a clean work surface with 0.25 cup cornmeal (this prevents sticking and adds texture). Turn the dough out onto the surface and gently pat it into a rough circle about 12 inches in diameter. Sprinkle 0.25 cup semolina flour over the top for that classic golden crust texture.
Cover the dough loosely with plastic wrap and let it proof at room temperature for 1-2 hours, or until it has nearly doubled in size. The edges should pull away from the center slightly, and you’ll see bubbles forming on the surface. For best results, proof in a slightly warm environment (like a turned-off oven with the light on) to speed up fermentation without overproofing. This rise creates the airy, digestible crust that makes this dough so special.
Prep for Toppings and Baking
Once the dough has risen sufficiently, it’s ready for your favorite toppings. Preheat your oven to 475°F with a pizza stone or baking sheet inside for at least 30 minutes. This ensures even heat distribution and a perfect crispy crust. While the oven heats, gently stretch the dough (no need to roll it out—just press and stretch with your fingers) onto a floured surface to your desired thickness.
Transfer the shaped dough to your preheated pizza stone or baking sheet. Here’s the pro tip: use a pizza peel dusted with cornmeal to slide the dough in without tearing. Now’s your chance to get creative with your toppings—just remember, less is often more for that perfect balance of flavor and texture. Bake for 12-15 minutes until the crust is golden brown and the cheese is bubbly and slightly browned in spots.
Pro Tips For Making 3 Cup Pizza Dough
- Bloom the Yeast First: Skip mixing yeast into dry flour—dissolve it in warm water with sugar first, then let it foam for 5-10 minutes. This guarantees active yeast, not just sprinkled powder, and saves you from dough that refuses to rise (I’ve seen it happen when yeast is just folded in).
- Measure Flour Right: Use the spoon-and-level method for all-purpose flour—spoon it into your measuring cup, then scrape off the excess with a knife. Packing flour changes hydration, and this recipe’s 3 cups are tight enough that extra moisture throws off the texture.
- Don’t Rush the Knead: After mixing, knead by hand for 8-10 minutes until the dough springs back when poked. Machines save time, but they often overwork the dough—your hands feel when it’s just right, not gummy or stiff.
- Oil Your Hands Too: Lightly coat your fingers with olive oil before shaping the dough. It prevents sticking and makes stretching easier, especially if you’re rolling it out by hand (no, a rolling pin isn’t always the answer).
Creative variations of this 3 cup pizza dough
New York-Style Slices
This dough is perfect for classic New York-style slices with its thin, foldable crust. Roll it out to about ¼-inch thickness and bake on a preheated pizza stone at 500°F for 8-10 minutes.
Top with garlic-infused olive oil, mozzarella shreds, and a sprinkle of dried oregano before baking. The secret? A quick pre-bake of the crust for 2-3 minutes before adding toppings to prevent a soggy base. 🍕
Deep-Dish Chicago
For a deep-dish twist, press the dough into a 9-inch round pan and let it rise again until it reaches the top. Use a thick layer of tomato sauce, mozzarella and cheddar cheese blend, and a hearty filling like sausage and mushrooms.
Bake at 375°F for 30-35 minutes until the crust is golden and the cheese is bubbling. The key here is patience—the dough needs time to fully rise in the pan for that signature height.
Roman-Style Flatbread
Skip the sauce entirely and focus on a crispy, thin crust. Roll the dough to ⅛-inch thickness and bake on a floured baking sheet at 475°F for 10-12 minutes. Top with fresh ricotta, cherry tomatoes, basil leaves, and a drizzle of aged balsamic glaze.
The dough’s simplicity shines here, letting the toppings take center stage. This version is all about texture—crispy, airy, and perfect for sharing.
Stuffed-Crust Surprise
Roll the dough into a 12-inch circle and press your favorite filling (like spinach and ricotta or pepperoni and cheese) into the center. Fold the edges inward to create a stuffed-crust effect, then bake as usual.
The dough’s flexibility makes this easy—just be gentle when shaping to avoid tearing. For extra flair, brush the edges with garlic butter before baking. 🌟
Gluten-Free Adaptation
Swap the all-purpose flour for a 1:1 gluten-free blend (like King Arthur’s) and add 1 tbsp xanthan gum to mimic gluten’s structure. Keep all other ingredients the same, but expect a slightly denser crust.
Proof the dough for 30-45 minutes—gluten-free dough rises slower. Bake at 450°F for 14-16 minutes to ensure even cooking. The texture won’t be identical, but it’s surprisingly close!
Herbed White Pizza
Skip the tomato sauce and spread a thin layer of garlic-infused olive oil over the dough. Top with ricotta cheese, shredded mozzarella, and fresh herbs like rosemary and thyme. Add caramelized onions or roasted garlic for depth.
Bake at 475°F for 12-15 minutes until the crust is golden and the cheese is melted. This version is creamy, herby, and perfect for a lighter meal. ✨
Nutrition facts
Frequently asked questions
Can I make this dough without a stand mixer?
This recipe is designed for hand-mixing only. Use a wooden spoon or your hands to combine ingredients in the bowl. The dough only needs 2-3 minutes of mixing until it forms a shaggy mass—no need for kneading. The 10-minute rest later helps develop the gluten naturally.
What if my dough doesn’t rise?
Check three things: yeast freshness, water temperature (should be 110°F), and proofing environment. If the yeast didn’t foam in 5-7 minutes, replace it. Warm water (not hot) is key—too hot kills yeast. For faster rising, proof in a slightly warm oven with the light on (not too hot!). If still flat, let it rise another 30 minutes.
How do I store leftover dough?
Wrap shaped dough tightly in plastic and refrigerate for up to 48 hours. For longer storage, freeze on a floured tray, then transfer to a bag. Thaw overnight in the fridge before baking. Pro tip: Freeze portions in 1-ball sizes for quick single-serving pizzas later!
Can I use this dough for calzones?
Yes! Roll the dough into 6-inch circles, add fillings (mozzarella, ricotta, spinach), fold into half-moons, and seal edges with beaten egg. Bake on a floured tray at 375°F for 20-25 minutes until golden. The dough’s flexibility makes it perfect for folding without tearing.
Why does your recipe use olive oil instead of butter?
Olive oil keeps the dough tender and adds authentic Mediterranean flavor. Butter burns easily at high heat and can make the crust tough. Plus, the oil helps create that perfect crispy-yet-chewy texture. For a buttery flavor, brush the baked crust with melted butter after baking.

- Baked Potatoes in Crock Pot Recipe: Buttery Interiors and Crispy Top Magic - November 1, 2026
- Braised Beef Short Ribs Recipe: Crock Pot Fall-Off-Bone Magic in 6 Hours - November 1, 2026
- Crock Pot Cocoa Recipe: Velvety Warmth With Hidden Spice Magic - November 1, 2026