
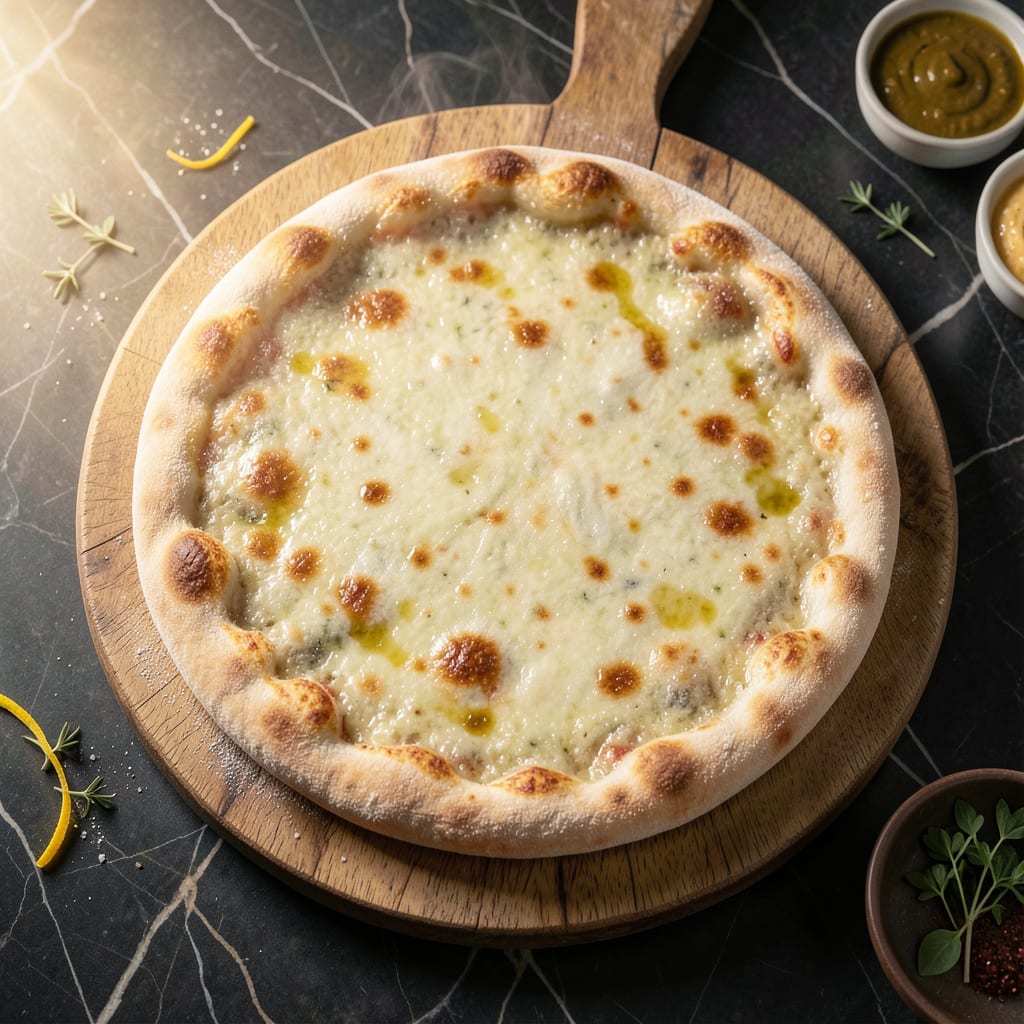
This recipe delivers a crispy pizza base with zero fat and all the satisfaction of traditional crust. The secret lies in a simple dough that bakes up light yet sturdy enough to hold your favorite toppings.
With just a few pantry staples and 15 minutes of active prep, you can create a guilt-free foundation for any pizza night. The result is a golden, flaky crust that shatters the myth that fat-free means flavor-free.
Ingredients for Fat Free Pizza Crust
Pantry staples create this crispy, guilt-free pizza foundation in no time.
| Ingredient | Amount | Notes |
|---|---|---|
| All-Purpose Flour 🌾 | 2 ½ cups | Plus extra for dusting |
| Active Dry Yeast 🍞 | 2 ¼ tsp | One 0.25 oz package |
| Granulated Sugar 🍚 | 1 tsp | Feeds the yeast |
| Salt 🧂 | 1 tsp | Enhances flavor |
| Warm Water 💧 | 1 cup | About 110°F |
| Olive Oil 🫒 | 0 tbsp | Optional for pan only |
| Cornmeal 🌽 | 2 tbsp | For dusting pan |
| Garlic Powder 🧄 | ½ tsp | For flavor in crust |
| Dried Oregano 🍃 | ½ tsp | Classic pizza herb |
| Dried Basil 🌿 | ½ tsp | Complements oregano |
The flour is your base here—King Arthur or Gold Medal give consistent results. Yeast matters too; check the expiration date (old yeast won’t activate). I always grab mine from Whole Foods bulk section since it’s fresher. Warm water should feel like a baby’s bath—too hot kills the yeast, too cold slows it down. No thermometer? Just use tap water that’s warm to the touch.
No cornmeal? Semolina or breadcrumbs work just as well for dusting. Swap the dried herbs for Italian seasoning at the same amount. If you want a hint of sweetness without sugar, a pinch of honey substitute (like agave) works, but skip it entirely for savory crusts. The garlic powder can be replaced with one minced fresh clove, but dried is easier here.
Dough rises best in a warm, draft-free spot—your oven with the light on works perfectly. Once baked, the crust stays crisp for 2 days in an airtight container at room temperature. For longer storage, freeze the baked crust for up to 1 month.
Why You’ll Love This Recipe
- No Fuss Dough: I love that it’s just flour, yeast, sugar, salt, and water—no oil, no mess, no waiting for butter to soften.
- Crisp Yet Light: The yeast gives it a fluffy rise while the warm water coaxes out a subtle sweetness that pairs perfectly with any topping.
- Meal Prep Hero: I make a double batch on Sunday, bake half for dinner, and store the rest raw in the fridge for a quick weeknight pizza.
- Penny Pincher: Honestly, it costs pennies compared to takeout and uses pantry staples I already have on hand.
Step-by-Step Instructions for Fat Free Pizza Crust
Here’s my tested method for achieving a crispy, flavorful crust without any added fat.
Step 1: Activate the Yeast
In a large mixing bowl, whisk together the 1 cup warm water, 1 tsp granulated sugar, and 2.25 tsp active dry yeast. Let this sit for 5-10 minutes until the mixture becomes foamy and bubbly.
This step is crucial—you’ll see the yeast coming to life as it feeds on the sugar. If the water was too hot, the yeast won’t activate, so make sure it’s about 110°F. Once foamy, you’re ready to add the dry ingredients.
Step 2: Mix and Knead the Dough
Add the 2.5 cups all-purpose flour, 1 tsp salt, 0.5 tsp garlic powder, 0.5 tsp dried oregano, and 0.5 tsp dried basil to the yeast mixture. Stir with a wooden spoon until a shaggy dough forms.
Turn the dough onto a lightly floured surface and knead for 8-10 minutes until smooth and elastic. The herbs and garlic powder will infuse the crust with classic pizza flavor as you work the dough.
Step 3: Let the Dough Rise
Shape the dough into a ball and place it in a lightly floured bowl. Cover with a clean kitchen towel and let it rise in a warm place for 1 to 1.5 hours or until doubled in size.
I like to place the bowl near a warm oven (turned off) or on top of the refrigerator. The dough should spring back slowly when pressed lightly with a finger. If it doesn’t rise properly, your yeast may have been old or the water temperature was off.
Step 4: Shape and Pre-Bake the Crust
Punch down the risen dough and transfer it to a surface dusted with 2 tbsp cornmeal. The cornmeal prevents sticking and adds a nice texture to the crust. Roll and stretch the dough into a 12-inch circle.
Place the shaped dough on a baking sheet lined with parchment paper. Pre-bake at 425°F for 8-10 minutes until the crust is just beginning to set but not yet browned. This step ensures a crispy base that won’t get soggy under toppings.
Step 5: Add Toppings and Finish Baking
After pre-baking, add your favorite toppings and return the pizza to the 425°F oven for an additional 10-12 minutes. Look for the edges to turn golden brown and the cheese to bubble.
The pre-baked crust will hold up perfectly to all your toppings while staying fat-free. Let it cool for 2-3 minutes before slicing so the cheese sets slightly. The cornmeal on the bottom gives it an extra crispy texture that everyone loves.
Pro Tips For Making Fat Free Pizza Crust
- Proof the Yeast: Always dissolve the active dry yeast in warm water (around 110°F) with a pinch of sugar first—I learned this the hard way after wasting flour on dough that never rose.
- Knead Longer: Work the dough for at least 8-10 minutes until smooth and elastic; skipping this makes the crust dense and chewy instead of light.
- Skip Cold Water: Using water that’s too cool slows yeast activation, so double-check it’s warm but not hot enough to kill the yeast (test it on your wrist like a baby bottle).
- Rest Before Rolling: Let the dough rise for 1-2 hours until doubled—rushing this step leaves you with a tough, flat crust that tastes more like a cracker.
Storing and Reheating fat free pizza crust
Room Temperature Storage
After baking, let your crust cool completely. Store it in an airtight container at room temperature for up to 2 days. I use a glass container with a snap-tight lid to maintain freshness.
Refrigerator Storage
For longer storage, wrap the cooled crust tightly in plastic wrap or place it in a zip-top bag. It will keep in the refrigerator for up to 5 days. Reheat before adding toppings to restore the crispy texture. ❄️
Freezing Method
Freeze the pre-baked crust for up to 1 month. Wrap it tightly in plastic wrap and then in aluminum foil to prevent freezer burn. Thaw overnight in the refrigerator before reheating.
Oven Reheating
Preheat your oven to 375°F. Place the crust directly on the oven rack or a baking sheet for 5-7 minutes until it regains its crispness. This method works best for frozen crusts too.
Toaster Oven Option
For quick reheating, use a toaster oven at 375°F for 3-4 minutes. Watch closely to avoid over-browning. I find this method works perfectly for single servings. 🔥
Topping Before Storage
Avoid adding toppings before storing, as they can make the crust soggy. Instead, store the crust plain and add toppings fresh when ready to bake and serve.
Nutrition Facts
Frequently Asked Questions
Can I make this without yeast?
Yes! Use 1.5 cups Greek yogurt and 2 cups self-rising flour for a quick no-yeast version. Mix and let rest for 10 minutes before shaping. It won’t rise as much but still tastes great.
Why pre-bake the crust?
Pre-baking for 8-10 minutes creates a firm base that won’t get soggy under toppings. It’s essential for a crispy texture without oil. Skipping this step can lead to a gummy crust.
Can I use whole wheat flour?
Substitute up to 1 cup of whole wheat flour for all-purpose. Add 1-2 tbsp extra water if the dough feels dry, as whole wheat absorbs more liquid.

- 8 Bean Soup Recipe Crock Pot: Hearty Vegetable Medley in One Pot - September 25, 2026
- 4C Bread Crumbs Meatballs Recipe: Crispy Crust and Juicy Centers - September 25, 2026
- 6 Oz Chocolate Chip Cookie Recipe: Perfectly Balanced Crispy Edges and Chewy Hearts - September 25, 2026