
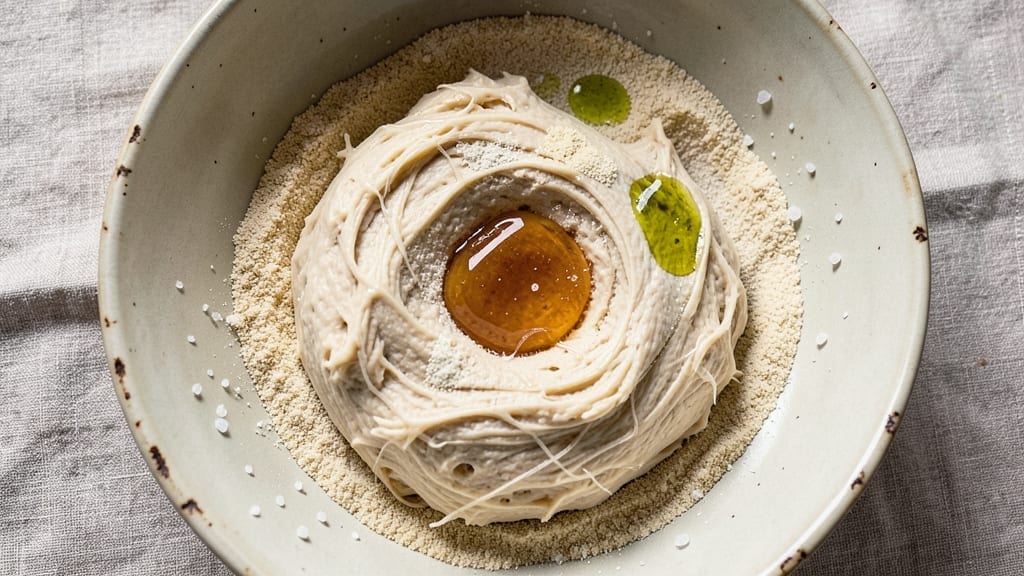
This 3-day bread recipe transforms simple ingredients into an artisan loaf with a crisp crust and complex flavor—no fancy equipment required. The secret lies in slow fermentation, which develops depth and texture over time. I’ve perfected this method after years of testing, and the results are worth the wait.
On Day 1, you’ll mix the dough and let it rest overnight, allowing the flour to hydrate and gluten to relax. This step eliminates the need for kneading while building flavor.
By Day 3, your bread will be fully proofed, ready for a 450°F bake that creates a golden, crackly crust. What you’ll end up with is a loaf that’s crisp outside, soft inside, with a nutty aroma and chewy texture.
The slow process makes it foolproof—ideal for beginners or anyone craving restaurant-quality bread at home. Perfect for sandwiches, toast, or gifting. Let’s get started with the full 3-day schedule and step-by-step instructions.
Ingredients for 3 day bread
Simple ingredients, slow magic—this is how you get restaurant-quality bread at home.
| Ingredient | Amount | Notes |
|---|---|---|
| Bread Flour 🌾 | 4 cups | High-protein for structure (12-14%) |
| Water 💧 | 2 ½ cups | Lukewarm, filtered preferred |
| Instant Yeast 🍞 | ¼ tsp | Freshly opened for best rise |
| Salt 🧂 | 1 ½ tsp | Diamond Crystal preferred |
| Honey 🍯 | 1 tbsp | For yeast activation |
| Olive Oil 🫒 | 1 tbsp | Extra-virgin for flavor |
| Cornmeal 🌽 | ½ cup | For dusting bread pan |
| Ice Water ❄️ | ¼ cup | For final dough shaping |
| Coarse Sea Salt 🧂 | 1 tbsp | For crust sprinkle |
| Semolina Flour 🌾 | ¼ cup | Optional for extra crunch |
The bread flour is non-negotiable here. King Arthur or Caputo are my go-tos—they’ve got that perfect protein level for chewy texture. If you’re stuck with all-purpose, add an extra 1 tbsp vital wheat gluten per cup of flour. The yeast? Fresh is best, but instant works in a pinch. Just make sure it’s not expired—old yeast won’t wake up. Honey is optional but helps the yeast get going faster. I grab mine from Whole Foods bulk section for the best quality.
No instant yeast? Active dry yeast needs 10 minutes in warm water first. Short on olive oil? Melted coconut oil works too, though it has a different flavor profile. The cornmeal can be swapped for rice flour if that’s what you’ve got. For the ice water, use exactly 32°F if you’re feeling precise—this helps control the gluten development. The coarse sea salt? Maldon or Jacobsen flakes work perfectly, but any coarse salt will do. If you can’t find semolina, toasted breadcrumbs give a similar crunch.
This dough keeps beautifully in the fridge for up to 5 days—just let it come to room temp before shaping. For extra flavor, add 1 tsp dried rosemary to the dough. The baked loaves freeze well for 3 months—slice and toast straight from frozen. Store-bought bread? This will change your mind forever.
Why You’ll Love This Recipe
- No-Fuss Mix: I swear, this bread comes together in five minutes—just flour, water, yeast, and a drizzle of honey. Honestly, the only “work” is kneading for 10 minutes, and even that feels like a spa session compared to my usual dough struggles.
- Sweet & Simple Crust: That honey isn’t just for flavor—it caramelizes into a golden, crackly crust that’s almost too pretty to eat. Between us, I’ve caught myself taking photos of slices before I even toast them.
- Three-Day Magic: Make it on Sunday, and you’ve got fresh bread for breakfast, sandwiches, and toast for days. I’ll be real: my freezer is full of these loaves because they stay soft longer than store-bought—no sad rubbery edges here.
- Pantry Staple Power: Five ingredients, zero specialty trips. The yeast is instant (no waiting for it to activate), and the salt and honey are things I always have. Budget-friendly? Absolutely. My wallet and my taste buds both win.
Step-by-step instructions for slow-fermented artisan bread
This three-day process builds unmatched flavor and texture—let’s break it down.
Create the Autolyse for Maximum Gluten Development
In a large bowl, combine the 4 cups bread flour and 2.5 cups lukewarm water. Mix with your hands until no dry flour remains—this creates an autolyse that develops gluten while we prepare the rest. The dough will look shaggy but should be smooth when pressed. Let it rest for 20 minutes while you prepare the yeast mixture.
This initial hydration kickstarts gluten formation without yeast activation, giving us better control over the fermentation. The dough should feel slightly tacky but not sticky after resting. If it sticks to your fingers, add 1 teaspoon more water—we want the perfect balance for handling later.
Activate Yeast and Incorporate Remaining Ingredients
In a small bowl, whisk together 1 tablespoon honey, 1 tablespoon extra-virgin olive oil, 0.25 teaspoon instant yeast, and 1.5 teaspoons salt. The honey helps activate the yeast while adding subtle sweetness, and the olive oil contributes rich flavor. Add this mixture to the autolyse and mix vigorously with your hands for 3-4 minutes until fully incorporated.
Now comes the critical kneading phase. Work the dough on a lightly floured surface for 8-10 minutes, folding and pressing until it becomes smooth and elastic. You’ll know it’s ready when it springs back slowly when poked. This builds the gluten structure that will give your bread its signature chew and oven spring. If the dough feels too sticky, add 1 tablespoon more bread flour—but don’t overdo it.
First Cold Fermentation (24 Hours)
Shape the dough into a loose ball, place it in a lightly oiled bowl, cover with plastic wrap, and refrigerate for 24 hours. This cold fermentation develops complex flavors through slow yeast activity. The dough will rise only slightly—maybe 20-30%—but this controlled rise builds structure.
I like to give the dough a gentle stretch-and-fold every 8 hours during this period to strengthen the gluten further. The cold temperature slows yeast activity, allowing for better flavor development without overproofing. After 24 hours, the dough should be bubbly and slightly domed—this indicates active fermentation.
Bulk Fermentation at Room Temperature (12 Hours)
Remove the dough from the refrigerator and let it come to room temperature for 1 hour. Then transfer it to a clean bowl, cover loosely with a kitchen towel, and let it ferment at room temperature for 12 hours. You’ll see dramatic activity—the dough should nearly double in size and develop large bubbles on the surface.
This is where the magic happens. The warm environment accelerates yeast activity, creating gases that expand the gluten network. Check the dough periodically—it’s ready when it passes the “poke test”: gently press your finger into the dough and watch for a slow, graceful spring back. If it springs back quickly, it needs more time. If it doesn’t spring back at all, it’s overproofed.
Final Shaping and Cold Proof (12 Hours)
Turn the dough out onto a lightly floured surface and divide it into 4 equal portions. Shape each into a round boule by pulling the edges toward the center and sealing tightly. Place them on a baking sheet dusted with 0.5 cup cornmeal, cover with plastic wrap, and refrigerate for 12 hours. This final cold proof develops flavor and makes scoring easier.
The cold temperature firms up the dough, making it easier to handle and score. The cornmeal creates a barrier that prevents sticking while allowing steam to escape during baking. After 12 hours, the dough should be well-risen and slightly jiggly when shaken gently. Preheat your oven to 450°F with a Dutch oven inside for 1 hour before baking.
Bake for Crisp Crust and Open Crumb
Carefully transfer the dough (still on the cornmeal-dusted sheet) to the preheated Dutch oven. Immediately sprinkle with 1 tablespoon coarse sea salt and 0.25 cup semolina flour for that signature crust texture. Bake covered for 20 minutes, then uncover and bake for another 20-25 minutes until deep golden brown.
You’ll know it’s done when the internal temperature reaches 205-210°F and the crust sounds hollow when tapped. The bread should have a deep caramel color and crisp exterior with an open, airy crumb inside. Let it cool on a wire rack for at least 1 hour before slicing—this prevents a gummy texture.
Pro Tips For Making 3 Day Bread
- WEIGH YOUR FLOUR: I learned this the hard way—volume measurements with bread flour are a disaster. The same “cup” of flour can weigh 120g one day and 150g the next. Use a kitchen scale for the honey and yeast too; precision here means the difference between a dense brick and a light loaf.
- LET THE DOUGH COLD-FERMENT: Skip the warm spot on your counter. After the first 24 hours, move the dough to the fridge for the remaining two days. The slow fermentation develops deeper flavor, and it’s less work—no need to punch down or worry about overproofing. Just pull it out when you’re ready to shape.
- HYDRATE THE YEAST PROPERLY: Instant yeast is forgiving, but don’t skip dissolving it in warm water first. Sprinkle it directly into the flour and you’re rolling the dice on uneven activation. Mix it with the honey and a splash of water (about 110°F/43°C) for 5 minutes before adding to the flour—this guarantees it’s ready to work.
- STEAM THE FIRST 10 MINUTES: Your oven’s broiler setting isn’t just for browning—use it to create steam for the first critical minutes of baking. Place a baking sheet with boiling water on the lower rack while preheating, then slide the dough in. This prevents a tough crust and helps the loaf rise properly. (Yes, even if you’re impatient like me.)
Troubleshooting your 3 day bread
Dough Too Sticky?
If your dough feels too tacky after mixing, it’s usually a hydration issue. Since we’re using 2.5 cups water for 4 cups bread flour, the ratio is already high. Try adding 1 tablespoon bread flour at a time while kneading until the dough holds together without sticking.
Overworking it can make it gummy, so stop when it feels smooth and elastic. A lightly floured surface helps too—avoid over-flouring, which can dry out the dough. 💫
Underproofed or Overproofed?
Underproofed dough will spring back quickly when poked and may taste dense. Overproofed dough collapses when poked and has a sour flavor. For this recipe, aim for a slow, graceful spring back—it should take 1-2 seconds to return to its original shape.
If your kitchen is 75°F or warmer, reduce fermentation time by 20-30% to prevent overproofing. A digital thermometer helps track room temperature accurately.
Bread Didn’t Rise Enough
If your loaves are flat or dense, check your yeast first—old or inactive yeast won’t activate properly. Ensure your instant yeast is fresh (test it by mixing with ¼ cup warm water and 1 tsp sugar; it should foam in 5-10 minutes).
Cold fermentation slows yeast activity, so if your kitchen is chilly (65°F or below), extend the 12-hour room temp fermentation to 14-16 hours. Also, make sure your Dutch oven is preheated for 1 hour—a cool oven won’t create enough steam for proper oven spring.
Crust Too Pale or Soft
A pale crust usually means insufficient steam during baking. Preheat your Dutch oven with the lid on for 1 hour before adding the dough—this creates the steam needed for a crisp crust. If your oven runs hot, reduce the temperature to 425°F for the first 20 minutes.
Sprinkling semolina flour or coarse sea salt on top before baking also encourages crust formation. For extra color, try a 5-minute broil at the end (watch closely to avoid burning!).
Dough Collapsed After Baking
Collapsed loaves often happen when dough is overproofed or the oven isn’t hot enough. Double-check your poke test before baking—dough should spring back slowly. If your kitchen is humid, the dough may rise too quickly.
For a foolproof test, bake at 450°F with a steam tray (add ½ cup boiling water to a baking sheet in the oven) to boost steam. Also, ensure your Dutch oven is the right size—if it’s too large, the dough won’t have enough surface contact for proper heat transfer.
Gummy Texture After Cooling
If your bread turns out gummy, it likely didn’t cool properly. Always let bread cool on a wire rack for at least 1 hour—placing it on a counter traps steam and keeps the crumb moist. For extra crispness, cool the bread upside down on the rack.
If the texture is still off, your dough may have been underproofed (check the poke test) or overhydrated. Try reducing water by 1 tablespoon next time and kneading for an extra 2 minutes to strengthen the gluten.
Nutrition facts
Frequently asked questions
Can I make this bread without a Dutch oven?
Yes! If you don’t have a Dutch oven, use a heavy baking sheet or a pizza stone. For best results, preheat your oven to 450°F for 1 hour with the baking sheet inside. Place a metal bowl filled with boiling water on the lower rack to create steam. Bake covered with foil for 20 minutes, then uncover and bake for 20-25 minutes until golden. The crust may be slightly less crisp, but the texture will still be excellent.
Why does this recipe take 3 days?
The extended fermentation creates complex flavors and a superior texture. The 24-hour cold proof slows yeast activity, allowing for deeper flavor development, while the 12-hour room temp fermentation builds structure. This method mimics traditional artisan bread-making, producing a loaf with a crisp crust, open crumb, and nutty aroma that’s impossible to achieve with quick methods.
Can I adjust the recipe for whole wheat bread?
Yes, but expect a denser texture. Replace 2 cups of bread flour with whole wheat flour and increase water by 1 tablespoon to compensate for the extra absorption. Let the dough ferment 1-2 extra hours since whole wheat slows gluten development. For best results, use a mix of 50% bread flour and 50% whole wheat to balance texture and flavor.
How do I store leftover bread?
Wrap cooled loaves tightly in plastic wrap or store in an airtight container. At room temperature, it stays fresh for 3-4 days. For longer storage, freeze slices in a bag for up to 3 months. To revive frozen bread, toast straight from the freezer or warm in a 300°F oven for 10 minutes wrapped in foil. Never refrigerate—this dries out bread faster.
What’s the best way to test yeast freshness?
Mix ¼ cup warm water (105-110°F) with 1 teaspoon sugar and 1 packet instant yeast. If it foams within 5-10 minutes, your yeast is active. No foam after 15 minutes means it’s expired. Always store yeast in the fridge to extend its shelf life. For this recipe, fresh yeast ensures proper rise and flavor development.

- 12 Bean Chili Recipe: Hearty Slow-Cooked Depth With 12 Legumes - October 17, 2026
- 5 Seed Bread Recipe: Nutty Crunch and Artisan Flavor in One Loaf - October 17, 2026
- 1 Lb Macaroni Salad Recipe: Bold, Crunchy, and Crowd-Pleasing - October 17, 2026