
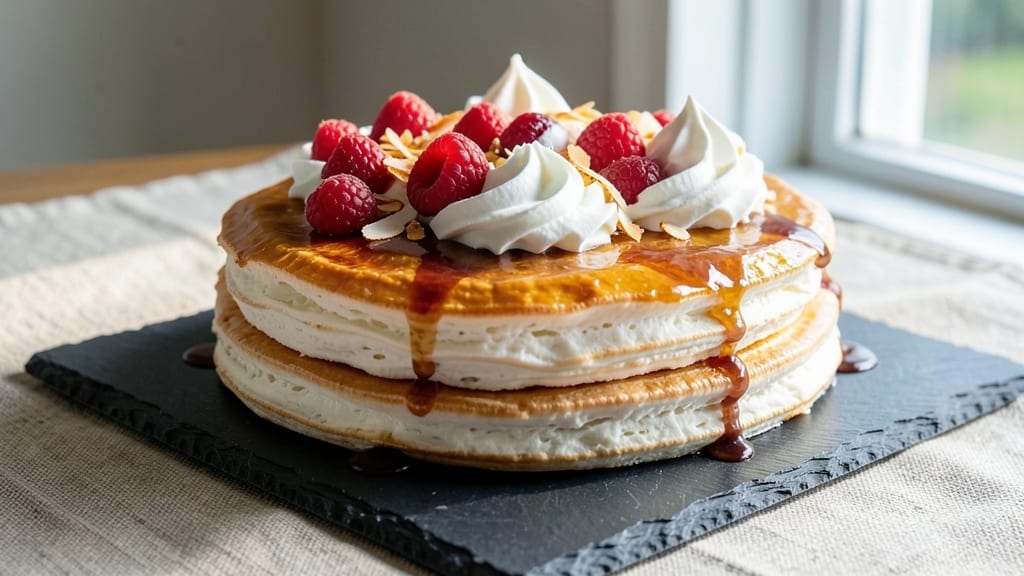
This 3 egg white pavlova recipe delivers the perfect balance of a crispy shell and a marshmallow-like center that’s light enough to float on air.
The secret lies in carefully whipping egg whites to stiff peaks and baking at a precise low temperature to create that signature crackly exterior while keeping the inside soft and cloud-like. I’ve perfected this technique after years of trial and error—no more soggy pavlovas or overly dry meringue here.
What makes this recipe special is the foolproof method for achieving that signature crackling crust without overbaking the center. You’ll need just 3 egg whites (plus a bit of sugar for structure), which makes this version more accessible than traditional recipes that call for whole eggs.
The key is patience—letting the meringue set slowly before baking ensures the crispy shell forms properly. By the time you’re done, you’ll have a stunning dessert with a crispy exterior that shatters slightly when touched and a marshmallow-soft interior that melts in your mouth.
Topped with whipped cream and fresh berries, it becomes a showstopper that’s perfect for celebrations or impressing guests. The presentation is just as important as the taste—here’s how to plate it beautifully.
This recipe scales perfectly for gatherings, and the leftovers (if there are any!) stay fresh for a day when stored properly. Let’s create this elegant yet simple dessert that always gets rave reviews.
Ingredients for 3 egg white pavlova
Precision ingredients for a perfect pavlova—crispy shell, marshmallow core, and flawless presentation.
| Ingredient | Amount | Notes |
|---|---|---|
| Large Egg Whites 🥚 | 3 whole | Room temperature, no yolks |
| Granulated White Sugar 🍚 | 1 cup | Superfine preferred for smoothness |
| Cornstarch 🌾 | 2 tbsp | For stability and crispiness |
| White Vinegar 🍶 | ½ tsp | For acidity and structure |
| Vanilla Extract 🌿 | ½ tsp | Pure, high-quality preferred |
| Heavy Whipping Cream 🧈 | 1 ½ cups | Full-fat for best stability |
| Powdered Sugar 🍚 | ½ cup | For sweetening whipped cream |
| Fresh Berries 🍓 | 2 cups | Raspberries or strawberries |
| Lemon Juice 🍋 | 1 tsp | Freshly squeezed for brightness |
| Unsalted Butter 🧈 | 2 tbsp | Softened for greasing |
| Diamond Crystal Kosher Salt 🧂 | ¼ tsp | For fine seasoning |
Egg whites are the foundation—use room temperature ones for best volume. Kirkland Signature or Organic Valley brands work perfectly, but avoid any with visible fat. The sugar should be superfine if possible; regular granulated works but may yield slightly less smooth peaks. For the cornstarch, Bob’s Red Mill is my go-to—it dissolves completely without graininess. The vinegar and vanilla are non-negotiable for structure and flavor; McCormick vanilla extract delivers consistent quality at a reasonable price.
No superfine sugar? Pulse regular granulated in a food processor for 30 seconds—it’ll work in a pinch. Substituting cream of tartar for vinegar? Use half the amount (0.25 tsp) for equivalent acidity. The berries can be fresh or thawed frozen—just pat them dry to prevent sogginess. For a citrus twist, swap lemon juice for orange juice at the same ratio. The butter should be softened but not melted when greasing the pan—this prevents sticking without making a mess.
Whipped cream should be made fresh and stored in an airtight container with parchment between layers to prevent drying. The pavlova itself keeps for 24 hours at room temperature if stored in a cool, dry place away from humidity. For longer storage, freeze the meringue base (without toppings) for up to 1 month—thaw at room temperature before adding fresh toppings. Always serve immediately after baking to preserve that signature crackly texture.
Why You’ll Love This Recipe
- No Stand Mixer Needed: I’ll be real—this meringue only needs a whisk and your arm. Three egg whites? No problem. The vinegar and cornstarch trick keeps it stable, so no deflating disasters here.
- Crispy Edge, Cloudy Magic: That sugar crust snaps like a cookie, but the inside stays light as a dream. Vanilla extract ties it all together—subtle, but you’ll notice it every time.
- Dessert for Any Occasion: Too fancy for a Tuesday? Nah. The same base works for fruit toppings, whipped cream, or even a drizzle of honey. My go-to? Warm berries in winter.
- Budget-Friendly Luxury: Three eggs, a splash of vinegar, and sugar—that’s it. No specialty tools, no expensive ingredients. Honestly, it’s the kind of dessert that makes you feel fancy without breaking the bank.
Step-by-step instructions for crispy pavlova with marshmallow core
Mastering this delicate balance of crispy shell and light center requires precision timing and technique.
Prepare the Pavlova Base for Maximum Stability
Preheat your oven to 275°F and position a rack in the lower third. Line a baking sheet with parchment paper and draw a 6-inch circle lightly with pencil as your guide. This low temperature prevents over-browning while ensuring proper setting.
In a stand mixer fitted with the whisk attachment, beat the 3 whole Large Egg Whites on medium speed until soft peaks form. Gradually add the 1 cup Granulated White Sugar, 2 tbsp Cornstarch, and 0.25 tsp Diamond Crystal Kosher Salt while mixing on high speed for 8-10 minutes until the meringue is glossy, thick, and holds stiff peaks that stand straight up when the whisk is lifted. The mixture should be pale and smooth with no graininess.
Here’s the thing – don’t rush this stage. You’re building the structural foundation of your pavlova. If the meringue still feels slightly sticky or doesn’t hold peaks, continue mixing for another 2-3 minutes. The sugar needs to fully dissolve and the proteins to fully denature for that perfect crisp shell.
Shape and Bake the Crisp Shell
Using a spatula, immediately transfer the meringue to the drawn circle on your parchment paper. Shape it into a nest by gently pushing the edges upward and inward with your fingers, creating a 1-inch high rim around the base. The center should be slightly concave to hold the whipped cream later.
Bake for exactly 1 hour and 15 minutes without opening the oven door. The meringue will gradually change from white to pale golden brown. You’re aiming for a crisp exterior that’s just beginning to set – it should feel firm to the touch but not completely hard. If you tap the side gently, it should give slightly rather than sound hollow.
I know it’s tempting to check earlier, but resist. The internal temperature should reach 100°F for proper setting. When you remove it from the oven, the outside should be crisp and the inside should still feel slightly soft and marshmallow-like when you gently probe with your finger.
Prepare the Whipped Cream Filling
While the pavlova bakes, combine the 1.5 cups Heavy Whipping Cream, 0.5 cup Powdered Sugar, 0.5 tsp Vanilla Extract, and 1 tsp Lemon Juice in a chilled bowl. Using a stand mixer, whip on medium-high speed until soft peaks form, then increase to high speed and whip for another 2-3 minutes until stiff peaks form that hold their shape when the whisk is inverted.
The acidity from the lemon juice and vinegar you’ll add next is crucial – it stabilizes the meringue structure. In a separate small bowl, whisk together the 0.5 tsp White Vinegar and 1 tsp Lemon Juice. Gently fold this mixture into the whipped cream using a spatula, being careful not to deflate the cream. The acidity helps create that signature marshmallow texture in the center.
Assemble and Chill for Perfect Texture
Once the pavlova has cooled completely to room temperature (about 30 minutes), carefully spread the whipped cream mixture evenly over the base, leaving a ½-inch border around the edges. This creates the classic pavlova shape while preventing the cream from touching the crisp shell.
Gently press the 2 cups Fresh Berries into the cream, leaving some whole for decoration. Finally, use a pastry brush to lightly coat the outer edges of the meringue with melted 2 tbsp Unsalted Butter – this adds shine and enhances the crisp texture. Refrigerate uncovered for at least 4 hours or overnight to allow the flavors to meld and the structure to fully set.
Serve for Maximum Crispness
Just before serving, run a small offset spatula around the edge of the pavlova to create a clean border between the crisp shell and the soft center. This technique ensures each slice maintains its structural integrity. Serve immediately while the contrast between the crisp exterior and marshmallow center is at its peak.
Each slice should deliver that satisfying crunch from the shell, followed by the light, airy cream, and finally the juicy berries. The key to success lies in that 1 hour 15 minutes bake time – any longer and the shell becomes too dry, any shorter and the center won’t set properly. This delicate balance is what makes an exceptional pavlova.
Pro Tips For Making 3 Egg White Pavlova
- Whip to Stiff Peaks: DESCRIPTION:
- Sift the Sugar: DESCRIPTION:
- Skip the Crowding: DESCRIPTION:
- Bake at 250°F: DESCRIPTION:
Serving suggestions for 3 egg white pavlova
Classic Whipped Cream
Start with 1.5 cups heavy whipping cream chilled in the fridge for at least 2 hours before whipping. Add ½ cup powdered sugar and ½ tsp vanilla extract while mixing on high speed until stiff peaks form.
For extra stability, fold in ½ tsp white vinegar and 1 tsp lemon juice—this creates that signature marshmallow texture. I always use Kirkland Signature cream because it whips consistently without splitting. 🧈
Fresh Fruit Arrangements
Raspberries and strawberries are my go-to toppings—their bright acidity cuts through the richness. Arrange 2 cups mixed berries in concentric circles on top of the cream, leaving some whole for decoration. For a tropical twist, swap berries for mango slices or passion fruit pulp.
Always pat berries dry first to prevent sogginess. A sprinkle of toasted coconut flakes adds crunch and visual appeal.
Citrus Zest Garnish
Zest 1 lime or lemon and sprinkle lightly over the whipped cream before adding berries. The citrus oils enhance the vanilla flavor and add a refreshing aroma. For a pop of color, add edible gold leaf or a drizzle of honey along the edges.
I like to finish with a few mint leaves for a sophisticated touch that pairs beautifully with the berries.
Chocolate Drizzle Option
For chocolate lovers, melt 4 oz dark chocolate (70% cocoa) with 1 tbsp coconut oil over a double boiler. Drizzle in a zigzag pattern over the cream before adding berries.
The bitterness balances the sweetness perfectly. Use a microplane to shave dark chocolate over the top for extra texture. This works especially well with tart berries like blackberries. 🍫
Seasonal Variations
Spring: Top with peach slices and a drizzle of peach jam for a summery feel. Summer: Use watermelon balls and basil leaves for a refreshing contrast. Autumn: Try roasted pear slices with a sprinkle of cinnamon.
Winter: Add candied cranberries and a dusting of powdered sugar for a festive touch. Each season brings its own delicious twist! 🍑
Nutrition facts
Frequently asked questions
Why does my meringue collapse after baking?
Overmixing or underbaking are the most common culprits. Make sure your egg whites are at room temperature and free of any fat. Whip just until stiff peaks form—no longer! Bake at 275°F for exactly 1 hour 15 minutes without opening the oven door. Humidity can also cause collapse, so bake on a dry day or use a desiccant packet in the oven.
Can I make this pavlova ahead of time?
Yes! The meringue base can be baked 1 day ahead and stored in an airtight container at room temperature. Add the whipped cream and toppings just before serving to maintain crispness. For longer storage, freeze the baked meringue (without toppings) for up to 1 month—thaw completely before assembling.
What’s the secret to getting that perfect crackly crust?
The magic happens during baking! Use a low oven temperature (275°F) and bake for the full 1 hour 15 minutes without opening the door. The slow, dry heat creates that signature crisp texture. For extra crunch, brush the edges with melted butter after baking. Avoid high humidity days—it makes meringue gummy instead of crisp.
How do I know when the meringue is fully set?
When removed from the oven, the outside should be crisp and the center should still feel slightly soft when gently pressed. It should hold its shape when tapped lightly—no jiggling! If it sounds hollow when tapped, it’s overbaked. The internal temperature should reach 100°F for perfect setting. Let it cool completely before adding toppings.
Can I use this recipe with store-bought whipped cream?
Technically yes, but homemade whipped cream with the acidity boost (vinegar + lemon juice) gives the signature marshmallow texture. If using store-bought, add ½ tsp cream of tartar to stabilize it. For best results, whip it with 1 extra tablespoon powdered sugar to compensate for the missing acidity and achieve that light, airy consistency.

- Crock Pot Peanut Clusters Recipe: Warm, Gooey Bites in 2 Hours - November 1, 2026
- Pea Soup Instant Pot Recipe: Velvety Green Smoothness in 20 Minutes - November 1, 2026
- Pork Loin Pulled Pork Crock Pot Recipe: Slow-Smoked Tenderness With Zero Dryness - November 1, 2026