
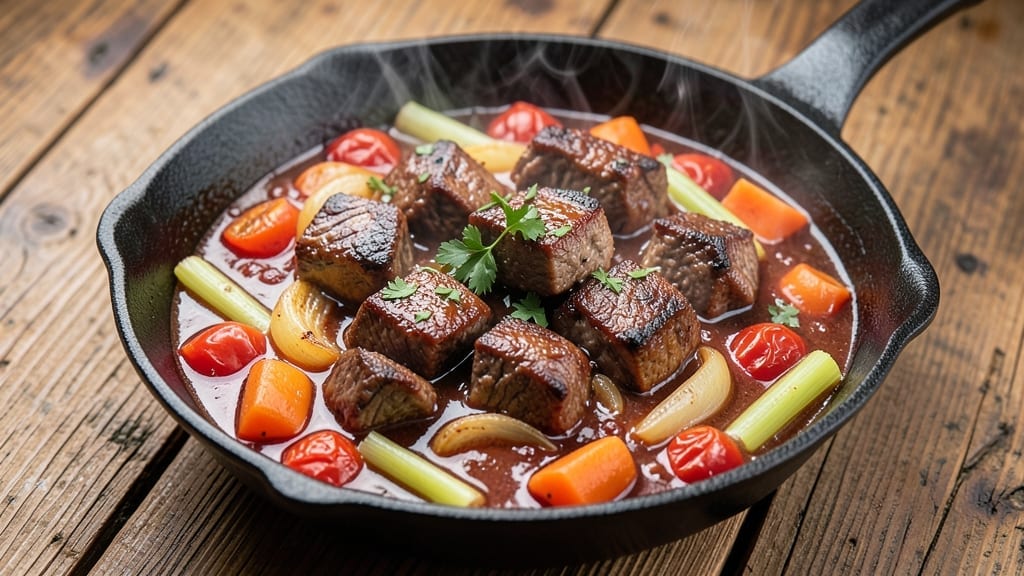
A 3-hour beef stew transforms tough cuts into melt-in-your-mouth tenderness through slow simmering—a technique that builds depth of flavor no shortcut can match.
The secret lies in proper browning of the beef, where caramelized crusts release rich umami into the broth, while aromatic vegetables infuse their essence over hours of gentle cooking. This isn’t just dinner; it’s a flavor journey that rewards patience with every spoonful of velvety, meaty perfection.
What sets this recipe apart is the balance of technique and simplicity. You’ll brown the beef in batches to avoid crowding the pan, creating those essential flavorful bits that form the stew’s foundation.
Then comes the slow simmer—where tough cuts become tender, vegetables soften just enough to release their sweetness, and the broth reduces to a concentrated, savory essence. The result? A hearty stew with layers of complexity that tastes even better the next day.
By the final hour, your kitchen will smell like a homey restaurant, and the stew will be ready to serve—rich with tender beef, perfectly softened vegetables, and a broth so flavorful it coats every bite.
The texture is what makes it special: fork-tender meat that falls apart at the touch, vegetables that hold their shape yet yield their sweetness, and a sauce thick enough to cling to crusty bread or roasted potatoes.
This stew is designed to feed a crowd or stretch into leftovers that taste just as good reheated. Serve it with a hunk of crusty bread to soak up every last drop of that aromatic broth, or pair it with roasted root vegetables for a complete meal.
The beauty of slow cooking lies in its ability to turn simple ingredients into something extraordinary—with just three hours and a little attention to detail.
Ingredients for 3 hour beef stew
Sixteen ingredients, three hours, restaurant-quality beef stew that transforms tough cuts into melt-in-your-mouth perfection.
| Ingredient | Amount | Notes |
|---|---|---|
| Chuck Roast 🥩 | 3 lb | Cut into 1.5-inch cubes, trimmed of fat |
| Yellow Onion 🧅 | 2 whole | Chopped into 1/2-inch pieces |
| Carrots 🥕 | 4 whole | Cut into 1-inch chunks, peeled |
| Celery Stalks 🧄 | 4 whole | Chopped into 1/2-inch pieces |
| Garlic Cloves 🧄 | 6 cloves | Minced, fresh preferred |
| Tomato Paste 🍅 | ½ cup | High-quality, no sugar added |
| Dry Red Wine 🍷 | 1 ½ cups | Bold variety like Cabernet Sauvignon |
| Beef Broth 💧 | 4 cups | Homemade or quality low-sodium |
| Bay Leaves 🌿 | 2 whole | Fresh preferred, remove before serving |
| Fresh Thyme 🌿 | 2 tbsp | Leaves only, chopped |
| Salt 🧂 | 2 tsp | Kosher or sea salt, adjust to taste |
| Black Peppercorns 🌶️ | 1 tsp | Freshly cracked |
| Olive Oil 🫒 | 2 tbsp | High-quality, for browning |
| Flour 🌾 | 2 tbsp | All-purpose, for dredging |
The chuck roast is your flavor foundation. Buy it pre-cut at Costco or your butcher for convenience, but if you’re cubing yourself, look for well-marbled beef—that fat renders into flavor. For the vegetables, organic carrots and celery from the grocery store’s produce section work perfectly, but farmers’ market finds add extra sweetness. The tomato paste? Rao’s or Muir Glen are my go-tos—no sugar added means purer flavor. And that red wine? Whatever bold bottle you’ve got open—Cabernet, Merlot, even a cheap Zinfandel will do the trick.
No red wine? Substitute beef broth with 1 tbsp balsamic vinegar for depth. Fresh thyme unavailable? Dried works at one-third the amount, but toast it first in the pan for 30 seconds to wake up the flavor. The flour isn’t for thickening—it’s for dredging the beef cubes before browning, creating that crucial crust. Skip it if you’re using pre-cut beef that’s already trimmed. For the broth, homemade is ideal, but even the basic boxed stuff works in a pinch. Just remember: salt the broth at the end, not the beginning, so flavors develop properly.
This stew tastes even better the next day—make extra. Store in an airtight container for 5-6 days in the fridge or freeze for up to 6 months. For reheating, use low heat and add a splash of broth or water to prevent drying. The beef will be fork-tender, the vegetables perfectly softened, and that caramelized crust from browning will add layers of umami. Portion into containers for easy lunches, or freeze individual servings for quick meals.
Why You’ll Love This Recipe
- Here’s what sold me: the slow caramelization of garlic cloves right in the pot. That deep, toasty aroma seeps into every bite, turning a simple stew into something ridiculously good. The carrots even get a little sweet—no extra sugar needed.
- Garlic-Glazed Magic: Here’s what sold me: the slow caramelization of garlic cloves right in the pot. That deep, toasty aroma seeps into every bite, turning a simple stew into something ridiculously good. The carrots even get a little sweet—no extra sugar needed.
- Leftovers That Save: Between us, this recipe makes way more than I can eat in one sitting. The next day, I reheat it with a splash of broth and a sprinkle of fresh thyme—still rich, still satisfying. Honestly, it’s my secret weapon for lazy lunches or when I’m too tired to cook.
- Budget Beef Bonanza: A chuck roast is cheap, but it feels like a splurge when it turns out this tender. I stretch it over rice or crusty bread, and suddenly, a $10 cut becomes a $50 meal. Plus, the onions and celery? They’re the kind of veggies that last forever in the crisper.
Step-by-step instructions for 3 hour beef stew
Transform tough chuck roast into tender, melt-in-your-mouth beef with this slow-cooked masterpiece.
Prep and Brown the Chuck Roast
Pat the 3 lb chuck roast dry with paper towels and cut it into 1.5-inch cubes, trimming any excess fat. This helps create a rich, flavorful broth later. Season each piece generously with 1 teaspoon salt and ½ teaspoon freshly cracked black peppercorns—don’t skip this step, as seasoning before browning ensures flavor penetration.
Heat 2 tablespoons olive oil in a large Dutch oven over medium-high heat. Working in batches to avoid crowding, sear the beef cubes for 2-3 minutes per side until deeply browned. You want a rich, caramelized crust—this builds the stew’s deep flavor foundation. Transfer the browned beef to a plate and set aside.
Build the Vegetable Base
In the same Dutch oven, reduce the heat to medium and add 2 tablespoons flour, stirring constantly for 1 minute to cook out the raw flour taste. This creates a light roux that thickens the stew slightly. Immediately add the chopped 2 whole yellow onions, 4 whole carrots, and 4 whole celery stalks, stirring to coat in the flour.
Cook the vegetables for 5-6 minutes, stirring occasionally, until they begin to soften and the flour develops a nutty aroma. Add the 6 minced garlic cloves and cook for another 30 seconds until fragrant. This step develops the stew’s aromatic backbone—don’t rush it or the flavors will be flat.
Deglaze and Simmer the Stew
Pour in the 1.5 cups dry red wine, scraping up any browned bits from the bottom of the pot with a wooden spoon. This deglazing step captures all the meaty flavors you worked so hard to create. Let the wine simmer for 2-3 minutes until it reduces by half and the alcohol burns off.
Stir in the 0.5 cup tomato paste, 4 cups beef broth, 2 whole bay leaves, and 2 tablespoons chopped fresh thyme. Return the browned beef to the pot, along with any accumulated juices from the plate. Bring the mixture to a gentle boil, then reduce heat to low to maintain a steady simmer.
Slow Cook to Perfection
Cover the Dutch oven and let the stew simmer gently for 2.5 hours. The key here is patience—this slow cooking time transforms the tough chuck roast into tender, fork-tender beef. Check occasionally and add ½ cup water if the stew becomes too thick, but avoid stirring too frequently as it can break up the meat.
After 2.5 hours, remove the lid and increase heat to medium-high to reduce the stew slightly, concentrating the flavors. The beef should be so tender it falls apart easily with a fork. Remove and discard the bay leaves before serving—this prevents a bitter aftertaste. Taste and adjust seasoning if needed, adding more salt or pepper as necessary.
Rest and Serve
Let the stew rest for 15-20 minutes before serving. This resting period allows the flavors to meld and the juices to redistribute throughout the stew. The result should be a rich, velvety sauce with perfectly tender beef and vegetables that have absorbed all the savory flavors.
Serve the beef stew hot, ladling it over crusty bread or mashed potatoes. The aroma alone will make your kitchen smell like a cozy country restaurant. Each bite should deliver tender beef, sweet carrots, earthy celery, and a deep, complex sauce that’s the result of hours of slow cooking. Store leftovers in the refrigerator for up to 5 days or freeze for 3 months—if it lasts that long.
Pro Tips For Making 3 Hour Beef Stew
- SEAR THE ROAST FIRST: High heat. Seriously, crank it up to medium-high until the chuck roast develops a deep brown crust—this isn’t just for looks. I learned the hard way that skipping this step leaves the stew tasting flat; that crust locks in flavor during the slow cook. Use about 2 tablespoons of oil, and don’t crowd the pan.
- CUT VEGETABLES UNIFORMLY: No “I’ll eyeball it” nonsense—chop onions into ½-inch chunks, carrots into ½-inch rounds, and celery into ½-inch pieces. My grandmother swore by this, and she was right: even cooking means no mushy bits or undercooked centers. A sharp knife and a steady hand make this faster than you’d think.
- DON’T SKIP THE DEGLAZE: After searing the meat, resist the urge to toss in the veggies right away. Splash in ½ cup of liquid (broth, wine, or even water) and scrape up those browned bits—this is where the flavor hides. I used to rush this, and the stew always tasted dull afterward.
- LOW AND SLOW AFTER 1 HOUR: Once the stew hits a simmer, drop the heat to the lowest setting your stove offers. After 1 hour, if the liquid isn’t reducing enough, cover it loosely and let it bubble gently. Sounds weird, but it works: this keeps the meat tender without turning the carrots to mush. (Yes, even if you’re impatient like me.)
Storing and reheating this recipe
Refrigerator Storage
Let your beef stew cool completely before transferring to airtight containers—I use glass Pyrex with snap-on lids for best results. Store in the refrigerator at 40°F or below for up to 5-6 days.
The flavors actually deepen overnight as the ingredients meld together, making it taste even richer the next day. 💫
Freezer Prep Tips
For long-term storage, portion the stew into freezer-safe containers or quart-sized freezer bags, leaving 1 inch of headspace for expansion. Seal tightly to prevent freezer burn and label with the date. This stew freezes beautifully for up to 6 months, with minimal texture changes when reheated properly.
Stovetop Reheating
My preferred method is stovetop reheating because it preserves the stew’s velvety texture. Transfer portions to a pot and heat over medium-low heat for 10-15 minutes, stirring occasionally. Add ¼ cup beef broth or water if the stew looks dry—this prevents the meat from becoming tough.
Taste and adjust seasoning afterward, as flavors can concentrate during storage. 🔥
Microwave Shortcuts
For quick reheating, use microwave-safe containers and heat on 50% power in 2-minute intervals, stirring between each interval. This gentle approach prevents hot spots and keeps the beef tender.
Cover with a damp paper towel to retain moisture, and add a splash of broth if needed to restore the perfect consistency.
Leftovers Magic
Beef stew tastes even better the next day—make extra if you can! The slow-cooked flavors develop further, and the beef becomes even more tender. Store in individual portions for easy grab-and-go lunches, or freeze single servings for 3-month convenience.
The secret to perfect leftovers? Always reheat gently and never skip the seasoning check. ✨
Serving Suggestions
Serve reheated stew over crusty bread or with buttered egg noodles to soak up every last drop of that rich sauce. For a complete meal, pair with roasted potatoes or a simple green salad.
The contrast of textures makes each bite even more satisfying, and the leftovers reheat beautifully for days of hearty meals. 🍽️
Nutrition facts
Frequently asked questions
Can I use a different cut of beef instead of chuck roast?
For similar results, try stew beef or short ribs. Chuck roast is ideal because of its fat content and flavor, but brisket or round roast will work if cut into small, even pieces. Just remember—leaner cuts like round roast may need a bit more liquid to stay tender during the long simmer.
Why does my stew taste bland after 3 hours?
Bland stew usually means one of two things: either the beef wasn’t properly browned (which builds flavor) or the seasoning was added too early. Always season the beef before browning and taste the finished stew—adding a splash of red wine or a pinch of salt at the end can often rescue it. The key is building layers of flavor through the browning process.
Can I make this stew in a slow cooker instead?
Yes! Brown the beef first in a skillet, then transfer everything to your slow cooker. Cook on low for 7-8 hours or high for 4-5 hours. The slow cooker’s gentle heat will work wonders, but you’ll need to reduce the liquid slightly at the end to concentrate the flavors. The texture will be slightly different but still delicious.
How do I know when the beef is tender enough?
The beef should be so tender it falls apart easily with a fork. After 2.5 hours of simmering, test a piece—if it’s still slightly resistant, let it cook another 30 minutes. Overcooking can make it mushy, so aim for that perfect fork-tender texture where it pulls apart cleanly.
What can I do if my stew is too thin?
Simmer uncovered for 10-15 minutes to reduce the liquid naturally. If that’s not enough, mix 1 tablespoon cornstarch with 2 tablespoons cold water, stir it into the stew, and simmer for another 5 minutes. This creates a smooth thickening without altering the flavor. Just avoid over-reducing or the stew may become gluey.

- Baked Potatoes in Crock Pot Recipe: Buttery Interiors and Crispy Top Magic - November 1, 2026
- Braised Beef Short Ribs Recipe: Crock Pot Fall-Off-Bone Magic in 6 Hours - November 1, 2026
- Crock Pot Cocoa Recipe: Velvety Warmth With Hidden Spice Magic - November 1, 2026