
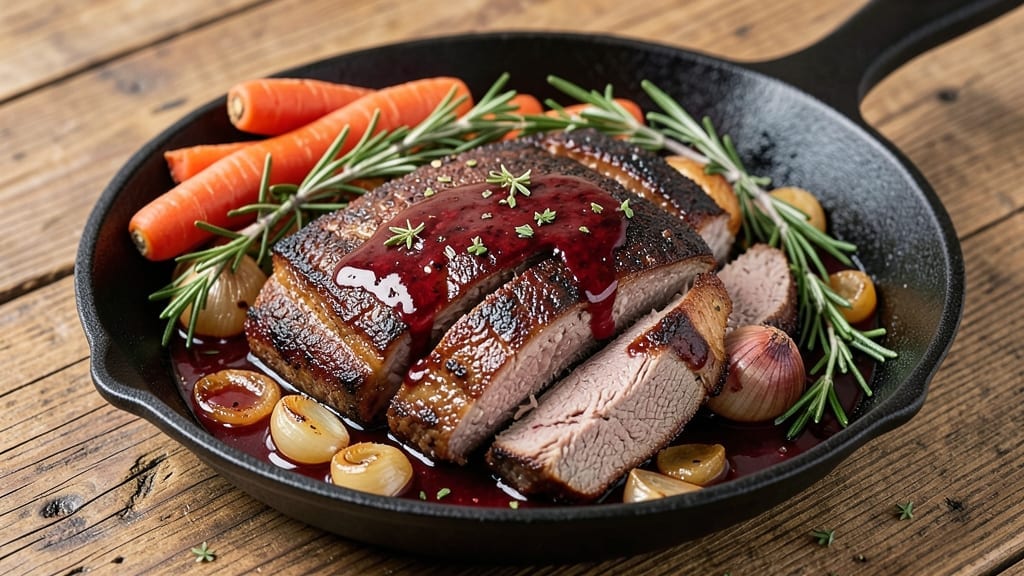
A 3-hour chuck roast recipe transforms tough beef into melt-in-your-mouth shreds with minimal effort—just sear, slow-cook, and let the oven work its magic. The key lies in high, steady heat that tenderizes the meat while developing deep, caramelized flavors in the pan.
This method delivers restaurant-quality results without requiring fancy techniques or expensive equipment.
Begin by searing the chuck roast in a hot Dutch oven until deeply browned on all sides—this step builds flavor that infuses the meat as it cooks. Then, add aromatics like onions, garlic, and herbs before pouring in enough liquid (broth or beer) to partially submerge the roast.
The slow braise breaks down connective tissue, leaving you with fork-tender meat that practically falls apart.
After 3 hours at 300°F, the roast will be so tender it shreds easily, releasing rich, savory juices. Serve it sliced against the grain with mashed potatoes or crusty bread to soak up every last drop.
The aroma alone will have everyone gathering around the table—this is comfort food at its finest, elevated by simple, foolproof techniques.
This recipe scales perfectly for gatherings, and leftovers reheat beautifully. The beauty of chuck roast lies in its versatility—use it for sandwiches, tacos, or simply as a hearty centerpiece. Let’s get cooking!
Ingredients for 3 hour chuck roast
Six aromatics, three liquids, and one key ingredient—chuck roast—that delivers melt-in-your-mouth tenderness after just three hours.
| Ingredient | Amount | Notes |
|---|---|---|
| Chuck Roast 🥩 | 3 lb | Bone-in preferred for flavor |
| Yellow Onions 🧅 | 2 whole | Sliced into wedges |
| Garlic Cloves 🧄 | 6 cloves | Smashed for maximum aroma |
| Carrots 🥕 | 4 medium | Peeled and cut into chunks |
| Fresh Thyme 🌿 | ½ ounce | Or 1 tbsp dried thyme |
| Fresh Rosemary 🌿 | ¼ ounce | Or 1 tsp dried rosemary |
| Beef Broth 💧 | 3 cups | Low-sodium preferred |
| Dry Red Wine 🍷 | 1 cup | Bold variety like Cabernet |
| Tomato Paste 🍅 | 2 tbsp | Smooth, not chunky |
| Extra-Virgin Olive Oil 🫒 | 2 tbsp | For searing |
| Kosher Salt 🧂 | 1 ½ tsp | Diamond Crystal preferred |
| Freshly Ground Black Pepper 🌶️ | 1 tsp | Cracked peppercorns |
| All-Purpose Flour 🌾 | 1 tbsp | For thickening if needed |
The chuck roast is non-negotiable here. Look for cuts with visible marbling—this fat renders during cooking, creating rich, flavorful juices. Costco or local butcher shops often carry the best quality at competitive prices. If you’re buying a whole roast, trim excess fat to 1/4-inch thickness for even cooking. Fresh herbs make all the difference: Trader Joe’s has excellent pre-bundled thyme and rosemary, but if you’re growing your own, snip fresh sprigs straight from the garden for peak flavor. The beef broth should be low-sodium—you’ll control the seasoning, not the packet.
No red wine? Dry white wine or extra beef broth works in a pinch, though the depth of flavor will differ. The tomato paste can be swapped for crushed San Marzano tomatoes if you prefer a less concentrated base. Fresh thyme and rosemary can be substituted with dried at one-third the amount, but toast the dried herbs first in a dry pan for 30 seconds to intensify their aroma. For the carrots, baby carrots or pre-cut chunks save time, though whole carrots peel and chop more evenly. The olive oil matters—use extra-virgin with a high smoke point like Bertolli or California Olive Ranch to prevent burning during the sear.
This dish reheats even better than it tastes fresh—3-4 days in the fridge with flavors deepening over time. For long-term storage, portion into airtight containers and freeze for up to 6 months. The slow-cooked juices make it perfect for sandwiches or tacos later in the week. To serve, shred against the grain using two forks, reserving some of the cooking liquid to deglaze the pan for a rich gravy. The aromatics can be prepped a day ahead, but sear the roast just before slow cooking to maintain that crucial caramelized crust.
Why You’ll Love This Recipe
- Thyme for Magic: That fresh thyme tied around the meat? It’s the secret weapon. The aroma alone makes my kitchen smell like a French bistro, and the flavor? Rich, earthy, and just sweet enough from the caramelized onions and roasted carrots. Honestly, the first bite makes me forget I’m cooking—until I realize how easy it was.
- Budget Hero: A chuck roast is basically the gift that keeps on giving—cheap, hearty, and packed with flavor. I’ve fed six people for under $20, and everyone leaves happy. The onions and carrots stretch the meal further, so it’s not just filling—it’s smart. Plus, no fancy ingredients means no excuses not to make it.
Step-by-step instructions for slow-braised chuck roast
This method transforms tough chuck roast into melt-in-your-mouth shreds through precise timing and technique.
Sear the Chuck Roast for Deep Flavor
Pat the 3 lb chuck roast dry with paper towels—this ensures maximum browning. Heat a Dutch oven over medium-high heat until a drop of the 2 tbsp extra-virgin olive oil sizzles. Add the roast and sear on all sides for 4-5 minutes per side until deeply browned with a crust forming. The color change signals the Maillard reaction, which builds rich flavor.
Remove the roast and set aside. In the same Dutch oven, add the 2 whole yellow onions (sliced into wedges) and cook for 3 minutes until lightly caramelized. Add the 6 smashed garlic cloves and cook for 30 seconds until fragrant. This step develops the aromatic base that will infuse the braising liquid.
Build the Braising Liquid
Return the seared roast to the Dutch oven. Add the 4 medium carrots (cut into chunks), 0.5 ounce fresh thyme, and 0.25 ounce fresh rosemary. Stir in the 2 tbsp tomato paste and cook for 1 minute to deepen its flavor. Pour in the 1 cup dry red wine and scrape up any browned bits from the bottom—this releases flavor locked in the pan.
Add the 3 cups beef broth and bring to a simmer. Sprinkle the roast with the 1.5 tsp kosher salt and 1 tsp freshly ground black pepper. The liquid should come about halfway up the roast—if not, add a splash of water. Cover the Dutch oven and transfer to a preheated 325°F oven.
Braise Until Fork-Tender
Braise for 2 hours, then check for doneness by inserting a meat thermometer into the thickest part of the roast. It should read 195-200°F—this is the “probe-tender” stage where collagen breaks down into gelatin, creating silky texture. If it’s not yet tender, continue braising in 15-minute increments until it reaches the target temperature.
During the last 30 minutes, sprinkle the 1 tbsp all-purpose flour over the roast. This helps thicken the braising liquid into a rich sauce. The flour should dissolve into the liquid without clumping, creating a velvety consistency that coats every bite.
Rest and Shred to Perfection
Remove the roast from the oven and transfer it to a cutting board. Tent loosely with foil and let rest for 15 minutes. This resting period allows the juices to redistribute, ensuring each shred remains moist. Meanwhile, skim excess fat from the braising liquid and reduce it on the stovetop over medium heat until slightly thickened.
Shred the roast using two forks, working against the grain for maximum tenderness. Return the shredded meat to the Dutch oven with the reduced braising liquid and toss to combine. The result should be succulent, flavorful shreds swimming in a rich, aromatic sauce—ready to serve immediately over mashed potatoes, crusty bread, or egg noodles.
Pro Tips For Making 3 Hour Chuck Roast
- SEAR THE ROAST FIRST: I learned this the hard way—skipping the sear means flavor just sits there, untouched. Hit that chuck roast with high heat in a hot Dutch oven or skillet until it’s deep brown on all sides (about 3-4 minutes per side). The crust locks in juices and turns that bland roast into something worth waiting for.
- CHAR YOUR ONIONS: Those yellow onions aren’t just there to soften—they need to caramelize. After searing the roast, pull it out, crank the heat to medium-high, and let the onions brown for 8-10 minutes before adding anything else. The deeper the color, the sweeter the flavor, and trust me, your dish will taste like you actually cooked it.
- DON’T OVERCROWD THE PAN: I used to dump everything in at once, thinking it’d speed things up. Wrong. After searing the roast and onions, add the carrots and garlic, but give them space. Overcrowding steams instead of browns, and you’ll end up with mushy veggies instead of caramelized bites. Work in batches if needed.
- REST THE MEAT UNDER FOIL: The moment that roast hits 145°F (or your preferred temp), pull it out and tent it loosely with foil. Let it sit for 10-15 minutes—yes, even if you’re starving. Skipping this step means dry, stringy meat, and nobody wants that after three hours of waiting. Patience here makes all the difference.
Wine and beer pairings for this 3 hour chuck roast
Red Wine Pairings
A bold Cabernet Sauvignon from Napa Valley is my go-to choice for this dish—its rich, dark fruit flavors and subtle tannins complement the deep, caramelized notes of the braised chuck roast. Look for a 2018 or newer vintage with at least 13% alcohol to stand up to the dish’s intensity.
The wine’s acidity also cuts through the richness, cleansing your palate between bites. 🍷
If you prefer something lighter, a Chianti Classico from Tuscany offers bright cherry and herbal notes that pair beautifully with the rosemary and thyme in the recipe. Opt for a Sangiovese-based blend with moderate tannins to avoid overpowering the tender meat.
Both wines enhance the meal’s rustic charm while keeping the focus on the chuck roast’s natural flavors.
Beer Pairings
A dark amber ale like Guinness or Samuel Smith’s Nut Brown Ale brings malty sweetness that balances the savory depth of the braised meat. The beer’s caramel and toasted notes mirror the caramelized onions and carrots in the dish, creating harmony with each bite.
Serve it slightly chilled to highlight its complexity. 🍺
For beer lovers, a Belgian-style dubbel with its rich, spiced profile works wonders. Brands like Westmalle Dubbel or Chimay Blue add layers of dark fruit and baking spices that echo the thyme and rosemary in the recipe. The beer’s slight bitterness also helps balance the dish’s richness without overpowering it.
Non-Alcoholic Options
For a refreshing non-alcoholic pairing, try a sparkling cranberry-ginger beverage like Zevia Cranberry Ginger. The tartness and effervescence cut through the richness of the braised meat, while the ginger adds a subtle warmth. Serve it ice-cold for the best contrast. 🥤
Another great option is a smoky black tea like Lapsang Souchong, which complements the dish’s savory, caramelized flavors without competing. Brew it strongly and serve it chilled with a splash of lemon to enhance its complexity. This pairing works surprisingly well for both tea lovers and those avoiding alcohol.
Nutrition facts
Frequently asked questions
Why does chuck roast need to cook for 3 hours?
The 3-hour cook time is key for transforming tough chuck roast into fork-tender shreds. At 325°F, the slow braise breaks down collagen in the meat’s connective tissue, converting it into gelatin that makes the texture melt-in-your-mouth. This method also allows flavors to develop deeply through the Maillard reaction and caramelization of aromatics.
Can I use a different cut of beef instead of chuck roast?
While chuck roast is ideal, you can substitute with bottom round or brisket—both have similar connective tissue. Avoid leaner cuts like sirloin, which won’t become tender with this method. If using brisket, increase cooking time by 30-45 minutes since it’s thicker. The flavor profile will differ slightly but still deliver excellent results.
What if my oven runs hotter than 325°F?
Most home ovens run 25-50°F hotter than set temperatures. To compensate, reduce heat to 300°F and check the roast after 2 hours. Use a meat thermometer—it should reach 195-200°F for perfect tenderness. If your oven is particularly hot, consider using an oven thermometer to monitor accuracy during cooking.
How do I store leftovers?
Store shredded chuck roast in an airtight container in the fridge for 3-4 days or freeze for up to 6 months. Reheat gently in a skillet with a splash of broth or water to maintain moisture. For best texture, reheat to 165°F—this preserves the meat’s tenderness and prevents drying out.
Can I make this in a slow cooker instead?
Yes! Sear the roast first, then transfer to a slow cooker with all ingredients (except flour). Cook on low for 8 hours or high for 5 hours. The flour should be added during the last 30 minutes on the stovetop to thicken the sauce. The texture will be slightly different but still delicious—just expect more liquid since slow cookers don’t evaporate as much.

- 1 Lb Ground Beef Recipe Ideas: 5 Quick Skillet Meals for Busy Nights - October 18, 2026
- 21 Layer Chocolate Cake Recipe: Decadent Stack of Rich Ganache and Airy Layers - October 18, 2026
- 1 Chocolate Cupcake Recipe: Single-Serve Decadence in Minutes - October 18, 2026