
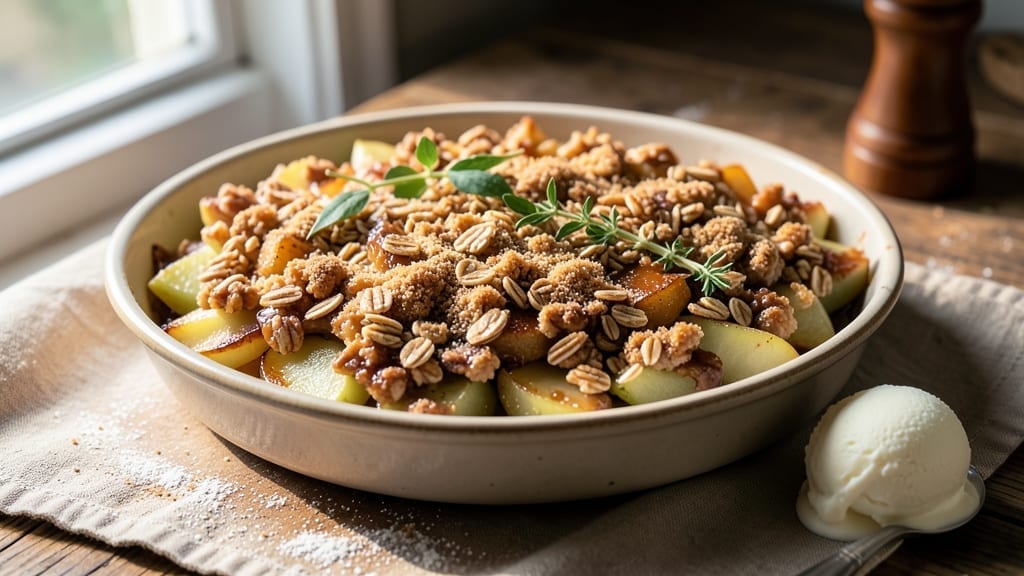
This 3 ingredient apple crisp recipe delivers all the warm, spiced comfort of a classic dessert without the complicated layers or long baking time. The secret lies in a simple oat topping that transforms tender apples into a foolproof crunchy finish—ready in under 30 minutes.
I developed this version after realizing most recipes overcomplicate what should be a quick, satisfying treat. What makes this crisp special is the balance: tart apples caramelize beautifully while the oat topping stays crispy, not soggy.
The cinnamon in the apples infuses the topping with warm spice, creating that signature apple crisp flavor without extra ingredients. You’ll need just one bowl for prep and one pan for baking—minimal effort for maximum comfort.
By the time it emerges from the oven, you’ll have a dessert that looks like it took hours to make—golden brown apples peeking through a crunchy oat lattice, with that unmistakable cinnamon aroma filling your kitchen. The best part?
It’s ready when you are, perfect for a quick weeknight dessert or a last-minute gathering treat. Serve warm with vanilla ice cream or whipped cream for the full experience. Here’s how to make it—simple, foolproof, and always impressive.
Ingredients for 3 ingredient apple crisp
Three ingredients, one bowl, thirty minutes—warm spiced apples with a crunchy oat crown.
| Ingredient | Amount | Notes |
|---|---|---|
| Granny Smith Apples 🍎 | 4 medium | Peeled, cored, sliced thin |
| Old-Fashioned Rolled Oats 🌾 | 2 cups | Quick or old-fashioned, not instant |
| Light Brown Sugar 🍚 | ¾ cup | Packed firmly, not leveled |
| Ground Cinnamon 🌿 | 1 ½ tbsp | Freshly ground preferred |
| Unsalted Butter 🧈 | ½ cup | Cold, cubed for topping |
| Vanilla Ice Cream 🍦 | 1 cup | For serving, optional |
Granny Smiths are non-negotiable here—their tartness balances the sweetness perfectly. Local farmers markets often have them cheaper than grocery stores, and they keep for 2 weeks in the fridge. If you can’t find Granny Smiths, Honeycrisp or Fuji work too, but they’ll be sweeter. The apples need to be firm but ripe—press gently, they should give just a little. I always peel mine (the skin can get tough when baking), but if you’re in a rush, skip it. Just core and slice them about 1/4-inch thick—thinner slices caramelize faster.
No rolled oats? Quick oats will work in a pinch, but they won’t be as crispy. The brown sugar should be packed firmly into the measuring cup—tap it gently to remove air bubbles. For extra warmth, add a pinch of nutmeg to the cinnamon. The butter matters here—use cold, cubed butter for the topping so it creates pockets of crispiness. If you’re watching sugar, you can reduce the brown sugar to 0.5 cup and add 1 tbsp maple syrup to the apples. The vanilla ice cream is optional but recommended—Breyers Homemade Vanilla or store-brand works perfectly.
Prepped apples can sit in a bowl for 1 hour before baking—toss them with cinnamon right before adding the topping. The oat mixture stays fresh for 2 days in the fridge, covered tightly. For a quick dessert, assemble the crisp and bake straight from the fridge—it’ll take 5 minutes longer but saves time. Leftovers? Reheat in 10-second bursts in the microwave—just enough to warm the apples without turning the topping soggy.
Why You’ll Love This Recipe
- No Chopping Chaos: Honestly, I slice those Granny Smiths while I’m talking to you—no peeling, no fuss. The crisp’s magic happens in the tossing, not the prep.
- Taste Like Autumn: That tart Granny Smith with the caramelized brown sugar? It’s the kind of flavor that makes you slow down mid-bite. The cinnamon oat topping? Pure comfort in every crunch.
- Weeknight Hero: I’ve served this warm with vanilla ice cream, packed it for lunch, even reheated leftovers for breakfast. It’s the ultimate “I don’t know what I’m doing” dish that always works.
- Pantry Staple Power: Butter, sugar, oats—you’re probably already stocked. No specialty ingredients, no last-minute grocery runs. And the leftovers? Still delicious the next day, no question.
Step-by-step instructions for 3 ingredient apple crisp
Here’s how to create a perfectly balanced crisp with tender apples and a crunchy oat topping—no fancy techniques required.
Prep and Toss the Apples
Peel, core, and slice the 4 medium Granny Smith Apples into thin, even pieces—about ¼-inch thick. The thinner the slices, the faster they’ll soften and release their juices. Spread them in a single layer across a 9×9-inch baking dish, leaving no gaps between slices. This ensures even cooking and maximum caramelization.
In a small bowl, whisk together the 0.75 cup Light Brown Sugar and 1.5 tablespoons Ground Cinnamon. Sprinkle this mixture evenly over the apple slices, pressing gently so it sticks. The sugar will help draw out moisture while the cinnamon infuses every bite with warm spice. Don’t skip this step—it’s what transforms simple apples into something extraordinary.
Assemble the Oat Topping
In a medium bowl, combine the 2 cups Old-Fashioned Rolled Oats with the 0.5 cup Unsalted Butter, cubed. Use your fingers to work the butter into the oats until the mixture looks crumbly and evenly coated. You should have a texture similar to wet sand—moist enough to hold together but not sticky. This creates the perfect balance of crispy and crunchy in every bite.
Real talk: if your butter feels too soft, chill the mixture for 10 minutes before proceeding. Cold butter creates a better crunch, while warm butter makes the topping too dense. Sprinkle the oat mixture evenly over the apples, pressing down lightly with your fingers to create a compact layer. This prevents the topping from sliding off during baking.
Bake Until Golden and Bubbling
Preheat your oven to 375°F. Place the baking dish on the middle rack and bake for 25-30 minutes, until the edges are deep golden brown and the apples are tender enough that a fork slides in easily. You’ll know it’s done when you see bubbles forming in the filling and the oat topping looks toasted—not just lightly browned.
Here’s the thing—don’t overbake. The crisp will continue cooking slightly as it rests, and you want those apples to stay tender, not mushy. If the top isn’t brown enough after 25 minutes, broil for 1-2 minutes at the end, watching closely to avoid burning. Let the crisp cool for 10 minutes before serving—this allows the juices to set and makes the first bite even more satisfying.
Serve Warm with Ice Cream (Optional)
Scoop the warm crisp into bowls and serve immediately. The contrast between the warm, spiced apples and the cool vanilla ice cream is what makes this dish truly special. If you’re serving the 1 cup Vanilla Ice Cream, let it soften slightly before scooping—this makes it easier to mix with the warm filling.
For an extra touch, drizzle a little of the caramelized apple juice from the baking dish over the top. This adds depth of flavor and ties everything together. Each bite should deliver tender, cinnamon-kissed apples with a satisfying crunch from the oat topping—simple ingredients transformed into something truly comforting.
Pro Tips For Making 3 Ingredient Apple Crisp
- Preheat That Pan: I learned this the hard way—skipping the preheat means the butter melts unevenly and you end up with a soggy bottom. Get your baking dish in the oven for 5 minutes at 375°F before adding anything. The butter will melt instantly, and your crisp topping will crisp up faster.
- Cut Apples Small: Big chunks stay undercooked, and you end up with a mushy center. Quarter the Granny Smiths, then slice each quarter into thin half-moons—about ¼-inch thick. They’ll soften evenly and caramelize without turning to applesauce.
- Skip the Overmixing: The second you start stirring the oats, sugar, and cinnamon with wet butter, you risk turning the topping into a paste. Toss the dry ingredients together first, then cut in the butter with a fork or your fingers until it’s crumbly but still holds shape. Messy? Yes. Better texture? Absolutely.
- Bake Until Golden: The topping won’t crisp up if you pull it out too soon. Let it bake until the edges are deep golden—almost brown—and the center is just starting to puff. If you’re unsure, walk away for 5 minutes. That’s when the magic happens. (Your future self will thank you.)
Pro cooking tips for this recipe
Oven Temperature Secrets
Your oven’s accuracy is everything here—I recommend using an oven thermometer to verify it’s actually at 375°F. Many home ovens run hot or cold, and this crisp relies on precise heat.
If your oven runs hot, reduce the temp to 350°F and add 5 minutes to the baking time. For even browning, rotate the pan halfway through baking. 🌡️
Apple Slice Precision
Consistency is key with apple slices—use a mandoline slicer for uniform ¼-inch slices if you have one. If not, a sharp chef’s knife works fine. The thinner the slices, the faster they’ll soften and release juices.
Arrange them in a single layer with no overlaps to ensure even cooking and maximum caramelization.
Butter Texture Matters
Cold, cubed butter is non-negotiable for that perfect crunchy topping. If your butter feels too soft from the fridge, pop the oat mixture in the freezer for 10 minutes before assembling.
This creates tiny pockets of air that expand during baking, giving you that satisfying crunch. Avoid melting the butter—this makes the topping dense and less crisp.
Baking Time Flexibility
Your crisp might be ready in 25 minutes or need 30 minutes—it depends on your oven and apple ripeness. The perfect moment is when the edges are deep golden brown and you see bubbles forming in the filling.
For extra color, broil for 1-2 minutes at the end, but watch closely to avoid burning.
Resting for Best Results
Never skip the 10-minute rest**—this allows the juices to redistribute and the topping to set properly. The first bite out of the oven might seem perfect, but waiting ensures the apples stay tender and the oat topping maintains its crunch.
This is where many home cooks rush and end up with a soggy bottom.
Juice Redistribution Hack
After baking, pour any caramelized apple juice from the pan over the top before serving. This adds depth of flavor and ties everything together beautifully. For an extra touch, sprinkle with flaky sea salt—just a pinch enhances all the sweet and spiced flavors. 💫
Nutrition facts
Frequently asked questions
Can I use any type of apple for this recipe?
Granny Smith apples are ideal because their tartness balances the sweetness perfectly. For a sweeter version, Honeycrisp or Fuji work well, but they’ll need more cinnamon (try 2 tablespoons instead of 1.5). Avoid overly soft apples like Red Delicious—they’ll turn mushy during baking.
Why does my oat topping get soggy?
Soggy topping usually means one of two things: butter that’s too soft or underbaking. Use cold, cubed butter and chill the oat mixture for 10 minutes if needed. Also, bake until the edges are deep golden brown—30 minutes at 375°F is standard, but check at 25 minutes.
Can I make this crisp ahead of time?
Assemble the crisp (without baking) and refrigerate for up to 24 hours. Bake straight from the fridge—it’ll take 5 extra minutes but saves time. For leftovers, reheat in 10-second microwave bursts to keep the topping crispy. The flavors actually improve overnight!
What if I don’t have vanilla ice cream?
No problem! Serve warm with whipped cream, Greek yogurt, or even a dollop of caramel sauce. For a dairy-free option, try coconut whipped cream or sorbet. The warm-spiced apples shine with any creamy topping—just keep it cool to contrast the warm dessert.
How do I make this gluten-free?
Swap the rolled oats for certified gluten-free oats and use a 1:1 gluten-free oat flour blend (like Bob’s Red Mill) for the topping. The texture will be slightly different but still delicious. For extra crunch, add 2 tablespoons chopped nuts to the topping before baking.

- 12 Bean Chili Recipe: Hearty Slow-Cooked Depth With 12 Legumes - October 17, 2026
- 5 Seed Bread Recipe: Nutty Crunch and Artisan Flavor in One Loaf - October 17, 2026
- 1 Lb Macaroni Salad Recipe: Bold, Crunchy, and Crowd-Pleasing - October 17, 2026