
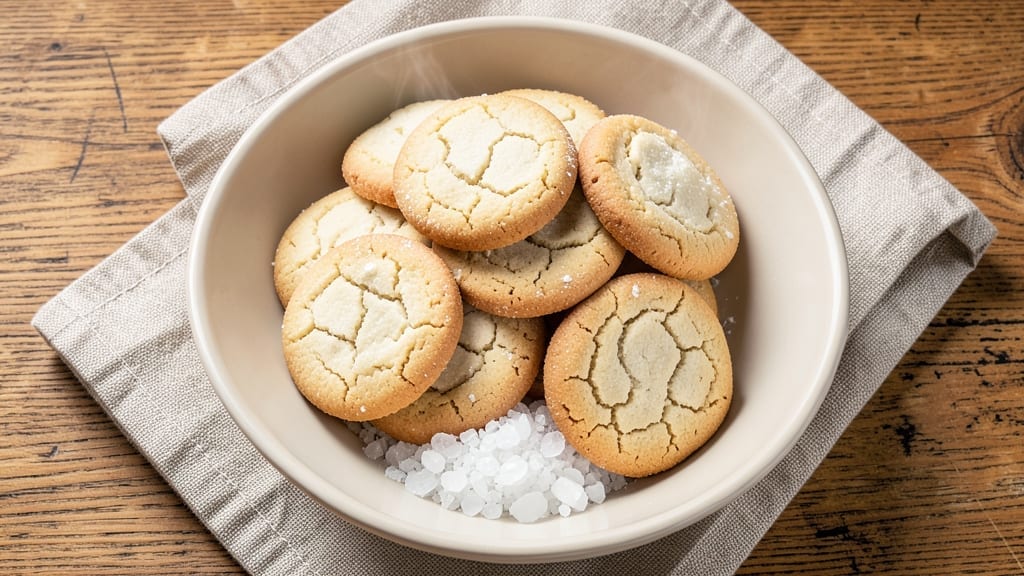
This 3-ingredient butter shortbread cookies recipe delivers the perfect balance of simplicity and indulgence—no fancy techniques, just a few minutes of mixing and baking for buttery, crumbly cookies that taste like a bakery secret.
The magic lies in cold butter and precise measurements, creating those signature tender layers and crisp edges without extra flour or sugar. I’ve been making these for holiday gifts and they disappear faster than I can say “shortbread.”
What makes these cookies truly special is their foolproof nature—no rolling, no chilling dough, and no waiting. The recipe relies on cold butter cut into flour, which creates steam during baking for that signature texture.
With just a 10-minute prep time and 12-15 minutes in the oven, you’ll have warm, golden cookies ready to serve. The simplicity doesn’t compromise on flavor; every bite delivers that classic buttery richness with just a hint of sweetness.
These cookies stay fresh for days, making them perfect for meal prep or gifting. The dough can be shaped into classic rounds, festive shapes, or even pressed into cookie molds for special occasions.
For an extra touch, sprinkle with flaky sea salt or a light dusting of powdered sugar while still warm. The result is a cookie that’s both elegant and effortless—ideal for busy bakers who still want to impress.
Once you master this recipe, you’ll find endless variations—adding lemon zest, vanilla extract, or even a pinch of cinnamon to create your own signature twist. The beauty of shortbread is its adaptability, but the core remains the same: rich, buttery, and utterly satisfying. Let’s get baking!
Ingredients for 3 ingredient butter shortbread cookies
Three ingredients. Zero fuss. The perfect buttery cookies in minutes.
| Ingredient | Amount | Notes |
|---|---|---|
| Unsalted Butter 🧈 | 1 cup | Cold, cut into small cubes |
| All-Purpose Flour 🌾 | 2 cups | Sifted for light texture |
| Granulated Sugar 🍚 | ¼ cup | White or light brown |
The butter is everything here—cold and unsalted is non-negotiable. Grab the European-style butter from the grocery store’s dairy section (Plugrá or Land O’Lakes European Style) if you can—it’s higher in fat, which means richer cookies. If you only have regular butter, that’s fine, but let it sit in the fridge for 30 minutes before cutting it. The sugar? White or light brown works, but brown adds just a hint of caramel flavor. Flour? King Arthur or Gold Medal brands are my go-tos—they’re reliable and consistent. Pro tip: weigh your flour if you have a kitchen scale, but if not, spoon it into the cup and level it off for accuracy.
No butter? Coconut oil works in a pinch (solid, not melted), but the flavor won’t be the same. Running low on sugar? Powdered sugar at half the amount is a decent swap, but the cookies will be slightly softer. Flour substitutes? Almond flour or oat flour can replace up to half, but texture changes dramatically. The dough is so simple that even if you mess up measurements, it’ll still taste good—just not perfect. And trust me, these cookies are worth the precision. If you’re feeling fancy, add a pinch of flaky sea salt to the dough or sprinkle it on top after baking for a gourmet touch.
This dough is a dream to store. Shape the cookies and freeze them on a tray for 1 hour, then transfer to a sealed container for up to 3 months. Freshly baked? Keep in an airtight container for 5 days—they’ll stay crisp. Want to make ahead? Shape the dough into logs, wrap in plastic, and chill for 24 hours before baking. The flavor actually improves overnight as the flour absorbs the butter. And if you’re gifting? Pack them in a tin with parchment paper between layers. They’ll look (and taste) like you spent hours in the kitchen.
Why You’ll Love This Recipe
- Pantry Magic: I swear, I’ve made this with whatever butter and flour was on hand—no fancy measuring cups, no stress. Just cold butter, a pinch of sugar, and the flour you already own. That’s it. The dough comes together in minutes, and honestly? It’s the kind of recipe that makes me feel like a baking genius without any effort.
- Buttery Bliss: The second those golden edges form, you’ll understand why this is my go-to. That crispy, melt-in-your-mouth texture? It’s all thanks to the butter and sugar working together—no weird aftertaste, just pure, rich satisfaction. I’ll be real: I’ve burned batches, but even those taste like a hug.
- Holiday or Hangry Fix: Between us, these are my secret weapon for last-minute gifts or when I just need something sweet now. Wrap them in parchment, tie with twine, and boom—instant hostess gift. Or, if you’re me, eat them straight from the pan while they’re still warm. No judgment.
- Zero-Waste Winner: The dough keeps for days in the fridge, and the cookies? They stay fresh for weeks if you’re not careful. Plus, the ingredients cost next to nothing—this is the kind of recipe that stretches your budget without stretching your patience. I’ve made these for potlucks, school lunches, and even as a “dessert” when I forgot to grocery shop. It’s unfussy, reliable, and always delivers.
Step-by-step instructions for 3-Ingredient butter shortbread cookies
Here’s how to transform just three simple ingredients into melt-in-your-mouth shortbread cookies.
Cut and Mix the Cold Butter
Start by cutting the 1 cup unsalted butter into small, pea-sized cubes. I like to use my chef’s knife for this—it gives me better control than a butter knife. Place the cubes in the bowl of a stand mixer fitted with the paddle attachment or in a large mixing bowl if using a hand mixer.
Mix the butter on low speed for 2-3 minutes until it becomes smooth and creamy but still maintains its cold texture. You’re looking for a light, fluffy consistency that’s almost like whipped butter. This cold mixing technique is crucial—it creates tiny air pockets that give shortbread its signature crumbly texture. If the butter starts to melt too quickly, chill the bowl in the freezer for 5 minutes to reset the temperature.
Gradually Add the Dry Ingredients
With the mixer still running on low speed, gradually add the 2 cups all-purpose flour and 0.25 cup granulated sugar. I like to sprinkle them in a slow, steady stream to prevent any flour from flying around your kitchen. Mix for another 1-2 minutes until the dough just comes together.
Here’s the thing—you don’t want to overmix. The moment the dough forms a shaggy mass that pulls away from the sides of the bowl, stop mixing immediately. Overworking the dough develops gluten, which makes shortbread tough instead of crumbly. If the dough seems too dry, you can add 1-2 teaspoons of cold water to help it bind, but don’t add more than that or the texture will suffer.
Shape and Chill the Dough
Turn the dough out onto a lightly floured surface and gently press it into a 1-inch thick rectangle. I use my hands for this—press down firmly but evenly to create a smooth, consistent shape. Wrap the dough tightly in plastic wrap and refrigerate for at least 30 minutes (or up to 24 hours).
This chilling step is non-negotiable. It firms up the butter, which prevents the cookies from spreading too much in the oven. The longer you chill the dough, the more flavor develops, but even 30 minutes makes a noticeable difference. If you’re short on time, you can chill the dough in the freezer for 15 minutes—just make sure it’s completely cold before shaping.
Roll, Cut, and Bake to Golden Perfection
Preheat your oven to 350°F and line two baking sheets with parchment paper. On a lightly floured surface, roll out the chilled dough to ¼-inch thickness. I use a rolling pin for this, but I also press down gently with my hands to ensure even thickness. Use a 2-inch round cutter (or a glass) to cut out cookies, gently re-rolling the scraps and cutting more shapes as needed.
Place the cut cookies on the prepared baking sheets, leaving 1 inch of space between each one. Bake for 12-15 minutes until the edges are just beginning to turn golden brown—they’ll continue baking on the hot sheet after you remove them from the oven. The centers should still look slightly pale when you take them out. Let the cookies cool on the baking sheet for 5 minutes before transferring them to a wire rack to cool completely. They’ll firm up as they cool, becoming crisp and crumbly.
Pro Tips For Making 3 Ingredient Butter Shortbread Cookies
- CHILL THE DOUGH: If you roll it out too soon, the butter will melt and your cookies will spread into sad, flat pancakes. Wrap the dough in plastic and refrigerate for at least 30 minutes—yes, even if you’re impatient. I used to skip this and ended up with a tray of buttery puddles instead of crisp edges.
- WEIGH YOUR FLOUR: Scooping flour from the bag packs too much air into your dough, making it tough and dense. Use a kitchen scale and measure by weight—1 cup of all-purpose flour is about 125 grams. I learned this the hard way after making a batch that crumbled like dry bread.
- CUT THIN STRIPS: Thick cookies bake unevenly and turn out greasy. Roll your dough to ¼-inch thickness and cut it into 2-inch squares or strips—just enough to fit on a baking sheet with space. My first attempt used ½-inch dough, and the centers stayed doughy while the edges burned.
- BAKE LOW AND SLOW: Preheat your oven to 325°F (not 350°F)—higher heat makes the butter melt too fast, ruining the texture. Bake for 12–15 minutes until just golden at the edges, not the centers. I was skeptical until I tried it: the cookies stay crisp without turning into butter logs.
Essential equipment for great 3 ingredient butter shortbread cookies
Stand Mixer Magic
Your stand mixer is the MVP for this recipe—it handles the cold butter beautifully without melting it too fast. I use my KitchenAid Artisan Series with the paddle attachment set to low speed for consistent results.
If you don’t have a mixer, a hand mixer works too, but keep the speed gentle to avoid warming the butter. For the ultimate shortcut, pulse the butter in a food processor for 30 seconds until crumbly, then proceed with the dry ingredients. 💫
Rolling Pin Essentials
A non-stick rolling pin (like the OXO Good Grips) is a game-changer for shortbread—it prevents dough from sticking and ensures even thickness. If you’re rolling by hand, press firmly but evenly to avoid uneven pressure.
For extra precision, chill your rolling pin in the freezer for 5 minutes before use, especially in warm kitchens. A glass or metal cutter (like a 2-inch round cookie cutter) works best for clean edges, but a rimmed glass does the trick in a pinch.
Baking Sheet Must-Haves
Use light-colored, heavy-duty baking sheets (like Nordic Ware Half-Sheet Pans) to prevent burning and ensure even heat distribution. Line them with parchment paper cut to size—this prevents sticking and makes cleanup effortless. For high-altitude baking, reduce oven temp to 325°F and bake for 14-16 minutes to avoid over-browning.
A wire cooling rack is non-negotiable for crispy results—it allows air circulation so cookies don’t steam and soften.
Optional Extras
A pinch of flaky sea salt (like Maldon) elevates these cookies to gourmet status—sprinkle it on top before baking for a perfect sweet-salty balance. For festive shapes, invest in cookie cutters (I love the Wilton Holiday Collection).
And if you’re feeling fancy, a pastry brush helps dust powdered sugar evenly on cooled cookies. Even a small offset spatula comes in handy for scraping every last bit of dough from the bowl! ✨
Nutrition facts
Frequently asked questions
Can I use salted butter instead of unsalted?
Yes, but reduce the sugar slightly to balance the saltiness. Use ¼ cup sugar instead of ⅓ cup if using salted butter. The flavor will still be rich, but the salt will enhance the buttery taste. For best results, stick with unsalted butter—it gives you full control over the flavor profile.
Why do my shortbread cookies turn out tough instead of crumbly?
Overmixing is the #1 culprit—stop mixing as soon as the dough forms a shaggy mass. Also, ensure your butter stays cold throughout the process. If the dough feels warm, chill it for 10 minutes before rolling. Another tip: don’t skip the 30-minute chill before baking—it’s what creates that signature tender texture.
Can I make these without a mixer?
Use a fork or your fingers to cut the cold butter into the flour until it resembles coarse crumbs. Then, press the mixture together with your hands until it just holds. The texture will be slightly less smooth, but the cookies will still be delicious. Just be gentle when mixing to avoid developing gluten.
How do I store these cookies to keep them crisp?
Store in an airtight container with parchment paper between layers. For maximum crispness, keep them at room temperature for 3-4 days. For longer storage, freeze the baked cookies (unfrosted) for up to 3 months. Thaw at room temperature—no need for the oven!
Can I add flavorings like vanilla or citrus zest?
Yes! The beauty of shortbread is its versatility. Add 1 teaspoon vanilla extract or 1 tablespoon lemon zest to the dough for a flavor twist. For citrus, use ½ teaspoon zest (too much can make the cookies bitter). Just remember these are still “3-ingredient” cookies—substitute one of the base ingredients if you want to keep it strictly minimalist.

- Baked Potatoes in Crock Pot Recipe: Buttery Interiors and Crispy Top Magic - November 1, 2026
- Braised Beef Short Ribs Recipe: Crock Pot Fall-Off-Bone Magic in 6 Hours - November 1, 2026
- Crock Pot Cocoa Recipe: Velvety Warmth With Hidden Spice Magic - November 1, 2026