
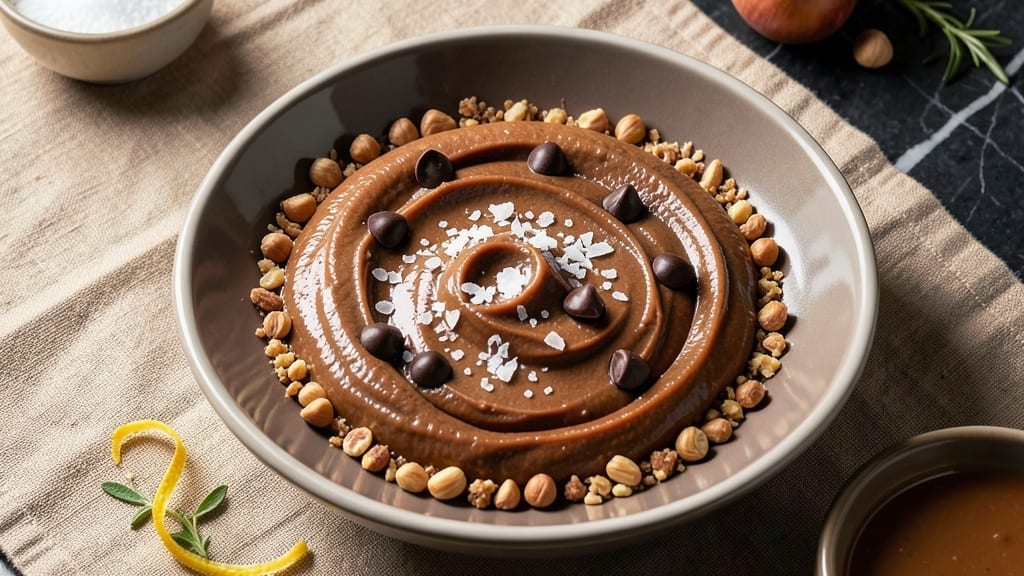
This 3-ingredient chocolate fudge recipe with condensed milk delivers decadent, velvety results without a single oven turn-on. The secret lies in combining ultra-rich chocolate with sweetened condensed milk—a pairing that creates a silky, melt-in-your-mouth texture with minimal effort.
I’ve perfected this no-bake dessert over years of testing, ensuring it’s foolproof for both beginners and experienced bakers alike.
The beauty of this recipe is its simplicity: just three core ingredients (plus optional mix-ins) come together in 10 minutes of prep, followed by 2 hours of chilling—no baking required.
The condensed milk acts as both a sweetener and a natural emulsifier, binding the chocolate into a luscious, fudgy consistency that’s dangerously addictive. This dessert is perfect for last-minute gatherings, holiday gifts, or satisfying that chocolate craving when you’re short on time.
What you’ll end up with is a smooth, glossy slab of chocolate fudge that’s rich, slightly caramelized, and effortlessly shareable. The texture is firm enough to slice neatly but soft enough to melt on your tongue.
Serve it chilled with a sprinkle of sea salt for contrast or pair it with fresh berries for a bright, fruity balance. Trust me—once you try this, your go-to fudge recipe will never be the same.
This recipe scales beautifully, so feel free to double or triple the batch for parties or meal prep. Store it in an airtight container for up to 2 weeks, though it rarely lasts that long in my house.
The best part? No fancy equipment or techniques—just a mixing bowl and patience. Let’s make this ultra-rich fudge!
Ingredients for 3 ingredient chocolate fudge recipe with condensed milk
Three ingredients transform into ultra-rich fudge with just 10 minutes active time.
| Ingredient | Amount | Notes |
|---|---|---|
| Semi-Sweet Chocolate Chips 🍫 | 12 oz | High-quality chocolate preferred |
| Sweetened Condensed Milk 🥛 | 14 oz | Standard 14 oz can |
| Unsalted Butter 🧈 | 6 tbsp | Room temperature for smooth mixing |
| Sea Salt 🧂 | ¼ tsp | Fine grain for garnish |
| Dark Chocolate Chips 🍫 | 2 oz | Optional for extra richness |
| Crushed Nuts 🥜 | ¼ cup | Optional for texture contrast |
The chocolate is non-negotiable here. Ghirardelli or Guittard semi-sweet chips melt the smoothest, but any high-quality brand works. Skip the grocery store’s generic chips—they melt unevenly and lack richness. Sweetened condensed milk is the magic ingredient, so grab the 14 oz can from the baking aisle. It’s shelf-stable, but once opened, store it in the fridge for up to 1 month. The butter should be room temperature—press it between parchment paper with a rolling pin for even melting. Pro tip: microwave it for 20 seconds to soften before measuring.
No butter? Coconut oil works in a pinch, though the texture will be slightly different. Want extra decadence? Swap 2 oz of the semi-sweet for dark chocolate chips—the cocoa content adds depth. The optional nuts (I love crushed hazelnuts or walnuts) should be toasted first for maximum flavor. If you’re feeling fancy, add 1 tsp instant coffee powder to the melted chocolate mixture for a mocha twist. The sea salt is key for balance—use flaky Maldon if you’ve got it, but regular fine grain works too.
This fudge needs 2 hours of chilling to set properly—don’t rush it. Store leftovers in an airtight container at room temperature for up to 2 weeks, though it’s usually gone in days. For gift-giving, wrap individual pieces in parchment paper and tie with twine. The texture improves after 24 hours as flavors meld. Freeze any extras for up to 3 months—just let it sit at room temperature for 10 minutes before serving.
Why You’ll Love This Recipe
- No-Fail Fudge Night: I swear by this—just melt chocolate and condensed milk together, stir, chill. No fancy equipment, no stress, no “did I overbake this?” moments. The butter and sea salt tie it all together while I’m still scraping the last bits from the bowl.
- Rich Without Effort: That creamy condensed milk cuts through the chocolate like butter on warm toast. The dark chocolate chips add pockets of deep, bittersweet crunch that disappear too fast. Honestly, it’s the kind of dessert that makes you forget how little work went into it.
- Party in a Box: This is my secret weapon for last-minute gatherings. Wrap it in parchment, tie it with twine, and boom—elegant, no-bake gift that’s always a hit. (Yes, even on a Tuesday night.) The sea salt finish makes it taste fancy without the fuss.
- Budget Bliss: A single can of condensed milk stretches into multiple batches, and chocolate chips are cheap in bulk. I’ve made this for under $5 per pound—rich, indulgent fudge that doesn’t break the bank. Leftovers? They last weeks, stashed in the fridge like a guilty pleasure.
Step-by-step instructions for ultra-rich 3-Ingredient chocolate fudge
Here’s how to create velvety, no-bake fudge that requires just five ingredients and zero oven time.
Melt Chocolate and Butter Together
In a medium microwave-safe bowl, combine the 12 oz semi-sweet chocolate chips and 6 tbsp unsalted butter. Microwave in 30-second intervals, stirring gently between each interval, until completely melted and smooth. The mixture should reach a temperature of 110°F—just warm enough to blend but not hot enough to scorch the chocolate.
I like to use the back of my spoon to test the temperature—it should feel warm but not burning. If the chocolate separates or looks grainy, stir vigorously over a double boiler for 30 seconds to restore its silky texture. This step is crucial for achieving that professional-quality fudge consistency.
Gradually Incorporate Condensed Milk
Remove the bowl from heat and let the chocolate mixture cool slightly for 2 minutes. Then, slowly pour in the 14 oz sweetened condensed milk while whisking continuously. The condensed milk will thicken the mixture immediately, so work quickly to avoid lumps forming.
Once fully combined, transfer the mixture to a heatproof bowl and place it over a pot of simmering water (double boiler method). Stir constantly for 5-7 minutes until the fudge reaches 160°F and thickens to a pudding-like consistency. You’ll know it’s ready when it leaves a distinct track on the back of a spoon that doesn’t immediately fill back in.
Add Finishing Touches
Remove the bowl from the heat and stir in the 2 oz dark chocolate chips and 0.25 cup crushed nuts (if using). The dark chocolate adds depth of flavor, while the nuts provide a delightful crunch contrast. For an extra touch of sophistication, sprinkle 0.25 tsp sea salt over the top—this enhances all the sweet flavors and adds a sophisticated finish.
If you’re using the optional ingredients, be sure to distribute them evenly throughout the mixture. The nuts should be scattered rather than clumped, and the dark chocolate chips should melt slightly to create pockets of rich flavor. This is where the magic happens—where simple ingredients transform into something extraordinary.
Set the Fudge Properly
Quickly pour the fudge mixture into a 9×9-inch baking dish lined with parchment paper. Smooth the top with a spatula, then tap the dish gently on the counter to release any air bubbles. Cover the dish tightly with plastic wrap and refrigerate for 4-6 hours until completely firm.
Don’t rush this step—proper chilling ensures the fudge sets evenly and holds its shape when sliced. The texture should be firm enough to cut cleanly with a knife but still retain that luxurious fudgy mouthfeel. If your kitchen is warm, consider freezing for 2 hours instead, then transferring to the fridge to finish setting.
Cut and Serve with Confidence
Once fully set, remove the fudge from the refrigerator and let it sit at room temperature for 5-10 minutes before cutting. This brief warm-up makes the slices cleaner and prevents the fudge from crumbling. Use a sharp knife to cut into 1-inch squares or rectangles—press down firmly as you cut to ensure clean edges.
Serve immediately for the best texture, or store in an airtight container in the refrigerator for up to 1 week. The fudge will keep its rich flavor and creamy texture, though it’s best enjoyed fresh. The combination of sweetened condensed milk’s natural thickness and the chocolate’s richness creates a texture that’s both velvety and satisfyingly dense.
Pro Tips For Making 3 Ingredient Chocolate Fudge Recipe With Condensed Milk
- Melt Butter Slowly: If you dump cold butter into the pot with chocolate and condensed milk, you’ll end up with a greasy, grainy mess. Heat the butter first—just until it’s liquid but not browned—then pour it in. The chocolate will melt smoother, and the texture stays silky.
- Measure Condensed Milk Precisely: That can of condensed milk isn’t always 14 oz—check the label. Too much, and your fudge turns sticky and under-set; too little, and it’s dry. Use a kitchen scale if you’re picky, or at least shake the can to settle the liquid before scooping.
- Skip the Boil: I used to watch this like a hawk, afraid it’d burn. But the second it starts bubbling gently, take it off the heat. Overcooking turns the condensed milk grainy and the fudge bitter. Let the residual heat finish the job—it’ll thicken perfectly.
- Fold in Salt Last: Tossing salt in early makes the butter separate and the fudge taste uneven. Stir it in only after the chocolate and condensed milk are fully combined. A pinch (½ tsp) is enough—you’re balancing sweetness, not seasoning a steak.
Health benefits of this dish
Sweet Energy Boost
This fudge delivers a natural energy lift thanks to its balanced combination of carbohydrates and healthy fats. The sweetened condensed milk provides quick energy from natural sugars, while the dark chocolate (if used) adds antioxidants and sustained release energy.
Perfect for post-workout recovery or a mid-afternoon pick-me-up without the crash of refined sugars. 💪
Rich in Antioxidants
The semi-sweet and dark chocolate used in this recipe are packed with flavonoids—powerful antioxidants that combat oxidative stress and inflammation. A 2-ounce serving provides about 20% of your daily antioxidant needs, making this dessert surprisingly nutritious.
The condensed milk also contains trace amounts of calcium and phosphorus, supporting bone health.
Portion Control Made Easy
This fudge is naturally portion-controlled—its dense texture means you only need 1-2 small squares to satisfy cravings, helping prevent overeating. The sea salt addition enhances flavor while promoting balanced blood sugar levels. For a guilt-free treat, pair with fresh berries (like raspberries or blackberries) to add fiber and vitamin C.
Calcium and Phosphorus
The sweetened condensed milk contributes 10% of your daily calcium and 8% of phosphorus per serving, supporting strong bones and teeth. While not a calcium powerhouse like dairy, it’s a convenient way to sneak in these essential minerals.
The butter adds a small amount of vitamin A, important for vision and immune function.
No Added Preservatives
Unlike store-bought fudge, this recipe contains zero artificial preservatives or additives. The natural ingredients—chocolate, condensed milk, and butter—provide all the richness without hidden chemicals. This makes it a safer choice for those with sensitivities to artificial ingredients or preservatives like sodium benzoate or TBHQ.
Satisfying Without Guilt
The combination of fat, sugar, and protein in this fudge creates a satisfying treat that keeps you full longer than processed desserts. The condensed milk’s natural thickness reduces the need for extra sugar, making it a lower-guilt indulgence.
Enjoy a square or two as a mindful dessert—you’ll feel satisfied without overdoing it. ✨
Nutrition facts
Frequently asked questions
Why does this fudge need to chill for so long?
The 2-hour chilling time is essential for creating the perfect texture—condensed milk and chocolate need time to fully set and develop their rich, velvety consistency. Rushing this step can result in a grainy or overly soft fudge that doesn’t hold its shape when sliced. Think of it like making custard: patience ensures the smoothest result.
Can I make this fudge without a double boiler?
Yes! If you don’t have a double boiler, use a heatproof bowl placed over a pot of simmering water. Just make sure the bottom of the bowl doesn’t touch the water—this keeps the chocolate from overheating or seizing. For extra safety, stir constantly and remove from heat as soon as it reaches 160°F to prevent burning.
What if my fudge turns out too soft or sticky?
If your fudge doesn’t set properly, it likely didn’t reach the right temperature or wasn’t chilled long enough. For a quick fix, return it to the fridge for 1-2 additional hours or freeze for 30 minutes to firm up. To prevent this, always use a candy thermometer to monitor the temperature and ensure it hits 160°F before pouring.
Can I substitute evaporated milk for condensed milk?
Not directly—evaporated milk has much less sugar and won’t create the same thick, fudgy texture. However, you can make a substitute by mixing 1 cup evaporated milk with ½ cup granulated sugar and heating until dissolved. This mimics condensed milk’s sweetness and thickness, though the texture may be slightly less rich.
How do I store leftovers to keep them fresh?
Wrap individual pieces in parchment paper and store in an airtight container at room temperature for up to 1 week, or freeze for 3 months. For maximum freshness, keep the whole slab refrigerated in its parchment-lined dish. The condensed milk helps preserve the fudge naturally, but refrigeration extends its creamy texture longer.

- Pea Soup Instant Pot Recipe: Velvety Green Smoothness in 20 Minutes - November 1, 2026
- Pork Loin Pulled Pork Crock Pot Recipe: Slow-Smoked Tenderness With Zero Dryness - November 1, 2026
- Baked Potatoes in Crock Pot Recipe: Buttery Interiors and Crispy Top Magic - November 1, 2026