
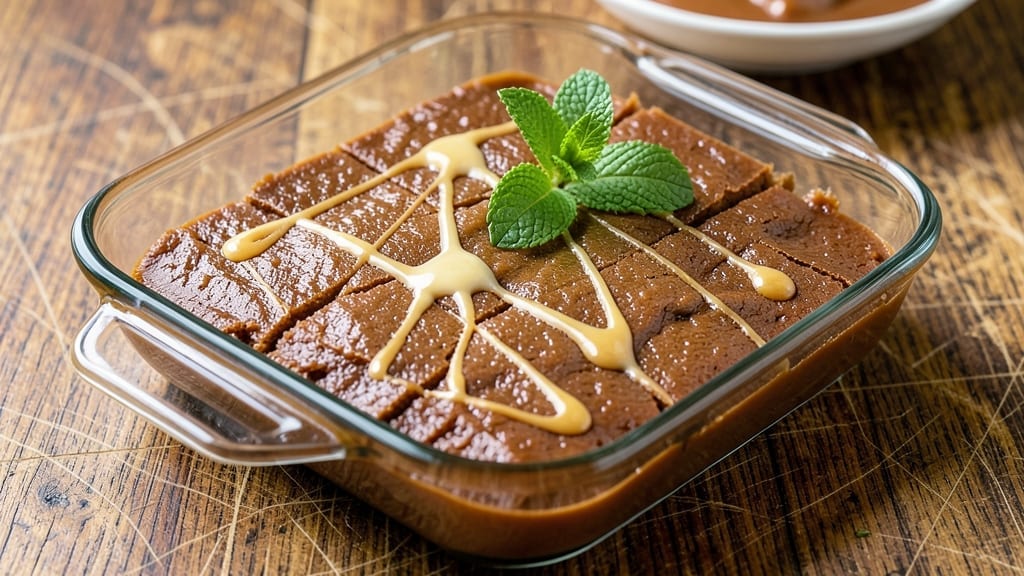
This 3-ingredient vanilla fudge recipe with condensed milk delivers restaurant-quality fudge in just 5 minutes of active time—no fancy equipment, no waiting hours, just pure, creamy indulgence.
The secret lies in condensed milk’s natural sweetness and thickening power, which transforms simple sugar and vanilla into velvety, melt-in-your-mouth squares that require zero skill to perfect. I’ve been making this version for years, and it’s the one people always ask for seconds of.
The process couldn’t be simpler: melt the sugar and condensed milk together until smooth, stir in vanilla, then pour into a lined pan and chill. That’s it. No tempering, no thermometers, no risk of grainy texture—just foolproof fudge that sets beautifully every time.
The result is a rich, ultra-creamy dessert with that classic vanilla fudge flavor, but with a fraction of the effort traditional recipes demand.
What you’ll end up with is a batch of golden-brown fudge that slices cleanly and melts luxuriously on the tongue, with just the right balance of sweetness and vanilla aroma.
The texture is firm enough to cut neatly but tender enough to dissolve at the slightest touch—exactly how fudge should behave. This is the kind of dessert that makes you feel like you’ve earned a treat without any of the fuss.
For a gourmet touch, press crushed nuts or dark chocolate shavings into the top before it sets, but even plain, it’s irresistible. Perfect for holidays, last-minute gifts, or satisfying that sudden sugar craving. Let’s make this fudge—your kitchen will smell like heaven in minutes.
Ingredients for 3 ingredient vanilla fudge recipe condensed milk
Three pantry staples transform into ultra-creamy fudge in minutes—no fancy skills needed.
| Ingredient | Amount | Notes |
|---|---|---|
| Granulated White Sugar 🍚 | 1 ½ cups | Standard grocery store sugar |
| Sweetened Condensed Milk 🥛 | 14 oz | Standard canned condensed milk |
| Pure Vanilla Extract 🌿 | 1 tbsp | High-quality vanilla preferred |
Condensed milk is the game-changer here. Store-brand cans work fine, but if you want the creamiest texture, grab the Carnation brand—it’s what I always use. The sugar should be standard white granulated (no need for fancy specialty sugars). Pro tip: check the can’s expiration date—older condensed milk can make your fudge grainy. If you’re worried about it, heat the can in hot water for 5 minutes before opening to ensure smoothness. Vanilla extract? McCormick or Nielsen-Massey are solid choices, but honestly, whatever you’ve got in your cabinet will work.
No vanilla extract? Vanilla sugar or even a scraped vanilla bean will add that signature flavor. Running low on condensed milk? Evaporated milk plus extra sugar (1 cup evaporated + 1 cup sugar) is a decent swap, though texture might be slightly firmer. The sugar can be swapped for light brown sugar if you want a caramel note, but it’ll change the color to golden-brown instead of classic white fudge. And if you’re feeling fancy, add a pinch of salt (1/4 tsp) to enhance the vanilla flavor—trust me, it makes a difference.
This fudge sets in the fridge, so keep it there until fully chilled (2-3 hours). Once set, it’ll keep for 1 week in an airtight container at room temperature, though I always eat mine faster than that. For a gourmet touch, press crushed nuts or chocolate shavings on top before it sets—it adds texture and looks impressive. If you make extra, it freezes beautifully for up to 3 months. Just let it thaw at room temperature before slicing.
Why You’ll Love This Recipe
- Pantry Magic: I swear, this is the kind of recipe where you open the cupboard and boom—you’ve got everything. No last-minute grocery runs, no forgotten spices. Just sugar, condensed milk, and a splash of vanilla. That’s it. Honestly, I keep this combo in my pantry just for moments like this.
- Rich Without Effort: The moment the sugar and condensed milk hit the heat, that caramelized depth unfolds like a secret. No butter, no chocolate—just pure, velvety vanilla fudge that tastes like a dessert you’d pay double for. Between us, the first bite always makes me pause and think, “Wait, is this really just three things?”
- Gift-Worthy in Minutes: Need a last-minute hostess gift? Wrap this up in wax paper and tie it with twine. It’s the kind of treat that says “I care” without requiring a bakery. My neighbor once took a piece to a potluck and got rave reviews—no one even knew it took less than 30 minutes to make.
- Leftovers That Last: This fudge keeps for weeks in the fridge, and honestly? That’s a win. I’ve had it sit untouched for over a month, and it still melts in your mouth like it was made yesterday. Plus, the cost? A fraction of store-bought. It’s my go-to for when I want something sweet but don’t want to break the bank—or my willpower.
Step-by-step instructions for ultra-rich vanilla fudge
This fudge comes together faster than you can say “condensed milk”—just three ingredients, five minutes, and pure indulgence.
🍳 Step 1: Combine Sugar and Condensed Milk
Place the 1.5 cups granulated white sugar in a medium saucepan over medium-high heat. Pour in the entire 14 oz sweetened condensed milk and stir gently but thoroughly with a wooden spoon. You’ll notice the sugar begins to dissolve almost immediately, creating a smooth, creamy mixture.
Let the mixture cook undisturbed for 3-4 minutes until it reaches a gentle boil. The sugar will fully dissolve, and you’ll see small bubbles forming along the edges. This is where the magic starts—don’t walk away. The mixture will begin to thicken noticeably as it heats.
🔥 Step 2: Simmer Until Thickened
Once boiling, reduce the heat to medium-low and let it simmer for 5-7 minutes. You’re looking for a dramatic change in texture—the mixture will go from a thin syrup to a thick, pudding-like consistency. It should coat the back of a spoon and leave a distinct trail when you run your finger through it.
Here’s the thing—this step requires your attention. If the mixture boils too vigorously, it can burn before thickening. If it’s too low, it might not reach the right consistency. You’ll know it’s ready when it forms soft peaks when dropped from a spoon and leaves a shiny, glossy surface.
👨🍳 Step 3: Add Vanilla and Prepare for Setting
Remove the pan from heat and stir in the 1 tablespoon pure vanilla extract. Let it cool for 2-3 minutes while you prepare your work surface. Line an 8×8-inch baking dish with parchment paper, leaving an overhang on the sides for easy removal later.
While the mixture cools slightly, you’ll notice it begins to thicken further. This is normal—it’s setting up. Don’t be tempted to rush this cooling process. If it cools too much before pouring, it might not set properly in the pan.
🥘 Step 4: Pour and Set the Fudge
Pour the warm fudge mixture into the prepared baking dish and spread it evenly using a rubber spatula. Tap the dish gently on the counter a few times to release any air bubbles. Let it cool at room temperature for 1-2 hours until completely firm to the touch.
The fudge should pull away cleanly from the parchment edges when you lift it. If it’s still too soft after 2 hours, place it in the refrigerator for 15-20 minutes to set fully. This cooling process is crucial—it allows the sugar and condensed milk to crystallize properly, giving you that perfect snap and creamy texture.
🍽️ Step 5: Cut and Serve
Once fully set, use a sharp knife to cut the fudge into 1-inch squares. For cleaner cuts, dip the knife in hot water between each slice. The fudge should hold its shape well and have a glossy sheen. Store any leftovers in an airtight container at room temperature for up to 5 days—though I doubt it’ll last that long.
Serve immediately for warm, gooey fudge, or let it sit at room temperature for 30 minutes before serving for a firmer texture. The flavor will deepen as it cools, with rich caramel notes from the condensed milk and a bright vanilla finish. Each bite should be ultra-smooth with just the right amount of snap.
Pro Tips For Making 3 Ingredient Vanilla Fudge Recipe Condensed Milk
- STIR CONSTANTLY AT FIRST: The first 3 minutes of simmering are when the sugar and condensed milk play chicken—if you walk away, you’ll end up with grainy fudge or a sad, lumpy mess. I learned this the hard way when I answered a phone call mid-stirring. Use a wooden spoon and keep it moving until the mixture thickens noticeably.
- CHILL THE MIX BEFORE TESTING: That 160°F (71°C) candy thermometer reading? It’s useless if your pot’s still hot. After removing from heat, let the fudge sit for 5 minutes—it’ll drop 10-15°F (5-8°C) just from cooling. Skip this, and you’ll either undercook it (grainy texture) or overwork it (crystallized disaster).
- USE REAL VANILLA EXTRACT: Vanilla flavorings or imitation extracts taste like they’re trying too hard. Pure vanilla extract has alcohol that cuts through the sweetness and actually enhances the caramel notes. Splurge on a small bottle—it’s the only thing that makes this fudge taste like it came from a bakery, not a can.
- STOP STIRRING WHEN IT’S THICK: The moment the fudge pulls away from the sides of the pot and forms a thick ribbon when you lift the spoon, that’s your cue to quit stirring. Overmixing after this point introduces air, which turns your fudge into a sad, crumbly mess. Let it cool undisturbed—your future self will thank you.
Storing and reheating your leftovers
Fridge Storage Basics
Your freshly made fudge will keep beautifully in the fridge for up to 5 days if stored properly. I always transfer the cut pieces to an airtight container lined with parchment paper to prevent sticking—Rubbermaid Brilliance containers work perfectly.
The parchment also makes it easy to grab a single piece without disturbing the whole batch. Place the container on the middle shelf where the temperature stays most consistent. 💫
Room Temp Preservation
For short-term storage (up to 3 days), keep your fudge at room temperature in an airtight container. I wrap mine in plastic wrap first, then place it in a glass storage container to maintain freshness.
The key is preventing moisture exposure—condensation is fudge’s worst enemy as it makes the texture soggy. Store it away from direct sunlight to preserve that creamy vanilla flavor.
Freezing for Later
This fudge freezes beautifully for up to 3 months without losing texture. Wrap individual squares tightly in plastic wrap, then place them in a freezer bag with all air squeezed out. I recommend using quart-sized freezer bags—they’re perfect for portion control.
When ready to enjoy, thaw at room temperature for 1-2 hours before serving. The texture remains perfect, though it’ll be slightly softer than fresh.
Reheating Warm Fudge
If you prefer your fudge warm and gooey, reheat individual pieces in the microwave for 10-15 seconds on 50% power. Cover with a damp paper towel to prevent drying.
For stovetop warming, place a piece in a small saucepan with 1 tablespoon water over low heat for 1-2 minutes, stirring gently until melted. This method preserves that rich caramelized flavor from the condensed milk. 🔥
Reviving Dry Fudge
If your fudge develops a dry crust from sitting too long, don’t toss it! Place the pieces in a microwave-safe bowl with 2 tablespoons water and heat for 10-15 seconds on 50% power. The moisture will revive the texture without making it soggy.
For a more dramatic transformation, warm the fudge in a saucepan with 1/4 cup heavy cream over low heat until smooth—this creates a decadent fudge sauce perfect for dipping fruit or ice cream.
Gift-Worthy Packaging
When gifting your fudge, I recommend wrapping individual pieces in parchment paper, then placing them in a small bakery box lined with tissue paper. Add a ribbon for that special touch. For extra protection during shipping, place the box in a plastic bag to prevent any potential moisture damage.
The fudge will stay fresh for 3-4 days** at room temperature when properly packaged this way. 💛
Nutrition facts
Frequently asked questions
Why does my fudge turn out grainy?
Graininess usually happens when the condensed milk is old or wasn’t heated properly. Always use fresh condensed milk (check the can’s expiration date) and heat it gently to 160°F before mixing with sugar. If you’re in a hurry, warm the can in hot water for 5 minutes before opening to ensure smoothness.
Can I make this fudge without vanilla extract?
Use 1 teaspoon vanilla sugar or scrape a vanilla bean for that signature flavor. For a different twist, try 1/2 teaspoon almond extract or even a pinch of cinnamon. Just remember, extracts are stronger—start with half the amount if you’re experimenting.
How do I fix fudge that’s too soft or too hard?
If your fudge is too soft, chill it in the freezer for 15-20 minutes before slicing. For overly hard fudge, place the pan in a warm water bath for 2-3 minutes to soften slightly. The key is patience—let it set at room temperature first before adjusting.
What’s the best way to cut fudge for clean slices?
Use a sharp chef’s knife and dip it in hot water between each cut. This prevents the fudge from sticking and gives you those perfect, clean edges. For extra precision, chill the fudge for 10 minutes in the freezer before slicing.
Can I add mix-ins like nuts or chocolate?
Yes! Press crushed nuts, chocolate chips, or sprinkles into the top of the warm fudge before it sets. For a marbled effect, swirl melted chocolate into the mixture before pouring. Just be sure to add them after the fudge has thickened but before it cools completely.

- 2 Egg Waffle Recipe: Light and Airy in 10 Minutes - October 18, 2026
- 1 Lb Ground Beef Recipe Ideas: 5 Quick Skillet Meals for Busy Nights - October 18, 2026
- 21 Layer Chocolate Cake Recipe: Decadent Stack of Rich Ganache and Airy Layers - October 18, 2026