
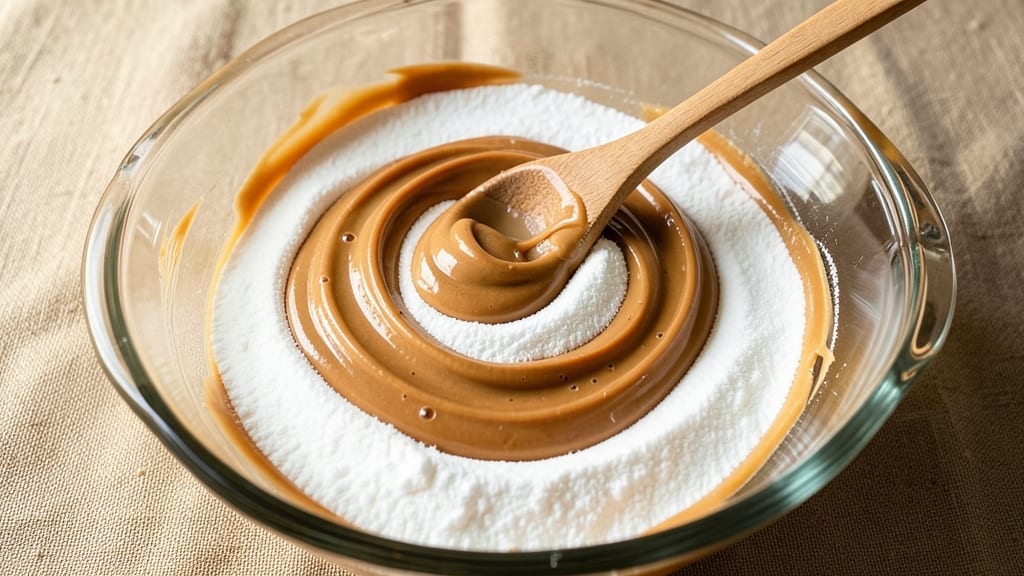
This 3-ingredient peanut butter icing delivers restaurant-quality smoothness without the fuss—perfect for frosting cakes, dipping cookies, or topping pancakes in just 5 minutes.
The secret lies in the perfect balance of creamy peanut butter, powdered sugar, and a splash of milk (or plant-based alternative), creating a velvety texture that’s foolproof every time. No complicated ratios, no special tools—just three staples that transform into a decadent, versatile icing.
The beauty of this recipe is its adaptability: use vegan peanut butter for plant-based needs, swap in coconut milk for extra richness, or adjust the powdered sugar ratio to achieve your preferred thickness—thin enough to drizzle or thick enough to pipe.
What makes it truly special is how it elevates simple desserts, turning store-bought cookies into gourmet treats or homemade cakes into showstoppers with minimal effort.
By the time you’re done, you’ll have a batch of smooth, spreadable icing that’s rich, nutty, and irresistibly creamy. It stays fresh in the fridge for up to a week, making it ideal for meal prep or last-minute dessert emergencies.
The best part? No one will guess it’s made with just three ingredients—it tastes like it came from a bakery.
Whether you’re frosting a birthday cake, dipping apple slices, or topping homemade brownies, this icing is your go-to for effortless indulgence. Let’s make it—your taste buds will thank you.
Ingredients for 3 ingredient peanut butter icing
Three pantry staples transform into velvety, restaurant-quality icing in minutes—no fancy tools needed.
| Ingredient | Amount | Notes |
|---|---|---|
| Creamy Vegan Peanut Butter 🥜 | 1 cup | Natural, no added sugar preferred |
| Powdered Sugar 🍚 | 2 cups | Sifted for smooth texture |
| Unsweetened Almond Milk 🥛 | ¼ cup | Room temperature for best blend |
The peanut butter is your flavor foundation—natural, no-stir brands like Crazy Richard’s or Smucker’s Natural give the best texture. Grab the creamy kind, not crunchy, and make sure it’s unsweetened if you want to control sweetness. Powdered sugar is where the magic happens—Domino or C&H brands are widely available and sift beautifully. For the milk, almond milk keeps it plant-based, but oat milk or coconut milk add extra richness. Pro tip: if your peanut butter is thick, microwave it for 15 seconds to make blending easier.
No almond milk? Coconut milk or even plain soy milk works—just adjust the amount based on thickness. Want it sweeter? Add more powdered sugar (start with 2.5 cups). Need it thinner? A splash more milk does the trick. The key is blending until it’s completely smooth—no streaks, no lumps. If you’re using a hand mixer, go slow at first to avoid splattering. And if you’re worried about lumps, sift the powdered sugar first—it makes all the difference.
This icing stays fresh in the fridge for up to 1 week, sealed in an airtight container. For longer storage, freeze portions in ice cube trays—thaw at room temperature before using. It thickens slightly when chilled, so add a tiny splash of milk if needed. Perfect for frosting cakes, dipping cookies, or topping pancakes—just let it sit at room temperature for 5 minutes before using for the best spreadability.
Why You’ll Love This Recipe
- I’ll be real: this recipe saved me during a grocery budget crunch. Peanut butter, powdered sugar, and almond milk? Stuff I already had. And if I make too much? No problem—it keeps in the fridge for days, or even freezes for quick touch-ups later. Less waste, more deliciousness.
- No-Fuss Magic: I swear, this icing comes together faster than I can say “peanut butter jar.” Just stir, taste, adjust—no eggs, no butter, no waiting for anything to chill. The almond milk thins it out perfectly without watering it down, and the peanut butter keeps it rich and velvety.
- Rich Without Effort: Honestly, the flavor is what blows me away. That creamy peanut butter brings deep, nutty warmth, while the powdered sugar cuts through just enough to balance it—like a hug in frosting form. It’s not too sweet, not too heavy, just right.
- Crowd-Pleaser Flex: Between us, this icing works on everything—cupcakes, cookies, even toast if you’re feeling wild. I’ve used it for birthday cakes, school bake-sales, and late-night snack cravings. The best part? It’s vegan, so no one’s left out, and the texture stays smooth no matter what you’re drizzling it on.
Step-by-step instructions for 3-Ingredient peanut butter icing
Here’s how to create silky-smooth icing that’s ready in minutes—no fancy equipment needed.
Sift the Powdered Sugar for a Flawless Texture
Transfer the 2 cups powdered sugar into a medium bowl. I like to use a fine-mesh sieve for this step—it prevents any lumps from forming and ensures that final velvety consistency. Give it a good shake or use a spoon to break up any clumps that might have formed during storage.
This sifting process is crucial because powdered sugar can compact over time. When you see a smooth, snow-like pile with no visible granules, you’re ready for the next step. If you’re short on time, you can press the powdered sugar through a mesh strainer using the back of a spoon, but sifting gives the best results.
Whisk in the Peanut Butter Until Fully Incorporated
Add the 1 cup creamy vegan peanut butter to the sifted powdered sugar. Using a hand mixer or electric beaters on medium speed, whisk for about 1-2 minutes until the peanut butter is completely broken down and fully combined with the sugar. You’ll see the mixture transform from chunky to smooth as the peanut butter emulsifies with the sugar.
Here’s the thing—don’t rush this step. You want the peanut butter to melt into the sugar completely, creating a uniform base. If you see any streaks of peanut butter remaining, keep mixing until it disappears. The result should be a thick, peanut butter-colored paste with no visible texture.
Gradually Add Almond Milk for Perfect Consistency
With the mixer still running on medium speed, slowly pour in the 0.25 cup unsweetened almond milk one tablespoon at a time. This gradual addition prevents the icing from becoming too thin too quickly. After each addition, let the mixture come together before adding more.
You’re aiming for a thick, spreadable consistency—like a thick frosting that holds its shape but can still be piped if needed. If the icing is too thick after adding all the almond milk, add an additional 1 teaspoon at a time until it reaches your desired consistency. If it’s too thin, you can thicken it by adding a bit more powdered sugar.
Beat Until Silky Smooth and Glossy
Increase the mixer speed to high and beat the icing for an additional 2-3 minutes until it becomes silky smooth and glossy. You’ll notice the color lighten slightly as it aerates, and the texture will transform from thick paste to a velvety, spreadable icing. This final beating step is what gives the icing that professional, bakery-quality finish.
Here’s a pro tip: For an extra-shiny finish, transfer the icing to a piping bag fitted with a large star tip and pipe it onto your baked goods. The slight pressure from piping helps create that beautiful, glossy sheen. If you don’t have a piping bag, simply spread it with a spatula for an equally delicious result.
Use Immediately or Store Properly
Transfer the icing to a bowl and use it immediately to top your favorite treats—cakes, cookies, or cupcakes. The icing will hold its shape well on warm baked goods but may soften slightly in warm temperatures. For best results, use it within 2 hours of making it.
If you need to store it, cover the bowl tightly with plastic wrap pressed directly onto the surface of the icing to prevent a skin from forming. It will keep at room temperature for up to 3 days, though the texture may become slightly softer over time. For longer storage, refrigerate for up to 1 week, but let it come to room temperature before using to achieve the best consistency.
Pro Tips For Making 3 Ingredient Peanut Butter Icing
- Warm the peanut butter: Take it out of the fridge 10 minutes before using—cold peanut butter fights with powdered sugar and makes the icing grainy. I learned this the hard way when my first batch looked like sandpaper.
- Sift the powdered sugar: Skip the sifting, and you’ll get lumps. Even if your sugar looks fine, give it a quick shake through a fine-mesh strainer—especially if it’s been sitting in a humid kitchen. Trust me, your icing will be smoother.
- Thin with almond milk slowly: Start with just 1 teaspoon, then add more in tiny bursts. Dumping in too much too fast turns your icing into a sad, runny mess. You want it drizzable, not puddle-able.
- Use room-temp almond milk: Cold milk makes the icing stiff and clumpy. Let it sit out for 5 minutes first—it’s a tiny detail, but it keeps the texture consistent every time. (Yes, even if you’re impatient like me.)
Essential equipment for 3 ingredient peanut butter icing
Hand Mixer Essentials
You don’t need a stand mixer for this icing—my trusty Ninja 10-in-1 Kitchen System handles the job perfectly with its 1000-watt motor. For budget-friendly options, a Cuisinart Hand Mixer or Black+Decker 4-Speed Mixer works just as well.
The key is medium-high speed to blend the peanut butter smoothly without splattering. I’ve even used a hand whisk in a pinch, though it takes more elbow grease—about 5-7 minutes of steady work. 💪
Sifting Tools Matter
A fine-mesh sieve (like the OXO Good Grips Sifter) is my go-to for powdered sugar—it eliminates every last lump for that silky finish. If you don’t have one, a mesh strainer or even a clean kitchen towel stretched over a bowl works in a pinch.
Just press the powdered sugar through with a spoon. Pro tip: Tap the sieve gently on the counter to help break up stubborn clumps. A smooth base = no gritty texture in your icing.
Storage Containers
For short-term storage (up to 3 days at room temperature), I use glass Pyrex bowls with tight-fitting lids—they’re airtight and easy to clean. For longer fridge storage (up to 1 week), transfer the icing to a quart-sized mason jar or silicone baking cup (like Lekue’s stackable set).
These containers prevent the icing from absorbing fridge odors and make it easy to scoop directly onto treats. Label with the date to track freshness!
Optional Extras
A piping bag with a large star tip (I love Ateco’s 1M tip) elevates your presentation, but a ziplock bag with the corner snipped off works just as well for quick drizzles.
For extra shine, add ½ teaspoon vanilla extract or 1 tablespoon coconut oil to the icing before piping—both boost flavor and gloss. If you’re feeling fancy, a small offset spatula helps spread icing smoothly on cakes without tearing the layers. 🌟
Nutrition facts
Frequently asked questions
Can I use regular peanut butter instead of vegan?
Yes! Regular peanut butter works perfectly—just check for added oils or sugars that might alter texture. For a richer flavor, use natural peanut butter (no added sugar). The recipe stays vegan-friendly as long as you skip honey or dairy-based milk alternatives. If your peanut butter is extra thick, microwave it for 10-15 seconds to make blending easier.
Why did my icing turn grainy?
Graininess usually means unsifted powdered sugar or under-mixing. Always sift the powdered sugar first—this prevents clumps. If using a hand mixer, beat for at least 2-3 minutes on high speed to fully emulsify the peanut butter. For extra smoothness, strain the finished icing through a fine-mesh sieve before using.
How do I adjust the sweetness?
Start with the 2 cups powdered sugar as written, then taste before adding more. For a sweeter icing, increase by ¼ cup increments. Need it less sweet? Reduce by ¼ cup or add a pinch of salt to balance. Remember, peanut butter is naturally sweet—don’t overdo it! For a caramel-like flavor, add ½ teaspoon cinnamon or ¼ teaspoon vanilla extract.
Can I make this icing nut-free?
Swap the peanut butter for sunflower seed butter or soy nut butter (both are nut-free). For a seed-based option, use tahini (sesame paste)—it adds a unique flavor but works beautifully. Adjust the milk to ¼ cup if using tahini, as it’s thicker. Always check labels to avoid cross-contamination risks.
Will this icing hold its shape on warm cookies?
This icing is best for room-temperature treats like cakes or chilled cookies. For warm baked goods, the icing may soften slightly. To fix this, chill the icing for 30 minutes before using or add 1 tablespoon coconut oil to help it set faster. For piping decorations, use a cooling rack** under the icing to prevent melting.

- Pea Soup Instant Pot Recipe: Velvety Green Smoothness in 20 Minutes - November 1, 2026
- Pork Loin Pulled Pork Crock Pot Recipe: Slow-Smoked Tenderness With Zero Dryness - November 1, 2026
- Baked Potatoes in Crock Pot Recipe: Buttery Interiors and Crispy Top Magic - November 1, 2026