
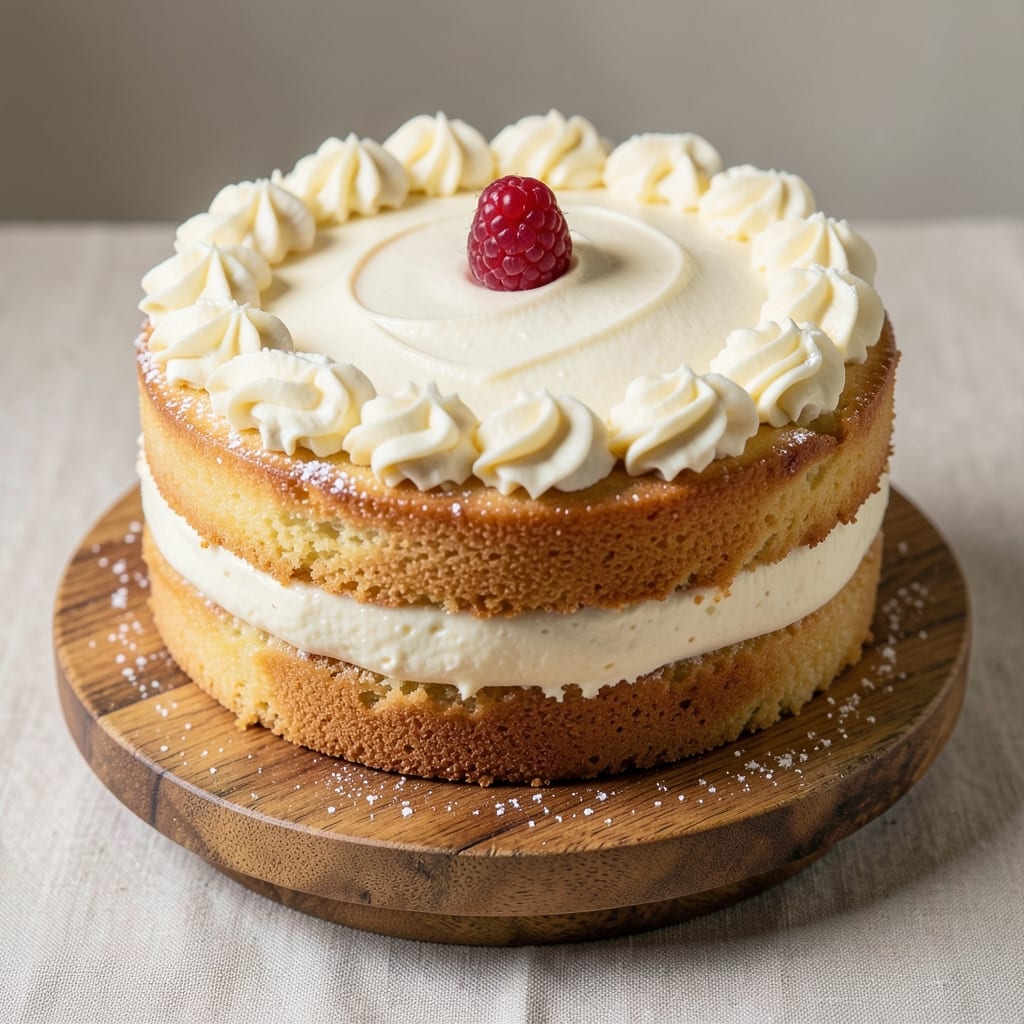
This 6-inch birthday cake recipe delivers all the celebration magic in a perfectly portioned package—ideal for small gatherings, single-serving surprises, or practice before tackling a full-size cake. 🎂 The secret lies in precise measurements and a vanilla bean frosting that transforms simple layers into something extraordinary.
I’ve baked this recipe countless times for friends’ milestone birthdays, and it never fails to impress with its tender crumb and silky smooth frosting.
The beauty of this recipe is its versatility—swap vanilla cake for chocolate, add sprinkles for a playful touch, or keep it elegant with fresh berries. With just one 6-inch pan, you’ll save time and energy while still delivering a showstopping dessert.
The frosting, made with real vanilla bean, gives that professional bakery finish without requiring advanced piping skills.
What you’ll achieve is a golden, moist cake with perfectly smooth frosting that holds its shape beautifully. Each slice is rich enough to satisfy a crowd but small enough to feel special.
The frosting’s vanilla aroma alone makes it feel like a celebration, and the clean, simple design ensures the cake itself remains the star.
Serve with a scoop of vanilla ice cream or a cup of hot tea for the perfect balance of textures and temperatures. This recipe scales effortlessly—double the batter for a larger cake, or make two for a party. Let’s get baking!
Ingredients for 6 inch birthday cake
Vanilla bean secrets plus precise measurements create this showstopping 6-inch birthday cake.
| Ingredient | Amount | Notes |
|---|---|---|
| All-Purpose Flour 🌾 | 1 cup | Sifted for light texture |
| Granulated Sugar 🍚 | ½ cup | White or light brown |
| Unsalted Butter 🧈 | ½ cup | Room temperature, cubed |
| Large Eggs 🥚 | 2 whole | Room temperature for even baking |
| Pure Vanilla Extract 🌿 | 1 tbsp | High-quality preferred |
| Baking Powder 🧂 | 1 ½ tsp | Diamond Crystal preferred |
| Salt 🧂 | ½ tsp | Fine sea salt preferred |
| Whole Milk 🥛 | ½ cup | Room temperature |
| Vanilla Bean Paste 🌿 | 1 tsp | For authentic vanilla flavor |
| Powdered Sugar 🍚 | 1 ½ cups | For frosting, sifted |
| Heavy Whipping Cream 🥛 | ½ cup | Cold for frosting |
| Vanilla Bean Seeds 🌿 | 1 tsp | Scraped from 1 bean |
| Unflavored Gelatin 🍬 | 1 tsp | For frosting stability |
| Fresh Blueberries 🫐 | ¼ cup | Optional garnish |
The vanilla bean paste and seeds are non-negotiable for that professional bakery aroma. Look for Madagascar vanilla beans at specialty stores like Williams Sonoma or Sur La Table—they carry high-quality pastes that make all the difference. Fresh blueberries add a pop of color; Trader Joe’s has the best seasonal selection. For the flour, King Arthur is my go-to—it’s finely milled and gives the lightest texture. The gelatin in the frosting might seem odd, but it’s what gives that silky, pipeable consistency without needing stabilizers.
No vanilla bean paste? Double the vanilla extract and add a pinch of almond extract for depth. Powdered sugar substitutes like confectioners’ sugar work fine, but avoid cornstarch-based versions—they can make frosting grainy. For a chocolate twist, swap half the all-purpose flour for Dutch-process cocoa powder (like Callebaut). The heavy whipping cream must be cold—leave it in the fridge until ready to use. If you’re making this ahead, prepare the frosting first and store it separately; it actually improves overnight.
Store the cake layers in an airtight container with parchment between them for up to 3 days. The frosting keeps for 5 days in the fridge, but it’s best made fresh. For a make-ahead option, bake the cake 1 day ahead and freeze the layers wrapped tightly in plastic. Bring to room temperature before frosting. The blueberries should be washed and dried thoroughly to prevent soggy cake—pat them with a paper towel if they’re particularly juicy.
Why You’ll Love This Recipe
- No Mixer Needed: Mixing this batter by hand is easier than I expected—just cream the butter and sugar until light, then fold in the flour. My hands are always greasier than my kitchen counter, but somehow it always turns out perfectly fluffy.
- Vanilla Buttercream Magic: That simple vanilla extract? It’s the secret weapon. The cake’s tender crumb soaks up just enough to make every bite taste like a warm hug, while the buttercream on top is so rich it’ll have everyone asking for seconds.
- Portion Control Perfection: Six inches might sound small, but it’s the ideal size for one person’s celebration—no stress over slicing a whole sheet cake. Honestly, it’s my go-to for birthdays when I’d rather spend time with my guest than cutting a mountain of cake.
- Budget-Friendly Indulgence: Using basic pantry staples means I never break the bank, but the result? A cake that tastes like it cost twice as much. Between us, this is how I make fancy desserts without the fancy price tag.
Step-by-step instructions for vanilla bean birthday cake with magic frosting
Master this delicate balance of tender cake and velvety frosting for a showstopping mini masterpiece.
👨🍳 Step 1: Prepare the Cake Batter with Precision
Preheat your oven to 350°F and grease a 6-inch round cake pan with butter, then line the bottom with parchment paper. In a medium bowl, whisk together the 1 cup sifted all-purpose flour, 1.5 teaspoons baking powder, and 0.5 teaspoon salt. Set aside—this is your dry mix.
In a separate large bowl, cream the 0.5 cup room-temperature unsalted butter and 0.5 cup granulated sugar on medium speed until light and fluffy, about 2-3 minutes. Add the 2 whole large eggs, one at a time, mixing well after each addition. This gradual incorporation prevents curdling and ensures a smooth batter.
Alternate adding the dry mix and 0.5 cup room-temperature whole milk to the butter-sugar mixture, beginning and ending with the dry mix. Mix on low speed until just combined—you should see no dry flour remaining. Stir in the 1 tablespoon pure vanilla extract and 1 teaspoon vanilla bean paste for that authentic depth of flavor. The batter should be smooth and slightly thick, like heavy pudding.
🍳 Step 2: Bake the Cake to Perfection
Pour the batter into the prepared 6-inch cake pan and smooth the top with a spatula. Bake in the preheated oven for 25-30 minutes, or until a toothpick inserted into the center comes out clean. The cake should have a golden top and pull away slightly from the edges of the pan.
I know it seems counterintuitive, but don’t overbake—this cake is delicate and needs to stay moist. If the top browns too quickly, tent the pan with aluminum foil after 15 minutes to prevent over-browning while ensuring the center cooks through. The cake will continue cooking slightly as it cools.
Remove the cake from the oven and let it cool in the pan for 10 minutes. Then, invert it onto a wire rack to cool completely. This cooling process is crucial—it allows the cake to set properly before frosting. If you try to frost it too soon, the warm cake will melt your beautiful frosting.
🥘 Step 3: Create the Vanilla Bean Frosting
In a small bowl, sprinkle the 1 teaspoon unflavored gelatin over 2 tablespoons cold water and let it bloom for 5 minutes. Meanwhile, in a heatproof bowl set over a pot of simmering water (double boiler), whisk together the 0.5 cup heavy whipping cream and 1.5 cups powdered sugar until smooth and warm.
Add the bloomed gelatin to the warm cream mixture and whisk until fully dissolved. Remove from heat and let it cool to room temperature, stirring occasionally. Once cooled, whip the mixture on high speed until it reaches soft peaks. This step is where the magic happens—the frosting should be thick enough to hold its shape but still spreadable.
Stir in the 1 teaspoon vanilla bean seeds and any remaining vanilla bean paste from the cake batter. This infusion ensures your frosting carries the same rich, authentic vanilla flavor as the cake itself. The frosting is now ready to transform your simple cake into a showstopper.
🎂 Step 4: Assemble and Garnish the Cake
Once the cake is completely cool, level the top if needed with a serrated knife. Place the cake on a cake stand or plate and spread a thin layer of frosting over the top to create a “crumb coat.” This initial layer seals in any crumbs and creates a smooth base for your final frosting.
Chill the cake in the refrigerator for 15 minutes to set the crumb coat. After chilling, apply the remaining frosting, spreading it evenly to create a smooth, elegant finish. For a professional look, use an offset spatula to create clean edges. The frosting should be thick enough to hold its shape but still smooth enough to spread evenly.
Garnish the top with the 0.25 cup fresh blueberries, pressing them gently into the frosting. The blueberries add a pop of color and a subtle tart contrast to the sweet cake. For extra flair, you can also sprinkle a few extra vanilla bean seeds on top or dust with powdered sugar. This cake is now ready to celebrate—just wait until you see the faces when they take that first bite!
Pro Tips For Making 6 Inch Birthday Cake
- Cream Butter & Sugar Slowly: I learned this the hard way—dumping cold butter into sugar and whipping it at high speed just creates greasy lumps. Instead, let the butter sit out for 30 minutes first, then beat it with the sugar on medium until it’s light and fluffy (about 3-4 minutes). That’s when you’ll see the magic happen—no more dense cake.
- Sift That Flour: Your future self will thank you if you skip the scooping-and-stirring method. Sift the flour directly into the bowl over the butter-sugar mix to avoid gluten overdevelopment, which makes the cake tough. And yes, even if you’re impatient like me—this step actually changes the texture.
- Don’t Overmix the Batter: I used to think more mixing = better cake, but now I know better. Once the flour is just combined, stop. Overmixing develops gluten, and your 6-inch cake will turn out dense instead of light. Fold in the vanilla gently—just until streaks disappear.
- Bake Until Golden, Not Just Set: Pulling the cake out when it’s just set? Big mistake. For a 6-inch cake, bake it until the top is golden brown and a toothpick comes out with moist crumbs (not wet batter). Overbaking dries it out, but underbaking leaves it gummy—neither is ideal for a birthday cake.
Common mistakes when making perfect results
Overmixing the Batter
I see this all the time—overmixing the batter until it turns tough and dense. The moment you see streaks of flour disappear, stop mixing immediately. Your goal is a smooth, slightly thick batter, not a glue-like consistency. Overmixing develops gluten too much, which makes the cake dry and rubbery. 🔥
Skipping Room Temperature Ingredients
Room-temperature butter, eggs, and milk are non-negotiable for this recipe. Cold butter won’t cream properly, and cold eggs won’t blend smoothly into the mixture. Take your eggs out of the fridge 30 minutes before baking, and let your butter sit at room temperature for 1-2 hours.
I learned this the hard way—my first attempt with cold butter resulted in a cake that was more like a brick!
Incorrect Oven Temperature
Setting your oven to 350°F is crucial—any hotter, and your cake will brown too quickly; any cooler, and it won’t rise properly. I recommend using an oven thermometer to confirm your oven’s accuracy. If your oven runs hot, reduce the temperature to 325°F and bake for 35-40 minutes instead.
The cake should pull away from the pan edges and have a golden top, not a dark crust.
Underestimating Cooling Time
Rushing the cooling process is a common mistake that leads to melted frosting. Let the cake cool in the pan for 10 minutes before transferring it to a wire rack.
Then, give it 2-3 hours to cool completely before frosting. I know it’s tempting to frost it sooner, but trust me—this patience pays off with a perfectly smooth finish. 💫
Frosting Too Soon
Applying frosting to a warm cake is a recipe for disaster—your beautiful frosting will melt into a sad, runny mess. Always frost a completely cool cake. If you’re short on time, chill the cake layers in the fridge for 15-20 minutes before assembling.
The frosting should be at room temperature when you apply it, but not warm.
Ignoring the Crumb Coat
Skipping the crumb coat is a rookie mistake that leads to crumbs all over your final frosting layer. Spread a thin layer of frosting over the cake, then chill it for 15 minutes to set.
This step seals in crumbs and creates a smooth base for your final frosting application. Without it, your cake will look messy and unprofessional—trust me, it makes all the difference!
Nutrition facts
Frequently asked questions
Can I make this recipe without vanilla bean paste?
For the cake, double the 1 tablespoon vanilla extract and add a pinch of almond extract (¼ teaspoon) for depth. For the frosting, use an extra ½ teaspoon vanilla extract plus a scraped vanilla bean if available. The flavor won’t be identical, but it’ll still taste amazing.
How do I adjust this for a chocolate version?
Replace ½ cup all-purpose flour with ½ cup Dutch-process cocoa powder (like Callebaut) and reduce the milk to ¼ cup. Add 1 tablespoon hot water to the cocoa to make it easier to mix. For the frosting, replace ½ cup heavy cream with ½ cup melted dark chocolate (cooled) and reduce powdered sugar to 1 cup. The frosting will have a rich chocolate-vanilla hybrid flavor.
Can I use this recipe for a different size pan?
For a 8-inch pan, double all ingredients. For a 4-inch pan, reduce everything by half. The baking time will vary: 8-inch cakes need 35-40 minutes, while 4-inch cakes bake in 18-22 minutes. Always use the same oven temperature (350°F) and check for doneness with a toothpick.
What if I don’t have a cake stand?
No problem! Place the cake on a large, flat plate or serving dish. For extra height, stack two plates together. If you want to decorate the sides, use a butter knife to create texture in the frosting. The key is to keep the cake stable—just avoid anything too wobbly when cutting slices.
How long will this cake keep?
Assembled, the cake stays fresh for 3 days at room temperature in an airtight container. For longer storage, refrigerate the unfrosted layers (wrapped in plastic) for up to 5 days or freeze for 1 month. The frosting keeps separately for 5 days in the fridge. Always bring to room temperature before serving for the best texture.

- 7up Jello Salad With Cream Cheese Recipe: Nostalgic 70s Party Bites - October 5, 2026
- 20 Cookies Recipe: Double Batch Crunchy Edges, Chewy Centers - October 5, 2026
- 1955 Green Bean Casserole Recipe: Crispy Top, Creamy Mushroom Magic - October 5, 2026