
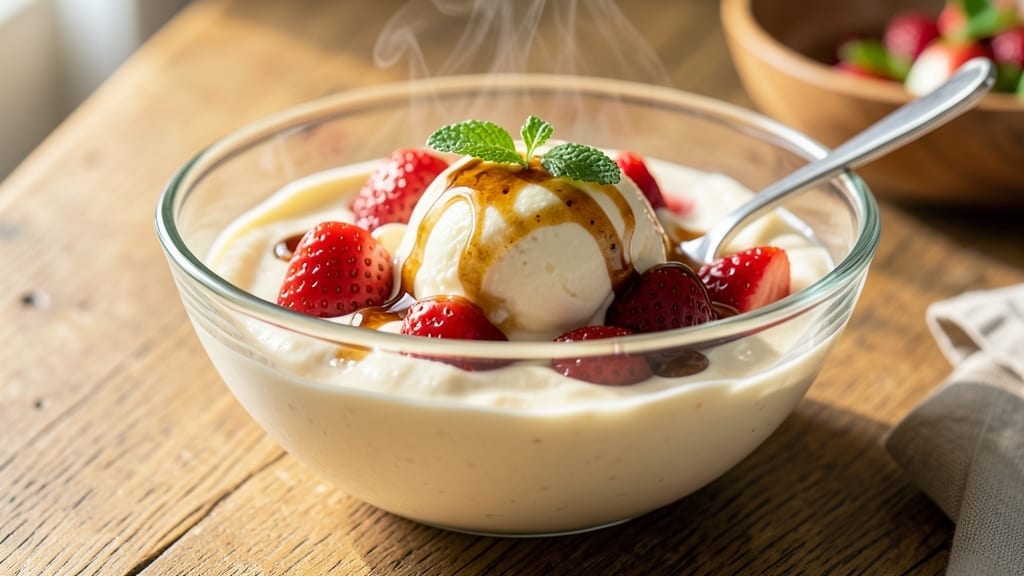
This 3-ingredient strawberry ice cream recipe redefines dessert simplicity by transforming just fruit, sweetener, and cream into velvety frozen magic—no churning required. ✨ The secret lies in blending ripe strawberries with coconut cream (or almond milk for a lighter version) and a touch of maple syrup, then freezing for a texture that rivals traditional ice cream.
I perfected this method after craving something cool, creamy, and guilt-free that still tasted like summer in every bite.
The beauty of this recipe is its foolproof technique—no ice cream maker, no complicated steps, just 10 minutes of prep and 4 hours of freezing. The key is using ripe, frozen strawberries (they blend smoother) and letting the mixture rest in the freezer for 2 hours before scooping.
This prevents rock-hard ice cream and ensures that creamy, dreamy consistency we all love. It’s the perfect balance of tangy strawberry flavor and smooth, luscious texture.
What you’ll end up with is a rich, vibrant dessert that looks as good as it tastes—think swirls of pink, speckled with tiny fruit pieces for texture. The coconut cream (or milk) adds natural sweetness and creaminess, while the maple syrup enhances the strawberry’s natural flavor without overpowering it.
This isn’t just a dessert; it’s a restaurant-quality treat made in your blender.
For extra indulgence, stir in a splash of vanilla extract or a sprinkle of crushed nuts before freezing. Serve it in bowls with fresh berries, a drizzle of honey, or as a topping for pancakes.
The possibilities are endless, and the process couldn’t be simpler. Let’s make this creamy, dreamy ice cream today!
Ingredients for 3 ingredient strawberry ice cream
Three ingredients, zero guilt—just pure summer in frozen form.
| Ingredient | Amount | Notes |
|---|---|---|
| Frozen Strawberries 🍓 | 2 cups | Ripe, unsweetened, no additives |
| Coconut Cream 🥥 | 1 can | Full-fat, chilled overnight |
| Pure Maple Syrup 🍯 | ¼ cup | Grade B for richer flavor |
The strawberries are non-negotiable here—frozen unsweetened is ideal (they blend smoother and keep the texture creamy). I grab mine from Trader Joe’s or Costco because they’re consistently ripe and sweet. If you can only find fresh, freeze them yourself for 24 hours first. The coconut cream? Full-fat is a must—it gives that luxurious texture. Chill the can overnight so the thick cream rises to the top (that’s the good stuff). Goya or Thai Kitchen cans are my go-tos—they’re affordable and reliable.
No coconut cream? Almond milk or cashew cream works for a lighter version, but the texture will be softer. Short on maple syrup? Agave nectar or date syrup are great swaps, though maple has that unmistakable depth. Want extra richness? Add 1 tablespoon of vegan butter**>—it blends right in and makes the ice cream ultra-creamy. The key is balancing sweetness—taste as you go. If it’s too tart, add more syrup; if too sweet, a splash of lemon juice cuts through.
This freezes best in a shallow container—loaf pan or rectangular dish works perfectly. Press plastic wrap directly on the surface before freezing to prevent ice crystals. It’s ready to scoop after 4 hours, but for that restaurant-quality texture, let it sit 2 hours before serving. Portion into balls for easy grab-and-go treats—keeps for 1 week in the freezer. Pro tip: Wash your blender immediately after—strawberry stains are stubborn.
Why You’ll Love This Recipe
- No Blender Needed: I’ll be real—sometimes I skip the blender entirely. Just toss frozen strawberries and coconut cream into a food processor (or even a sturdy jar with a lid) and pulse until it’s thick but still creamy. The texture’s like summer in a bowl, no fancy tools required.
- Sweet Without Guilt: That pure maple syrup isn’t just flavor—it’s the good kind of sweet. A single tablespoon (or two, okay, three) turns those frozen strawberries into something rich and velvety, but without the sticky aftertaste of store-bought syrups. Honestly, it’s the kind of dessert that makes me forget I’m eating ice cream at 9 PM.
- Crowd-Pleaser for Any Gathering: Between us, this is my secret weapon for potlucks, BBQs, or even just a lazy Sunday. It’s light enough for a summer picnic but hearty enough to impress at a dinner party. Plus, the coconut cream adds a luxurious twist—no one will guess it’s just three ingredients.
- Leftovers? Just Freeze Again: Make a big batch, and if it doesn’t disappear in one sitting, no stress. Scoop whatever’s left into a container, pop it back in the freezer, and—voilà—fresh ice cream in minutes. I’ve done this three times this month, and it’s always just as good the second (or third) time around.
Step-by-step instructions for 3-Ingredient strawberry ice cream
Here’s the no-churn, no-machine method that delivers creamy, dreamy strawberry ice cream in minutes.
🍳 Step 1: Blend the Strawberries Until Silky
Start by placing the 2 cups frozen strawberries into a high-powered blender. I like to use a Vitamix or Ninja for this—regular blenders struggle with frozen fruit. Pulse a few times to break up the largest chunks, then blend continuously for 1-2 minutes until completely smooth and vibrant pink.
You want a texture like thick paint—no ice crystals or pulp should remain. If it’s too thick, scrape down the sides and blend another 30 seconds. The smoother the base, the creamier your final ice cream will be. Here’s the thing—don’t skip this step. Any remaining ice will create icy patches in your finished product.
🥘 Step 2: Whip the Coconut Cream to Stiff Peaks
While the strawberry purée blends, open the chilled can of coconut cream (it should have separated—only use the thick, solid part on top). Discard the watery coconut milk underneath. Place the thick cream in a chilled mixing bowl and whip with an electric mixer on high speed for 2-3 minutes until it forms stiff peaks.
This whipped coconut cream is your secret weapon—it replaces traditional heavy cream while keeping the ice cream luxuriously smooth. If your cream isn’t chilled, it won’t whip properly. I always keep my bowl and beaters in the freezer for 10 minutes before whipping. You’ll know it’s ready when the peaks hold their shape when you lift the beaters.
🥘 Step 3: Combine and Sweeten the Mixture
Add the strawberry purée to the whipped coconut cream and gently fold together using a spatula. This is where the magic happens—the vibrant pink swirls through the white cream. Pour in the 0.25 cup pure maple syrup and fold it in completely. Taste a spoonful—you want the sweetness to balance the tartness of the strawberries.
Here’s the trick: don’t overmix. Just combine until everything is evenly distributed. The maple syrup not only sweetens but also helps prevent ice crystals from forming during freezing. If you’re using Grade B maple syrup (which I recommend), you’ll get that beautiful caramel color and complex flavor that regular syrup can’t match.
⏰ Step 4: Freeze Until Firm (The Patience Step)
Transfer the mixture to a loaf pan or airtight container, smoothing the top with a spatula. Cover with plastic wrap pressed directly onto the surface to prevent ice crystals. Freeze for at least 4 hours (overnight is ideal) until completely solid.
Real talk: this is the hardest part. But trust me—rushing leads to icy, grainy ice cream. When it’s ready, it should be firm enough to scoop cleanly without sticking. If you’re impatient, let it sit at room temperature for 5-10 minutes before scooping to make it easier to serve. The longer it freezes, the creamier it’ll be.
🍦 Step 5: Scoop and Serve (The Best Part!)
Remove the ice cream from the freezer and let it sit for 5 minutes to soften slightly. Scoop into bowls using an ice cream scoop or spoon. For extra flair, drizzle with additional maple syrup or top with fresh strawberry slices. Serve immediately while still slightly soft for the perfect texture.
Each bite should deliver that perfect balance of creamy coconut richness and bright strawberry flavor. If it’s too hard after freezing, let it sit at room temperature for another 5 minutes. And here’s a pro tip: if you have leftovers, store them in an airtight container and they’ll keep for up to 2 weeks in the freezer—though they rarely last that long!
Pro Tips For Making 3 Ingredient Strawberry Ice Cream
- Pulse, Don’t Blend: DESCRIPTION: Hit the strawberries in short bursts—3-4 seconds at a time—until they’re chunky but smooth. Over-blending turns them into strawberry mush, and you’ll lose that perfect texture where every bite has a little surprise. I learned this the hard way after making a sad, soupy mess one summer.
- Thaw Coconut Cream First: DESCRIPTION: Let the coconut cream sit at room temp for 10 minutes before opening—it’s thicker and easier to measure. Dumping cold coconut cream straight from the fridge into your mixer means extra air gets whipped in, and your ice cream might turn icy instead of creamy. Trust me, this small step makes a real difference.
- Skip the Ice Cream Maker?: DESCRIPTION: If you’re short on time, freeze the mixture in a shallow container, stirring every 30 minutes for 3 hours. It’s not as smooth, but it’s still delicious—and way less work. I do this when I’m craving ice cream at 11 PM and don’t want to wait 6 hours.
- Sweeten Early, Sweeten Right: DESCRIPTION: Mix the maple syrup into the coconut cream before adding the strawberries—it dissolves better and coats every bit of fruit. And for the love of dessert, use pure maple syrup, not pancake syrup. The difference is like night and day, and your taste buds will notice immediately.
Best sauces and condiments for this 3 ingredient strawberry ice cream
Maple Syrup Drizzle
Start with a Grade B maple syrup—its deeper caramel notes complement the strawberry’s natural tartness perfectly. I recommend Wilder’s Vermont Grade B for that authentic, robust flavor. Drizzle 1-2 tablespoons over each serving just before eating to add a glossy finish and balance any lingering tartness.
For extra decadence, warm the syrup slightly before drizzling—it enhances the aroma and creates a beautiful swirl pattern. 🍯
Fresh Berries Topping
Nothing beats the contrast of fresh strawberries or raspberries on top of your ice cream. I like to slice ½ cup strawberries into thin rounds and arrange them artistically around the bowl. For a pop of color, add blueberries or blackberries—their juiciness cuts through the creaminess.
Keep the fruit chilled until serving to prevent it from melting too quickly. A sprinkle of freeze-dried strawberry powder adds a fun crunch and intensifies the flavor.
Toasted Nut Crunch
For texture lovers, toast ¼ cup chopped pecans or almonds in a dry skillet over medium heat for 3-4 minutes until golden brown. Let them cool slightly, then sprinkle over the ice cream.
The nutty richness pairs beautifully with the coconut cream, adding a satisfying crunch. I also love adding crushed graham crackers for a s’mores-inspired twist—just toast them lightly in the same skillet. 🌰
Caramel Swirl
Elevate your ice cream with a homemade caramel swirl. Heat ½ cup coconut sugar in a saucepan with 2 tablespoons coconut cream until melted and golden. Let it cool slightly, then swirl it into the ice cream mixture before freezing.
The caramel will create beautiful ribbons when scooped. For a vegan-friendly version, use date syrup instead of traditional caramel. This adds a buttery depth that makes the dessert feel like a gourmet treat. 🍯
Vanilla Bean Infusion
Enhance the flavor profile by adding 1 teaspoon vanilla extract or even better, ½ vanilla bean scraped and added to the strawberry purée before blending. The vanilla’s warmth rounds out the tartness of the strawberries and complements the coconut cream beautifully.
For a more intense flavor, infuse ½ cup coconut cream with the vanilla bean for 1 hour before whipping. This step is optional but transforms the ice cream from good to extraordinary. ✨
Spiced Cinnamon Dust
Finish with a light dusting of cinnamon for a cozy, aromatic touch. I use a fine-mesh sieve to sprinkle ½ teaspoon ground cinnamon evenly over the top. For a more sophisticated twist, mix the cinnamon with a pinch of cardamom or nutmeg.
This subtle spice blend adds warmth and complexity without overpowering the natural flavors. A quick shake of the sieve ensures an even, elegant presentation. 🌶️
Nutrition facts
Frequently asked questions
Can I use fresh strawberries instead of frozen?
Fresh strawberries won’t work as well for this recipe—they won’t blend as smoothly and may create icy patches. If you only have fresh, freeze them for 24 hours first to break down their texture. The moisture content in fresh berries can also make the final product icier. For best results, stick with frozen strawberries!
Why did my ice cream turn out grainy?
Graininess usually means the mixture wasn’t smooth enough before freezing or it froze too quickly. Always blend strawberries until completely silky (no ice crystals) and freeze in a shallow container with plastic wrap pressed directly on the surface. Let it freeze slowly for 4+ hours—rushing causes ice crystals. If it’s already grainy, blend it again after thawing slightly.
Can I make this without coconut cream?
Yes! For a lighter version, use almond milk or cashew cream>—just whip it to stiff peaks first. For extra richness, try 1 cup full-fat coconut milk> (chilled overnight) or even vegan yogurt> blended with 1 tablespoon cornstarch> to thicken. The texture will be softer but still delicious. The key is ensuring your base is thick enough to freeze properly.
How do I make it softer for kids or warm weather?
Let the frozen ice cream sit at room temperature for 10-15 minutes before serving—this softens it while keeping it scoopable. For an even softer texture, reduce freezing time to 3 hours> (though it may be icier). You can also add 1 tablespoon lemon juice> to the mixture before freezing—it lowers the freezing point slightly, creating a creamier result.
What’s the best way to store leftovers?
Transfer scooped portions to an airtight container with parchment paper between layers to prevent freezer burn. It keeps for 2 weeks> in the freezer. For best texture, let it sit at room temperature for 5 minutes before scooping again. If it gets too hard, microwave for 10 seconds> (covered) to soften slightly before serving. The longer it sits in the freezer, the creamier it becomes!

- Baked Potatoes in Crock Pot Recipe: Buttery Interiors and Crispy Top Magic - November 1, 2026
- Braised Beef Short Ribs Recipe: Crock Pot Fall-Off-Bone Magic in 6 Hours - November 1, 2026
- Crock Pot Cocoa Recipe: Velvety Warmth With Hidden Spice Magic - November 1, 2026