
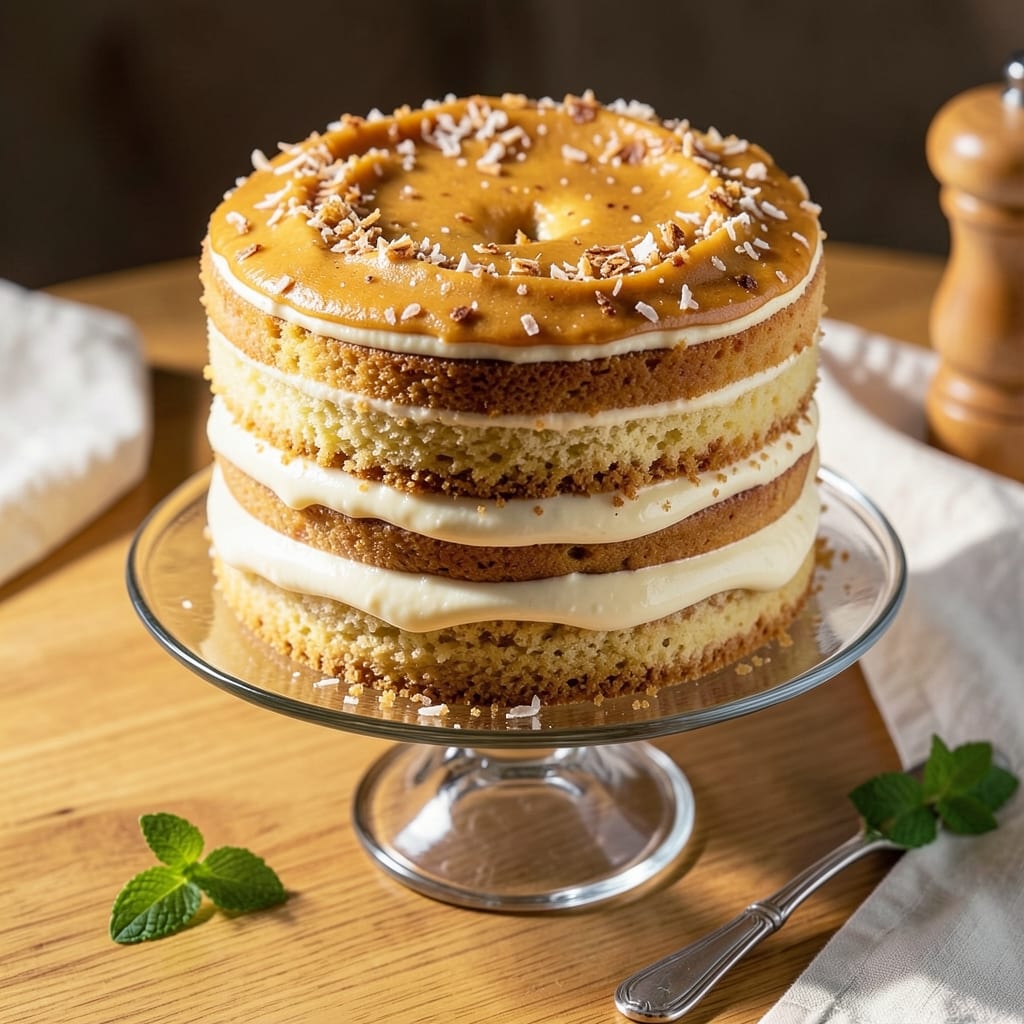
A 5-day coconut cake transforms simple ingredients into a moist, layered masterpiece where vanilla and coconut flavors develop into perfect harmony. 🌟 The secret lies in patience—each day infuses the cake with deeper coconut aroma and irresistible moisture, creating a texture that’s light yet rich.
Unlike traditional cakes that dry out, this method ensures every slice stays tender and flavorful for days.
The process begins with a classic vanilla cake base, baked in layers and soaked progressively with coconut syrup over five days. This gradual infusion prevents sogginess while building layers of coconut essence that become more pronounced with each passing day.
The result is a cake that’s not just visually stunning but also packed with complex flavors that evolve beautifully.
By the final day, you’ll have a cake with golden layers, a delicate crumb, and a coconut aroma that fills the room. The syrup-soaking method guarantees moisture without heaviness, while the vanilla base provides the perfect balance.
Whether served at a celebration or enjoyed as a decadent treat, this cake delivers restaurant-quality results with minimal effort.
Perfect for special occasions or when you want to impress guests with a dessert that gets better over time. The step-by-step approach makes it accessible for home bakers, ensuring professional results every time. Let’s get started on this layered vanilla-coconut masterpiece!
Ingredients for 5 day coconut cake
Twelve simple ingredients transform into a layered vanilla-coconut masterpiece that gets better each day.
| Ingredient | Amount | Notes |
|---|---|---|
| All-Purpose Flour 🌾 | 3 cups | Sifted for even texture |
| Granulated Sugar 🍚 | 2 cups | White or light brown |
| Unsalted Butter 🧈 | 1 ½ cups | Room temperature, softened |
| Large Eggs 🥚 | 6 whole | Room temperature |
| Vanilla Extract 🌸 | 2 tbsp | Pure vanilla preferred |
| Baking Powder 🧂 | 2 tsp | Diamond Crystal preferred |
| Salt 🧂 | ½ tsp | Fine sea salt |
| Shredded Coconut 🥥 | 2 cups | Sweetened, unsweetened works too |
| Coconut Milk 🥥 | 13 ½ oz | Full-fat canned, chilled overnight |
| Coconut Cream 🥥 | 1 cup | From chilled coconut milk |
| Coconut Sugar 🍚 | ½ cup | Or substitute brown sugar |
| Lemon Juice 🍋 | 2 tbsp | Freshly squeezed |
| Vanilla Bean Paste 🌸 | 1 tbsp | Optional for extra flavor |
| Toasted Coconut Flakes 🥥 | ½ cup | For garnish |
The coconut milk is your secret weapon—full-fat canned from Trader Joe’s or Costco gives the richest texture. Chill a can overnight, then scoop out the thick cream from the top. The vanilla extract matters too: pure Madagascar bourbon (like Nielsen-Massey) has the best depth. For the shredded coconut, Bob’s Red Mill is my go-to—it stays fresh longer. The flour? King Arthur if you’re splurging, but any all-purpose works. Toast your coconut flakes in a dry pan for 2 minutes—they’ll add crunch and aroma to every slice.
No coconut milk? Substitute coconut cream plus 2 tbsp water for the same richness. Out of vanilla extract? Vanilla bean paste (like Frontier Co-op) is a game-changer—it’s like having vanilla pods at home. The coconut sugar can be swapped for brown sugar, but it adds a caramel note that’s worth hunting down. For the syrup, if you can’t find coconut sugar, white sugar plus 1 tsp coconut extract works in a pinch. The lemon juice brightens everything—don’t skip it, even if you’re not a lemon fan. And if you’re feeling fancy, infuse the coconut cream with a scraped vanilla bean while it chills overnight.
This cake rewards patience—store it in an airtight container between layers, covered with plastic wrap. The syrup keeps for 1 week refrigerated, so make extra. Once fully soaked, it stays fresh for 5 days at room temperature or 2 weeks refrigerated. For serving, dust with toasted coconut flakes right before slicing—they add that final crunch. The cake actually improves as it sits, so make it a day ahead if you can. Trust me, the first slice out of the fridge on day 5 is worth the wait.
Why You’ll Love This Recipe
- No-Fuss Mixing: This cake comes together with just five ingredients—no fancy techniques, no extra bowls. Cream butter and sugar until light, toss in eggs and vanilla, then fold in flour. That’s it. Honestly, I’ve made it while chatting on the phone.
- Coconut Magic: The slow five-day process lets the coconut milk soak into the layers like a dream—moist but not soggy, with that caramelized sweetness from the sugar. (Yes, even on a Tuesday night.) The vanilla ties it all together without overpowering.
- Weekend Prep, Weekday Wins: Bake it on Saturday, and you’ve got dessert for birthdays, book club, or just because. Slice it, wrap it in parchment, and stash it in the fridge. No reheating needed—just grab and serve.
- Budget-Friendly Luxury: Butter and eggs make it feel special, but the rest of the ingredients are pantry staples. A single batch feeds a crowd, and leftovers? They disappear faster than I can say “second slice.” My secret weapon for gatherings where I don’t want to stress.
Step-by-step instructions for layered vanilla-coconut cake
This cake gets better with time—here’s how to build layers of tropical flavor that develop beautifully over five days!
👨🍳 Step 1: Prepare the Vanilla Coconut Cake Layers
Preheat your oven to 350°F and grease three 9-inch round cake pans with butter or baking spray. Line the bottoms with parchment paper for easy removal. In a large mixing bowl, cream together the 1.5 cups unsalted butter and 2 cups granulated sugar on medium speed until light and fluffy—about 3-4 minutes. You’ll know it’s ready when the mixture nearly doubles in volume and looks pale.
Add the 6 whole large eggs one at a time, mixing well after each addition. Then stir in the 2 tbsp vanilla extract and 1 tbsp vanilla bean paste (if using). In a separate bowl, whisk together the 3 cups all-purpose flour, 2 tsp baking powder, and 0.5 tsp salt. Gradually add the dry ingredients to the wet mixture, mixing just until combined—don’t overmix. The batter should be smooth and slightly thick.
Divide the batter evenly among the prepared pans. Bake for 25-30 minutes or until a toothpick inserted in the center comes out clean. Let the layers cool in the pans for 10 minutes, then transfer to a wire rack to cool completely. Here’s the thing—these layers need to be fully cooled before assembly, or your coconut filling will turn into a soggy mess!
🥘 Step 2: Make the Coconut Cream Filling
This is where the magic happens! In a medium bowl, whisk together the 1 cup coconut cream (from the chilled 13.5 oz coconut milk), 0.5 cup coconut sugar, 2 tbsp lemon juice, and 1 tbsp vanilla extract until smooth. The coconut cream should be thick and creamy—if it’s too runny, chill it for another 10 minutes to firm up.
In a separate bowl, gently fold in the 2 cups shredded coconut until evenly distributed. The filling should be thick enough to hold its shape but still spreadable. Here’s my pro tip: I like to divide the filling into three equal portions for even distribution between the layers. If you’re feeling fancy, you can toast the shredded coconut first for extra crunch!
🍳 Step 3: Assemble the Cake Layers
Place the first cake layer on a serving plate or cake stand. Spread about ⅓ of the coconut cream filling evenly over the top, leaving a ½-inch border around the edges. This prevents the filling from oozing out when you slice it later. Sprinkle a thin layer of the 2 cups shredded coconut over the filling for texture.
Repeat with the remaining layers, adding the second layer, another ⅓ of the filling, and more shredded coconut. Top with the final layer and spread the remaining filling over the top. Press down gently to ensure good contact between layers. Here’s the crucial part: refrigerate the assembled cake for at least 4 hours before serving—this allows the flavors to meld and the filling to set properly.
⏰ Step 4: Develop the Flavor Over 5 Days
The real secret to this cake is letting it mature! After the initial 4-hour chill, cover the cake with plastic wrap and refrigerate for up to 5 days. Each day, the coconut flavor intensifies and the textures become more balanced. The filling will thicken slightly, and the cake layers will absorb the tropical essence.
Before serving, let the cake sit at room temperature for 30 minutes to soften slightly. Dust the top with 0.5 cup toasted coconut flakes for extra crunch and visual appeal. Slice with a sharp, hot knife for clean cuts—this prevents the filling from squeezing out. Serve with a dollop of whipped coconut cream or a scoop of vanilla ice cream for the ultimate tropical experience!
Pro Tips For Making 5 Day Coconut Cake
- Whisk Eggs Until Ribbon Stage: This isn’t just mixing—stretch the batter until it holds a slow ribbon when the whisk is lifted. I used to eyeball it and ended up with dense layers. Five seconds of extra effort guarantees light, airy crumb, especially with the butter-heavy dough.
- Cream Butter and Sugar Cold: Pull the butter straight from the fridge and let it sit just until it yields to a spoon—not melted. Cold butter creates pockets for the coconut flavor to bloom over five days, while warm butter makes the cake greasy. Trust me, your patience pays off.
- Sift Flour Twice: The first sift removes lumps, but the second ensures no hidden grit ruins the texture. I learned this after biting into a cake with a weird texture—turns out, flour clumps hide in plain sight. Skip the lazy dump-and-stir.
- Bake at 325°F, Not Higher: This cake relies on slow, even cooking to develop its signature moisture. At 350°F, the outside burns before the center sets. I’ve ruined three batches by rushing—now I set the oven to 325°F and walk away. The thermometer never lies.
Essential equipment for great 5 day coconut cake
Mixing Bowls
Invest in a set of stainless steel mixing bowls—I swear by the OXO Good Grips 5-Piece Nesting Set—because they’re durable, non-reactive, and easy to clean. The 5-quart bowl handles the cake batter perfectly, while the smaller bowls keep your dry ingredients organized.
Avoid glass bowls for this recipe; they can crack under the weight of the batter and are harder to clean after coconut syrup residue. 🥣
Stand Mixer
A stand mixer with a paddle attachment is a game-changer for creaming butter and sugar to the perfect light texture. My go-to is the KitchenAid Artisan Series—it’s powerful enough for this recipe and won’t overheat.
If you don’t have one, a hand mixer works, but be prepared for some arm work. The key is mixing on medium speed to avoid incorporating air bubbles that could affect the cake’s texture.
Cake Pans
Use three 9-inch round cake pans with removable bottoms for foolproof layers. I recommend Wilton Perfect Results Non-Stick Cake Pans—they release cleanly and prevent sticking. Grease them with butter (not oil) and line the bottoms with parchment paper for extra insurance.
If you only have one pan, bake the layers one at a time and let them cool completely before assembling. Pro tip: Chill the pans in the freezer for 10 minutes before baking to ensure even rise.
Offset Spatula
An offset spatula (like the Michael Ruhl offset spatula) is essential for spreading the coconut cream filling evenly between layers. Its angled blade helps you reach the edges without tearing the cake.
Use it to smooth the filling and create that perfect ½-inch border—this keeps the filling contained and prevents messy slices. Keep it handy for frosting too if you decide to add a final coconut glaze.
Plastic Wrap
For the 5-day soaking process, you’ll need heavy-duty plastic wrap (like Glad Press’n Seal) to seal the cake airtight. This prevents drying and keeps the coconut flavors locked in. Wrap the cake snugly after each day’s soaking, pressing the plastic directly against the top to eliminate air pockets.
I also recommend using a round cake carrier to transport it easily—just pop the wrapped cake inside for a polished presentation. ❄️
Knife for Slicing
A sharp, hot knife is non-negotiable for clean slices. Heat a serrated knife under hot water for 10 seconds before each cut to prevent the filling from oozing out. I love the Mercer Culinary Genesis—its long blade glides through layers effortlessly.
For extra flair, dust the top with toasted coconut flakes right before serving to add crunch and visual appeal. Trust me, your guests will notice the difference! 🌟
Nutrition facts
Frequently asked questions
Why does this cake need 5 days to develop its flavor?
The 5-day process allows the coconut essence to fully infuse into the cake layers through gradual soaking. Each day, the coconut syrup penetrates deeper, creating a perfect balance between moisture and flavor intensity. This method prevents sogginess while building complex tropical notes that simple one-day cakes can’t achieve.
Can I make this cake without coconut milk?
Yes! For a substitute, mix 1 cup coconut cream with 2 tablespoons water to replicate the same richness. If you’re avoiding coconut entirely, try a heavy cream and sugar mixture sweetened with 1 teaspoon coconut extract for a similar flavor profile. The texture will be slightly different but still delicious.
How do I prevent the cake layers from getting soggy?
Ensure your cake layers are completely cooled before assembly, and spread the coconut filling with a ½-inch border around edges. Chill the assembled cake for at least 4 hours before refrigerating. Using room-temperature butter and eggs also helps maintain proper structure. The plastic wrap sealing during the 5-day process keeps moisture locked in without over-saturating.
Can I make this cake in advance for a party?
This cake is perfect for making ahead! Assemble it completely and refrigerate for up to 5 days before serving. The flavors actually improve with time. Just bring it to room temperature for 30 minutes before slicing to ensure clean cuts. The gradual soaking process means it stays moist and delicious even after several days.
What’s the best way to store leftovers?
Wrap individual slices tightly in plastic wrap and store at room temperature for 2 days or refrigerate for up to 5 days. For longer storage, freeze slices for 1 month. The cake’s moisture content means it won’t dry out quickly, but refrigeration extends freshness. Reheat slices in the microwave for 10-15 seconds to restore warmth.

- Baked Potatoes in Crock Pot Recipe: Buttery Interiors and Crispy Top Magic - November 1, 2026
- Braised Beef Short Ribs Recipe: Crock Pot Fall-Off-Bone Magic in 6 Hours - November 1, 2026
- Crock Pot Cocoa Recipe: Velvety Warmth With Hidden Spice Magic - November 1, 2026