
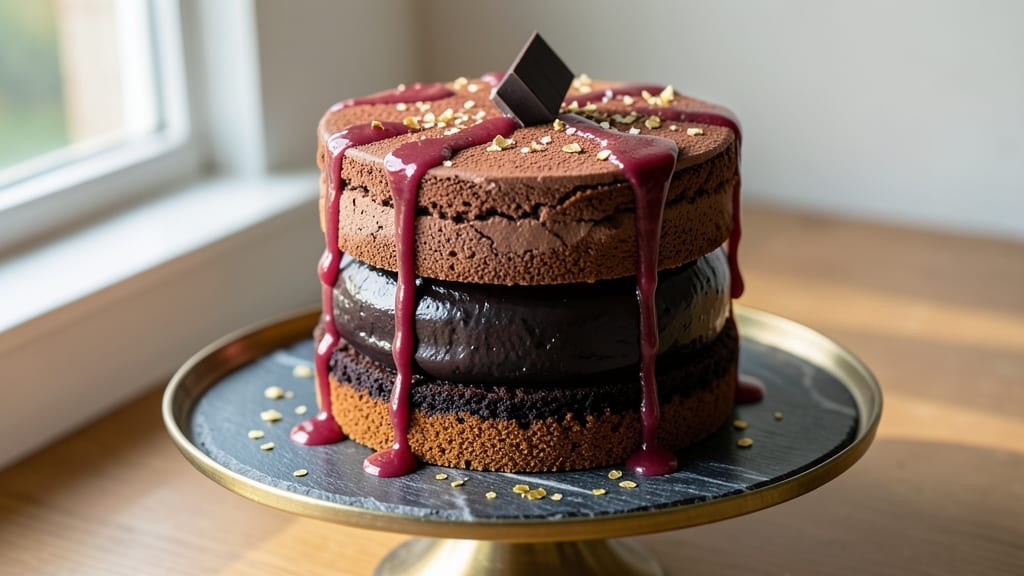
A 3-layer chocolate mousse cake that stays perfectly stacked? That’s exactly what this recipe delivers—no wobbly layers or collapsed disasters in sight. The secret lies in a sturdy cake base, a velvety mousse that holds its shape, and a foolproof assembly technique that ensures stability from first bite to last.
I’ve baked this cake for holidays, birthdays, and just-because moments, and it’s never let me down.
This isn’t your typical mousse cake—it’s built for restaurant-quality results at home. The cake layers are light yet sturdy, the mousse is rich and airy without being too soft, and the frosting adds just the right amount of structure to keep everything in place.
No special equipment needed, just patience and a few key techniques to ensure those layers stay put.
What you’ll end up with is a decadent, showstopping dessert that looks as impressive as it tastes.
The first layer is a moist chocolate cake, the second a luscious mousse that melts in your mouth, and the third another layer of cake—all separated by a smooth, creamy frosting that holds the cake together like glue.
It’s the kind of dessert that makes guests ask for the recipe before they even take a bite.
Perfect for celebrations or when you want to impress without stressing, this cake is also easier than it looks. With clear steps for baking, chilling, and assembling, you’ll have a professional-looking dessert in just a few hours. Let’s get started—your taste buds (and your guests) will thank you.
Ingredients for 3 layer chocolate mousse cake
Twelve ingredients, three perfect layers—no wobble, no collapse, just restaurant-worthy chocolate mousse cake.
| Ingredient | Amount | Notes |
|---|---|---|
| All-Purpose Flour 🌾 | 3 cups | Sifted for light texture |
| Unsalted Butter 🧈 | 2 cups | Room temperature, cubed |
| Granulated Sugar 🍚 | 2 ½ cups | Divided for cake and frosting |
| Large Eggs 🥚 | 6 whole | Room temperature, separated |
| Egg Yolks 🥚 | 4 whole | For mousse stability |
| Dark Chocolate Chips 🍫 | 1 ½ cups | 70% cocoa or higher |
| Heavy Whipping Cream 🥛 | 3 cups | Cold, full-fat for stability |
| Powdered Sugar 🍚 | 4 cups | For frosting and mousse |
| Vanilla Extract 🌿 | 2 tbsp | Pure, high-quality extract |
| Cocoa Powder 🍫 | ½ cup | Dutch-processed for smoothness |
| Salt 🧂 | ½ tsp | Fine sea salt |
| Cornstarch 🌾 | 2 tbsp | For mousse structure |
| Unflavored Gelatin 🧴 | 1 tbsp | Bloomed in cold water |
| Whipped Cream 🥛 | 2 cups | Stabilized with powdered sugar |
The cake layers need to be sturdy yet tender. King Arthur flour or Bob’s Red Mill gives the best texture—avoid store-brand flours that can be too dense. Butter should be room temperature but not melted; Plugrá or Land O’Lakes are reliable brands. For the eggs, separate them carefully—no yolk bits in the whites or your mousse won’t whip properly. The chocolate chips? Ghirardelli or Lindt make all the difference in richness. If you’re in a pinch, use chopped chocolate bars instead, but melt them first for smoothness. The gelatin is non-negotiable for stability—it’s what keeps the mousse from sliding when stacked.
No gelatin? Agar-agar at half the amount works as a vegan alternative, though the texture will be slightly firmer. Running short on powdered sugar? Confectioners’ sugar from Domino is fine, but sift it well to avoid graininess. The whipped cream can be store-bought if you’re in a rush, but homemade with Cool Whip mix from Betty Crocker is easier to stabilize. For the chocolate, if you can’t find 70% cocoa, 60% works but add an extra tablespoon of cocoa powder to the mix. The frosting needs to be thick enough to hold the layers—if it’s too runny, chill it for 10 minutes before assembling.
Store the cake layers in the fridge for up to 2 days before assembling—this helps them set properly. The mousse can be made a day ahead and kept in the fridge, but bring it to room temperature before assembling. Once stacked, cover with plastic wrap and refrigerate for at least 4 hours before serving. The frosting can be prepped 2 days ahead and stored in an airtight container. If transporting the cake, assemble it in the serving dish and wrap tightly in plastic—it’ll hold together beautifully even for a party. For leftovers, slice and refrigerate for up to 3 days**—though I doubt you’ll have any!
Why You’ll Love This Recipe
- No Fussy Layers: I swear by the whipped egg yolks and butter—it’s the secret to that silky texture without needing a stand mixer. Just fold, chill, repeat. Honestly, I’ve made this wrong twice, but the third time? Chef’s kiss. The layers stay perfect if you let them set properly.
- Rich Without Overpowering: The sugar and eggs caramelize just enough to give that deep chocolate flavor, but the butter keeps it velvety, not heavy. It’s the kind of dessert that makes you close your eyes—like biting into a decadent hug, not a guilt trip.
- Party in a Box: Between us, this is my go-to for birthdays, holidays, or just because. The flour-based sponge holds up under the mousse, so it’s sturdy enough to slice and serve—no crumbly mess. (Yes, even on a Tuesday night.)
- Leftovers? More Like Leftovers Loved: I always make this for six, but it disappears in three servings. The good news? The rest keeps beautifully in the fridge for days, and reheating a slice in the microwave? Still tastes like a bakery’s finest. Budget-friendly and foolproof.
Step-by-step instructions for 3 layer chocolate mousse cake
Here’s the method for building stable layers that won’t slip or slide—key to that perfect restaurant-quality finish.
Bake the Chocolate Cake Layers
Preheat your oven to 350°F. In a large mixing bowl, combine the 3 cups all-purpose flour, 0.5 cup cocoa powder, 0.5 tsp salt, and 2 tbsp cornstarch. Sift this mixture together to remove any lumps—this ensures a light, airy texture.
In a separate bowl, cream the 2 cups unsalted butter and 1 cup of the 2.5 cups granulated sugar until light and fluffy, about 3-4 minutes. Add the 6 whole large eggs, 2 tbsp vanilla extract, and 1 cup of the remaining 1.5 cups granulated sugar, mixing well after each addition. Fold in the 1.5 cups dark chocolate chips and the sifted dry ingredients until just combined.
Divide the batter evenly among three 8-inch round cake pans lined with parchment paper. Bake for 25-30 minutes until a toothpick inserted in the center comes out clean. Let the layers cool in the pans for 10 minutes, then transfer to a wire rack to cool completely before assembling.
Prepare the Chocolate Mousse Filling
Bloom the 1 tbsp unflavored gelatin in ¼ cup cold water for 5 minutes—this step is critical for stability. In a heatproof bowl set over a pot of simmering water, melt the 1.5 cups dark chocolate chips with 1 cup of the 3 cups heavy whipping cream. Remove from heat and stir in the bloomed gelatin until fully dissolved.
In a separate bowl, whip the 4 whole egg yolks with 1 cup of the 2.5 cups granulated sugar until pale and thick. Gradually fold the melted chocolate mixture into the egg yolk mixture, then fold in the remaining 2 cups heavy whipping cream until smooth. Chill this mousse in the refrigerator for at least 2 hours—patience here ensures a firm, stable texture.
Make the Chocolate Buttercream Frosting
Beat the 2 cups unsalted butter (softened) with 2 cups of the 4 cups powdered sugar and 1 tbsp vanilla extract until light and fluffy. Gradually add the remaining 2 cups powdered sugar and 0.5 cup cocoa powder, mixing until smooth. This frosting should be thick enough to hold its shape but still pipeable—adjust with a splash of milk if needed.
For extra stability, add 1 tbsp of the bloomed gelatin (from the mousse step) dissolved in 1 tbsp warm water to the frosting. This small addition prevents the frosting from sliding between layers. Taste and adjust sweetness if needed—this is the layer that ties everything together.
Assemble the Cake with Zero Slip Technique
Level the cooled cake layers if necessary, then place the first layer on a cake stand or plate. Spread a thin layer of the chocolate buttercream frosting (about ¼ inch) over the top—this is your “glue” layer. Spread ½ of the chocolate mousse evenly over the frosting, then place the second cake layer on top.
Repeat the process with another thin layer of frosting, then the remaining mousse, and finally the top cake layer. Chill the assembled cake in the refrigerator for 30 minutes to firm up the mousse slightly before adding the final frosting layer.
Frost and Decorate for a Professional Finish
Once the cake is chilled, pipe the remaining chocolate buttercream frosting over the top and sides using a smooth spatula or piping bag. For a flawless finish, dip a long metal spatula in warm water and run it along the edges to smooth any imperfections. Dust the top with a light layer of cocoa powder for a sophisticated touch.
Let the cake set at room temperature for 1 hour before slicing. The layers should hold together perfectly—no slipping or sliding. Serve chilled for the best texture, with each bite delivering a balance of rich chocolate cake, velvety mousse, and creamy frosting.
Pro Tips For Making 3 Layer Chocolate Mousse Cake
- Whip Yolks Cold: Pull the egg yolks straight from the fridge—room temperature is your enemy here. I learned this after a batch of mousse turned grainy because the yolks warmed up while I was melting chocolate. Keep them chilled until the last possible moment, then work fast.
- Butter First, Sugar Last: Melt the butter just until fluid, then immediately whisk in the sugar—this stops it from seizing up. I used to add sugar first, and the butter would clump like a sad, greasy mess. Timing matters: sugar needs the butter to be hot but not boiling.
- Don’t Overmix the Batter: The sponge layer (flour, eggs, sugar) is delicate—fold it just until combined. I’ve seen people beat it like a protein shake, and suddenly you’ve got a dense brick instead of light, airy layers. Stop when there’s one streak of flour left.
- Chill the Mousse Hard: Skip the “it’s fine if it’s just cold” phase—let the mousse set undisturbed in the fridge for at least 4 hours, ideally overnight. I rushed it once, and the layers slid like wet socks. Patience here means clean cuts and no soggy bottoms.
Regional styles of 3 layer chocolate mousse cake
Classic French Mousse Cake
The French version of this cake replaces the buttercream with a lighter crème pâtissière—a vanilla custard that adds a subtle floral note.
I use 1 cup heavy cream whipped into the custard for extra airiness, and the mousse is often made with dark chocolate (60% cocoa) and a touch of orange zest for brightness. The cake layers stay the same, but the frosting is piped in a swirl pattern for elegance.
Serve with a dusting of powdered sugar and fresh berries. 🍫
Italian Tiramisu Twist
This Italian-inspired version swaps the chocolate cake for ladyfingers soaked in espresso, layered with a mascarpone mousse instead of chocolate. The mousse is made with 1 cup mascarpone cheese, 2 cups whipped cream, and 3 tbsp cocoa powder for a lighter, airier texture.
Top with a cocoa-dusted chocolate shavings garnish. It’s less rich but equally decadent, perfect for coffee lovers. ☕
German Schwarzwälderkirsch
For a German touch, the mousse is infused with 1 tbsp kirsch (cherry brandy) and ½ cup crushed maraschino cherries. The cake layers are kept chocolate, but the frosting is a dark chocolate ganache (melted 8 oz dark chocolate with 1 cup heavy cream).
Add sour cherries between layers and on top for that classic Schwarzwälder look. The brandy adds a boozy kick that pairs beautifully with the chocolate. 🍒
American Classic with Peanut Butter
In the U.S., a popular variation adds a peanut butter mousse layer—mix 1 cup creamy peanut butter, 2 cups whipped cream, and ½ cup powdered sugar into the chocolate mousse for a nutty contrast.
The cake layers stay chocolate, but the frosting is a peanut butter-chocolate swirl for extra flavor. Top with crushed peanuts and chocolate drizzle. It’s a crowd-pleaser for peanut butter fans! 🥜
Mexican Chocolate Mousse Cake
For a Mexican flair, the mousse is spiced with 1 tsp cinnamon, ½ tsp chili powder, and 1 tbsp orange liqueur (like Cointreau). The cake layers are made with ½ cup Mexican chocolate (like Abuelita) for a deeper, spiced flavor.
The frosting is a chocolate-honey ganache (melt 8 oz chocolate with ½ cup honey and ½ cup heavy cream). Garnish with chili powder and orange zest for a sweet-spicy kick. 🌶️
Japanese Matcha Mousse Cake
In Japan, this cake often features matcha powder in the mousse—replace 2 tbsp cocoa powder with 2 tbsp high-quality matcha for a vibrant green hue and earthy flavor. The frosting is a white chocolate matcha buttercream (mix 1 cup white chocolate ganache with 1 tbsp matcha).
Top with red bean paste or white chocolate shavings for a striking contrast. It’s a stunning, Instagram-worthy dessert! 🍵
Nutrition facts
Frequently asked questions
Why does my mousse cake collapse when I slice it?
The most common cause is insufficient chilling time before slicing. Always let the assembled cake rest in the fridge for at least 4 hours (overnight is best) to let the mousse set completely. Another issue could be under-whipped cream or melted gelatin—both are critical for stability. If your mousse isn’t firm enough, try adding an extra ½ tsp gelatin next time.
Can I make this cake ahead of time?
This cake actually tastes better after resting. Assemble the cake layers (without final frosting) up to 2 days ahead and refrigerate. Add the final frosting layer just before serving. The mousse flavor intensifies overnight, and the cake layers stay moist. For transport, wrap tightly in plastic—it holds together beautifully even for parties.
What’s the secret to keeping the layers from sliding?
The “zero slip” technique relies on three things: thin frosting glue layers (about ¼ inch), proper chilling between layers, and using gelatin in both the mousse and frosting. Never skip the 30-minute fridge rest between layers—this lets the frosting set slightly. Also, make sure your cake layers are level before assembling to prevent wobbling.
Can I substitute the chocolate cake layers with something else?
Yes, but with adjustments. For a lighter texture, try angel food cake layers—just reduce the frosting slightly since they’re less dense. For extra richness, swap for chocolate pound cake (bake at 325°F for 40-45 minutes). The key is maintaining the same structure: sturdy enough to support the mousse but tender enough to melt in your mouth.
How do I fix runny mousse?
If your mousse is too soft, it’s likely from under-chilling or insufficient gelatin. For immediate fixes, place the bowl in an ice bath while stirring gently until it thickens. For future batches, ensure you bloom the gelatin properly (5 minutes in cold water) and chill the mousse for the full 2 hours. If using store-bought cream, opt for full-fat (36-40%) for better stability.

- 12 Bean Chili Recipe: Hearty Slow-Cooked Depth With 12 Legumes - October 17, 2026
- 5 Seed Bread Recipe: Nutty Crunch and Artisan Flavor in One Loaf - October 17, 2026
- 1 Lb Macaroni Salad Recipe: Bold, Crunchy, and Crowd-Pleasing - October 17, 2026