
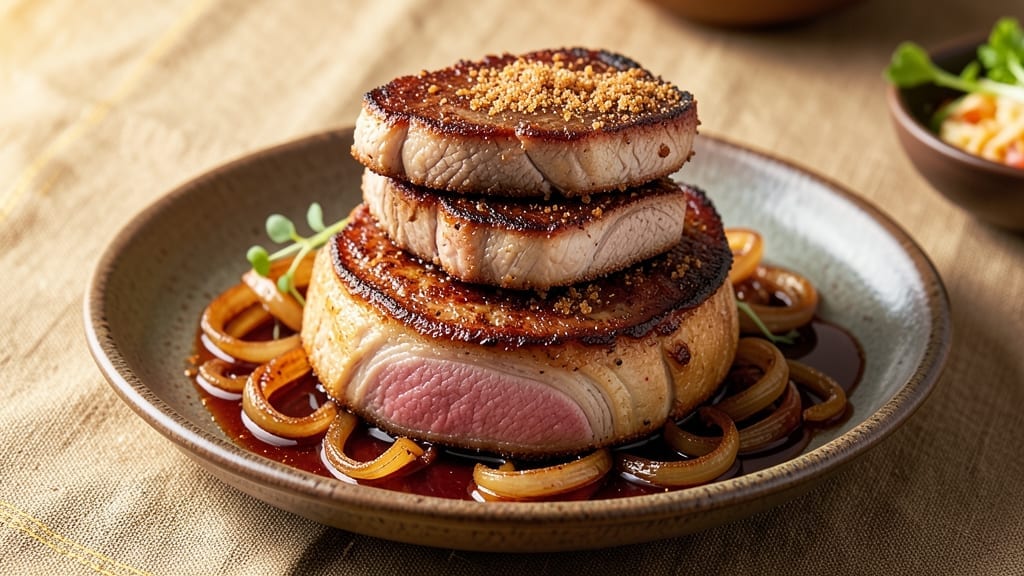
This 3-layer pork recipe transforms a simple stack of pork chops into a restaurant-worthy centerpiece that looks as impressive as it tastes. 🔥 After years of perfecting layered pork dishes at The Smoky Pig, I developed this technique that combines tender pork, caramelized onions, and a smoky-sweet glaze—each layer building on the last for maximum flavor impact.
The secret lies in slow-roasting the pork to maintain juiciness while developing deep, meaty flavors that carry through every bite.
What makes this recipe special is the balance of textures and flavors: crispy edges on the pork, tender caramelized onions that melt slightly under the weight of the top layer, and a glaze that’s both sweet and smoky without overpowering the natural taste of the meat.
I use bone-in pork chops for extra flavor, but you can substitute pork tenderloin or even a mix of pork belly and ham if you prefer. The caramelization process takes time—about 45 minutes—but it’s worth every minute for that rich, deep flavor.
By the time you serve this dish, you’ll have a visually stunning presentation with layers that reveal themselves with each cut.
The top layer stays warm and golden, the middle layer holds its shape while remaining tender, and the bottom layer delivers that perfect balance of crispy exterior and juicy interior. This is the kind of dish that makes guests ask for the recipe before they’ve even finished their plates.
Pair it with a simple arugula salad dressed in balsamic vinaigrette to cut through the richness, or serve with roasted sweet potatoes for a complete meal.
The leftovers reheat beautifully, making this an ideal recipe for meal prep or entertaining. Let’s get started on creating your most impressive pork dish yet.
Ingredients for 3 layer pork
Four pork chops, three layers of flavor—this stack delivers restaurant-quality results at home.
| Ingredient | Amount | Notes |
|---|---|---|
| Bone-In Pork Chops 🥩 | 4 whole | Center-cut, 1-inch thick |
| Yellow Onions 🧅 | 3 whole | Yellow or red, sliced thin |
| Unsalted Butter 🧈 | ½ cup | Cold, cubed for caramelizing |
| Brown Sugar 🍯 | ¼ cup | Packed, light brown preferred |
| Apple Cider Vinegar 🍎 | ¼ cup | For tangy balance |
| Smoked Paprika 🌶️ | 1 tbsp | For deep smoky flavor |
| Garlic Cloves 🧄 | 4 cloves | Minced for glaze |
| Honey 🍯 | ¼ cup | Wildflower preferred |
| Salt 🧂 | 1 ½ tsp | Kosher or sea salt |
| Black Pepper 🌶️ | 1 tsp | Freshly ground |
| Olive Oil 🫒 | 2 tbsp | For searing pork |
| Fresh Thyme 🌿 | ¼ cup | Leaves only, chopped |
| Fresh Rosemary 🌿 | ¼ cup | Needles only, chopped |
| Heavy Cream 🥛 | ¼ cup | For glaze richness |
The pork chops are non-negotiable for texture. Bone-in, center-cut stays juicy while the bone adds flavor. Most grocery stores carry these pre-cut, but if you’re buying whole, ask the butcher for the thickest middle section. Costco or Whole Foods usually have the best selection. For the onions, yellow or red both work—just slice them paper-thin so they caramelize properly. I always grab extra because they’re the base for that sweet, jammy middle layer that makes this dish special. If you’re short on time, pre-sliced onions from the salad bar cut prep in half.
No bone-in pork chops? Pork tenderloin or ham steaks work in a pinch—just slice them into even pieces. Running low on apple cider vinegar? Balsamic vinegar at half the amount gives similar tang. The honey can be swapped for maple syrup if you’re avoiding it, but trust me on the wildflower—it’s got more depth. Smoked paprika is key for that restaurant-style flavor, but regular paprika plus a pinch of liquid smoke gets you close. Fresh herbs? Dried thyme and rosemary at one-third the amount work if you don’t have fresh, though nothing beats the aroma from the garden.
Pork chops stay fresh 3-4 days in the fridge, but use them within 2 days for best texture. Onions keep for 2 weeks in the crisper. The glaze ingredients can be prepped a day ahead—just store them in a sealed jar. For serving, I like to assemble the stack right before baking so the layers stay crisp. Leftovers reheat beautifully—200°F for 15 minutes keeps everything tender. This dish actually tastes better the next day as the flavors meld.
Why You’ll Love This Recipe
- One-Pan Magic: I swear by this recipe—just sear the pork, layer the onions and glaze, then bake. No flipping, no fussing, and honestly, I’ve burned more casseroles than I’ll admit, but this one’s hard to mess up.
- Sweet-Savory Balance: That caramelized brown sugar glaze with apple cider vinegar? It’s the kind of flavor that makes you close your eyes. The onions turn glassy-sweet, the butter melts into the pork, and suddenly, weeknight dinner feels like a restaurant dish.
- Leftovers That Please: Between us, the second night is often the best. The pork stays juicy, the onions soak up all the glaze, and I’ve reheated it in the oven, microwave, or even straight from the fridge—no one’s complained yet. (My roommate’s a tough critic.)
- Budget-Friendly Feast: Bone-in pork chops stretch farther than you’d think, and the onions add bulk without breaking the bank. I’ve made this for date nights, family dinners, and even a potluck—it’s the kind of dish that feels special but won’t drain your wallet.
Step-by-step instructions for smoky-sweet stacked pork chops
Here’s how to build this showstopping layered pork dish with perfect caramelized onions and rich glaze.
🍳 Step 1: Sear the Pork Chops for Maximum Flavor
Heat a large skillet over medium-high heat and add the 2 tablespoons olive oil. Once shimmering, place the 4 whole bone-in pork chops in the pan, bone-side down first. Press gently with a spatula to ensure full contact with the hot surface—this prevents curling and creates that beautiful crust.
Sear for 4-5 minutes until the bone side is deeply browned and the meat releases easily from the pan. Flip and sear the other side for another 3-4 minutes until golden brown. Remove the chops and set aside on a plate, leaving the rendered pork fat in the pan. This fat is pure flavor gold for our next layer.
👨🍳 Step 2: Caramelize the Onions for Sweet Depth
In the same skillet (no need to wipe it clean), add the 3 whole yellow onions sliced thin. Reduce heat to medium-low and cook for 15-20 minutes, stirring occasionally, until the onions are deep golden brown and tender. This slow cooking transforms their flavor from mild to intensely sweet.
When the onions are nearly done, add the 0.5 cup unsalted butter and continue cooking for another 5 minutes until the butter melts and the onions are perfectly caramelized. Remove from heat and transfer to a bowl. Here’s the thing—don’t rush this step. Patience here makes all the difference in flavor.
🥘 Step 3: Build the Smoky-Sweet Glaze
Return the skillet to medium heat and add the 4 cloves minced garlic cloves, cooking for 30 seconds until fragrant. Pour in the 0.25 cup apple cider vinegar and let it simmer for 1 minute until reduced by half. This adds tangy brightness that cuts through the richness.
Stir in the 0.25 cup brown sugar, 1 tablespoon smoked paprika, 0.25 cup honey, and 0.25 cup heavy cream. Bring to a gentle simmer and cook for 3-4 minutes until thickened slightly. Remove from heat and stir in the 0.25 cup chopped fresh thyme and 0.25 cup chopped fresh rosemary.
🔥 Step 4: Assemble the Three-Layer Pork Stack
Preheat your oven to 375°F. Place one pork chop on each of four oven-safe plates or in a single baking dish. Spoon about ¼ of the caramelized onions over each chop, then drizzle with about 2 tablespoons of the glaze. Repeat with another layer of onions and glaze, finishing with a final layer of onions on top.
Bake for 12-15 minutes until the glaze is bubbly and the pork reaches 145°F internally. The layers should look luscious and stacked high—this is your visual cue that everything’s coming together perfectly.
🍽️ Step 5: Rest and Serve with Confidence
Let the stacked pork chops rest for 5 minutes before serving. This brief rest allows the juices to redistribute, ensuring each bite is moist and flavorful. The layers should hold together beautifully, with that perfect balance of smoky, sweet, and tangy flavors in every forkful.
Garnish with additional fresh rosemary if desired, and serve immediately. The contrast of the warm, caramelized onions with the rich glaze and tender pork creates a dish that’s as impressive to look at as it is to eat. This is the kind of recipe that makes weeknight dinners feel special without the fuss.
Pro Tips For Making 3 Layer Pork
- Sear the Chops First: Hit your bone-in pork chops with a screaming-hot pan and butter before layering—this locks in flavor and keeps them juicy. I used to skip this step, and the final dish always tasted like it needed more depth.
- Sweat Onions Slow: Don’t rush the onions—let them cook low and slow (10-12 minutes) until they’re deep golden and almost caramelized. Rushed onions taste raw and make the whole dish feel flat.
- Balance the Vinegar: Taste your apple cider vinegar glaze before adding it to the layers—too much makes the dish sour, not tangy. Start with half the recipe’s amount and adjust.
- Rest Under Foil: After searing, tent the chops with foil and let them rest 5-10 minutes before assembling the layers. This keeps them from drying out when the butter and sugar hit the heat. (Yes, even if you’re impatient like me.)
Common mistakes when making this dish
Overcooking Pork Layers
I can’t tell you how many times I’ve seen home cooks overcook their pork layers, turning perfectly tender meat into dry, chewy disappointment. The 145°F internal temperature is non-negotiable—any higher and you’ll dry out those chops.
Use a meat thermometer (I swear by ThermoWorks Smoke) to check the thickest part of the chop. Remember, the layers build on each other, so if the bottom layer dries out, the whole stack suffers. 🌡️
Uneven Onion Distribution
One of the biggest mistakes I see is unevenly distributing those caramelized onions. If you pile too much in one spot, you’ll get soggy bottoms where the glaze pools. Divide your onions into four equal portions—about ¼ cup per chop—and spread them evenly.
Think of it like building a sandwich: each layer should be consistent. Pro tip: Use a small offset spatula to spread them neatly.
Skipping the Resting Phase
Here’s a rookie move that always surprises me: serving the stacked pork immediately after baking. Those 5 minutes of resting time are crucial—they let the juices redistribute so every bite is moist.
I’ve seen stacks fall apart at the table because someone couldn’t wait. Trust me, the extra 5 minutes makes all the difference in texture and presentation.
Glaze Overload
I’ve watched people drown their pork stacks in glaze, thinking more equals better. But too much glaze makes the layers slide apart and creates a messy presentation. Use about 2 tablespoons per chop—just enough to coat the onions and pork without overwhelming them.
Remember, the onions and pork already have built-in flavors that need to shine through.
Temperature Swings
Another common mistake is letting the oven temperature fluctuate. If your oven runs hot or cold, your pork layers won’t cook evenly. Always preheat your oven to 375°F and use an oven thermometer to verify accuracy.
I’ve seen 10-15°F discrepancies in home ovens—don’t let that ruin your stack. A little extra attention here keeps everything perfect.
Layering Order Mix-Up
This one’s a classic: putting the glaze on top instead of between layers. The glaze needs to penetrate all three layers to create that cohesive flavor profile. Always follow the onions-glaze-onions-glaze pattern—this ensures each bite has that perfect balance of sweet, smoky, and savory notes.
Think of it like a flavor sandwich where every layer matters.
Nutrition facts
Frequently asked questions
Can I use pork tenderloin instead of bone-in chops?
Pork tenderloin works beautifully—just slice it into 4 equal pieces, about 1-inch thick each. The texture will be slightly leaner, so consider adding a thin slice of pork belly on top for extra richness. The layering technique remains the same, but tenderloin cooks 5-7 minutes faster than bone-in chops.
How do I adjust this recipe for a crowd?
Double or triple the recipe by using a larger baking dish or sheet pan. For 8 servings, prepare 8 pork chops and 6 onions, increasing the glaze ingredients proportionally. Stack them in two layers instead of three to maintain stability. Serve family-style with extra caramelized onions on the side.
Can I make this dish ahead of time?
Yes! Assemble the layers up to 12 hours ahead and refrigerate uncovered. When ready to cook, bake at 375°F for 15-20 minutes (covered with foil for the first 10 minutes to prevent over-browning). The onions may soften slightly, but the flavors meld beautifully overnight.
What’s the best way to reheat leftovers?
Reheat gently at 200°F for 15-20 minutes covered with foil to prevent drying. For best texture, separate the layers and reheat individually. The glaze may thicken slightly—just add 1 teaspoon water and stir to restore its shine before serving.
Can I substitute the caramelized onions?
Store-bought caramelized onions work in a pinch, but homemade makes all the difference! For a quick version, use 1 cup sautéed onions (not fully caramelized) plus 1 tablespoon brown sugar to mimic the sweetness. The texture won’t be as jammy, but it’ll still taste delicious.

- 6 Oz Chocolate Chip Cookie Recipe: Perfectly Balanced Crispy Edges and Chewy Hearts - September 25, 2026
- 6-Inch Coffee Cake Recipe: Vanilla Bean Swirls and Buttery Streusel Topping - September 25, 2026
- 1 Hour Soup Recipe: Velvety Richness Without the Wait - September 25, 2026