
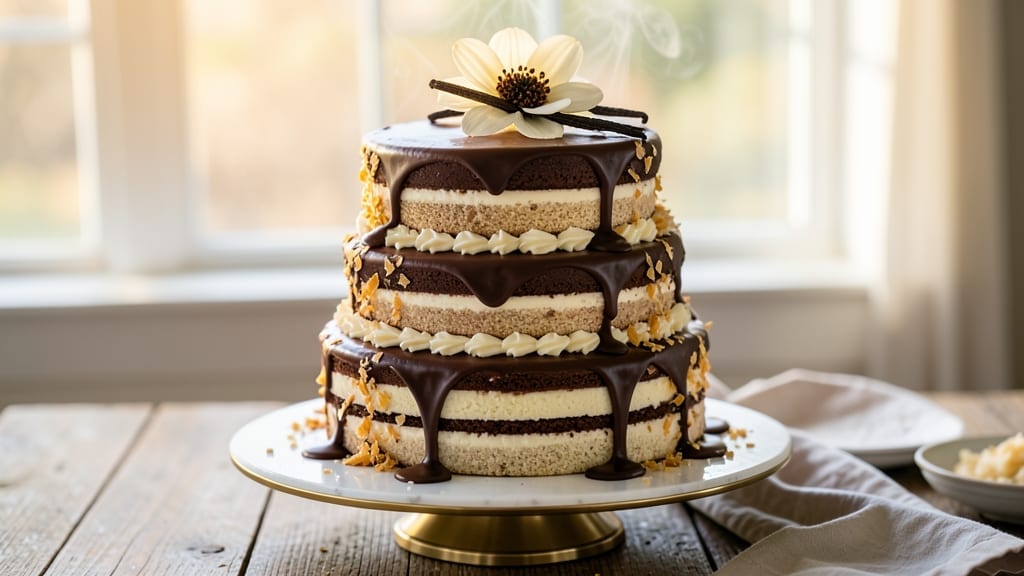
Baking a 3-layer vanilla cake from scratch delivers that restaurant-quality showstopper you crave—layers of tender crumb, swirls of vanilla bean, and velvety buttercream that melts in your mouth. 💛 The secret lies in precise measurements and patience: folding in vanilla extract at the right moment and letting the cake cool completely before frosting.
I’ve perfected this recipe over years of baking, and it’s the one people always ask for seconds on.
What sets this apart is the vanilla bean swirls baked into each layer, adding depth and a professional touch without extra effort. The buttercream is rich but not overly sweet, with a perfect knife consistency that holds up for piping.
Unlike boxed mixes, this recipe gives you control over texture and flavor, with a moist crumb that stays fresh for days when stored properly.
By the time you’re done, you’ll have a cake that looks like it belongs on a dessert table—golden layers, smooth frosting, and clean edges that make it look effortless.
The vanilla bean swirls peek through the buttercream, hinting at the luxurious flavor beneath. This is the kind of cake that makes birthdays, anniversaries, or just-Tuesday desserts feel special.
Ready to impress? The process is straightforward: bake, cool, layer, and frost. No fancy equipment needed—just patience and attention to detail. Let’s get started on creating your perfect vanilla cake.
Ingredients for 3 layer vanilla cake recipe from scratch
Twelve ingredients for a showstopper cake—vanilla swirls and buttery layers that taste like love.
| Ingredient | Amount | Notes |
|---|---|---|
| All-Purpose Flour 🌾 | 4 cups | Sifted for light texture |
| Granulated Sugar 🍚 | 2 ½ cups | Divided for cake and frosting |
| Unsalted Butter 🧈 | 2 cups | Room temperature, cubed |
| Pure Vanilla Extract 🌿 | 2 tbsp | High-quality, not imitation |
| Vanilla Beans 🍃 | 2 whole | Split lengthwise for swirls |
| Large Eggs 🥚 | 6 whole | Room temperature, separated |
| Baking Powder 🧂 | 2 tsp | Freshly measured |
| Salt 🧂 | ½ tsp | Fine sea salt |
| Milk 🥛 | 1 ½ cups | Room temperature |
| Heavy Cream 🥛 | 1 cup | Cold for buttercream |
| Powdered Sugar 🍚 | 4 cups | Sifted for smooth frosting |
| Vanilla Bean Seeds 🍃 | 1 tbsp | Scraped from beans |
| Unflavored Gelatin 🧂 | 2 tsp | Bloomed in 3 tbsp water |
The vanilla beans are non-negotiable here. Madagascar Bourbon beans from Penzeys or your local specialty shop give the best flavor, but any quality vanilla bean works—just split them lengthwise and scrape out the seeds for the swirls. The butter? Plugrá or Land O’Lakes unsalted are my go-tos, but any good brand will do. Room temperature butter is key—press it between paper towels for 10 minutes if it’s too cold. The flour should be sifted before measuring to avoid dense layers, and King Arthur or Gold Medal are my trusted brands for baking.
No vanilla beans? Double the vanilla extract and add a pinch of almond extract for depth. Short on eggs? Replace each egg with 1/4 cup applesauce for the cake, but the buttercream will still need the structure eggs provide. The gelatin in the frosting is what gives it that silky, pipeable consistency—Great Lakes or Knox are reliable brands. If you’re avoiding gelatin, make a simple whipped cream frosting instead, but you’ll lose that professional sheen. The powdered sugar should be sifted before whipping to avoid lumps, and Domino or C&H are my top picks for smooth results.
Store the cake layers wrapped in plastic between parchment paper for up to 2 days at room temperature. The frosting can be made a day ahead and stored in the fridge—just whip it back up before frosting. Once assembled, keep it covered at room temperature for 3-4 days or freeze the whole cake for up to 3 months. To serve, slice with a warm, wet knife for clean edges every time. The vanilla swirls peek through beautifully, making it look like a bakery masterpiece.
Why You’ll Love This Recipe
- No Mixer Needed: I swear by this recipe when my stand mixer’s on vacation—just a bowl and a whisk. The butter-cream layers come together with a few minutes of elbow grease, and honestly? The results are just as light and fluffy as the boxed stuff, but with real vanilla that actually tastes like vanilla.
- Vanilla Overload (In a Good Way): Between the scraped vanilla bean seeds and that extra splash of extract, this cake hits you with pure vanilla happiness. It’s not subtle—it’s ridiculously good, like the difference between drinking tea with a teabag and one with loose leaves.
- Weeknight Leftovers Win: Slice one layer for breakfast the next morning, pack slices for lunch, or freeze the whole thing for a last-minute dessert. The buttercream stays creamy even after days, and I’ve sent this cake to work parties where no one guessed it was made the night before.
- Budget-Friendly Luxury: You’re using pantry staples—flour, sugar, butter—but the vanilla bean makes it feel special without breaking the bank. I’ve made this for birthdays, holidays, and even just because, and it never feels like a splurge. (Yes, even on a Tuesday night.)
Step-by-step instructions for vanilla bean swirl cake
Let’s create a showstopping vanilla cake with swirling vanilla bean magic and velvety buttercream.
👨🍳 Step 1: Prepare the Vanilla Bean Swirl Paste
Split the 2 whole vanilla beans lengthwise and scrape out all the 1 tbsp vanilla bean seeds using the tip of a knife. In a small bowl, combine the seeds with 3 tbsp of the 1.5 cups milk and let it steep for 15 minutes at room temperature. This creates our signature swirl flavor.
While steeping, place the 2 tsp unflavored gelatin in a small bowl and sprinkle over 3 tbsp water. Let it bloom for 5 minutes until it becomes gelatinous. Then gently warm the bloomed gelatin in a microwave for 10 seconds until fully dissolved. Stir this into the vanilla-milk mixture until completely smooth.
🍳 Step 2: Bake the Three Layers
Preheat your oven to 350°F and grease three 8-inch round cake pans, lining the bottoms with parchment paper. In a large bowl, sift together the 4 cups all-purpose flour, 2 tsp baking powder, and 0.5 tsp salt. Set aside.
In a separate large bowl, beat the 2 cups unsalted butter (at room temperature) with 1 cup of the 2.5 cups granulated sugar until light and fluffy (3-4 minutes). Add the 6 whole large eggs one at a time, mixing well after each addition. Stir in the 2 tbsp pure vanilla extract and the remaining 1.5 cups granulated sugar.
Gradually add the dry ingredients to the wet, mixing on low speed just until combined. Fold in the vanilla bean-milk mixture until evenly distributed. Divide the batter evenly among the prepared pans and bake for 25-30 minutes or until a toothpick comes out clean. Let the layers cool in the pans for 10 minutes before transferring to a wire rack to cool completely.
🥘 Step 3: Assemble with Vanilla Bean Swirls
Once all layers are completely cool, level the tops if needed. Place the first layer on a cake stand or plate. Spread a thin layer of the vanilla bean paste (about 2 tbsp) over the top, then pipe a generous border of buttercream around the edges. Place the second layer on top and repeat the process with another layer of paste and buttercream. Top with the final layer.
To create the signature swirls, pipe a zigzag pattern of buttercream around the edge of the cake, then use a small offset spatula to gently drag through the center, creating beautiful swirls. Chill the cake in the refrigerator for 30 minutes to set before frosting completely.
🍽️ Step 4: Create the Buttercream Frosting
In a stand mixer fitted with the whisk attachment, beat the 1 cup heavy cream (cold) until soft peaks form. In a separate bowl, combine the 4 cups powdered sugar with the remaining 1 tbsp pure vanilla extract and 0.5 tsp salt. Gradually add the powdered sugar mixture to the beaten cream while mixing on low speed.
Once fully combined, increase the speed to medium and beat for 3-4 minutes until the frosting is light, fluffy, and holds its shape. Pipe or spread this buttercream over the chilled cake, creating smooth sides and a decorative top. Use a small spatula to create texture if desired, then garnish with additional vanilla bean seeds for a beautiful finish.
Pro Tips For Making 3 Layer Vanilla Cake Recipe From Scratch
- Cream Butter Properly: Beat the butter and sugar until it’s light and fluffy—think pale yellow, not just smooth. I used to rush this, and the cake turned dense. Take the extra 2-3 minutes; it’s what makes the layers tender.
- Scrape the Bowl: After mixing wet ingredients, scrape the bowl with a rubber spatula—every time. Butter clings to the sides, and you’ll end up with dry spots in your batter. (Yes, even if it looks mixed.)
- Don’t Overmix the Flour: Fold in the dry ingredients just until combined—lumps are better than tough cake. Overmixing develops gluten, and that’s how you get a cake that’s more bread-like than light and airy.
- Use Room-Temp Vanilla: Grate vanilla beans fresh and let the seeds sit in warm water for 10 minutes before using. Cold seeds release flavor poorly, and that’s how you end up with a cake that tastes almost vanilla. (Almost isn’t good enough.)
Regional styles of these flavors
Classic American Vanilla
This is the cake that started it all—simple, elegant, and universally loved. In the U.S., vanilla cake often features a vanilla bean-infused batter with a rich buttercream, just like this recipe. The key difference?
American bakers often add a pinch of almond extract (about ¼ tsp) to the frosting for depth. Serve it with a scoop of vanilla ice cream for the ultimate comfort dessert. 🌟
French Vanilla Bean Torte
French bakers take vanilla cakes to another level with their vanilla bean torte, where the batter is often enriched with egg yolks and whipped egg whites for a lighter texture. The frosting?
A silky Italian meringue buttercream—made with cooked sugar syrup and egg whites—that gives it that signature French smoothness. For a twist, swap the buttercream for a vanilla pastry cream filling between layers. 🥖
Japanese Vanilla Sponge
Japanese vanilla cakes are all about delicate texture and subtle sweetness. They often use less sugar (about 1.5 cups total instead of 2.5) and more egg whites for a lighter, airier crumb.
The frosting? A vanilla whipped cream or a mirin-infused buttercream for a hint of floral sweetness. Garnish with edible gold leaf or fresh berries for a showstopping presentation. 🍡
German Vanilla Layer Cake
German bakers love a dense, moist vanilla cake with a crumb that’s almost bread-like. Their version often includes sour cream (about ½ cup) in the batter for extra tenderness, and the frosting is a vanilla glaze or a simple dusting of powdered sugar.
For a festive touch, bake the layers in square pans and frost with a marzipan layer on top. 🎂
Mexican Vanilla Cake
In Mexico, vanilla cake often gets a tropical twist with ingredients like orange zest or cinnamon. The frosting might include a splash of orange liqueur (like Cointreau) for a boozy kick.
Serve it with a side of churros or a cup of Mexican hot chocolate for a dessert that’s both sweet and spicy. 🌶️
Modern Twist: Matcha Vanilla
For a contemporary take, infuse the batter with 1 tsp matcha powder (sifted in with the flour) and use a white chocolate buttercream. The matcha adds a subtle earthiness that pairs beautifully with the vanilla.
Top with white chocolate shards and fresh mint leaves for a stunning visual contrast. 💚
Nutrition facts
Frequently asked questions
Can I substitute vanilla extract for vanilla beans in this recipe?
You can use double the vanilla extract (so 4 tbsp total) plus a pinch of almond extract for depth, but you’ll lose the signature swirls. For best results, invest in quality vanilla beans—they make a noticeable difference in flavor and presentation.
How do I prevent my cake layers from cracking when frosting?
Let the layers cool completely before assembling, and make sure they’re level. Chill the cake for 30 minutes in the fridge before adding the final frosting layer. This helps the buttercream set properly without cracking.
Can I make this cake in advance?
Bake the layers 1-2 days ahead and store wrapped in plastic between parchment. The frosting can be made a day ahead and refrigerated—just whip it back up before using. The cake stays fresh for 3-4 days at room temperature or 3 months frozen.
Why did my cake turn out dense instead of light?
Overmixing the batter or using cold ingredients are common culprits. Make sure your butter is room temperature and mix just until combined. Also, don’t overfill the pans—batter should reach about 2/3 full of the pan height. A toothpick test (clean when inserted) is key too!
What’s the best way to level my cake layers?
Use a serrated knife or cake leveler for clean cuts. Place the pan on a cutting board and gently saw back and forth while keeping the knife level. For extra precision, use a hot knife—run it under hot water between cuts to prevent sticking.

- 12 Bean Chili Recipe: Hearty Slow-Cooked Depth With 12 Legumes - October 17, 2026
- 5 Seed Bread Recipe: Nutty Crunch and Artisan Flavor in One Loaf - October 17, 2026
- 1 Lb Macaroni Salad Recipe: Bold, Crunchy, and Crowd-Pleasing - October 17, 2026