
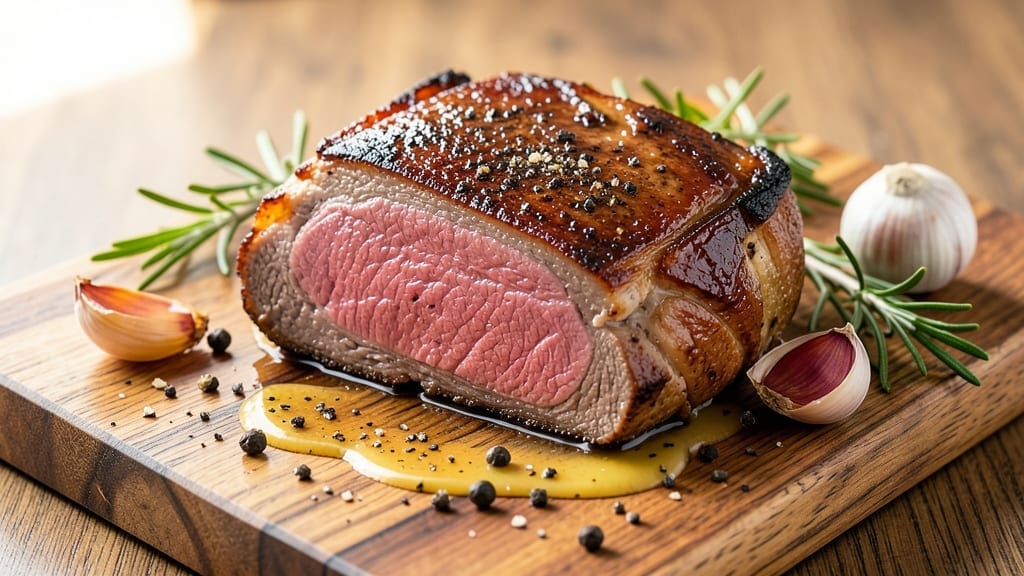
A 3 lb boneless ribeye roast cooked to perfection delivers melt-in-your-mouth tenderness and bold beefy flavor that transforms any dinner into an unforgettable meal. The secret lies in precise temperature control and a slow, even roast that guarantees a juicy pink center without drying out the exterior.
This method ensures restaurant-quality results at home, with minimal effort and maximum impact.
What sets this recipe apart is the balance between high-heat searing and low-and-slow roasting, which develops deep flavor while preserving moisture. You’ll start with a quick sear to create a flavorful crust, then move to a controlled oven environment that cooks the roast evenly.
The key is patience—allowing the meat to rest after roasting ensures every slice stays tender and succulent.
By the time you carve into this roast, you’ll have a perfectly cooked center with a rich, caramelized exterior that holds up to every bite.
The aroma alone will have everyone anticipating dinner, and the texture—tender yet firm—will make this your go-to recipe for special occasions or weekend feasts. Pair it with roasted garlic mashed potatoes or a crisp red wine reduction for an elevated dining experience.
This recipe is designed for confidence, whether you’re cooking for a family gathering or treating yourself to a luxurious meal. The technique is straightforward, and the results are consistently impressive. Let’s get started on creating a roast that will have everyone asking for seconds.
Ingredients for 3 lb boneless ribeye roast
Juicy pink center guaranteed with these premium ingredients for your perfect 3 lb ribeye roast.
| Ingredient | Amount | Notes |
|---|---|---|
| Boneless Ribeye Roast 🥩 | 3 lb | Center-cut, 1-1.5 inches thick |
| Kosher Salt 🧂 | 1 ½ tbsp | Diamond Crystal preferred, freshly ground |
| Freshly Ground Black Pepper 🌶️ | 1 ½ tbsp | Coarse grind for texture |
| Unsalted Butter 🧈 | ½ cup | Cold, cubed for crust |
| Garlic Cloves 🧄 | 8 whole | Smashed, skin-on for flavor |
| Fresh Rosemary Sprigs 🌿 | 4 whole | Fresh, woody stems intact |
| Fresh Thyme Sprigs 🌿 | 4 whole | Leaves only, stems removed |
| Extra-Virgin Olive Oil 🫒 | 2 tbsp | High smoke point, fruity |
| Red Wine 🍷 | ½ cup | Bold, dry variety like Cabernet |
| Beef Tallow or Duck Fat 🧈 | 2 tbsp | For extra crust richness |
| Red Wine Vinegar 🍷 | 1 tbsp | For deglazing pan |
| Fresh Parsley 🌿 | ¼ cup | Chopped, for garnish |
The ribeye is the star, so center-cut matters most—ask your butcher for a roast with good marbling and even thickness. Costco or Whole Foods usually carry excellent quality, but any reputable meat counter will do. Look for a piece with a bright red color and visible fat pockets—this ensures juiciness. If your roast is uneven, trim any thick spots to about 1.5 inches. The fresh herbs (rosemary, thyme) should be vibrant green with no wilting—Trader Joe’s often has great bundles for this. For the wine, any bold, dry red works—Cab Sauv, Merlot, whatever’s open. The tallow or duck fat is optional but adds an incredible crust—butter alone works fine if you’re skipping it.
No red wine? Beef broth with a splash of balsamic gets you close. Fresh herbs? Dried works at one-third the amount, but the flavor won’t be as bright. The butter should be cold—pop it in the freezer for 15 minutes before cubing. For the garlic, smashing the cloves releases more flavor than mincing. If you’re using pre-minced garlic, toast it first in the pan. The kosher salt is non-negotiable—Diamond Crystal dissolves differently than Morton’s, so if that’s all you have, use half the amount. The olive oil should be high-quality—California or Italian varieties work best for searing. And if you don’t have tallow, extra butter or ghee in the crust will still give you a great result.
This roast reheats beautifully—200°F for 30 minutes with a splash of beef broth keeps it moist. Keeps 3-4 days in the fridge, wrapped tightly in butcher paper, then foil. For leftovers, slice against the grain and reheat with a pat of butter. The crust is best eaten fresh, but the meat stays tender for days. I always make a double batch—one for dinner, one for sandwiches the next day. Freeze portions for up to 3 months if you’re really ambitious. The herbs can be prepped a day ahead, but keep the garlic and butter fresh until searing day.
Why You’ll Love This Recipe
- I’ll be real: most roast leftovers are sad. Not this. The ribeye stays juicy for days, perfect for quick breakfasts (yes, I’ve done it), reheated in a skillet with a splash of beef broth, or even chopped into tacos. Zero waste, all flavor.
- Minimal Prep Required: I swear by this one—just a quick rub of salt, pepper, and smashed garlic cloves, then a pat of butter. No marinating, no fussing with herbs, just pure, unadulterated beef prep in under five minutes.
- Butter-Garlic Magic: That simple butter-and-garlic sear on the outside? It turns a good roast into something dangerously tender. The crust is rich, the inside melts like a dream, and honestly, it’s the kind of flavor that makes people ask, “What’d you do to this?”
- Weeknight or Weekend Hero: Between us, this is my go-to for both lazy Fridays and Sunday dinners. Slice it thin for sandwiches, serve it with mashed potatoes, or toss it into a pasta—it’s the one roast that works for everything without extra effort.
Step-by-step instructions for perfectly juicy ribeye roast
Here’s how to transform that 3 lb ribeye into melt-in-your-mouth perfection with a pink center every time.
Prep the Roast for Maximum Flavor and Juiciness
Start by letting the ribeye roast sit at room temperature for 30-45 minutes while you prep everything else. This ensures even cooking throughout. Pat the roast dry with paper towels—this step is non-negotiable for crispy crust. I like to use two layers of paper towels to really get it dry.
In a small bowl, combine the 1.5 tbsp kosher salt and 1.5 tbsp freshly ground black pepper. Rub this mixture all over the roast, pressing it into the meat so it penetrates. Let it sit uncovered in the fridge for 1 hour (or up to 24 hours for deeper flavor). This dry-brining technique keeps the meat moist while building that flavor bomb crust.
Build the Herb Butter Crust
While the roast rests, prepare the herb butter crust. In a small bowl, combine the 0.5 cup cold unsalted butter, 8 smashed garlic cloves (skin-on for extra flavor), 4 fresh rosemary sprigs, and 4 fresh thyme sprigs. Use your hands to work the herbs into the butter until it’s evenly distributed—this creates pockets of flavor that’ll melt into the meat.
Roll this butter mixture into a log and wrap it tightly in plastic wrap. Chill until ready to use. The cold butter ensures it’ll create a golden crust rather than melt away. When you’re ready to cook, remove the plastic and gently press the butter log onto the roast, coating it completely. The herbs will infuse the meat with aromatic depth while the butter creates that irresistible crust.
Sear for Crust and Flavor Foundation
Preheat your oven to 425°F. Heat a heavy oven-safe skillet over medium-high heat and add 2 tbsp extra-virgin olive oil and 2 tbsp beef tallow or duck fat. When the fat shimmers (about 2 minutes), carefully place the roast in the skillet, fat-side down.
Sear for 3-4 minutes until a deep golden crust forms. You’ll see the fat render beautifully and the meat develop that gorgeous caramelized crust. Flip the roast and sear the other side for another 3-4 minutes. This high-heat sear locks in juices and builds flavor that no slow cooking alone could achieve. Transfer the skillet to the oven and roast for 1 hour.
Deglaze and Finish with Wine Reduction
After 1 hour, remove the roast from the oven and carefully pour in the 0.5 cup red wine and 1 tbsp red wine vinegar. Immediately return the skillet to the oven and cook for another 30 minutes. The wine reduces beautifully, creating a glossy sauce that’ll baste the meat and add depth of flavor.
Check the internal temperature at the thickest part of the roast—it should read 125°F for medium-rare (the pink center we’re after). If it’s not quite there, return to the oven for another 10-15 minutes. The residual heat will carry it to perfect doneness. Let the roast rest for 15-20 minutes before slicing—this resting period is crucial for juices to redistribute.
Slice and Serve with Herb Garnish
Slice the roast against the grain into ½-inch thick slices. The meat should be tender enough to pull apart slightly with your fingers but still hold its shape. Spoon the reduced wine sauce over the top and garnish with the 0.25 cup chopped fresh parsley for a pop of color and freshness.
Serve immediately with roasted vegetables or a simple green salad. The contrast of the crispy crust with the juicy pink center creates the perfect balance of textures and flavors. Each bite delivers that rich, beefy satisfaction with layers of herb-infused butter and wine reduction that make this roast truly special.
Pro Tips For Making 3 Lb Boneless Ribeye Roast
- CRANK THE HEAT FIRST: Start your roast over medium-high heat until it’s searing hard on all sides—about 5 minutes per side. I used to low-and-slow this, but the crust never developed the way it does when you shock the meat with real heat first. (Yes, even if you’re impatient like me.)
- SALT THE GARLIC: Toss those minced garlic cloves in a pinch of kosher salt before adding them to the butter—it keeps them from burning and makes them taste brighter. I learned this the hard way after charring a batch and wondering why my roast tasted flat.
- DON’T CUT INTO IT YET: Let the roast rest for at least 10 minutes under foil before slicing—juices will redistribute, and you’ll avoid a dry first bite. I know, I know, but trust the process. (Your future self will thank you.)
- USE COLD BUTTER: Chill the butter-garlic mixture for 10 minutes before spreading it on the roast—it’ll melt slower and baste the meat more evenly. Sounds weird, but it works: no greasy mess, just a rich, even coating.
Common mistakes when making this dish
Skipping the Rest
This is the #1 mistake I see home cooks make—they can’t resist slicing into that beautiful roast the second it comes out of the oven. Resist the urge! Let your 3 lb ribeye roast rest for at least 15-20 minutes before slicing.
This allows the juices to redistribute throughout the meat instead of pooling on your cutting board. I’ve seen perfectly cooked roasts turn dry and disappointing just because someone couldn’t wait. 💡
Uneven Thickness
If your roast has uneven thickness, you risk some slices being overcooked while others remain underdone. Always trim any thick spots to about 1.5 inches before cooking. I like to use a sharp boning knife to create an even surface.
This ensures consistent doneness throughout the entire roast, giving you that perfect medium-rare center in every slice.
Over-Salting
While salt is essential for flavor, over-salting can make the meat taste bland or even cause it to dry out. Stick to the 1.5 tbsp kosher salt measurement and don’t double it.
Remember, kosher salt has larger crystals than table salt, so it’s less concentrated. I’ve ruined a perfectly good roast by over-salting—trust the recipe!
Skipping the Room Temp Step
Taking your roast straight from the fridge to the pan is a recipe for uneven cooking. Let it sit at room temperature for 30-45 minutes first. This allows the meat to cook more evenly, preventing a cold center that might stay undercooked while the exterior browns too quickly.
I always set a timer when I take the roast out of the fridge so I don’t forget this crucial step.
Using Low-Quality Fat
The fat you use for searing makes all the difference in creating that perfect crust. Don’t skimp on extra-virgin olive oil or beef tallow. Cheap oils with low smoke points won’t create the same rich, flavorful crust.
I prefer to use a mix of both for maximum flavor and texture. The butter should also be cold—don’t use softened butter from the fridge door!
Ignoring Internal Temp
Guessing doneness by time or appearance leads to disappointment. Always use a meat thermometer to check the internal temperature. For medium-rare, aim for 125°F at the thickest part of the roast.
I keep a ThermoWorks Smoke thermometer handy for all my roasts—it’s worth every penny for perfect results every time. 🌡️
Nutrition facts
Frequently asked questions
What’s the best way to store leftover ribeye roast?
Wrap the cooked roast tightly in butcher paper, then foil to preserve moisture. Store in the fridge for 3-4 days, or freeze for up to 3 months. For reheating, warm slices in a skillet with butter at 200°F for 30 minutes—this keeps them tender. The crust loses crispiness when reheated, but the meat stays juicy.
Can I substitute beef tallow with something else?
Use duck fat for extra richness or extra unsalted butter (same amount). Olive oil works too, but tallow/duck fat gives the best crust. If you’re vegetarian, vegetable shortening mimics the texture—just don’t expect the same beefy flavor. The key is high smoke point fat for that golden crust.
How do I adjust cooking time for a different size roast?
Use 15 minutes per pound for medium-rare at 425°F. For a 2 lb roast, cook 30 minutes total; for 4 lbs, 60 minutes. Always check internal temp—125°F for medium-rare. The wine reduction time stays the same (30 minutes). A meat thermometer is your best friend here!
What are the best side dishes to serve with this roast?
Classic pairings include creamy garlic mashed potatoes, roasted root vegetables, or a simple arugula salad with balsamic. For a heartier meal, try crusty bread to soak up the wine reduction. Avoid heavy sides—this roast is rich enough to stand alone. The wine reduction also makes a great sauce for pasta if you have leftovers!
Why does my ribeye turn out dry?
Most likely you skipped the resting time or overcooked it. Always rest for 15-20 minutes—this redistributes juices. Also check your internal temp: 125°F for medium-rare, 135°F for medium. If your roast was thick, trim uneven spots before cooking. Dry meat often means the oven was too hot or the roast wasn’t properly sealed during cooking.

- Pea Soup Instant Pot Recipe: Velvety Green Smoothness in 20 Minutes - November 1, 2026
- Pork Loin Pulled Pork Crock Pot Recipe: Slow-Smoked Tenderness With Zero Dryness - November 1, 2026
- Baked Potatoes in Crock Pot Recipe: Buttery Interiors and Crispy Top Magic - November 1, 2026