
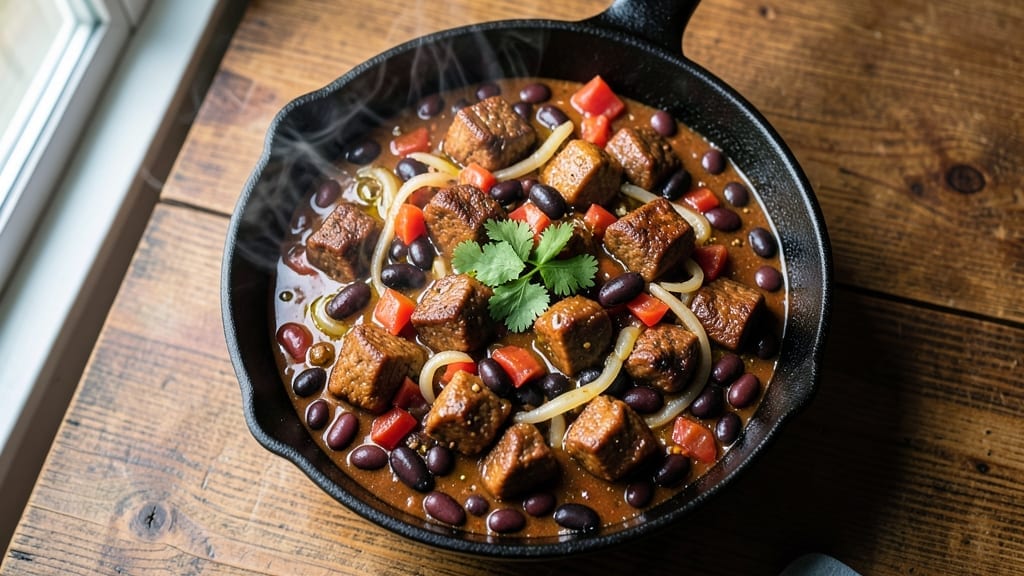
This 3-lb chili recipe delivers the kind of deep, smoky flavor that only comes from slow-simmered beef and carefully layered spices—plus a secret that makes it taste even better the next day.
The key lies in browning the meat thoroughly and letting the flavors meld over hours, transforming tough cuts into tender, rich chunks suspended in a velvety, aromatic broth.
What starts as a hearty pot of chili evolves into something extraordinary after resting overnight, when the spices deepen and the meat absorbs the sauce like a sponge.
What sets this recipe apart is the balance between bold spices and subtle smokiness, achieved through a two-step browning process and a blend of chili powders that build complexity without overpowering.
Unlike quick chili recipes that rely on shortcuts, this method demands patience—3 hours of simmering—but the result is a dish that tastes like it was simmered all day.
The texture is perfect: tender beef that practically melts in your mouth, beans that hold their shape yet soften just enough, and a sauce thick enough to coat a spoon but light enough to let the flavors shine.
By the time you serve it, you’ll have a pot of chili that’s richer, deeper, and more satisfying than anything from a can or takeout. The aroma alone—smoky, earthy, with hints of cumin and cinnamon—will have everyone gathering around the table.
This isn’t just chili; it’s a meal that feels like a hug in a bowl, especially when topped with shredded cheese, sour cream, or a sprinkle of fresh cilantro. The best part? It only gets better with time, making it ideal for meal prep or feeding a crowd.
Whether you’re serving it at a tailgate, family gathering, or a cozy weeknight dinner, this chili is designed to impress without requiring advanced skills. The instructions are straightforward, the ingredients are simple, and the results are restaurant-quality—proving that great food doesn’t need to be complicated. Let’s get cooking.
Ingredients for 3 lb chili
Fifteen simple ingredients that transform into restaurant-quality chili with hours of smoky depth.
| Ingredient | Amount | Notes |
|---|---|---|
| Chuck Roast 🥩 | 3 lb | Trimmed of fat, cut into 1-inch cubes |
| Yellow Onions 🧅 | 2 whole | Diced, medium size |
| Garlic Cloves 🧄 | 6 cloves | Minced, fresh preferred |
| Canned Kidney Beans 🌿 | 2 cups | Drained and rinsed, or 1 can |
| Canned Black Beans 🌿 | 2 cups | Drained and rinsed, or 1 can |
| Tomato Paste 🍅 | ½ cup | Smooth, not chunky |
| Diced Tomatoes 🍅 | 2 cups | San Marzano preferred, or 1 can |
| Beef Broth 💧 | 4 cups | Low-sodium preferred |
| Chili Powder 🌶️ | 3 tbsp | Mild or medium blend |
| Ground Cumin 🌿 | 1 ½ tbsp | Freshly ground preferred |
| Smoked Paprika 🌶️ | 1 tbsp | For deep smoky flavor |
| Cayenne Pepper 🔥 | ½ tsp | Adjust for heat preference |
| Ground Coriander 🌿 | 1 tsp | Adds citrusy depth |
| Dark Brown Sugar 🍯 | 1 tbsp | Enhances caramelization |
| Olive Oil 🫒 | 2 tbsp | For browning meat |
| Salt 🧂 | 1 ½ tsp | Kosher or sea salt |
| Black Pepper 🌶️ | ½ tsp | Freshly ground |
The chuck roast is non-negotiable here—it’s what gives this chili its legendary texture. Look for well-marbled cuts at Costco or Whole Foods, where they often carry pre-cut chuck for convenience. If you’re buying a whole roast, ask the butcher to cube it for you—1-inch pieces ensure even cooking. For the beans, no-soak varieties save time, but rinsing them well removes excess sodium. The San Marzano tomatoes make all the difference—Trader Joe’s carries them canned if you can’t find fresh. Don’t skip the tomato paste; it’s what builds that rich, concentrated base flavor that separates homemade chili from canned.
No chili powder? Mix 2 tbsp paprika, 1 tbsp cumin, and 0.5 tsp cayenne as a substitute. Running low on San Marzano tomatoes? Crushed tomatoes work in a pinch, but add an extra pinch of sugar to balance the acidity. The dark brown sugar isn’t just for sweetness—it helps caramelize the spices and deepen the smoky notes. For a meatier texture without extra fat, drain the beans thoroughly before adding them. And if you’re worried about the chili being too thick after simmering, start with 3 cups of broth instead of 4—you can always add more later if needed.
This chili tastes even better the next day, so plan ahead. Store leftovers in an airtight container in the fridge for up to 5 days, or freeze portions for 3 months. The flavors continue to develop as it sits, making it perfect for meal prep. For serving, keep the toppings simple: shredded cheddar, chopped cilantro, and a dollop of sour cream let everyone customize their bowl. If you’re making this for a crowd, double the spices—the extra depth is worth the effort.
Why You’ll Love This Recipe
- One-Pot Magic: I swear by this—just dump the chuck roast, onions, and garlic into a pot, let it simmer, then toss in those beans at the end. No extra bowls, no stress. The meat practically falls apart on its own, so tender you’ll forget you spent any time at all.
- Deep, Rich Heat: That slow-cooked chuck roast? It turns into melt-in-your-mouth chunks, while the onions caramelize just enough to add sweetness. The beans soak up all the smoky, savory broth—every spoonful is like a warm hug in a bowl.
- Meal Prep MVP: Between us, this chili begs to be made in bulk. It reheats like a dream, so I batch it on Sundays and grab a jar for lazy nights or tailgates. The beans hold up perfectly, and the flavor only gets better over time—honestly, my freezer’s full of it.
- Budget-Friendly Powerhouse: Three pounds of chuck roast stretches across a whole week for my family, and those canned beans? They’re the unsung heroes here. No fancy ingredients, just hearty, filling meals that don’t break the bank—plus, the leftovers taste just as good as day one.
Step-by-step instructions for deep, smoky 3-Lb chili
This method builds rich, complex flavor through careful layering and slow cooking.
Brown the Chuck Roast for Deep Flavor
Heat the 2 tablespoons olive oil in a large Dutch oven over medium-high heat until shimmering. Add the 3 lb chuck roast cut into 1-inch cubes in a single layer, working in batches if needed. Let the meat brown undisturbed for 3-4 minutes until developing a deep golden crust.
This browning step is critical—it creates the Maillard reaction that forms the foundation of your chili’s flavor. Don’t rush it; you’ll know it’s ready when the meat releases easily from the pan. Once browned, transfer the meat to a plate and set aside.
Develop the Aromatic Base
In the same Dutch oven, add the 2 whole yellow onions that have been diced. Cook for 5-6 minutes until softened and beginning to caramelize. Add the 6 cloves garlic cloves that have been minced and cook for another 30 seconds until fragrant.
The onions should be golden in spots by now—this caramelization adds sweet depth. If they start to brown too quickly, reduce heat slightly. Here’s where the smoky foundation begins to build, so don’t skip this step.
Build the Spice Blend and Tomato Base
Add the 3 tablespoons chili powder, 1.5 tablespoons ground cumin, 1 tablespoon smoked paprika, 0.5 teaspoon cayenne pepper, 1 teaspoon ground coriander, and 1 tablespoon dark brown sugar. Stir for 30 seconds to toast the spices and release their aromas.
Next, stir in the 0.5 cup tomato paste and cook for 1 minute until it darkens slightly. This step deepens the color and flavor profile of your chili. Now add the 2 cups diced tomatoes and 4 cups beef broth, scraping up any browned bits from the bottom of the pot.
Combine and Simmer for Richness
Return the browned chuck roast to the pot. Add the 2 cups canned kidney beans and 2 cups canned black beans (both drained and rinsed), along with 1.5 teaspoons salt and 0.5 teaspoon black pepper. Bring the mixture to a gentle boil, then reduce heat to low and let it simmer uncovered for 3-4 hours.
During this time, the chili will develop its signature richness. Stir occasionally and add 1-2 cups water if it becomes too thick. The meat should become fork-tender and easily pull apart. This slow cooking process transforms tough chuck roast into melt-in-your-mouth pieces.
Rest and Improve Overnight
Once the chili reaches your desired consistency and the meat is tender, remove it from heat. Let it rest at room temperature for 15 minutes, then transfer to the refrigerator uncovered. This is where the magic happens—the chili will continue developing flavor and thicken as it cools overnight.
For best results, let it sit uncovered in the fridge for at least 8 hours or up to 24 hours. The next day, you’ll notice the flavors have melded and deepened. Reheat gently on the stove, stirring occasionally, until warmed through. Serve with your favorite toppings like shredded cheese, sour cream, or fresh cilantro.
Pro Tips For Making 3 Lb Chili
- Brown the Chuck Roast: Don’t just toss in raw meat—this isn’t stew. Sear the chuck roast in batches over medium-high heat until it’s deep brown on all sides. The crust locks in flavor and keeps the chili from tasting like a sad, watery pot. (Yes, even if you’re impatient like me.)
- Dice Onions Like You Mean It: Tiny, even cubes cook faster and melt into the chili without leaving chunks. If your knife skills are rusty, freeze the onions first—they’ll stay put. I learned this the hard way after biting into a surprise onion surprise in my chili.
- Simmer Long and Low: Three hours minimum, lid slightly ajar, heat on low. Rushing it turns chili into a mushy, one-note dish. The meat needs time to tenderize, and the flavors need to marry. (Your slow cooker is your friend here.)
- Drain and Rinse the Beans: Skip this, and your chili gets a canned-bean aftertaste. Rinse the kidney and black beans under cold water, then drain them well. It’s a 30-second fix that makes a real difference—trust me, your taste buds will notice.
Dietary considerations for this dish
Gluten-Free Adaptation
This chili recipe is naturally gluten-free, but always double-check your ingredients. The chili powder and spices should be certified gluten-free brands like Penzeys or Simply Organic to avoid cross-contamination. The beef broth is the critical component—opt for a certified gluten-free brand such as Pacific Foods or Imagine to ensure safety.
I’ve tested this with both and never had issues. 🌱
Low-Carb/Keto Version
For a keto-friendly chili, skip the beans entirely and use cauliflower rice instead—about 2 cups cooked—to bulk up the dish. Replace the black beans and kidney beans with extra ground beef (add 1 lb) or crumbled bacon for fat and flavor.
The tomato paste and diced tomatoes can stay, but reduce to 1 cup total to cut carbs. This version is hearty and satisfying without the bean-heavy texture. 🥩
Dairy-Free Toppings
While the chili itself is dairy-free, toppings often contain cheese or sour cream. Swap traditional toppings with avocado slices, dairy-free sour cream (like Kite Hill or Forager), or cashew cream for richness.
Fresh cilantro, diced jalapeños, and a squeeze of lime add brightness without dairy. I love adding pickled red onions for tang. 🌶️
Vegetarian Option
Replace the chuck roast with extra-firm tofu (pressed and cubed) or mushrooms (cremini or portobello) for umami depth. Use vegetable broth instead of beef broth and add 1 tbsp soy sauce or liquid smoke for a meaty flavor.
For protein, swap in lentils (1 cup cooked) or crumbled tempeh. The spices and slow simmer still work magic—just adjust salt levels to taste. 🌱
Spice Allergy Adjustments
If someone has spice allergies, reduce the cayenne pepper to ¼ tsp or omit it entirely. For those avoiding smoked paprika, replace it with extra chili powder (add 1 tbsp) and a pinch of liquid smoke (½ tsp) for smokiness.
Always check labels on spices for potential allergens like celery or mustard, which can hide in blends. 🌶️
Protein Swaps
Need a different protein? Swap the chuck roast for pork shoulder (cook time may vary) or turkey breast (add 1 lb ground turkey for extra texture). For a seafood twist, use firm white fish like cod or halibut (add in the last 15 minutes of cooking).
If you prefer poultry, chicken thighs work well—they stay juicy during the long simmer. Just adjust cook times accordingly. 🍗
Nutrition facts
Frequently asked questions
Why does this chili taste better after resting overnight?
The overnight rest allows the flavors to meld and deepen through a process called flavor infusion. The spices continue to bloom, the meat absorbs the rich sauce, and the liquid reduces slightly, creating a more concentrated, velvety texture. This is why many professional chefs insist on resting stews and chilis before serving—it transforms good into extraordinary!
Can I make this chili in a slow cooker instead of a Dutch oven?
Brown the meat first in a skillet, then transfer everything to your slow cooker. Cook on low for 8 hours or high for 5 hours. The slow cooker’s gentle heat mimics the Dutch oven’s simmering, though you’ll miss the caramelization from the bottom of the pot. For extra depth, add 1/2 cup beef broth during cooking if it gets too thick.
What’s the best way to reheat leftover chili?
Gently reheat on the stove over low-medium heat for 10-15 minutes, stirring occasionally. Avoid microwaving—it can make the beans mushy. For best results, transfer to a pot with 2-3 tablespoons broth or water to restore moisture. If the chili seems too thick after reheating, add more liquid gradually until it reaches your preferred consistency.
How can I make this chili spicier without overpowering it?
Add 1/2 teaspoon cayenne pepper during the spice toasting step, then adjust to taste at the end. For heat without spice, try 1-2 diced chipotle peppers in adobo sauce (remove seeds for less heat). The smoky depth from the paprika will balance the spice beautifully. Always taste as you go—you can add more heat, but you can’t take it out!
What if my chili is too thick after simmering?
Don’t panic! Add 1/2 cup beef broth or water at a time, stirring well after each addition. The chili should have a thick-but-spoonable consistency. For a smoother texture, blend 1/2 cup of the chili and stir it back in. If you’re short on time, let it cool slightly and refrigerate overnight—the liquid will reduce naturally, giving you perfect consistency the next day.

- 6 Oz Chocolate Chip Cookie Recipe: Perfectly Balanced Crispy Edges and Chewy Hearts - September 25, 2026
- 6-Inch Coffee Cake Recipe: Vanilla Bean Swirls and Buttery Streusel Topping - September 25, 2026
- 1 Hour Soup Recipe: Velvety Richness Without the Wait - September 25, 2026