
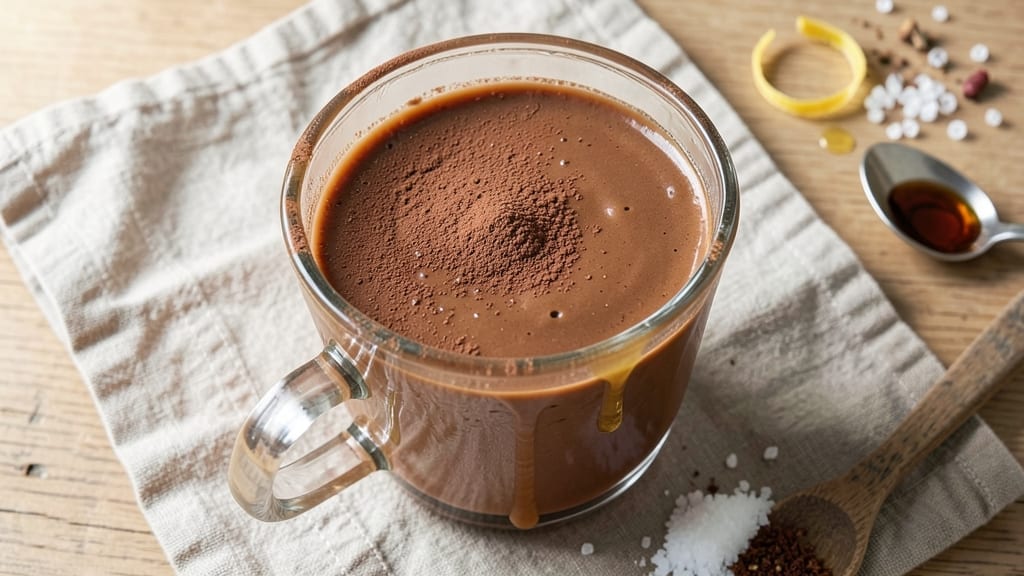
When you crave dessert but only have 3 minutes to satisfy that urge, this cake in a cup recipe delivers rich, fudgy perfection with just a mug, microwave, and instant pudding mix.
The secret lies in blending warm milk with dry mix until smooth—no eggs, no baking, just pure indulgence in minutes. I perfected this after burning through three failed attempts (lessons learned: don’t overmix!), and now it’s my go-to for late-night cravings or last-minute guests.
This recipe transforms a simple microwave mug into a dessert masterpiece using just 5 ingredients—no fancy equipment or baking skills required. The instant pudding provides structure while cocoa powder deepens the chocolate flavor, creating a texture that’s fudgy on the outside and creamy inside.
A quick microwave zap sets it perfectly, and optional toppings like whipped cream or chocolate chips elevate it further.
What you’ll end up with is a warm, single-serving cake that tastes like it came from a bakery, not a microwave. The edges stay slightly crispy while the center remains velvety, and the rich chocolate flavor satisfies any sweet tooth.
It’s the ideal solution for when you need dessert fast—no waiting for an oven to preheat or a cake to cool.
Serve it immediately for warm, gooey perfection or let it cool slightly for a firmer texture. Pair with a scoop of vanilla ice cream or a drizzle of caramel for extra decadence. Here’s how to make it—in just 3 minutes.
Ingredients for 3 minute cake in a cup
Five simple ingredients transform your microwave into a dessert maker—no eggs, no baking, just pure indulgence.
| Ingredient | Amount | Notes |
|---|---|---|
| Instant Chocolate Pudding Mix 🍫 | ½ cup | Vanilla or chocolate flavor preferred |
| Whole Milk 🥛 | ½ cup | Warm to room temperature first |
| Unsweetened Cocoa Powder 🍫 | 2 tbsp | Natural or Dutch-processed preferred |
| Granulated Sugar 🍚 | 2 tbsp | Adjust for sweetness preference |
| Vegetable Oil 🫒 | 1 tbsp | Light or neutral oil preferred |
| Vanilla Extract 🌿 | ½ tsp | Pure vanilla extract preferred |
| Mini Chocolate Chips 🍫 | ¼ cup | Optional for topping |
| Whipped Cream 🧈 | ¼ cup | Optional for topping |
The instant pudding mix is the backbone here—Betty Crocker or Jell-O work perfectly, but check the label for chocolate flavor if you want deeper cocoa notes. Warm the milk first (microwave for 30 seconds, stir, let sit)—cold milk makes the batter lumpy. The cocoa powder is non-negotiable for that rich chocolate flavor; Hershey’s Special Dark or Ghirardelli Natural are my go-tos. Sugar is flexible—start with 2 tbsp, taste, then add more if needed. The oil keeps it moist (don’t skip this!), and vanilla extract adds depth. Grab these at any grocery store—no specialty shopping required.
No instant pudding mix? Substitute 3 tbsp cornstarch + 2 tbsp cocoa powder + 2 tbsp sugar—it’s the same science, just more measuring. Whole milk can be swapped for 2% or almond milk, but whole gives the creamiest texture. Short on cocoa? Add an extra 1 tbsp of pudding mix for chocolate intensity. The chocolate chips and whipped cream are purely optional—skip them if you’re keeping it basic, or go all out with both. Pro tip: Microwave-safe mugs (like those from IKEA or Target distribute heat better—avoid thin plastic ones that warp.
This keeps for 2 days in the fridge, but honestly? It’s best eaten fresh. If making ahead, store the dry mix + wet ingredients separately until ready to microwave. For leftovers, reheat for 10-15 seconds to restore gooeyness. The batter doubles as a single-serving cake or mini trifle layer—just pour into a small ramekin for a fancier presentation. Freeze portions for 1 month—thaw and microwave for 45 seconds to revive.
Why You’ll Love This Recipe
- No Mixing Madness: I swear, this recipe is the kind of lazy genius you didn’t know you needed—just dump the pudding mix, stir in the milk, and let the cocoa powder do its magic. No measuring cups, no whisking until your arm falls off, just boom—ready in minutes.
- Rich Without the Work: That extra cocoa powder turns this into something serious—deep, fudgy, and way more indulgent than store-bought. Honestly, the oil gives it this velvety texture that makes it taste like a dessert you’d order at a café, not something you threw together in a mug.
- Desk Snack to Date Night: Between us, I’ve had this for a 3 PM slump, a last-minute study break, and even as a fancy-ish after-dinner treat when I forgot to bake anything. The same five ingredients work for all of it—just adjust the sugar if you’re feeling extra sweet (or not).
- Pantry Stash Magic: You’re already using stuff you have—no special trips, no wasted ingredients. That pudding mix? It’s probably sitting in your cupboard collecting dust. This turns it into something that actually matters, and the leftovers? They last in the fridge for days, begging to be reheated (or eaten cold, no judgment).
Step-by-step instructions for single-serve mug magic
Here’s how to transform simple pantry staples into rich, cake-like dessert in minutes.
Warm the Milk and Whisk Dry Ingredients
In a small microwave-safe bowl, warm the 0.5 cup whole milk for 30 seconds until it reaches about 110°F—just warm to the touch. This gentle heat helps activate the pudding mix for a smoother texture. While the milk warms, whisk together the 0.5 cup instant chocolate pudding mix, 2 tbsp unsweetened cocoa powder, 2 tbsp granulated sugar, and 0.5 tsp vanilla extract in a separate bowl until completely smooth.
The reason we whisk the dry ingredients first is to prevent clumping when mixed with the warm milk. I like to press down gently with a spoon to ensure no powder remains on the bottom of the bowl. This prep work makes the next step effortless—no lumps mean a silky final texture.
Combine and Microwave in Stages
Pour the warm milk into the dry mixture and stir vigorously for 20 seconds until fully incorporated. The batter should be thick but pourable. Transfer the mixture to a single 12-ounce microwave-safe mug, pressing any thick batter against the sides with a spoon to ensure even cooking.
Microwave on high power for 45 seconds. Here’s the critical part: after the initial 45 seconds, remove the mug and stir vigorously for 10 seconds. This prevents the center from becoming gummy. Return to the microwave and cook for another 30 seconds. The cake should be set but still slightly jiggly in the center—this ensures a moist texture rather than dryness.
Add Chocolate Chips and Finish
Sprinkle the 0.25 cup mini chocolate chips evenly over the top of the cake while it’s still warm. The residual heat will cause them to melt slightly into the surface, creating pockets of melted chocolate in every bite. For an extra touch, dollop the 0.25 cup whipped cream on top and gently swirl it into the chocolate chips with a knife.
Let the cake cool for 1-2 minutes before serving—this allows the flavors to meld and the whipped cream to set slightly. You’ll notice the cake develops a subtle crackly top as it cools, which is a sign of perfect texture. Serve immediately while the chocolate chips are still soft and the cream is fluffy.
Customize and Enjoy
For a richer flavor, drizzle with melted chocolate or caramel sauce before serving. If you prefer a firmer texture, microwave for an additional 10 seconds after the initial 75 seconds. The beauty of this recipe is its adaptability—you can adjust sweetness by adding more sugar or depth by mixing in a splash of coffee or espresso powder.
Each mug yields a single serving with a dense, fudgy texture that’s surprisingly similar to a classic chocolate cake. The cocoa powder enhances the chocolate flavor from the pudding mix, creating a complex, satisfying dessert that’s ready in under three minutes. Enjoy it warm for the ultimate indulgence!
Pro Tips For Making 3 Minute Cake In A Cup
- Whisk the Milk First: Pour the whole milk into your mug before adding the pudding mix—this prevents clumping like you wouldn’t believe. I used to dump everything in at once, and half the time, I’d end up scraping lumps off the sides. Stirring the milk first guarantees a smooth batter every time.
- Use Warm Milk (Not Cold): Microwave the milk for 20 seconds—just enough to take the chill off. Cold milk makes the pudding mix thicken unevenly, and your cake will come out dense. Warm milk blends in faster and gives you that perfect, creamy texture.
- Skip the Extra Cocoa: The pudding mix already has cocoa in it, and adding more turns your cake into a brick. Trust the recipe’s measurements—unless you’re going for a super intense chocolate flavor, which isn’t what this recipe is about.
- Grease the Mug Well: Coat the inside of your mug with a thin layer of vegetable oil and dust it with a pinch of sugar before pouring the batter. This keeps the cake from sticking like glue and adds a subtle caramelized crust when it bakes. (Yes, even if you’re using nonstick—do it anyway.)
Troubleshooting your 3 minute cake in a cup
Overmixed Batter
If your batter looks like pancake batter or has lumps, you’ve overmixed it—this is my most common mistake! The pudding mix needs just enough stirring to dissolve completely.
Whisk the dry ingredients first, then fold in the warm milk with a spoon in a gentle “J” motion for 20 seconds max. Overmixing introduces too much air, causing a dense, rubbery texture.
If it happens, pour into the mug anyway and microwave for 10 seconds less than directed to compensate. 🔥
Gummy Center
A gummy center usually means undercooking or stirring too much after microwaving. Stick to the 45 + 30-second timing—no more! If it’s still gummy, return for 10-second intervals until set but still slightly jiggly.
Pro tip: Use a 12-ounce microwave-safe mug (like those from IKEA)—thinner mugs cook unevenly. Also, avoid stirring after microwaving unless absolutely necessary.
Dry or Crumbly Texture
This happens when the batter is too thick or overcooked. Ensure your milk is warm (not hot) to activate the pudding mix properly. If the batter looks thick, add 1 tsp more milk before microwaving. For dry results, reduce microwave time by 5 seconds next time.
I’ve also found that using Hershey’s Special Dark cocoa powder adds richness that prevents dryness. Cover the mug loosely with a paper towel during microwaving to retain moisture.
Lumpy Top
Lumps on top mean the batter didn’t distribute evenly or the mug wasn’t microwave-safe. Press any thick batter against the mug’s sides with a spoon before microwaving. If using a new mug, test it first with a splash of water—if it boils unevenly, it’s not safe.
For a smoother top, sprinkle a pinch of cocoa powder over the batter before microwaving. This creates a thin barrier that prevents lumps from forming. 💫
Burnt Edges
Burnt edges are a sign of overcooking or an uneven mug. Always microwave on high power for the exact times listed—no more! If your mug has thin spots, rotate it halfway through microwaving.
I recommend using a microwave-safe ceramic mug (like those from Target) for even heat distribution. For extra insurance, microwave for 5 seconds less than directed and check frequently.
Weak Chocolate Flavor
If your cake tastes more like vanilla than chocolate, you likely used too little cocoa powder or a weak pudding mix. Always use 2 tbsp unsweetened cocoa powder (like Ghirardelli Natural) and check your pudding mix label—some brands are less potent.
For an extra boost, add 1 tsp melted chocolate to the batter before microwaving. If using vanilla-flavored pudding mix, swap in chocolate pudding mix for deeper flavor.
Nutrition facts
Frequently asked questions
Can I make this cake without a microwave?
Not recommended for the same quick results! This recipe relies on microwave heat for the 3-minute magic. However, you could try baking it in a 4-inch ramekin at 350°F (175°C) for 12-15 minutes—it’ll be denser but still delicious. The texture won’t be as fudgy, though. For true speed, stick to the microwave method!
How do I make this recipe dairy-free?
Swap the whole milk for unsweetened almond milk or oat milk (warm it first). Use dairy-free whipped cream or coconut whipped cream for toppings. The texture will be slightly lighter, but still rich. For extra richness, add 1 tbsp melted coconut oil to the batter.
Can I use this for a larger group?
Yes! Double the recipe and divide it among 4 mugs (use 12-ounce mugs). For a sheet cake, pour the batter into a 9-inch round pan lined with parchment paper and microwave for 2 minutes, stirring halfway. The texture will be more like a traditional cake. For 8 servings, triple the recipe and bake in a 9×9-inch pan at 350°F (175°C) for 20 minutes.
Why does my cake crack on top?
That’s actually a good sign! The crack forms as the cake cools and sets, indicating it’s perfectly cooked. For a smoother finish, sprinkle a pinch of cocoa powder on top before microwaving—it creates a thin barrier that prevents cracking. If you prefer no cracks, reduce microwave time by 5 seconds next time. The texture won’t be as rich, though!
Can I make this ahead of time?
For best results, make it fresh—this cake is designed for instant gratification! However, you can prep the dry ingredients in advance and store them in an airtight container for up to 1 week. Keep the milk separate until ready to use. If you must store leftovers, refrigerate for up to 2 days and reheat for 10-15 seconds to restore gooeyness. Freezing isn’t recommended as it alters the texture.

- Pork Loin Pulled Pork Crock Pot Recipe: Slow-Smoked Tenderness With Zero Dryness - November 1, 2026
- Baked Potatoes in Crock Pot Recipe: Buttery Interiors and Crispy Top Magic - November 1, 2026
- Braised Beef Short Ribs Recipe: Crock Pot Fall-Off-Bone Magic in 6 Hours - November 1, 2026