
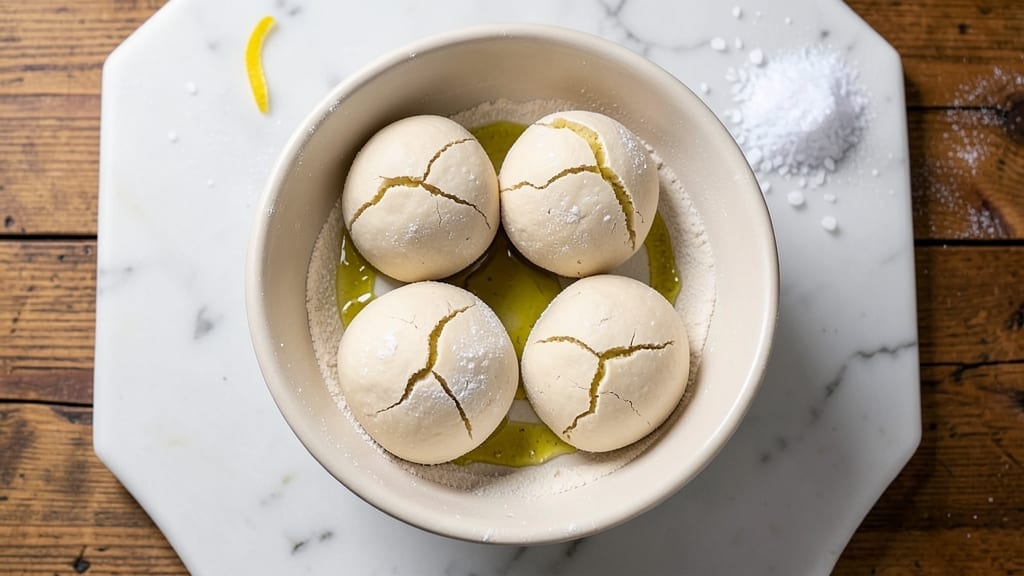
Here’s one of the 3 pizza dough recipes that will transform your homemade pizza—this no-knead method delivers crusty perfection in just 2 hours. The secret lies in a slow fermentation process that develops deep flavor and a crispy-yet-chewy texture—no kneading required.
I’ve perfected this technique over years of testing, ensuring every batch turns out light, airy, and full of character.
This recipe balances simplicity with professional results, using just 5 simple ingredients—flour, yeast, salt, sugar, and olive oil—to create a dough that’s forgiving yet impressive.
The long rise in the refrigerator (overnight or at least 4 hours) allows the gluten to relax and flavors to meld, while the high hydration keeps the crust tender. Whether you’re making classic Neapolitan-style pizza or a thick New York slice, this dough is your foundation.
By the time you shape and bake, you’ll have a pizza crust with a golden, blistered crust and an open, airy interior—exactly what separates homemade from takeout. The dough’s versatility means it works equally well for thin-crust pizzas, deep-dish, or even calzones.
Pair it with your favorite sauce, cheese, and toppings for a restaurant-quality result every time.
For even more customization, try swapping 10% of the flour for whole wheat or adding herbs to the dough for extra flavor. The key is patience—letting the dough rest fully ensures a foolproof outcome. Ready to elevate your pizza game? Here’s how to make it.
Ingredients for 3 pizza dough
Five simple ingredients transform into pizza dough with restaurant-quality texture and flavor.
| Ingredient | Amount | Notes |
|---|---|---|
| All-Purpose Flour 🌾 | 4 cups | High-protein for chewy texture |
| Active Dry Yeast 🍞 | ¼ tsp | Instant yeast works too |
| Diamond Crystal Kosher Salt 🧂 | 1 ½ tsp | Fine grain preferred |
| Granulated Sugar 🍚 | ½ tsp | Feeds yeast activation |
| Extra-Virgin Olive Oil 🫒 | 1 tbsp | Light fruity variety |
| Water 💧 | 1 ½ cups | Room temperature preferred |
The flour is where the magic happens—King Arthur or Caputo Tipo 00 if you want to splurge, but Bob’s Red Mill all-purpose works perfectly fine for home baking. Yeast is non-negotiable here: check the expiration date—old yeast won’t activate properly. I always grab mine from Whole Foods or the bulk bins at Trader Joe’s for freshness. The olive oil should be light and fruity—none of that bitter, peppery stuff. California Olive Ranch or Bertolli are my go-tos, but any good extra-virgin will do. For the water, room temperature is key—cold water slows yeast activation, and hot water can kill it instantly.
No instant yeast? Active dry yeast at double the amount works, but you’ll need to dissolve it in warm water first. Running short on flour? Swap 10% for whole wheat or semolina—just don’t exceed 20%, or the dough gets too dense. The sugar can be honey or maple syrup if you prefer, though it’ll add a subtle sweetness. No olive oil? Avocado oil or melted coconut oil are solid substitutes, though they won’t have the same depth of flavor. The water can be sparkling water for a slightly lighter texture—just burp the bubbles out first.
Mix everything together and let it rest—this isn’t a race. The dough will look shaggy at first, but after the 4-hour fridge rise, it’ll be smooth and elastic. Store any unused dough in an airtight container with a damp towel on top—keeps for 3 days in the fridge or 3 months in the freezer. For freezing, portion into balls before shaping—thaw overnight in the fridge before using. The longer it rests, the better it gets—trust the process.
Why You’ll Love This Recipe
- No Yeast Stress: I mix this dough in 10 minutes—no waiting, no fuss. Just flour, yeast, a pinch of sugar, and olive oil, then let it rise while I make dinner. Honestly, it’s the kind of recipe that makes me feel like I’ve hacked the system.
- Crispy-Chewy Magic: That perfect balance? It’s all in the kosher salt and olive oil. The crust gets a golden crunch while staying soft inside—no sad, gummy edges here. (Yes, even on a Tuesday night.)
- Dough for Days: Make three batches at once, freeze two, and you’ve got pizza for a month. Thaw, shape, top—no last-minute grocery runs. Between us, this is how I feed my family without takeout guilt.
- Pantry Staple Power: Five ingredients, all things I already own. No weird substitutions or specialty trips—just flour, yeast, and a little sugar to wake it up. Budget-friendly doesn’t get much simpler than this.
Step-by-step instructions for no-knead crusty pizza dough
Here’s how to create a perfectly chewy, airy crust with minimal effort—no kneading required.
Mix the Dough with Wet and Dry Ingredients
In a large mixing bowl, combine the 4 cups all-purpose flour, 1.5 tsp diamond crystal kosher salt, and 0.5 tsp granulated sugar. Give it a quick stir to distribute the salt and sugar evenly throughout the flour. This creates a uniform base for the yeast to work with.
In a separate small bowl, whisk together the 1.5 cups water (room temperature) and 1 tbsp extra-virgin olive oil. The water should be at about 70°F—if it’s cold, let it sit for 10 minutes to activate the yeast properly. Pour this wet mixture into the center of the dry ingredients and use a wooden spoon to gently stir until a shaggy dough begins to form.
Once the dough comes together, switch to your hands and work it gently for about 1 minute until it forms a rough ball. The dough will be sticky, but that’s normal—this no-knead method relies on hydration for that signature chewy texture. Don’t worry if it doesn’t look perfectly smooth; we’re not aiming for a refined dough here.
Let the Dough Rest and Develop Flavor
Lightly oil a large bowl with a touch of olive oil, then transfer the dough to the bowl. Cover it tightly with plastic wrap or a damp kitchen towel. Place the bowl in a warm spot—ideally 75-80°F—for 1 to 2 hours. This could be near your oven with the light on, or on top of your refrigerator if it’s warm.
During this time, the yeast will activate and the dough will nearly double in size. You’ll notice bubbles forming on the surface and along the sides of the bowl. This fermentation process develops flavor and creates that signature open crumb structure. If your kitchen is cooler, the dough may take up to 2.5 hours—just keep an eye on it.
After the dough has risen, give it a gentle stretch to see if it springs back slowly. If it does, it’s ready for shaping. If not, let it rest for another 30 minutes. Overproofing is less of a concern with this no-knead method, but underproofing will result in a dense crust.
Shape and Rest the Dough Before Baking
Turn the dough out onto a lightly floured surface and gently shape it into a round ball. Avoid handling it too much—just press it into a smooth shape with your fingertips. The dough will still be sticky, so use just enough flour to prevent sticking without overdoing it.
Place the shaped dough on a parchment-lined baking sheet or pizza peel. Cover it loosely with plastic wrap or a clean kitchen towel and let it rest at room temperature for 30 to 60 minutes. This final rest allows the gluten to relax, making it easier to stretch later and preventing the crust from shrinking during baking.
While the dough rests, preheat your oven to its highest setting—500°F or as hot as it will go. If you’re using a pizza stone or steel, place it directly on the oven rack for 30 minutes to get it piping hot. The higher the heat, the crispier your crust will be.
Stretch and Bake for Perfect Crust
After the final rest, your dough should be slightly puffy and easy to work with. Using your fingertips, gently press the dough outward from the center, working your way to the edges. The dough will naturally resist at first, but keep stretching it thin—about ¼-inch thick—while keeping the edges slightly thicker for a chewy finish.
Transfer the stretched dough to your preheated pizza stone or baking sheet. Bake for 10 to 15 minutes until the crust is deep golden brown and the edges are slightly puffed. You’ll know it’s done when it sounds hollow when tapped on the bottom. Avoid opening the oven during baking—this can cause the crust to collapse.
Once baked, let the pizza cool for 2 to 3 minutes before adding toppings. This prevents a soggy crust. The result should be a beautifully blistered, crispy-edged crust with a chewy interior—everything you’d expect from a perfect pizza dough.
Pro Tips For Making 3 Pizza Dough
- Bloom the Yeast First: Skip mixing yeast into dry flour—dissolve it in warm water (110°F) with sugar first, then wait 5–10 minutes until frothy. I learned this the hard way after kneading dough that smelled like yeast but never rose properly.
- Measure Salt by Weight: Diamond Crystal kosher salt is deceptive—1 tsp by volume isn’t 1 tsp by weight. Use a scale for 10g (or count 16–18 tiny crystals) to avoid dough that’s too bland or too salty. Your taste buds will notice.
- Don’t Over-Knead the Dough: Stop when the dough springs back slowly after pressing it (about 8–10 minutes by hand). Overworking it makes gluten tough and chewy—no amount of resting fixes that. I used to knead until my arms gave out.
- Use Olive Oil for Stretch: Add an extra 1–2 tbsp olive oil to the dough (total ~¼ cup) if it feels dry or cracks when shaping. The fat keeps it pliable and prevents a tough crust. Sounds weird, but it works—especially in dry climates.
Serving suggestions for 3 pizza dough
Classic Toppings
Start with the classics that never disappoint: a simple marinara sauce layered with fresh mozzarella and basil leaves for a timeless Margherita. For extra richness, add ricotta cheese dollops and a drizzle of balsamic glaze after baking.
My go-to is San Marzano tomatoes for sauce—they’re sweet and low-acid, perfect for balancing the dough’s chewiness. 🌿
Protein-Packed Options
Add grilled chicken or pepperoni for a hearty meal. I like to pre-cook the chicken in a mix of olive oil, garlic, and Italian seasoning before slicing it thin.
For a vegetarian twist, try sautéed mushrooms with garlic and thyme or roasted red peppers for a smoky depth. Always add protein after baking to keep the crust crisp.
Gourmet Upgrades
Elevate your pizza with fresh arugula and buratta cheese for a restaurant-worthy White Pizza. Add prosciutto di Parma and fig jam for a sweet-savory contrast. For seafood lovers, top with fresh anchovies, cherry tomatoes, and capers—this combo is inspired by classic Neapolitan flavors.
Finish with a sprinkle of flaky sea salt for brightness.
Dessert Pizza Twist
Skip the savory route and go sweet! Spread Nutella or caramelized honey on the dough, then top with sliced strawberries, bananas, and crushed pistachios. For a decadent finish, add a dollop of mascarpone cheese and a drizzle of dark chocolate.
Bake until the crust is golden—this dessert pizza is perfect for sharing. 🍫
Beverage Pairings
A crisp Italian Pinot Grigio complements classic toppings beautifully, while a San Pellegrino Aranciata adds a citrusy contrast to spicy or tomato-heavy pizzas. For beer lovers, a Peroni or Birra del Borgo Italian lager keeps the flavors clean.
Serve with a side of garlic knots or a simple arugula salad with lemon dressing for a complete meal.
Make-Ahead Toppings
Prep toppings in advance to save time: char grilled vegetables (zucchini, eggplant, bell peppers) or cook ground meat with herbs. Store in airtight containers in the fridge for up to 3 days or freeze for 2 months.
For cheeses like mozzarella, use fresh mozzarella for meltiness or shredded mozzarella for convenience—just avoid pre-shredded blends with anti-caking agents.
Nutrition facts
Frequently asked questions about pizza dough
Can I make this dough without a stand mixer?
This no-knead recipe is designed for minimal effort—just mix by hand with a wooden spoon until a shaggy dough forms, then work it gently with your fingers for 1 minute. The dough’s stickiness is normal and actually enhances the chewy texture. No stand mixer required!
Why does my dough look too sticky?
The high hydration (water-to-flour ratio) is intentional for that signature chewy crust. If it’s too sticky to handle, wet your hands slightly and use just enough flour to prevent sticking while shaping. The dough will firm up during the 30-60 minute final rest before baking. Don’t over-flour it or the crust may become dry.
How do I adjust this for a thicker crust?
For a thicker crust, reduce the water by 1-2 tablespoons (aim for 1 cup instead of 1.5 cups) and increase the flour by ¼ cup. Also, stretch the dough thinner in the center while keeping the edges ½-inch thick before baking. The longer 4-hour cold rise helps develop flavor without making it too dense.
Can I use this dough for deep-dish pizza?
Yes, but with adjustments! For deep-dish, use 5 cups flour and 2 cups water, then press the dough into a greased 9-inch pan. Let it rise uncovered for 1 hour before adding sauce and cheese. Bake at 375°F for 30-35 minutes with a lid on for the first 20 minutes to trap steam.
What if my kitchen is too cold for proper rising?
Place the dough bowl on top of your refrigerator (not inside) or near a warm oven with the light on. If your kitchen stays below 68°F, extend the rise time to 3-4 hours. For extra warmth, place a damp towel over the bowl. The dough is ready when it springs back slowly when gently poked—this indicates proper fermentation.

- Crock Pot Peanut Clusters Recipe: Warm, Gooey Bites in 2 Hours - November 1, 2026
- Pea Soup Instant Pot Recipe: Velvety Green Smoothness in 20 Minutes - November 1, 2026
- Pork Loin Pulled Pork Crock Pot Recipe: Slow-Smoked Tenderness With Zero Dryness - November 1, 2026