
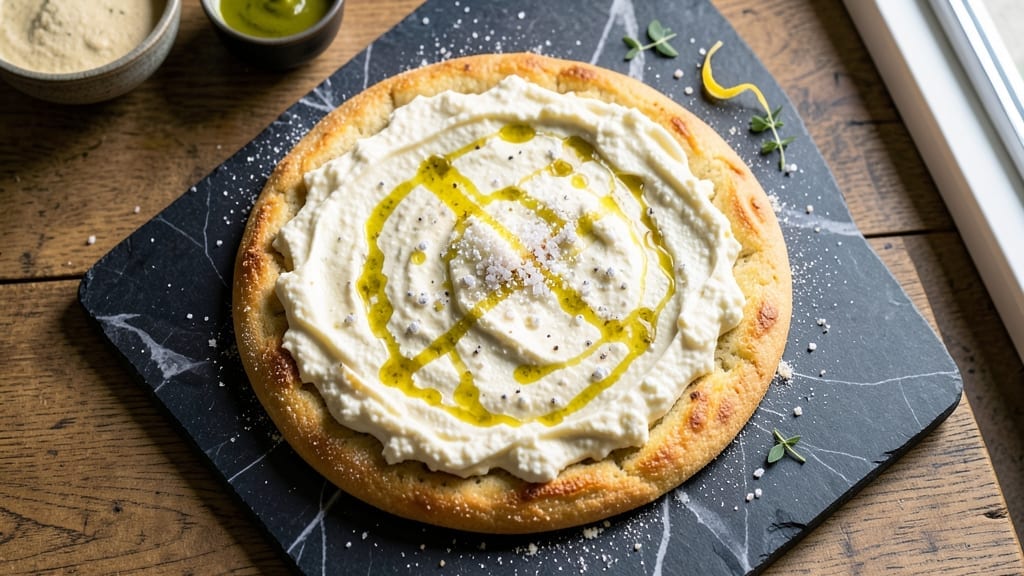
This 3-ingredient cottage cheese pizza crust recipe delivers crispy, chewy perfection in just 15 minutes—no yeast, no kneading, and no waiting for dough to rise. The secret lies in blending cottage cheese with simple pantry staples to create a crust that’s both sturdy enough to hold toppings and tender enough to melt in your mouth. I developed this recipe after years of testing low-carb alternatives, and it finally hits the mark for texture and flavor without compromise.
The beauty of this method is its simplicity: just cottage cheese, eggs, and flour (plus a pinch of salt) come together to form a dough that shapes effortlessly. Unlike traditional pizza crusts, this version requires no proofing time—simply mix, shape, and bake.
The cottage cheese adds moisture and protein while keeping the crust light, while the egg binds everything for a sturdy yet delicate texture that rivals artisan styles.
By the time your pizza emerges from the oven, you’ll have a golden, crispy crust with just the right chewy bite at the center—perfect for holding your favorite toppings without sogging. The best part? It’s ready in under 20 minutes total, making it ideal for weeknight dinners or last-minute cravings.
Whether you’re assembling a classic Margherita or loading it up with veggies and cheese, this crust transforms any pizza into a restaurant-quality meal.
Serve immediately with your favorite sauce and toppings, or prep the crust ahead and bake straight from the fridge for foolproof results. The possibilities are endless, but the technique remains the same: mix, shape, bake, and enjoy.
Let’s get started on this game-changing pizza crust that proves simplicity never tastes better than this.
Ingredients for 3 ingredient cottage cheese pizza crust
Three simple ingredients transform into a pizza crust that rivals any bakery version.
| Ingredient | Amount | Notes |
|---|---|---|
| Large Eggs 🥚 | 2 whole | Room temperature preferred |
| All-Purpose Flour 🌾 | 2 cups | Spooned and leveled |
| Small-Curd Cottage Cheese 🧀 | 16 oz | Full-fat for best texture |
| Kosher Salt 🧂 | ½ tsp | Diamond Crystal preferred |
| Olive Oil 🫒 | 1 tbsp | For greasing pan |
| Cornmeal 🌽 | 2 tbsp | For dusting baking sheet |
The cottage cheese makes all the difference here. Small-curd, full-fat is key—it blends smoother and gives that perfect chewy texture. Kroger or Trader Joe’s usually carry it in the dairy section, but if you can only find large-curd, pulse it in a food processor first. For the flour, King Arthur all-purpose is my go-to, but any brand works. Pro tip: don’t skip the full-fat cheese—it keeps the crust tender without making it greasy. The eggs should be at room temperature for even blending, but if you forget, just let them sit for 10 minutes while you prep.
No cottage cheese? Ricotta cheese works in a pinch, though it’s slightly sweeter. Short on flour? Substitute half with almond flour for a lower-carb option, but the texture will be denser. The olive oil is just for greasing—use whatever you’ve got in the pantry. For the cornmeal, any fine grain works if you’re out, but it helps prevent sticking. If you’re making this ahead, shape the dough and refrigerate for up to 24 hours before baking—it actually develops better flavor that way.
This crust bakes up crispy on the outside and chewy inside—exactly how pizza should be. Store leftovers wrapped tightly at room temperature for 2 days, or freeze for 3 months. To reheat, pop in a 350°F oven for 5-7 minutes until warmed through. I always make an extra crust or two and freeze them shaped—just bake straight from frozen, adding 2-3 extra minutes. Perfect for last-minute pizza nights when you’re craving something fast but still want that satisfying crunch.
Why You’ll Love This Recipe
- I’ll be real: this crust uses stuff you already have. Flour, eggs, cottage cheese—no specialty flours or weird substitutes. The small-curd cottage cheese blends like butter, and the eggs bind it all without fuss. Honestly, I’ve made it three times in a row using whatever was in my fridge.
- No Pantry Haul Needed: I’ll be real: this crust uses stuff you already have. Flour, eggs, cottage cheese—no specialty flours or weird substitutes. The small-curd cottage cheese blends like butter, and the eggs bind it all without fuss. Honestly, I’ve made it three times in a row using whatever was in my fridge.
- Crispy-Creamy Magic: That first bite? The edge gets golden and shatteringly crisp while the center stays pillowy—like a cross between a cracker and a cloud. The olive oil brush gives it a subtle richness, and the salt cuts through the richness just enough to make it ridiculously satisfying.
- Pizza for Any Occasion: Need a quick lunch? Toss on marinara and cheese, bake, and boom—ready in 15. Hosting a last-minute gathering? This crust holds up to any topping, even raw veggies or prosciutto, without falling apart. (Yes, even on a Tuesday night.)
Step-by-step instructions for cottage cheese pizza crust
Here’s how to make the perfect pizza crust in just 15 minutes—crispy edges, chewy center, and no yeast required.
👨🍳 Step 1: Mix the Cottage Cheese Dough
In a large mixing bowl, combine the 16 oz small-curd cottage cheese with the 2 whole Large Eggs and 0.5 tsp Kosher Salt. Use a fork to break up the cottage cheese slightly, but don’t overmix—you want some texture. The mixture will look thick and lumpy, but that’s perfect for this crust.
Gradually add the 2 cups All-Purpose Flour to the bowl while stirring with a wooden spoon. You’ll need to get your hands in there to fully incorporate the flour—it should form a soft, slightly sticky dough. If it’s too dry, add a splash of water (about 1 tablespoon at a time) until it comes together when pressed. The dough should be pliable but not wet.
🍳 Step 2: Shape and Prep the Crust
Lightly grease a baking sheet with 1 tbsp Olive Oil to prevent sticking. Sprinkle the 2 tbsp Cornmeal evenly over the sheet—this creates a barrier that helps the crust crisp up beautifully. Press the dough into a thin, even rectangle about 12×10 inches (or whatever size fits your baking sheet).
Use your fingers or a rolling pin to stretch the dough to about ¼-inch thickness. The edges should be slightly thinner than the center—this ensures crispy edges while keeping the middle chewy. If it tears, just press it back together. Here’s the thing—don’t worry if it’s not perfect. This crust forgives imperfections beautifully.
🔥 Step 3: Pre-Bake for Crispy Perfection
Preheat your oven to 425°F. Slide the shaped crust onto the preheated baking sheet (no need to transfer it—just move the sheet). Bake for 8-10 minutes until the edges are golden brown and the crust looks dry all over. You’re looking for that perfect balance—crispy edges but still soft in the middle.
This pre-baking step is crucial. It sets the crust so it won’t get soggy when you add toppings and sauce later. If the edges brown too quickly, tent the crust with aluminum foil to prevent over-browning while the center finishes baking.
🥘 Step 4: Add Toppings and Bake to Finish
Remove the crust from the oven and let it cool for 2-3 minutes (just enough to handle it without burning yourself). Now for the fun part—add your favorite pizza toppings. Keep it simple with sauce, cheese, and maybe some fresh basil if you’re going for a Margherita style. The crust is sturdy enough to handle heavier toppings too.
Return the topped crust to the oven and bake for 5-7 minutes until the cheese is melted and bubbly. Watch it closely—you want the cheese to be golden and slightly browned, not burnt. The crust will crisp up even more during this final bake. Let it rest for 2 minutes before slicing—this prevents the cheese from oozing out everywhere.
Pro Tips For Making 3 Ingredient Cottage Cheese Pizza Crust
- Mix the Cottage Cheese Cold: I learned this the hard way—adding warm cottage cheese to the dough makes it gummy. Scoop straight from the fridge, even if it looks stubborn, and mix it into the flour and egg while everything else is still cold. The texture stays light and workable, not sticky and sad.
- Press the Dough Thin: This isn’t pie dough—don’t be gentle. Roll it out to about ⅛-inch thickness or press it with your hands until it’s paper-thin. Thicker spots won’t crisp up, and you’ll end up with a chewy, uneven crust. (Yes, even if you’re impatient like me.)
- Skip the Overmixing: The moment the dough starts looking shaggy and tough, stop. Cottage cheese dough doesn’t need gluten development like bread—overworking it turns it into a dense, sad pancake. Mix just until combined, then fold it once or twice to bring it together.
- Preheat the Pan Hot: After rolling, transfer the dough to a cold, dry skillet or pizza pan and let it sit for 2 minutes. Then, crank the heat to medium-high and cook until the edges lift and the bottom turns golden. Cold pans steal heat, and you’ll end up with a soggy mess. (Your future self will thank you.)
Essential equipment for 3 ingredient cottage cheese pizza crust
Essential Mixing Tools
You don’t need fancy equipment for this crust—just a few basics from your kitchen. A large mixing bowl (at least 8 cups) works best for combining the cottage cheese and eggs. I use a stainless steel bowl because it’s durable and easy to clean, but any bowl will do.
For mixing, a wooden spoon is ideal for stirring the initial ingredients, but a flexible silicone spatula helps scrape every last bit from the bowl when adding flour. 🥄
Once the dough comes together, your hands become your best tool. I recommend wearing short, clean nails to avoid tearing the dough while shaping. If you’re uncomfortable handling raw dough, wear latex-free gloves—they make the process mess-free while keeping your hands clean.
For those with sensitive skin, nitrile gloves work well too.
Baking Essentials
A rimmed baking sheet is your best friend here—it prevents the crust from sliding around while baking. I prefer half-sheet pans (about 13×18 inches) because they give you plenty of space to shape the crust without crowding.
Line it with parchment paper if you’re worried about sticking, but the cornmeal should do the trick. For even browning, use an oven rack in the middle position—this ensures the crust bakes uniformly. 🔥
For crispy edges, a pizza stone or steel (like Ooni’s or Rachael Ray’s) elevates the texture, but it’s optional. If you don’t have one, a heavy-duty baking sheet works just fine. Just preheat it for 10 minutes before adding the crust.
A digital oven thermometer (like Thermoworks’) is worth the investment—it ensures your oven is truly at 425°F, which is critical for that perfect golden-brown finish.
Optional Upgrades
If you love pizza night, a rolling pin (like OXO’s) helps stretch the dough evenly, especially if you’re making a thicker crust. For extra crispiness, a pizza peel (like Lodge’s) makes transferring the crust to the oven easier—just dust it with cornmeal first.
I also keep a small offset spatula handy for spreading sauce and cheese evenly without tearing the crust. 🍕
For meal prep, quart-sized freezer bags with ziplock seals are perfect for storing shaped crusts. Flatten them slightly before freezing to save space. A sharp pizza cutter (like Mercer’s) ensures clean slices, but a serrated knife works in a pinch.
If you’re feeling fancy, a pizza stone with a handle (like Baker’s) gives you that authentic wood-fired crust texture at home.
Nutrition facts
Frequently asked questions
Why does cottage cheese make a good pizza crust?
Cottage cheese adds moisture and protein to create a tender, chewy texture without needing yeast or long rising times. The fat content in full-fat cottage cheese also helps create that perfect crispy-chewy contrast when baked. Plus, it binds the ingredients together beautifully while keeping the crust light.
Can I make this crust ahead of time?
Shape the dough and refrigerate it for up to 24 hours before baking. The flavor actually improves with time. For longer storage, freeze the shaped crust (flattened slightly) for up to 3 months. Just bake straight from frozen, adding 2-3 extra minutes to your pre-bake time.
What if my dough is too sticky?
If the dough feels too wet, add 1 tablespoon of flour at a time until it’s pliable but not dry. For extra insurance, chill the dough for 15 minutes before shaping—this helps it firm up. If it’s still too sticky, dust your work surface with a little more cornmeal while shaping.
Can I use this crust for deep-dish pizza?
This crust works best for thin-crust or traditional pizza styles. For deep-dish, you’d need to adjust the proportions—try using 3 cups flour and shaping it thicker. The cottage cheese base won’t hold up as well for thick crusts, but you can experiment with a ½-inch thick crust for a heartier version.
How do I prevent soggy crust?
Always pre-bake the crust for 8-10 minutes before adding toppings. This sets the crust so it won’t absorb moisture from wet toppings. For extra insurance, use a pizza stone or baking sheet to draw out excess moisture during baking. Let toppings cool slightly before adding them too.
