
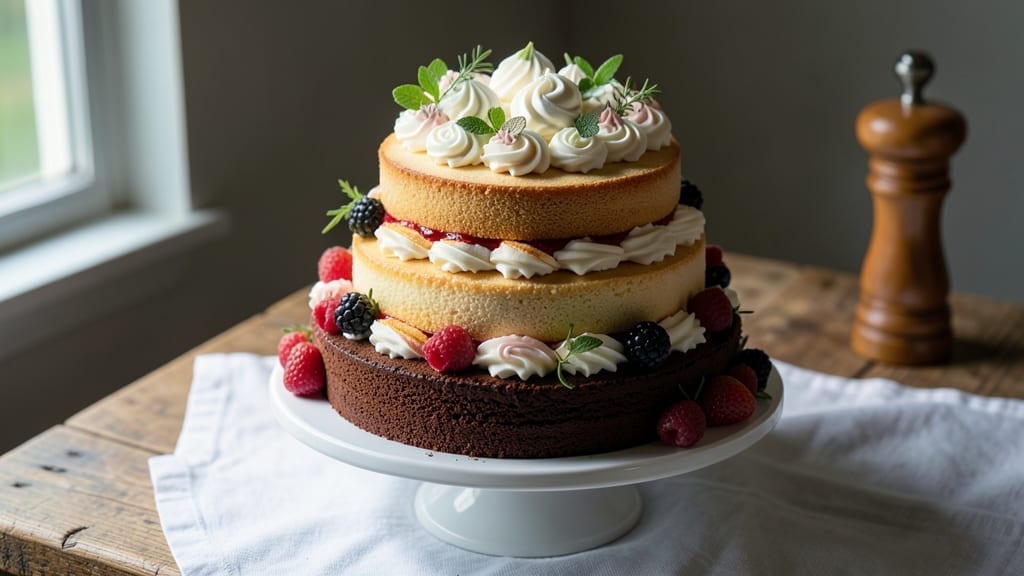
Creating a 3-tier cake from scratch feels like crafting a masterpiece—each layer must be perfect to build that elegant, show-stopping centerpiece. 💛 The secret lies in precise baking times, proper chilling, and flawless buttercream that holds those tiers together without collapsing.
I’ve perfected this method over years of baking, and it delivers restaurant-quality results that look and taste like they came from a professional bakery.
This recipe starts with light-as-air sponge layers that bake evenly at 350°F for exactly 25-30 minutes, then cool completely before filling. The homemade French buttercream—rich, smooth, and stable—is the foundation for both filling and decorating, ensuring your cake holds its shape and tastes divine.
We’ll build each tier with precise leveling and crumb coating, then stack them with confidence.
By the time you’re done, you’ll have a cake that’s not just beautiful but structurally sound, with flawless piping, clean edges, and a texture that’s light yet sturdy.
The buttercream’s velvety smoothness contrasts perfectly with the tender cake layers, and the final touches—whether buttercream rosettes or fresh flowers—will make it the star of any celebration.
Perfect for weddings, anniversaries, or special birthdays, this cake proves that homemade can rival the best bakery creations. Let’s get started on your masterpiece—every layer matters!
Ingredients for 3 tier cake recipe from scratch
Twelve essential ingredients to craft a showstopping 3-tier masterpiece with restaurant-quality buttercream.
| Ingredient | Amount | Notes |
|---|---|---|
| All-Purpose Flour 🌾 | 4 ½ cups | Sifted for lightness, room temperature |
| Unsalted Butter 🧈 | 2 ¼ cups | Cold, cubed, European preferred |
| Granulated Sugar 🍚 | 3 ½ cups | Superfine for smooth texture |
| Large Eggs 🥚 | 12 whole | Room temperature, separated |
| Vanilla Extract 🌿 | 2 tbsp | Pure Madagascar bourbon |
| Baking Powder 🧂 | 1 tbsp | Freshly opened |
| Salt 🧂 | ½ tsp | Fine sea salt |
| Heavy Cream 🥛 | 4 cups | Cold, 35% fat minimum |
| Powdered Sugar 🍚 | 6 cups | Sifted for smooth buttercream |
| Lemon Zest 🍋 | 1 tbsp | Freshly grated |
| Vanilla Bean Paste 🌿 | 1 tbsp | High-quality for depth |
| Parchment Paper 📄 | 1 sheet | For cake boards |
| Cake Boards 🍰 | 3 whole | 8-inch, 6-inch, 4-inch |
| Fresh Flowers 🌸 | 1 bunch | Edible variety for decor |
The flour and butter are your foundation—King Arthur flour and Plugrá butter are my go-tos for that signature lightness. The butter must be cold when creaming, or you’ll risk dense layers. Grab a digital kitchen scale for precision, especially with the butter and sugar. Eggs should be room temperature, so pull them out 30 minutes before starting. The vanilla extract? Madagascar bourbon is worth the splurge—it adds depth that imitation can’t match. For the buttercream, Powdered Sugar by Domino sifts beautifully and prevents clumping. Pro tip: Use a stand mixer with a paddle attachment for silky-smooth results.
No superfine sugar? Pulse regular granulated sugar in a food processor for 30 seconds. Running out of vanilla? Almond extract at half the amount works in a pinch, but the flavor will be different. Heavy cream too warm? Chill the bowl and whisk before whipping. For the cake boards, Amazon has great options—just make sure they’re at least 1/4-inch thick to support the weight. The fresh flowers? Local farmers markets often have edible varieties like violets or pansies that add stunning color without overpowering the cake’s flavor. If you’re short on time, store-bought cake boards work just fine—just clean them thoroughly before use.
Store flour and sugar in airtight containers to keep them fresh—glass jars with tight seals are ideal. Buttercream keeps beautifully in the fridge for up to 5 days, but bring it to room temperature before using. Cake layers? Wrap tightly in plastic wrap and store at room temperature for up to 2 days. The parchment paper and cake boards can be reused for future projects—just wash gently with warm, soapy water. For the flowers, trim stems and store in water in the fridge overnight if prepping ahead. Every layer deserves this kind of care—your future self (and guests) will thank you!
Why You’ll Love This Recipe
- Here’s what sold me: this cake costs a fraction of what store-bought tiers do, but it looks like the real deal. A box of cake mix won’t give you this kind of texture or height. Plus, the leftovers? They stay moist for days—perfect for sneaking into lunches or midnight cravings. (Yes, even on a Tuesday night.)
- No Fuss Layers: I swear by this recipe because it’s about as simple as cake gets—literally. You’re just creaming butter and sugar, folding in eggs one at a time (no overmixing, no stress), and letting the vanilla do its magic. The secret’s in the patience: baking each tier at the same temp means no guessing, no last-minute oven drama.
- Butter-Sugar Bliss: That rich, velvety crumb? It’s all in the butter-to-sugar ratio. The eggs add structure without dryness, and the vanilla? It’s not just flavoring—it’s the soul of this cake. Honestly, the first time I tasted it, I thought, “This is the kind of cake I’d buy at a bakery… if I didn’t just make it myself.”
- Party-Proof Perfection: Three tiers mean you can dress it up for weddings, birthdays, or just because. Add a simple buttercream or fresh berries, and it’s instant showstopper. Between us, I’ve used the leftovers for cake pops (trust me, they’re addictive) or even breakfast cake slices—because why should dessert have all the fun?
Step-by-step instructions for stacking your 3-Tiered masterpiece
Here’s where the magic happens—let’s build this showstopper from scratch to stunning stack.
👨🍳 Step 1: Bake the Cake Layers with Precision
Preheat your oven to 350°F and prepare three 8-inch, 6-inch, and 4-inch round cake pans by lining them with the parchment paper and greasing lightly with butter. In a stand mixer, combine the 4.5 cups all-purpose flour, 1 tablespoon baking powder, and 0.5 teaspoon salt. Sift this mixture directly into a large bowl to aerate.
In another large bowl, beat the 2.25 cups cold unsalted butter and 3.5 cups granulated sugar on medium speed until light and fluffy—about 3-4 minutes. Add the 12 room-temperature eggs one at a time, mixing well after each addition. Alternate adding the dry ingredients and 2 tablespoons vanilla extract in three parts, beginning and ending with flour. Divide the batter evenly among the prepared pans.
Bake the cakes for 25-30 minutes or until a toothpick inserted into the center comes out clean. Let them cool in the pans for 10 minutes before transferring to a wire rack to cool completely. This gradual cooling prevents cracking. Real talk: if your oven runs hot, check the 8-inch layer first—it takes longest to bake.
🥘 Step 2: Craft the Signature Homemade Buttercream
Place the 4 cups cold heavy cream in a chilled bowl and whip with an electric mixer until soft peaks form. In a separate large bowl, beat the 2.25 cups cold unsalted butter until pale and creamy—about 3-5 minutes. Gradually add the 6 cups powdered sugar, 1 tablespoon lemon zest, and 1 tablespoon vanilla bean paste while mixing on low speed.
Incorporate the whipped cream in two additions, mixing just until combined. This buttercream should be smooth, fluffy, and pipeable—like thick whipped cream. For extra stability, chill the buttercream for 30 minutes before assembling. Here’s the thing—homemade buttercream tastes infinitely better than store-bought, but it requires patience. Don’t rush the chilling step or your frosting will slide.
🍳 Step 3: Level and Crumb-Coat the Layers
Once completely cool, use a serrated knife to level the tops of each cake layer. Place the 8-inch layer on the 8-inch cake board and spread a thin layer of buttercream (about ¼ inch thick) over the top. This crumb coat prevents crumbs from mixing into your final frosting. Repeat with the 6-inch and 4-inch layers, placing them on separate boards.
Chill the crumb-coated cakes for 15 minutes in the freezer while you prepare your piping bag with a star tip. Here’s where precision matters: the 8-inch layer should have a 6-inch layer centered on top, and the 4-inch layer should sit perfectly centered above that. Use a cake turntable to rotate the cakes while you pipe the buttercream—this ensures even coverage and professional-looking seams.
⏰ Step 4: Frost and Stack with Confidence
Pipe a generous layer of buttercream around the base of the 8-inch layer, creating a 2-inch wide band about 1 inch high. Place the 6-inch layer on top and pipe another band around it, leaving about 1 inch of the 8-inch layer visible. Repeat with the 4-inch layer, creating a tiered effect. Chill the stacked cake for 20 minutes to set the buttercream.
For the final touch, pipe a smooth layer of buttercream over the entire cake using a large round tip. Use an offset spatula to create clean, smooth sides. Arrange the fresh flowers on top for a stunning presentation. I like to place them in a circular pattern around the center flower for balance. Serve immediately or refrigerate for up to 4 hours before serving.
Pro Tips For Making 3 Tier Cake Recipe From Scratch
- Cream Butter Slowly: I learned this the hard way—dumping cold butter into sugar and jumping straight to mixing leaves you with a grainy, uneven batter. Instead, let the butter sit at room temp for 2 hours (yes, even if you’re impatient), then beat it with the sugar on medium-high for 3-5 minutes. You want ribbons that cling to the beaters like wet paint—no dry bits, no lumps. This ensures your cake layers stay tender, not dense.
- Sift Flour Twice: Skimping on this step is how you end up with tunnels or a cake that collapses like a house of cards. Sift the flour before measuring, then sift it again right into your mixing bowl. The extra effort removes hidden clumps and aerates the flour, which lightens the crumb. (Pro move: Use a fine-mesh sieve—don’t rely on the cheap one that came with your measuring cups.)
- Bake One Layer First: Your oven’s hot spots are real, and baking all three tiers at once guarantees at least one will be underdone or overbaked. Test the oven by baking one layer fully, checking the center with a toothpick. Adjust racks or temperature as needed—this single test saves you from a ruined middle tier or a gummy top.
- Cool Layers Properly: I used to rush this, and the result? Frosting sliding off like a greased pig at a county fair. Let each layer cool completely on a wire rack for at least 1 hour before frosting—no peeking at the edges. If you’re in a hurry, chill them uncovered in the fridge for 20 minutes, but bring them to room temp before assembling. Cold layers = cracked frosting.
Pro cooking tips for perfect results
Precision Baking Tips
Bake your cake layers at 350°F for exactly 25-30 minutes—no more, no less! Use an oven thermometer to verify your oven’s accuracy, as many run hot or cold. I swear by the Thermoworks Oven Thermometer—it’s a game-changer.
For even baking, rotate the pans halfway through at the 15-minute mark. Let the cakes cool in their pans for 10 minutes before transferring to a wire rack to prevent cracking. 🌡️
Buttercream Mastery
Chill your buttercream for 30 minutes before assembling—this critical step prevents sliding and ensures clean piping. Use a stand mixer with a paddle attachment for silky-smooth results, mixing on medium speed to avoid incorporating air.
For extra stability, add 1 teaspoon cornstarch to the powdered sugar mixture. I’ve found that Domino powdered sugar dissolves the best without clumping. 🥄
Leveling Like a Pro
Use a serrated knife to level your cake layers—press down firmly and twist slightly for clean edges. Place a 4-inch cake board on top of the cake to create a flat surface, then slice off any domed portions.
For perfect alignment, draw a pencil mark on the underside of each layer to guide placement. A cake turntable makes rotating layers effortless during assembly. ✨
Stacking Secrets
Pipe a 2-inch wide band of buttercream around each tier before stacking—this creates a sturdy foundation. Use a cake dowel (available at baking supply stores) to support the weight of upper tiers if needed.
Chill the stacked cake for 20 minutes between layers to set the buttercream. For extra security, place a dental floss loop around the middle tier before adding the top layer. 💪
Decorating Tricks
For smooth sides, use an offset spatula to gently press buttercream onto the cake’s surface. Work in small sections and blend with circular motions. To create clean edges, dip a bench scraper in warm water and wipe along the cake’s base.
Fresh flowers add elegance—choose varieties like pansies or violets that won’t wilt quickly. 🌸
Time-Saving Shortcuts
Make your buttercream a day ahead and store it in an airtight container in the fridge—it actually improves in flavor! For busy bakers, consider using a boxed cake mix for the layers (just add extra eggs and butter for moisture).
Prep your cake boards by lining them with parchment paper ahead of time. I keep my piping bags filled and ready in the fridge for quick assembly. 💡
Nutrition facts
Frequently asked questions
What’s the best way to prevent my 3-tier cake from collapsing?
Chill your buttercream for 30 minutes before assembling and use a cake dowel between tiers if needed. Pipe a 2-inch wide band of frosting around each layer before stacking to create a sturdy foundation. Always chill the cake for 20 minutes between layers to set the buttercream completely.
Can I make this cake ahead of time?
Bake the cake layers 2 days ahead and store them wrapped in plastic at room temperature. Make the buttercream 1 day ahead and refrigerate in an airtight container. Assemble the cake 4-6 hours before serving to let the frosting set properly. The flavors actually improve with time!
How do I keep my buttercream from sliding off?
Make sure your buttercream is properly chilled before piping and use a stand mixer with a paddle attachment for smooth, stable results. Add 1 teaspoon cornstarch to the powdered sugar for extra stability. When stacking, pipe a 2-inch wide band around each tier and chill for 20 minutes before adding the next layer.
What’s the best way to level my cake layers?
Use a serrated knife and press firmly while twisting slightly for clean edges. Place a 4-inch cake board on top of the cake to create a flat surface, then slice off any domed portions. For perfect alignment, draw a pencil mark on the underside of each layer to guide placement. A cake turntable makes rotating layers effortless during assembly.
Can I use boxed cake mix for this recipe?
Yes! For a shortcut, use a high-quality boxed mix but add 2 extra eggs and ½ cup extra butter for moisture. Bake at 325°F instead of 350°F to prevent over-browning. The buttercream and assembly steps remain the same. Just be sure to level the layers carefully for a professional finish.

- 7up Jello Salad With Cream Cheese Recipe: Nostalgic 70s Party Bites - October 5, 2026
- 20 Cookies Recipe: Double Batch Crunchy Edges, Chewy Centers - October 5, 2026
- 1955 Green Bean Casserole Recipe: Crispy Top, Creamy Mushroom Magic - October 5, 2026