
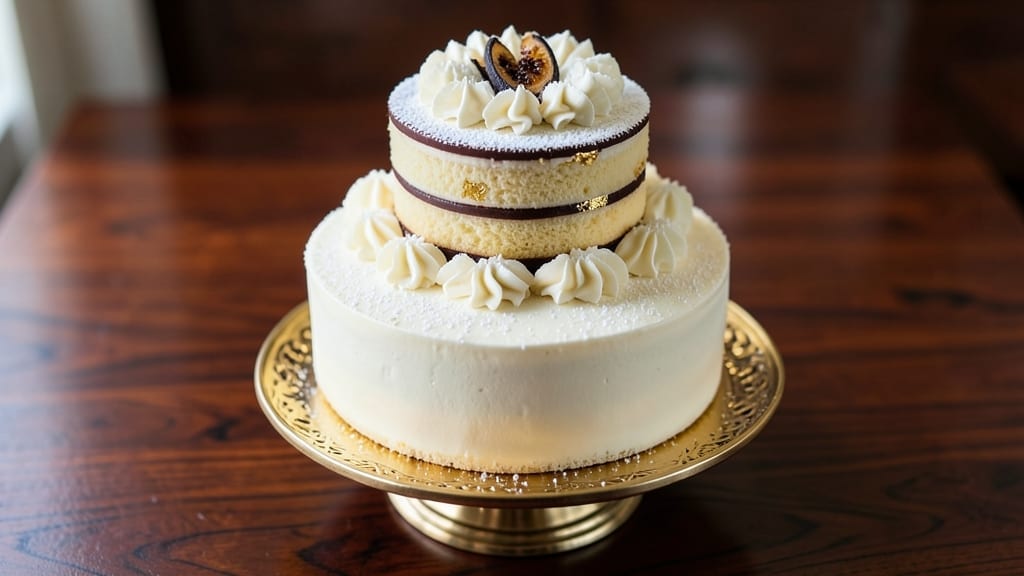
This vanilla 3-tier cake recipe delivers the kind of showstopping elegance that makes any celebration feel truly special. 💛 The secret lies in perfectly balanced layers—moist vanilla cake with just the right crumb, stabilized with dowels for structural integrity, and crowned with velvety buttercream that transforms simple layers into a work of art.
I’ve baked countless tiered cakes, and this method ensures each slice stays as impressive as the whole presentation.
The foundation begins with a foolproof vanilla cake batter that bakes evenly in three tiers, from a delicate 6-inch bottom to a graceful 4-inch top. Professional bakers know stability is everything, so we’ll use wooden dowels and crumb coating to create clean layers and prevent collapse.
The buttercream isn’t just frosting—it’s the magic that binds each tier together while creating those signature smooth curves and sharp edges.
What you’ll achieve is a cake that looks as stunning as it tastes—layers of tender vanilla cake separated by rich buttercream, all standing proudly on its cake stand.
The key is patience: allowing each layer to cool completely, building slowly from the bottom up, and working with room-temperature buttercream for that perfect pipeable consistency. This isn’t just dessert; it’s a centerpiece that will have guests reaching for their cameras before their forks.
Perfect for weddings, anniversaries, or milestone birthdays, this cake builds confidence with every layer. We’ll cover everything from baking times to decorating techniques, including how to create clean edges and add final flourishes.
The result? A cake that looks like it came from a five-star bakery—but with the satisfaction of making it yourself. Let’s get started on creating your masterpiece.
Ingredients for 3 tier cake recipe vanilla
Six cups flour, three tiers of perfection—this is where vanilla dreams come true.
| Ingredient | Amount | Notes |
|---|---|---|
| All-Purpose Flour 🌾 | 6 cups | Sifted for even texture |
| Granulated Sugar 🍚 | 3 cups | Divided for cake and buttercream |
| Unsalted Butter 🧈 | 2 cups | Room temperature, cubed |
| Large Eggs 🥚 | 12 whole | Room temperature, separated |
| Vanilla Extract 🌿 | 2 tbsp | Pure Madagascar bourbon |
| Baking Powder 🍞 | 2 tsp | Aluminum-free preferred |
| Salt 🧂 | ½ tsp | Fine sea salt |
| Whole Milk 🥛 | 1 ½ cups | Room temperature |
| Wooden Dowels 🪵 | 12 pieces | 4-inch and 6-inch lengths |
| Powdered Sugar 🍚 | 8 cups | For buttercream |
| Heavy Whipping Cream 🥛 | 2 cups | Cold, whipped to stiff peaks |
| Vanilla Bean Paste 🌿 | 1 tbsp | For buttercream flavor |
| Edible Gold Leaf ✨ | 1 sheet | Optional for decoration |
The flour is the backbone of this cake. King Arthur or Gold Medal are my go-tos—they give that tender crumb without being too dense. If you’re baking in a humid climate, add an extra 1/4 cup of flour to compensate. The butter? Plugrá or Land O’Lakes work perfectly, but never use salted—we control the salt here. Room temperature is non-negotiable; cold butter creates tunnels, and warm butter can cause the cake to sink. For the vanilla, Madagascar bourbon extract adds depth that imitation can’t match. The eggs? Separate them carefully—room temperature eggs incorporate better and prevent dense cake.
No vanilla extract? Vanilla bean paste or even a scraped vanilla bean will work in a pinch, though the flavor won’t be as rich. Running short on baking powder? Baking soda plus cream of tartar at half the amount is a solid swap. For the buttercream, powdered sugar is key—Domino or C&H brands are consistent. If you’re making this ahead, you can prep the buttercream up to 3 days early and store it in the fridge, just be sure to re-whip it before assembling. The dowels? Amazon or craft stores sell them in bulk—4-inch for the top tier, 6-inch for the middle and bottom. No dowels? Popsicle sticks work in a pinch, though they won’t be as sturdy.
This cake is a marathon, not a sprint. The layers need to cool completely—at least 2 hours—before frosting to prevent sogginess. Buttercream keeps for 5 days in the fridge, covered tightly. For long-term storage, freeze the unfrosted layers wrapped in plastic for up to 3 months. The gold leaf? Apply it last—it’s delicate and can lift if the buttercream isn’t fully set. If you’re nervous about decorating, practice piping swirls on parchment first. The cake itself? It stays fresh for 3-4 days at room temperature, but trust me—it’ll be gone before then.
Why You’ll Love This Recipe
- Pantry Staples Only: I swear by this recipe because it uses what’s already in my kitchen—no specialty ingredients or last-minute grocery runs. That rich vanilla buttercream? Just softened butter, sugar, and a splash of vanilla extract—no fancy stabilizers or powdered sugar headaches.
- Buttercream Bliss: The moment the buttercream comes together—creamy, not grainy—is pure magic. That vanilla extract isn’t just an afterthought; it’s the star, cutting through the flour’s earthiness with a warmth that makes every bite feel like a hug. (Yes, even on a Tuesday night.)
- Layered for Any Event: Need a showstopper for a birthday, bridal shower, or just because? The three tiers let you customize—add sprinkles, fresh berries, or a dusting of powdered sugar without overcomplicating things. It’s fancy enough for guests but simple enough I won’t stress.
- Leftovers? More Like Leftovers: This cake actually improves the next day. The buttercream firms up just enough to slice cleanly, and the vanilla flavor deepens—perfect for breakfast sandwiches or a quick dessert when you’re too tired to bake. Honestly, I make it half-size just so I can enjoy the extras.
Step-by-step instructions for vanilla 3 tier cake
Here’s how to build a showstopping three-tier vanilla cake with perfect layers and flawless buttercream.
👨🍳 Step 1: Prepare the Cake Batter
Preheat your oven to 350°F and grease three 8-inch round cake pans with butter, then line the bottoms with parchment paper. Sift together the 6 cups all-purpose flour, 2 tsp baking powder, and 0.5 tsp salt in a large bowl to remove lumps.
In a separate large bowl, cream the 2 cups unsalted butter and 1.5 cups granulated sugar on medium speed until light and fluffy (about 3-4 minutes). Add the 12 whole large eggs one at a time, mixing well after each addition. Stir in the 2 tbsp vanilla extract and 1.5 cups whole milk until smooth.
Gradually fold in the dry ingredients until just combined—don’t overmix. Divide the batter evenly among the prepared pans, tapping them gently on the counter to remove air bubbles. Bake for 25-30 minutes or until a toothpick inserted in the center comes out clean. Let the cakes cool in the pans for 10 minutes, then transfer to a wire rack to cool completely.
🍳 Step 2: Level and Frost the Cake Layers
Once completely cooled, trim the tops of each cake layer to create even surfaces using a serrated knife. Place one cake layer on a cake stand or plate, then spread a thin layer of buttercream (about ½ inch) using an offset spatula. Repeat with the remaining two layers, stacking them with the 12 wooden dowels inserted through the centers for support.
To make the buttercream, beat the 2 cups unsalted butter (at room temperature) until smooth, then gradually add the 8 cups powdered sugar, 1 tbsp vanilla bean paste, and 2 tbsp vanilla extract, mixing on low speed. Increase to medium and whip for 3-4 minutes until light and fluffy. In a separate bowl, whip the 2 cups cold heavy whipping cream to stiff peaks, then gently fold it into the buttercream mixture for added stability.
🥘 Step 3: Assemble the Three-Tier Cake
Begin by frosting the middle tier cake layer with buttercream, then place it on top of the bottom tier. Use a cake turntable to create an even, smooth surface. Repeat the process with the top tier, ensuring each layer is centered and level. Chill the cake in the refrigerator for 30 minutes to help the buttercream set before adding the final decorative layers.
Once chilled, apply a thin crumb coat of buttercream to seal in any loose crumbs, then refrigerate for another 15 minutes. Finally, add the final layer of buttercream, smoothing it with a bench scraper for a polished finish. For extra elegance, apply the edible gold leaf to the top tier or decorate with fresh flowers and piped buttercream accents.
⏰ Step 4: Final Touches and Serving
Let the cake sit at room temperature for 1-2 hours before slicing to allow the buttercream to firm up slightly. Serve slices on a cake stand or individual plates, ensuring each portion includes all three tiers for a dramatic presentation. The cake will keep well in the refrigerator for up to 3 days, covered tightly with plastic wrap.
For the best results, bring the cake to room temperature before serving to enhance the flavor and texture of the buttercream. Enjoy your stunning three-tier vanilla cake with friends and family—it’s sure to be the centerpiece of any celebration!
Pro Tips For Making 3 Tier Cake Recipe Vanilla
- Weigh Your Butter: I learned this the hard way—packing butter into measuring cups leaves air pockets that throw off your cake’s texture. Use a kitchen scale for 227 grams (1 cup) of unsalted butter, then press it into the bowl with your fingers to create a smooth, even base before creaming.
- Room-Temp Eggs Matter: Cold eggs from the fridge will curdle when mixed with warm butter, leaving you with a lumpy batter. Pop your eggs out 30 minutes before baking and let them sit in a warm (not hot) water bath—this keeps the yolks intact and your cake light.
- Bake Until Springy: The cake might look done at the toothpick test, but pull it out too early and the tiers will sink as they cool. Press the center gently—it should spring back slowly, not wobble like jelly. If unsure, add 2-3 minutes and let them rest 10 minutes before unmolding.
- Skip the Extra Vanilla: That extra teaspoon of vanilla extract you’re tempted to add? It’s unnecessary and can make the flavor muddy. Stick to the recipe’s amount (usually 2 teaspoons), and if you want more vanilla notes, infuse the butter with a scraped vanilla bean while it cools.
Dietary considerations for this recipe
Gluten-Free Adaptations
For a gluten-free version, replace the 6 cups all-purpose flour with a 1:1 gluten-free baking flour blend like King Arthur Measure for Measure or Bob’s Red Mill 1-to-1. These blends contain xanthan gum, which mimics gluten’s structure and helps bind the cake.
You may need to add ½ tsp xanthan gum if your blend doesn’t include it. Keep all other ingredients the same, but expect slightly denser layers—bake for 5-10 minutes longer to ensure doneness. 🌾
Dairy-Free Options
To make this cake dairy-free, use 2 cups vegan butter (like Miyoko’s or Earth Balance) for both the cake and buttercream. Replace the whole milk with unsweetened almond milk or oat milk (ensure they’re full-fat for best texture).
For the buttercream, substitute 2 cups cold coconut cream (chilled overnight) for the heavy whipping cream. The flavor will still be rich and creamy, though slightly lighter. 🥥
Nut-Free Considerations
This recipe is naturally nut-free, but always check labels on ingredients like vanilla extract and powdered sugar for cross-contamination warnings. If using vanilla bean paste, opt for a nut-free brand like Lake Champlain.
For added safety, prepare the cake in a nut-free kitchen or use separate utensils and bowls. The buttercream remains nut-free as long as you avoid nut-based extracts or fillings. 🛡️
Sugar-Free Modifications
For a sugar-conscious version, reduce the granulated sugar in the cake to 1 cup and replace it with 1 cup granulated erythritol or monk fruit sweetener. For the buttercream, use 6 cups powdered erythritol (like Lakanto) and add 1 tsp vanilla bean paste for flavor depth.
Note that sugar-free cakes may be slightly denser and less moist—consider adding 2 tbsp applesauce to the batter to improve texture. 🍬
Egg-Free Substitutions
To make this cake egg-free, replace the 12 eggs with a flax or chia egg substitute. Mix 3 tbsp ground flaxseed or chia seeds with 9 tbsp water per egg, then let sit for 5 minutes to thicken. Use this mixture in place of the eggs in the batter.
For the buttercream, ensure your vegan butter is well whipped to achieve the same lightness. The cake may be slightly less stable, so increase dowel support during assembly. 🥚
Nutrition facts
Frequently asked questions
How do I prevent my 3-tier cake from collapsing?
Use wooden dowels through each tier’s center for structural support, and let cakes cool completely before stacking. Apply a thin crumb coat of buttercream, then chill for 30 minutes before adding the final frosting layer. This creates a solid foundation that holds up to the weight of the upper tiers.
Can I bake this cake in advance?
Yes! Bake the cake layers up to 2 days ahead and store them wrapped tightly at room temperature. Assemble the cake 24 hours before serving to allow the buttercream to set properly. If storing longer, freeze the unfrosted layers for up to 3 months—thaw overnight in the fridge before assembly.
What’s the best way to decorate a 3-tier cake for beginners?
Start with a smooth buttercream base using a bench scraper for clean edges. For simple elegance, add a piping border around each tier with a star tip. Use edible gold leaf on the top tier or fresh flowers for a pop of color. Keep decorations proportional to each tier’s size—smaller accents on the top tier work best.
Why did my buttercream turn grainy?
Grainy buttercream usually means your butter wasn’t soft enough or you added powdered sugar too quickly. Always use room-temperature butter and sift the powdered sugar first. If it happens, beat the mixture again for 2-3 minutes—the warmth from mixing will smooth it out. For extra stability, fold in 2 tbsp whipped cream as shown in the recipe.
How many servings does this cake actually provide?
This recipe serves 12-15 people when cut into proper slices (each guest gets a piece from all three tiers). For larger groups, bake an extra 8-inch layer or consider a 4-tier version with smaller top tiers. Remember, tiered cakes are about presentation—smaller portions create a more dramatic effect.

- 12 Bean Chili Recipe: Hearty Slow-Cooked Depth With 12 Legumes - October 17, 2026
- 5 Seed Bread Recipe: Nutty Crunch and Artisan Flavor in One Loaf - October 17, 2026
- 1 Lb Macaroni Salad Recipe: Bold, Crunchy, and Crowd-Pleasing - October 17, 2026