
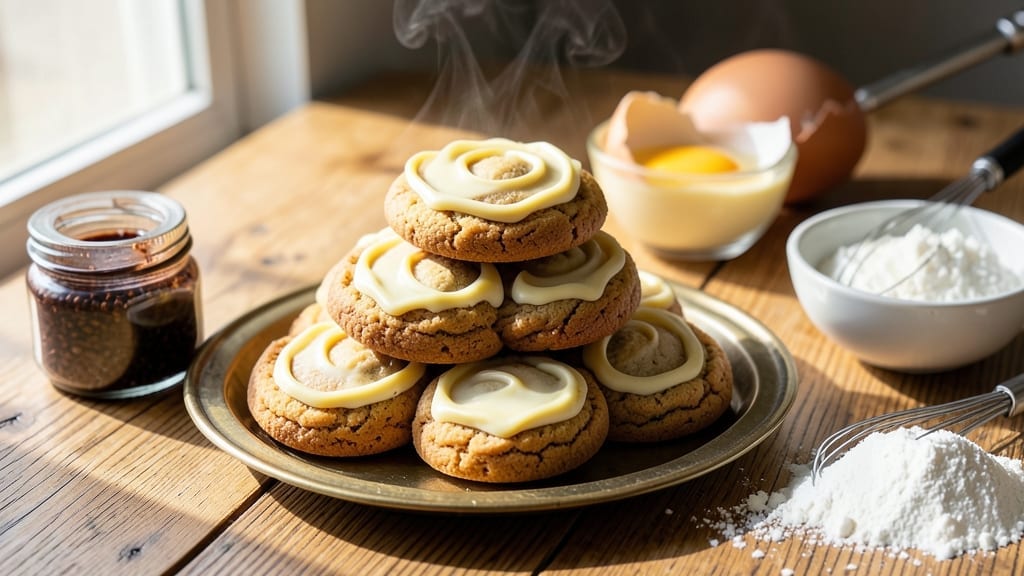
This 30-minute cookie recipe delivers restaurant-quality vanilla bean swirls with buttery frosting layers—no waiting hours for chilling dough. The secret lies in room-temperature butter and a simple swirl technique that creates marbled beauty while keeping the texture perfectly tender yet sturdy.
I developed this during a particularly busy week when I needed cookies fast, and it’s become my go-to for last-minute treats or when I crave something sweet without the fuss.
The recipe relies on time-saving techniques like preheating the oven while mixing and using vanilla bean paste for intense flavor without the mess of scraping seeds. You’ll mix, swirl, bake, and frost in under 30 minutes—no waiting for dough to rest or frosting to set.
The result? Cookies with golden edges, soft centers, and layers of vanilla-infused dough and frosting that taste like they came from a bakery.
What makes these cookies special is their versatility—they’re sturdy enough for gifting or parties but simple enough for a weeknight craving. The frosting stays smooth and creamy, not too sweet, and the vanilla bean adds a sophisticated depth that elevates ordinary cookies.
Plus, the dough comes together in one bowl, reducing cleanup.
Perfect for holidays, potlucks, or satisfying a sudden sugar craving, these cookies prove you don’t need hours to make something impressive. Let’s get baking!
Ingredients for 30 minute cookie
Room-temperature butter, vanilla bean paste, and powdered sugar create these marbled cookies with buttery layers.
| Ingredient | Amount | Notes |
|---|---|---|
| Unsalted Butter, Room Temperature 🧈 | 1 cup | Cut into small cubes for easier mixing |
| Granulated Sugar 🍚 | ¾ cup | Superfine sugar for finer texture |
| Vanilla Bean Paste 🌿 | 2 tbsp | Intense flavor without scraping seeds |
| Large Eggs 🥚 | 2 whole | Room temperature for smooth mixing |
| All-Purpose Flour 🌾 | 2 cups | Sifted for light texture |
| Baking Soda 🧂 | ½ tsp | Ensures proper rise |
| Diamond Crystal Kosher Salt 🧂 | ½ tsp | Adjusts flavor balance |
| Vanilla Extract 🍋 | 1 tsp | Enhances bean paste flavor |
| Powdered Sugar 🍚 | 2 cups | For smooth, creamy frosting |
| Heavy Whipping Cream 🥛 | ½ cup | Cold for stable whipping |
| Vanilla Bean Seeds 🌿 | 1 tsp | From scraped vanilla bean |
| Vanilla Extract 🍋 | ½ tsp | For frosting depth |
| Milk 🥛 | 1 tbsp | Adjusts frosting consistency |
The butter is non-negotiable here—room temperature is critical for smooth mixing and that signature tender crumb. Plugrá or Land O’Lakes unsalted are my go-tos, but any good-quality butter works. If yours is too cold, microwave it in 20-second bursts until just soft. The vanilla bean paste is worth the splurge—Madagascar beans give the deepest flavor. Buy a whole bean, scrape the seeds, and save the rest for future recipes. For the flour, King Arthur or Gold Medal brands stay light and consistent, but sift it anyway to avoid dense cookies. The powdered sugar? Domino brand dissolves perfectly in the frosting—no gritty surprises.
No vanilla bean paste? Double the vanilla extract and add a pinch of salt to mimic the depth. Short on powdered sugar? Mix granulated sugar with 1 tbsp cornstarch for a close substitute. The frosting can handle half-and-half or coconut milk instead of heavy cream, though texture may vary slightly. For a richer dough, swap 2 tbsp of the sugar for brown sugar. The eggs need to be room temp too—pop them in warm water for 5 minutes if they’re straight from the fridge. And if you’re feeling fancy, add a pinch of espresso powder to the dough to enhance the vanilla flavor.
Butter and dough should be covered and chilled for up to 2 days, though I usually bake them fresh. The frosting stays fresh for 3 days in the fridge, covered tightly. For gifting, wrap individual cookies in parchment and tie with twine—they’ll stay fresh for a week. Freeze unbaked dough balls for 3 months (bake straight from frozen, adding 2 minutes to cook time). The frosting? Whip it last-minute—it sets beautifully on chilled cookies, so plan accordingly. Store frosted cookies in an airtight container with parchment between layers to prevent sogginess.
Why You’ll Love This Recipe
- No Fuss, Big Payoff: The butter’s already room temp, the sugar mixes in like magic, and you’re done before the timer goes off. Honestly, I’ve made cookies that took twice as long but tasted half as good—this one’s the real deal.
- Vanilla Kicks It Up: That little splash of vanilla bean paste? It’s the secret weapon. You’re not just tasting vanilla—you’re getting this rich, floral depth that makes every bite feel like a little treat, not just a cookie.
- Party in a Jar: Freeze half the dough for later, bake the rest for a snack, or double it for a crowd. Between us, I’ve used these to impress guests, pack lunches, and even bribe my kid to eat veggies. (Okay, maybe not the last one, but still.)
- Budget-Friendly Luxury: Butter, sugar, eggs, flour—these are pantry staples that won’t break the bank. Yet somehow, they taste like you spent hours on them. I’ll be real: my grocery bill stays low, but my cookie jar never empties.
Step-by-step instructions for vanilla bean swirl cookies
Ready to create showstopping cookies with layers of vanilla flavor and buttery frosting?
Cream the Butter and Sweeteners
In a stand mixer fitted with the paddle attachment, combine the 1 cup unsalted butter, room temperature (cut into small cubes) with the 0.75 cup granulated sugar. Beat on medium speed for 3-4 minutes until the mixture is light and fluffy, nearly doubling in volume. You’ll see it go from pale to a creamy, ribbony texture—this is what creates those signature crackly tops.
Add the 2 tablespoons vanilla bean paste and mix for another 30 seconds until fully incorporated. The paste should dissolve completely, leaving no visible streaks. I like to press my finger into the mixture—it should hold a slight indentation without being too soft. This ensures the cookies hold their shape while baking.
Add Eggs and Dry Ingredients
Add the 2 whole large eggs, one at a time, mixing on low speed for 30 seconds after each addition. Scrape down the sides of the bowl to ensure everything’s evenly combined. Then add the 1 teaspoon vanilla extract and mix for another 10 seconds. This step builds structure while keeping the cookies tender.
In a separate bowl, whisk together the 2 cups all-purpose flour, 0.5 teaspoon baking soda, and 0.5 teaspoon diamond crystal kosher salt. With the mixer on low, gradually add the dry ingredients to the wet mixture. Mix just until combined—you should still see small flour streaks. Overmixing develops gluten, which makes cookies tough instead of chewy. Stop mixing as soon as the dough comes together.
Create the Swirl Dough
Divide the dough in half. To one half, add 1 teaspoon vanilla bean seeds scraped from a vanilla bean. Mix gently with a silicone spatula just until the seeds are distributed. This creates the signature swirl pattern that makes these cookies special. The seeds add bursts of vanilla flavor throughout each bite.
Shape both dough portions into disks, wrap in plastic wrap, and refrigerate for at least 30 minutes. Chilling is crucial—it firms up the butter so the cookies spread evenly and develop that perfect crackly crust. While the dough chills, preheat your oven to 350°F and line two baking sheets with parchment paper.
Bake the Cookie Layers
Roll out the first dough disk on a lightly floured surface to about 1/8-inch thickness. Cut into 2-inch rounds using a cookie cutter. Place them 2 inches apart on the prepared baking sheets. Repeat with the second dough portion, pressing gently to create a slight indentation in the center of each cookie.
Bake for 10-12 minutes until the edges are golden brown and the centers still look slightly soft. They’ll continue cooking on the hot sheet after removal. Rotate the pans halfway through for even baking. Let the cookies cool on the baking sheets for 5 minutes before transferring to a wire rack to cool completely.
Prepare the Frosting
In a medium bowl, combine the 2 cups powdered sugar, 0.5 cup heavy whipping cream (chilled), and 0.5 teaspoon vanilla extract. Using an electric mixer, beat on medium-high speed until soft peaks form. The frosting should be thick enough to hold its shape but still spreadable—this creates that signature swirl effect.
Once the cookies are completely cool, spread a generous layer of frosting between two cookies, pressing gently to create a swirl pattern. The frosting should be thick enough to create visible ridges when spread. Repeat with the remaining cookies and frosting. These cookies are best enjoyed fresh, but they’ll keep for up to 3 days in an airtight container at room temperature.
Pro Tips For Making 30 Minute Cookie
- Cream Butter Slowly: I used to dump the sugar in all at once and wonder why my dough turned greasy. Instead, add the sugar to the butter gradually—about 1 tablespoon at a time—while mixing on medium. This keeps the texture smooth and prevents a sad, oily dough that won’t hold its shape.
- Test Eggs First: Crack your eggs into a small bowl before adding them to the dough. You’ll catch that one weirdly watery or shell-speckled egg that can throw off the whole batch. Trust me, I’ve made cookies with a rogue egg white—it’s a disaster waiting to happen.
- Chill the Dough: Even if you’re in a hurry, give the dough a 5-minute rest in the fridge before scooping. This firms it up just enough to hold its shape when baking—no more flat, sad cookies that look like they’ve seen better days.
- Use a Scale: Measuring flour by scooping and leveling is a gamble, and I’ve lost count of how many batches I’ve ruined by overdoing it. Weigh your flour instead—125 grams for this recipe—and your cookies will bake evenly every single time. No more dry, crumbly failures.
Essential equipment for 30 minute cookie
Stand Mixer Must-Have
Your stand mixer is the unsung hero of this recipe—it creates that signature light, fluffy texture in minutes. I use my KitchenAid Artisan Series with the paddle attachment for creaming the butter and sugar.
The paddle’s broad surface ensures even mixing without overdeveloping gluten. For smaller batches, a hand mixer works too, but you’ll need to mix longer to achieve the same airy consistency. 🌟
Cookie Cutters for Precision
Uniform cookies are key for that bakery-style look. I recommend 2-inch round cookie cutters made of high-quality stainless steel—they cut cleanly and last for years. Brands like Wilton or OXO Good Grips are my go-tos.
If you don’t have cutters, a flour-dusted glass works in a pinch, but the edges won’t be as crisp. For swirl cookies, precise rounds ensure even baking and frosting application.
Parchment Paper Essentials
Lining your baking sheets with parchment paper prevents sticking and makes cleanup effortless. I prefer unbleached, food-grade parchment like If You Care brand—it’s sturdy enough to handle hot pans and won’t tear when removing cookies.
Cut sheets to fit your pans with 1-inch overhangs on all sides for easy transfer. Pro tip: Lightly grease the parchment with butter before baking for extra insurance against sticking.
Vanilla Bean Tools
The secret to authentic vanilla flavor lies in proper extraction. Grab a vanilla bean splitter (available from Sur La Table or Amazon) to easily scrape seeds from the pod. This tool gives you precise control over how much seed you add to each dough portion.
For the paste, a small offset spatula helps mix it evenly into the butter without leaving streaks. I keep a whole vanilla bean in my pantry—it lasts up to a year if stored in a cool, dark place.
Offset Spatula for Frosting
A flexible offset spatula (I use a 6-inch Ateco brand) is perfect for spreading the frosting between cookies. The angled head lets you create those beautiful swirl patterns with minimal effort.
For extra precision, chill the spatula in the freezer for 5 minutes before using—it helps control the frosting’s spreadability. Keep a damp cloth nearby to wipe up any drips or spills during assembly.
Air-Tight Storage
For freshness, store frosted cookies in airtight containers with layers separated by parchment paper. I love Glasslock containers because they’re stackable and let me see the cookies without opening.
For gifting, wrap individual cookies in parchment paper, tie with twine, and place in a cellophane bag with a sticker. This keeps them fresh for up to 5 days at room temperature.
For longer storage, freeze unbaked dough balls in a ziplock bag for up to 3 months—just add 2 extra minutes to baking time.
Nutrition facts
Frequently asked questions
Why do I need to chill the dough for 30 minutes?
Chilling the dough prevents excessive spreading during baking, giving you those perfect 2-inch rounds with crisp edges. The cold butter firms up, ensuring even baking and that signature crackly crust. Skip this step, and you’ll end up with flat, cake-like cookies instead of sturdy, chewy treats.
Can I make these cookies without vanilla bean paste?
Double the vanilla extract (2 teaspoons) and add a pinch of salt to mimic the depth of vanilla bean paste. For extra flavor, add 1/4 teaspoon ground cardamom or a drop of almond extract. The cookies will still taste amazing—just slightly less complex.
How do I fix overmixed dough?
If your dough looks tough or develops gluten strands, don’t panic! Stop mixing immediately and gently fold in 1 extra tablespoon of butter to tenderize. For a quick fix, add 1 tablespoon of milk or heavy cream to relax the gluten. The cookies may spread slightly more, but they’ll still be delicious.
Can I bake these cookies from frozen?
Yes, but with adjustments! Shape dough balls and freeze them on a tray for 1 hour, then transfer to a bag. Bake straight from frozen, adding 2 extra minutes to the 10-12 minute time. For best results, let them cool completely before frosting. The texture will be slightly denser but still delicious.
Why is my frosting too runny?
If your frosting separates or pools, it’s likely too warm. Chill the bowl in the freezer for 5 minutes while you whip it again. For a thicker consistency, add 1 tablespoon more powdered sugar at a time until it holds its shape. If it’s still too thin, try adding 1 teaspoon more heavy cream and chilling the bowl again.

- Baked Potatoes in Crock Pot Recipe: Buttery Interiors and Crispy Top Magic - November 1, 2026
- Braised Beef Short Ribs Recipe: Crock Pot Fall-Off-Bone Magic in 6 Hours - November 1, 2026
- Crock Pot Cocoa Recipe: Velvety Warmth With Hidden Spice Magic - November 1, 2026