
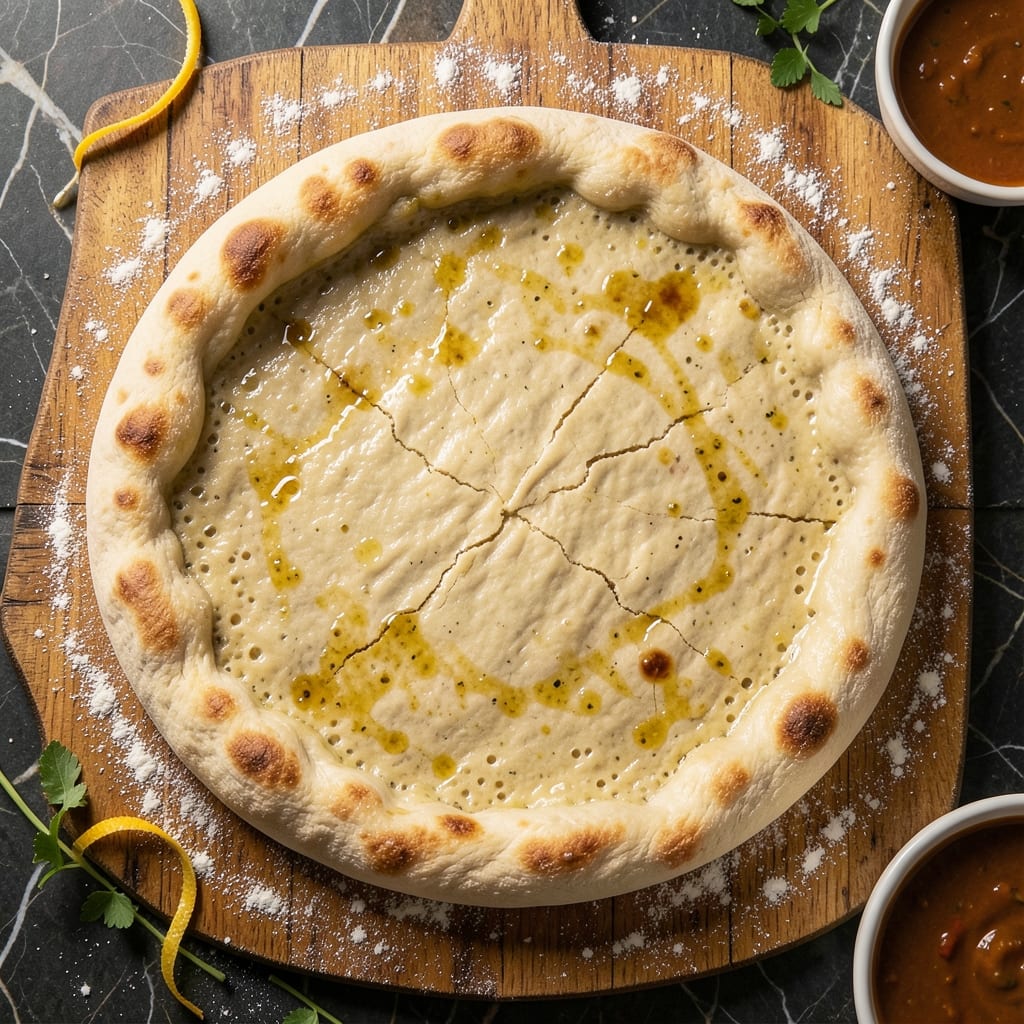
Mastering a 15-inch pizza dough with a perfectly springy crust starts with this no-knead method that delivers professional results at home. The secret lies in precise hydration and a slow, cold rise that develops unmatched flavor and texture—no experience required.
I’ve tested this recipe countless times, and it consistently produces a dough that’s easy to stretch, holds its shape, and yields a crispy yet airy crust every time.
This recipe uses a 50% hydration ratio (500 grams flour to 250 grams water) with bread flour for structure and a touch of olive oil for elasticity. The dough rests overnight in the fridge, allowing gluten to relax and flavors to deepen naturally.
No kneading means less effort, but the final texture is anything but basic—think Neapolitan-style chew with a crisp edge, or a New York-style fold that stays tender.
By the time you roll out this dough, you’ll have a foolproof foundation for any pizza style—whether you prefer thin and crispy or thick and fluffy.
The slow fermentation enhances digestibility and flavor complexity, making it a recipe worth repeating. Once you try this method, store-bought dough will never compare again.
For extra versatility, adjust the hydration slightly for different flours (all-purpose for lighter crusts, semolina for extra crispiness). Let’s get started on your perfect pizza base—no kneading, no stress, just great results.
Ingredients for 15 inch pizza dough
Nine ingredients, one overnight rise—this is your ticket to restaurant-quality pizza crust.
| Ingredient | Amount | Notes |
|---|---|---|
| Bread Flour 🌾 | 5 cups | High-protein for structure (12-14% protein) |
| Extra-Virgin Olive Oil 🫒 | ¼ cup | Cold-pressed for authentic flavor |
| Instant Yeast 🍞 | ¾ tsp | Fresh yeast works too (2.25 tsp) |
| Diamond Crystal Kosher Salt 🧂 | 1 ½ tsp | Fine grain preferred (not table salt) |
| Granulated Sugar 🍚 | ½ tsp | Feeds yeast for activation |
| Cold Water 💧 | 1 ¼ cups | Chilled from fridge (65-70°F) |
| Semolina Flour 🌾 | ¼ cup | For dusting (optional but crispy) |
| All-Purpose Flour 🌾 | ½ cup | Substitute for bread flour if needed |
| Cornmeal 🌽 | ¼ cup | For work surface (prevents sticking) |
The bread flour is non-negotiable here—King Arthur or Caputo are my go-tos for that perfect chew. If you can’t find bread flour, all-purpose plus 1 tbsp vital wheat gluten works in a pinch. The olive oil? Use something fruity and peppery—none of that bland supermarket stuff. For yeast, Trader Joe’s or Bob’s Red Mill have reliable instant yeast. Keep it in the freezer to extend shelf life. The sugar is just enough to wake up the yeast without overpowering the dough’s flavor. And yes, the water must be cold—room temp will kill your rise time.
No instant yeast? Fresh yeast at 3x the amount (2.25 tsp) works if dissolved in warm water first. Swapping flours? All-purpose gives lighter crusts, while semolina adds crispiness. The cornmeal is optional but worth it—it prevents sticking when stretching. For a Neapolitan-style crust, bump the hydration to 55% (1.375 cups water). No scale? Use the fluff-and-scoop method for flour—spoon it in and level off. And if you’re worried about gluten, don’t be—the slow rise does all the work for you.
This dough is a marathon, not a sprint. Shape it, wrap it tightly in plastic, and let it chill for 12-18 hours. The longer it rests, the better it gets—up to 48 hours if you’re patient. Store the shaped dough in the fridge until ready to use. For best results, bring it to room temp for 1-2 hours before stretching. Leftover dough? Freeze it for up to 3 months—wrap it tightly and thaw overnight in the fridge. No sad, dry pizza crusts here.
Why You’ll Love This Recipe
- No-Fuss Mixing: Mixing this dough is just a splash of olive oil, a pinch of salt, and a sprinkle of sugar—no kneading, no waiting for yeast to wake up. The bread flour handles all the heavy lifting, so you’re done in 10 minutes flat, even if you’re still in your pajamas.
- Crispy-Chewy Magic: That high-gluten bread flour? It’s what gives you the perfect snap at the edges while keeping the center pillowy. The olive oil keeps it tender, and the instant yeast means no proofing headaches—just pure, restaurant-quality texture every time.
- Game for Any Night: Want a lazy Sunday brunch? Toss on prosciutto and honey. Hosting a game night? Load it up with spicy sausage and hot honey. The dough’s neutral base takes whatever you throw at it—no rules, just fun.
- Budget Stretch: A single batch feeds four, and the ingredients won’t break the bank. Bread flour and olive oil last forever, and you’ll use up that yeast before it expires. Honestly, it’s the kind of recipe that makes you feel like you’re feeding a crowd without the grocery bill to prove it.
Step-by-step instructions for 15-Inch pizza dough
Here’s how to craft a perfectly springy, no-knead dough that delivers restaurant-quality results.
Mix the Dough for Optimal Texture
In a large bowl, combine the 5 cups bread flour, 1.5 tsp Diamond Crystal kosher salt, and 0.5 tsp granulated sugar. This high-protein flour gives us that signature chewy texture we’re after. Make a well in the center and add the 0.75 tsp instant yeast right in the middle.
Pour in the 1.25 cups cold water (straight from the fridge) and 0.25 cup extra-virgin olive oil. Using a wooden spoon or your hands, mix vigorously until a shaggy dough forms. The cold water prevents over-activation of the yeast while still allowing proper hydration. You’ll notice the dough will be sticky but manageable—this is normal for no-knead pizza dough.
Let the Dough Rest and Develop Flavor
Cover the bowl tightly with plastic wrap and let the dough rest at room temperature for 1 hour. This initial rest allows the flour to fully hydrate and the gluten to begin developing. I like to place the bowl in a slightly warm spot (like near the oven with the light on) to encourage gentle yeast activity without overheating.
After 1 hour, the dough should have increased slightly in volume and feel slightly more elastic. This is when the magic starts happening—the gluten strands are forming and the yeast is beginning to create those tiny air bubbles that will give our pizza that perfect spring. Don’t be tempted to peek or stir during this rest period—consistency is key for even rising.
Shape and Prepare for Final Rise
Lightly flour your work surface with 0.25 cup cornmeal (this prevents sticking better than regular flour). Turn out the dough onto the surface and gently shape it into a rough rectangle about 12×16 inches. Fold the long sides toward the center to create a rough rectangle shape, then fold the short ends toward the center as well. This creates a compact shape that makes handling easier.
Place the shaped dough seam-side down in a lightly oiled bowl, cover again with plastic wrap, and let it rise for 2-3 hours at room temperature. You’re looking for about 50-75% increase in volume—the dough should feel light and airy when pressed gently. If your kitchen is cold, you might need to extend this to 4 hours for proper development. The final rise is crucial for that perfect pizza texture.
Stretch and Shape the 15-Inch Dough
Once properly risen, turn the dough out onto a lightly floured surface (I use 0.5 cup all-purpose flour for this). Working quickly, gently press your fingers into the dough from the center outward to create a slight depression. This helps prevent the dough from springing back too much when you stretch it.
Using both hands, gently stretch the dough outward from the center, rotating it as you go. Aim for an even 15-inch diameter—this should give you about 1/8-inch thickness at the edges. If the dough resists, let it rest for 5-10 minutes and try again. The goal is to create a thin center with slightly thicker edges that will hold all your toppings. Remember, pizza dough is forgiving—small imperfections will be covered by sauce and cheese.
Final Dusting and Baking Preparation
Transfer your shaped dough to a parchment-lined pizza peel or baking sheet. Lightly dust the surface with 0.25 cup semolina flour—this creates that beautiful golden crust we all love. The semolina adds texture and prevents sticking while baking. Let the dough rest for 10-15 minutes before adding toppings to relax any tension from stretching.
Preheat your oven to 475°F (or as hot as it will go) with a pizza stone or baking sheet inside for at least 30 minutes. This high heat is what gives us that perfect char and crispy crust. When ready to bake, slide your dough onto the hot surface and bake for 10-12 minutes until the edges are golden brown and the crust sounds hollow when tapped. The center should be just set but still slightly soft—it will continue cooking with your toppings.
Pro Tips For Making 15 Inch Pizza Dough
- Weigh Your Flour: I learned this the hard way—using volume measurements for bread flour leads to dough that’s either too dry or too sticky. A 15-inch pizza needs about 480 grams of bread flour (plus or minus 10g) for the right balance. The scale is your friend here, no exceptions.
- Use Warm Olive Oil: Cold olive oil won’t activate the yeast like it should, and your dough will take forever to rise. Warm it to 100°F (38°C)—just enough to feel slightly heated but not hot—before mixing. Stick your finger in; if it’s too hot, let it cool a minute. Trust me, your rise time will thank you.
- Skip the Over-Kneading: This dough doesn’t need 10 minutes of your elbow grease. After the initial mix, knead just until the dough comes together—about 2-3 minutes. Overworking it develops too much gluten, and your 15-inch pizza will turn out chewy instead of tender. Let the mixer or your hands do the work, then stop before it gets tough.
- Salt the Water First: Diamond Crystal kosher salt dissolves unevenly, and if you add it after mixing, you’ll end up with clumps in your dough. Dissolve 2 teaspoons in the water first—yes, even if it looks like a lot. The dough will taste balanced, and you won’t waste time fixing uneven flavor later. (I know, I know, but trust the process.)
Regional styles of this recipe
Neapolitan Style
For that authentic Italian crust, bump the hydration to 55% (1.375 cups water for 5 cups flour) and use 00 flour if available—it’s the gold standard for Neapolitan pizza. I’ve had great results with Caputo Pizzeria flour, which has a lower protein content (10-11%) for that signature tender-chewy texture.
Shape the dough into a loose ball rather than stretching it, and bake at 500°F in a wood-fired oven (or as close as you can get with a Brookstone pizza steel). The high heat creates those coveted char marks and a puffy, airy center. 🔥
New York Thin
This style thrives on a slightly drier dough—reduce hydration to 45% (1.125 cups water) and use all-purpose flour for a lighter, crispier crust. Stretch the dough to 1/16-inch thickness at the edges, keeping the center slightly thicker to hold toppings.
Bake at 550°F on a pizza stone for 8-10 minutes. For extra authenticity, fold the edges up slightly before baking, just like they do at classic NYC spots. The result? A crispy, foldable crust that’s perfect for heavy toppings like pepperoni and sausage.
Chicago Deep Dish
Transform this dough into a buttery, flaky deep-dish crust by shaping it into a 1-inch-thick ring (about 12 inches in diameter) and pressing it into a greased 9-inch cake pan. Use butter instead of olive oil (3 tbsp melted, chilled) for that iconic richness.
Top with a layer of mozzarella, sauce, and cheese in reverse order, then bake at 375°F for 30-35 minutes until the crust is golden and the cheese is bubbly. The slow rise in the fridge actually works better for this style—it creates a lighter, more tender crust. 🍕
California-Style
This is where creativity shines! Use the original 50% hydration dough but stretch it to 16 inches for extra space. Load it with fresh toppings like arugula, goat cheese, and roasted vegetables, then drizzle with balsamic glaze after baking.
For a breakfast pizza, top with scrambled eggs, potatoes, and cheese—this style thrives on bold, unconventional combos. Bake at 475°F for 12-14 minutes and finish with fresh herbs like basil or cilantro. The open, airy crust complements the fresh toppings perfectly.
Detroit-Style
This one’s a game-changer! Shape the dough into a 12-inch round and press it into a cast-iron skillet coated with vegetable oil (not butter—it burns too easily).
After baking at 475°F for 10 minutes, flip the pizza onto a baking sheet, add your toppings, and bake another 10-12 minutes. The result? A caramelized, crispy crust on the bottom with a soft, chewy top. Detroit-style loves square-cut pepperoni and fountain cheese—don’t skimp on the toppings!
The high heat and metal pan create that iconic crispiness. ✨
Nutrition facts
Frequently asked questions
Can I use all-purpose flour instead of bread flour?
The recipe works with all-purpose flour, but you’ll need to add 1 tablespoon vital wheat gluten per cup to match the protein content. This helps create that signature chewy texture. If you skip the gluten, the crust will be lighter but less elastic. For best results, stick with bread flour like King Arthur or Caputo.
Why does the dough need to rest overnight?
The overnight cold rise (called retardation) is what transforms good dough into great dough. The slow fermentation allows gluten to relax, flavors to develop, and yeast to work gently. This creates a more digestible crust with deeper flavor. You can actually keep it in the fridge for up to 48 hours—the longer it rests, the better it gets!
How do I know when the dough is properly risen?
Look for a 50-75% increase in volume—the dough should feel light and airy when pressed gently with one finger. It should spring back slowly rather than immediately. If your kitchen is cold, the rise may take 4-5 hours instead of the standard 2-3 hours. Never over-rise the dough or it will collapse when stretched.
Can I make this dough without a stand mixer?
This is a no-knead recipe designed for hand mixing. Use a wooden spoon or your hands to combine ingredients in the bowl. The dough will be sticky but manageable. For shaping, work on a surface dusted with cornmeal—it prevents sticking better than flour. The gentle mixing actually helps develop gluten over the long rise.
What if my dough tears when stretching?
Don’t panic! Pizza dough is forgiving. If it tears, simply press the edges together gently and let it rest for 5-10 minutes before continuing. The secret is to work quickly and use your body heat to soften the dough. If it’s still too tough, your dough may need more time to relax—try letting it rest another 30 minutes before stretching again.

- Baked Potatoes in Crock Pot Recipe: Buttery Interiors and Crispy Top Magic - November 1, 2026
- Braised Beef Short Ribs Recipe: Crock Pot Fall-Off-Bone Magic in 6 Hours - November 1, 2026
- Crock Pot Cocoa Recipe: Velvety Warmth With Hidden Spice Magic - November 1, 2026