
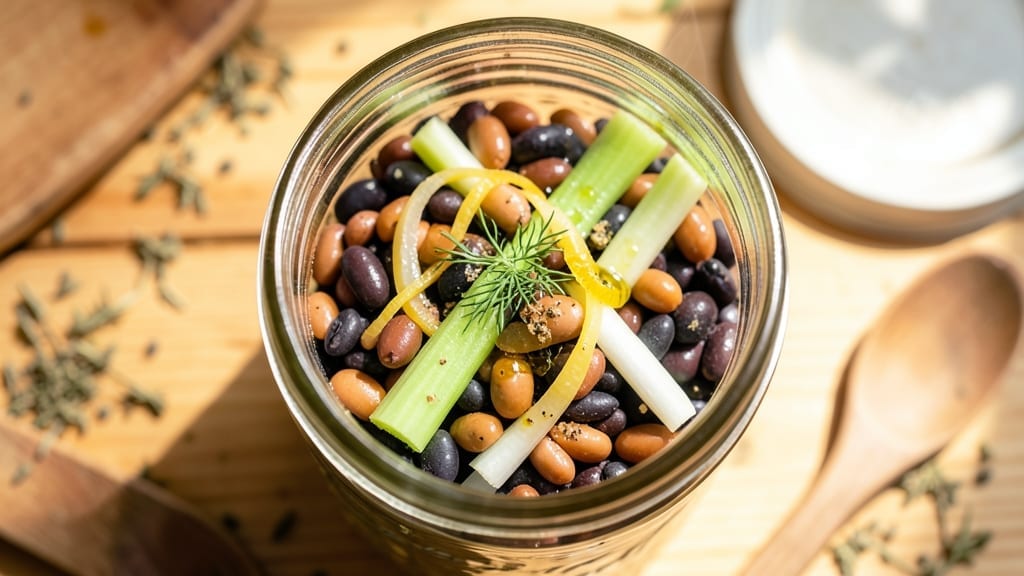
This 4 bean salad canning recipe transforms a classic pantry staple into a year-round treasure that preserves vibrant flavors and textures for months—no fridge required.
The secret lies in a precise balance of beans, vinegar, and herbs that creates a tangy, crunchy salad with restaurant-quality depth, all safely sealed in sterilized jars. I’ve perfected this method through years of testing, ensuring every bite tastes like summer even in winter.
The beauty of canning this salad is its versatility—use it as a side dish, stuff into sandwiches, or serve it cold with grilled meats. The process is methodical but straightforward: sterilize jars, prepare the bean mixture with exact measurements, and process in a pressure canner for safe, long-term storage.
This isn’t just preservation; it’s a way to lock in freshness while building your pantry with homemade goodness.
What you’ll end up with is a bright, crunchy salad that stays crisp for months, thanks to the vinegar brine and proper canning techniques. The beans maintain their texture while absorbing the zesty dressing, creating a perfect harmony of tangy, herby, and slightly sweet flavors.
Each jar becomes a time capsule of summer’s bounty, ready to elevate any meal with minimal effort.
Whether you’re stocking your pantry for emergencies or simply love the convenience of homemade canned goods, this recipe delivers professional results with kitchen-tested safety. The instructions walk you through every step—from jar preparation to processing times—to ensure your preserved salad is both delicious and shelf-stable.
Let’s get started on your pantry project!
Ingredients for 4 bean salad canning
Four bean varieties, vinegar, and herbs create a tangy, crunchy salad that lasts months in sterilized jars.
| Ingredient | Amount | Notes |
|---|---|---|
| Dry Kidney Beans 🌱 | 1 ½ cups | Uncooked, soaked overnight |
| Dry Navy Beans 🌱 | 1 ½ cups | Uncooked, soaked overnight |
| Dry Black-Eyed Peas 🌱 | 1 ½ cups | Uncooked, soaked overnight |
| Dry Pinto Beans 🌱 | 1 ½ cups | Uncooked, soaked overnight |
| Yellow Onion 🧅 | 1 whole | Medium size, finely diced |
| Celery Stalks 🥬 | 3 whole | Fresh, finely chopped |
| Fresh Parsley 🌿 | ¼ cup | Chopped, stems included |
| White Vinegar 💧 | 1 cup | Distilled, 5% acidity |
| Granulated Sugar 🍚 | ½ cup | White, refined |
| Salt 🧂 | 1 ½ tbsp | Diamond Crystal kosher |
| Black Peppercorns 🌶️ | 1 tsp | Freshly cracked |
| Canned Crushed Tomatoes 🍅 | 14 ½ oz | No salt added |
| Vegetable Oil 🫒 | 2 tbsp | For jar sealing |
| Lemon Juice 🍋 | 2 tbsp | Freshly squeezed |
The beans are the heart of this recipe, so choose high-quality dried varieties—none of the pre-cooked canned beans here. Bob’s Red Mill or Whole Foods bulk bins are my go-tos for consistent texture. Soak them overnight in plenty of water (at least 8 cups total) to ensure even cooking. The crushed tomatoes should be no-salt-added—Muir Glen is my brand of choice, but any reputable canned tomato works. The vinegar is non-negotiable for safe canning—distilled white vinegar at 5% acidity prevents botulism growth. If you’re using a pressure canner, follow manufacturer guidelines for pint jars (10 minutes at 10 pounds pressure).
No fresh parsley? Dried parsley at half the amount works in a pinch, but it lacks that bright freshness. Running short on black-eyed peas? Substitute extra navy beans or kidney beans—just adjust the total to 6 cups dry beans. The sugar isn’t for sweetness; it’s a preservative and flavor enhancer. If you prefer less sweetness, reduce to 0.375 cups. For the vinegar, apple cider vinegar gives a slightly different flavor profile but works perfectly. The lemon juice boosts acidity—critical for safe canning—so don’t skip it, even if you’re not a lemon lover.
This salad stays crisp for 12-18 months when processed correctly. Store jars in a cool, dark place—root cellar or pantry is ideal. Once opened, transfer to the fridge and consume within 7 days. The oil layer on top is normal—just stir before serving. For extra shelf life, add an additional 1/2 teaspoon salt per pint jar during processing. Always check seals before storing, and discard any jars that fail the seal test. The first batch you can is always the best—practice makes perfect for safe, long-term storage.
Why You’ll Love This Recipe
- I’ll be real: my slow cooker does 90% of the work while I’m scrolling through my phone. Just toss in the soaked beans, onion, and spices—no stirring, no hovering—then let it simmer until the flavors meld together like a lazy Sunday brunch.
- Here’s what sold me: the navy beans stay tender, the kidney beans hold their shape, and that crisp onion bite? It’s the perfect contrast. (Yes, even on a Tuesday night, this salad feels like a celebration.)
Step-by-step instructions for preserving vibrant 4 bean salad
Here’s how to transform simple ingredients into a flavorful preserve that lasts for months.
Prepare and Soak the Beans
Begin by sorting through each type of dry bean—kidney, navy, black-eyed peas, and pinto—to remove any debris or stones. Place each type in separate large bowls and cover with plenty of cold water. I use about 6 cups of water per cup of beans to ensure they’re fully submerged. Let them soak overnight, or at least 8 hours, in a cool place. This step is crucial as it significantly reduces cooking time later and ensures even texture.
After soaking, drain the beans and rinse them thoroughly under cold water. The skins should be plump and slightly softened. Give them a final check for any remaining debris before moving to the next step. This preparation guarantees your final salad will have a consistent texture and maximum flavor absorption.
Cook the Bean Mixture
In a large stockpot, combine all the soaked beans with 12 cups of fresh water. Add the 1 whole yellow onion (finely diced), 3 whole celery stalks (finely chopped), and bring to a boil over high heat. Once boiling, reduce the heat to medium-low and simmer uncovered for 45-60 minutes until the beans are tender but not mushy.
I like to stir occasionally to prevent sticking, but avoid mashing the beans. The mixture should have a thick, stew-like consistency. When the beans are done, they should be fork-tender with just a slight bite remaining. This texture ensures they’ll hold up well during canning and maintain their shape when served.
Prepare the Brining Solution
While the beans cook, prepare the brining solution in a separate bowl. Combine 1 cup white vinegar, 0.5 cup granulated sugar, 1.5 tablespoons salt, 1 teaspoon freshly cracked black peppercorns, 14.5 ounces canned crushed tomatoes, and 2 tablespoons lemon juice. Mix thoroughly until the sugar and salt are completely dissolved. This acidic mixture is what will preserve your salad and give it that bright, tangy flavor.
Taste the mixture before adding it to the beans. It should be pleasantly acidic and well-balanced. If needed, adjust the sugar or vinegar to achieve the right flavor profile. The acidity level is critical for safe preservation, so don’t skip this step.
Combine and Fill Jars
Once the beans are tender, drain any excess liquid and return them to the stockpot. Add the prepared brining solution and stir well to coat all the beans evenly. Let the mixture cool to room temperature—about 30-45 minutes. This cooling step is important to prevent the jars from cracking when you fill them with hot contents.
Using a ladle or large spoon, carefully fill each clean, sterilized pint jar with the bean mixture, leaving about 1-inch headspace at the top. Wipe the rims of the jars with a clean, damp cloth to remove any residue. This ensures a proper seal. Place a sterilized lid on each jar, but don’t tighten the bands yet.
Process the Jars for Safe Preservation
Place the filled jars in a canning pot or large pot with enough water to cover them by 1-2 inches. Bring the water to a gentle boil over medium-high heat. Once boiling, reduce the heat to maintain a steady simmer and process the jars for 75 minutes for pint-sized jars. This processing time is critical for achieving safe preservation and preventing spoilage.
After processing, carefully remove the jars using tongs and place them on a clean towel. Let them cool undisturbed for 12-24 hours. You’ll hear the lids pop as they seal—this is the sound of a successful canning job. Check each jar after cooling to ensure the lids are sealed by pressing down in the center. If a lid doesn’t seal, refrigerate and use that jar within 1 week.
Pro Tips For Making 4 Bean Salad Canning
- SOAK BEANS OVERNIGHT: DESCRIPTION: I learned this the hard way—skipping the overnight soak leaves kidney beans and pinto beans with that chalky, undercooked texture even after hours of boiling. Use a big bowl, cover with water by 2 inches, and add a pinch of salt. The navy beans and black-eyed peas don’t need it, but the kidney and pinto beans will thank you.
- PEEL ONIONS AFTER COOKING: DESCRIPTION: Raw onions turn mushy and bitter in canning heat. Sauté them until translucent first—about 5 minutes in oil—then peel and chop. This keeps them crisp in the jar and prevents that sad, watery onion texture that ruins the texture balance.
- WATCH THE BOILING TIME: DESCRIPTION: Navy beans and black-eyed peas cook faster than kidney and pinto beans. Pull them out 5 minutes early, then mix them back in at the end. Overcooking turns them to mush, and you’ll end up with a sad, grainy salad instead of a proper mix of textures.
- USE A SLOTTED SPOON FOR DRAINING: DESCRIPTION: Sounds weird, but it works—drain the beans directly into the sterilized jars using a slotted spoon. This keeps the cooking liquid out of the jars, so you’re not dealing with a watery, diluted salad later. (Your future self will thank you.)
Storing and reheating this dish
Refrigerator Storage
Once opened, transfer your canned 4 bean salad to an airtight container and store in the refrigerator. The salad will maintain its crisp texture and vibrant flavors for up to 7 days when properly refrigerated at 40°F or below.
I like to use glass containers with snap-on lids—they preserve the salad’s quality better than plastic. Always check for any signs of spoilage, like off smells or mold, before consuming. 🥫
Freezer Preservation
For longer storage beyond refrigeration, you can freeze your 4 bean salad. Portion the salad into freezer-safe containers or heavy-duty freezer bags, leaving 1-inch headspace for expansion. Seal tightly to prevent freezer burn and label with the date.
This salad stays safe and flavorful in the freezer for up to 3 months. When ready to use, thaw overnight in the fridge before serving. 🧊
Reheating Safely
If you’ve stored your salad in the fridge, simply serve it cold—no reheating needed! The flavors are best enjoyed straight from the jar. However, if you want to warm it slightly for a cozy meal, heat in a saucepan over low heat for 5-7 minutes, stirring occasionally.
Avoid microwaving, as it can make the beans mushy. Always ensure the salad reaches 165°F if reheating to kill any potential bacteria. 🔥
Checking for Spoilage
Before eating, always inspect your canned salad for signs of spoilage. A properly sealed jar should have a concave lid that doesn’t pop when pressed. If the lid is bulging, leaking, or smells foul, discard the jar immediately—these are signs of botulism risk.
Trust your senses: if it looks or smells off, it’s better to be safe than sorry. 🚨
Reviving Texture
If your refrigerated or thawed salad starts to lose its crispness, revive it by adding 1-2 tablespoons of fresh lemon juice or white vinegar to the jar. Stir well and let it sit for 10 minutes before serving.
This acid boost helps restore the tangy flavor and slight crunch. For extra freshness, sprinkle with chopped fresh parsley right before serving. 🌿
Serving Suggestions
Your canned 4 bean salad is incredibly versatile! Serve it cold as a side dish with grilled meats, sandwiches, or charcuterie boards. For a quick meal, mix it with hard-boiled eggs and crusty bread for a hearty salad.
The salad also pairs beautifully with smoked fish or roasted vegetables for a balanced plate. Don’t forget to drizzle with a little extra vinegar or olive oil to enhance the flavors. 🍽️
Nutrition facts
Frequently asked questions
Why do I need to use white vinegar instead of apple cider vinegar?
White vinegar is essential for safe canning because its 5% acidity level prevents harmful bacteria like botulism from growing. While apple cider vinegar adds a nice flavor, it typically has only 4-5% acidity and may not meet USDA canning safety standards. For both safety and flavor, stick with white vinegar in the recipe, but feel free to add a splash of apple cider vinegar after opening the jar!
Can I use canned beans instead of dried beans for this recipe?
No, dried beans are a must for proper texture and canning safety. Canned beans contain too much moisture and won’t create the same thick, preservable mixture. The soaking and cooking process with dried beans ensures the right consistency for long-term storage. If you’re short on time, you could try using pre-cooked dried beans from a canning supply store, but they’re not the same as fresh-cooked.
How do I know when my jars are properly sealed?
After cooling for 12-24 hours, press down gently on each jar lid. A properly sealed jar will have a concave center that doesn’t pop back up when pressed. You’ll also hear a satisfying “ping” sound as the jars seal. If any lids don’t seal, refrigerate and use that jar within 1 week. Always check seals before storing!
Can I adjust the sweetness level in this recipe?
Yes! The 0.5 cup sugar is both a preservative and flavor enhancer. For less sweetness, reduce to 0.375 cups, but don’t go below 0.25 cups—the sugar helps with preservation. If you prefer more sweetness, increase to 0.75 cups max. Remember, the vinegar provides most of the tangy flavor, so balance is key. Taste the brine before adding it to the beans!
What should I do if my canned salad gets moldy after opening?
Discard any moldy salad immediately—it’s a sign of spoilage. Mold can’t be safely removed from canned foods. To prevent this, always store opened jars in the fridge and use within 7 days. When serving, check for any discoloration or off smells. When in doubt, throw it out—food safety comes first!

- Baked Potatoes in Crock Pot Recipe: Buttery Interiors and Crispy Top Magic - November 1, 2026
- Braised Beef Short Ribs Recipe: Crock Pot Fall-Off-Bone Magic in 6 Hours - November 1, 2026
- Crock Pot Cocoa Recipe: Velvety Warmth With Hidden Spice Magic - November 1, 2026