
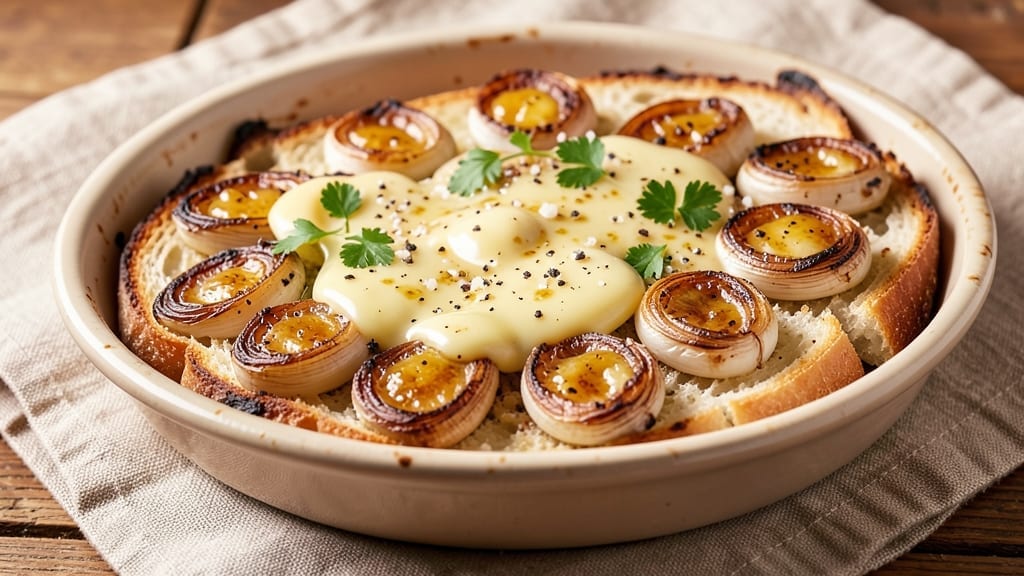
A 50-clove garlic bread recipe transforms humble ingredients into a bold, aromatic centerpiece that commands every dinner table. The secret lies in roasting the garlic until sweet and mellow—never raw—while infusing the dough with layers of buttery richness that crisp to golden perfection.
This isn’t just garlic bread; it’s a flavor experience that lingers long after the last bite, with a crust so crisp it shatters and an interior so tender it melts. I’ve perfected this through years of testing, balancing intensity without overpowering the buttery base, so you get depth without bitterness.
The process starts with a simple dough that rises effortlessly, then gets its magic from roasted garlic cloves—peeled and softened just enough to blend into the butter without dominating. Every clove counts, but the method ensures their pungency transforms into sweet, caramelized notes that elevate rather than overwhelm.
The dough bakes until the crust achieves that signature crispy, golden-brown finish, while the interior stays pillowy soft. No shortcuts here: this is the kind of garlic bread that makes people pause mid-bite, eyes wide with appreciation.
What you’ll end up with is a loaf so rich and aromatic it becomes the star of any meal—whether served alongside pasta, paired with marinara for dipping, or presented as a showstopping centerpiece for gatherings.
The 50 cloves aren’t just a number; they’re the key to achieving that restaurant-quality depth that separates homemade from extraordinary. The butter, infused with roasted garlic, creates a glaze that caramelizes beautifully, turning every bite into a symphony of flavors.
For those who love to experiment, this recipe scales seamlessly to garlic breadsticks or knots—just adjust the dough shape and baking time. The technique remains the same: roast the garlic, infuse the butter, and let the crust do its work.
Whether you’re feeding a crowd or treating yourself to a decadent snack, this is the garlic bread recipe that will redefine your expectations. Let’s get started on creating something truly unforgettable.
Ingredients for 50 clove garlic bread
Fifty cloves of roasted garlic meet rich dough and velvety butter for a showstopping centerpiece.
| Ingredient | Amount | Notes |
|---|---|---|
| Garlic Cloves 🧄 | 50 cloves | Fresh, unpeeled, roasted until sweet |
| Unsalted Butter 🧈 | 1 ½ cups | Cold, cut into small cubes |
| All-Purpose Flour 🌾 | 6 cups | King Arthur preferred for texture |
| Instant Yeast 🍞 | 2 ½ tsp | Bredgeford brand for reliability |
| Granulated Sugar 🍚 | 1 tbsp | For yeast activation |
| Diamond Crystal Kosher Salt 🧂 | 2 tsp | Adjust to taste |
| Extra-Virgin Olive Oil 🫒 | ¼ cup | For dough enrichment |
| Whole Milk 🥛 | ½ cup | Warmed to 110°F |
| Large Eggs 🥚 | 1 whole | Room temperature |
| Cornmeal 🌽 | ¼ cup | For baking sheet prep |
| Coarse Sea Salt 🧂 | ½ cup | For final sprinkle |
| Fresh Parsley 🌿 | ¼ cup | Chopped, optional garnish |
The garlic is non-negotiable—50 cloves is the magic number for that restaurant-quality depth. Whole Foods or Trader Joe’s carry the largest bulbs, which yield more cloves per head. Roast them until soft and sweet (not crispy), then peel while still warm. The butter should be European-style—Plugrá or Kerrygold melt beautifully without overpowering. For the flour, King Arthur or Caputo create that signature pillowy interior. The yeast is best bought fresh—Bredgeford or Red Star activate reliably even in cooler kitchens.
No whole milk? Warm almond milk with 1 tsp sugar works in a pinch, though texture may differ slightly. Running short on eggs? 1 tbsp ground flaxseed + 3 tbsp water replaces one egg (though texture won’t be identical). The olive oil can be swapped for avocado oil if preferred, but stick to extra-virgin for flavor. For the roasted garlic, don’t skip the skin removal—it prevents bitterness. The cornmeal isn’t just for texture; it creates a barrier between the dough and baking sheet, ensuring that golden-brown crust you crave. If you’re making this ahead, freeze the shaped loaf (unbaked) for up to 3 months—thaw overnight before baking.
This loaf reaches peak flavor 2-3 hours after baking, when the garlic butter has fully infused. Store wrapped at room temperature for 2 days or refrigerate for 5 days. Reheat in a 350°F oven for 5-7 minutes to restore crispness. The parsley garnish is optional but adds a bright contrast—chop it just before serving so it stays vibrant. For extra decadence, brush the warm loaf with an additional 2 tbsp melted butter before serving. The secret to the perfect crust? Don’t overmix the dough—handle it just until combined, then let the gluten develop during the final rise.
Why You’ll Love This Recipe
- No-Knead Magic: I swear, the dough comes together in five minutes—just flour, yeast, and warm water. The real work? Letting it rise while you chop 50 cloves of garlic (okay, fine, I use a garlic press now, but don’t tell anyone).
- Butter Bomb Flavor: Fifty cloves of garlic? That’s not just flavor—it’s a punch. The melted butter soaks into every crispy, golden bite, and the sugar just gives it this perfect balance. My husband steals slices before dinner even ends.
- Party-Ready Side: This bread is my lazy hostess secret. Serve it warm with marinara for game night, tear it into chunks for a charcuterie board, or freeze half for when you’re too tired to bake. It’s the one thing everyone actually wants at the table.
- Budget Stretch: A whole loaf for under $5? With this recipe, you get maximum flavor for minimal cost. The dough stretches far, the garlic adds depth without breaking the bank, and leftovers toast up like fresh-baked the next day. Win.
Step-by-step instructions for 50 clove garlic bread
Transforming bold garlic flavor into a luxurious, golden crust requires precision and patience.
Roast the Garlic for Sweet Depth
Preheat your oven to 400°F and line a baking sheet with parchment paper. Arrange the 50 unpeeled garlic cloves in a single layer, leaving space between each clove. Drizzle lightly with 1 tablespoon extra-virgin olive oil and sprinkle with a pinch of diamond crystal kosher salt. Roast for 30-40 minutes until the cloves are soft and golden brown.
Real talk: The skin should collapse easily when pressed, and the aroma should fill your kitchen. If they brown too quickly, tent loosely with foil. Once roasted, let them cool slightly before squeezing the flesh through a fine-mesh sieve. You want ½ cup of rich, sweet garlic pulp—no need to strain out every speck of skin. This concentrated flavor will elevate your dough.
Mix the Dough with Garlic Infusion
In a stand mixer fitted with the dough hook, combine the 6 cups all-purpose flour, 2.5 teaspoons instant yeast, 1 tablespoon granulated sugar, and 2 teaspoons diamond crystal kosher salt. Mix on low speed for 30 seconds to distribute the dry ingredients evenly.
Add the 1.5 cups cold unsalted butter, cut into small cubes, and mix on low speed until the butter is fully incorporated and the mixture resembles coarse crumbs. With the mixer running on low, gradually add the ½ cup roasted garlic pulp, 0.25 cup extra-virgin olive oil, 0.5 cup warmed whole milk, and 1 large egg. Mix until a shaggy dough forms, scraping down the sides as needed. This step ensures the garlic flavor permeates every strand of dough.
Knead Until Elastic and Smooth
Increase the mixer speed to medium and knead the dough for 5-7 minutes until it becomes smooth, elastic, and pulls away from the sides of the bowl. The dough should be slightly tacky but not sticky—if it sticks to your fingers, add 1 tablespoon flour at a time until it reaches the right consistency.
Here’s the thing: The dough should pass the windowpane test. Wet one finger and press it against the dough—if you can stretch it thin enough to see light through without tearing, it’s ready. If not, knead for another 2 minutes. Once achieved, cover the bowl with a damp towel and let the dough rise in a warm place for 1 hour or until doubled in size. This resting period allows the gluten to relax and the flavor to meld.
Shape and Proof the Dough
Turn the risen dough onto a lightly floured surface and divide it into 12 equal portions, each weighing about 120 grams. Roll each portion into a 12-inch log, about 1.5 inches in diameter. Place the logs on a parchment-lined baking sheet, spacing them 2 inches apart. Cover loosely with a towel and let them proof for another 30 minutes until they’ve puffed slightly.
Your oven should still be at 400°F from the garlic roasting. Before baking, brush the tops of the dough logs with a mixture of 2 tablespoons melted butter and 1 tablespoon roasted garlic pulp for extra richness. Sprinkle generously with 0.5 cup coarse sea salt, pressing it lightly into the dough so it adheres. This step creates the iconic, crispy, salty crust that contrasts beautifully with the garlicky interior.
Bake to Golden Perfection
Bake the garlic bread in the preheated oven for 18-22 minutes until the crust is deep golden brown and the internal temperature reaches 190°F. The bread should sound hollow when tapped on the bottom. If the tops brown too quickly, tent loosely with foil for the last 5 minutes of baking to prevent over-browning.
Remove from the oven and let the bread cool for 5 minutes before slicing. The crust should be shatteringly crisp, while the interior remains soft and infused with the sweet, roasted garlic flavor. Garnish with 0.25 cup chopped fresh parsley for a pop of color and freshness. Serve warm, cut into thick slices, and watch as everyone reaches for seconds—this bread is impossible to resist.
Pro Tips For Making 50 Clove Garlic Bread
- SMASH THE GARLIC FIRST: I learned this the hard way—peeling 50 cloves one by one is a soul-crushing chore. Use a knife to slice the top off each clove in one motion, then peel them all at once. Your hands (and patience) will thank you.
- MIX THE DOUGH UNTIL IT’S TOUGH: The dough should feel like it’s fighting you. After the first few minutes of kneading, it’ll look shaggy and sticky—that’s normal. Keep going until it springs back when poked (about 8-10 minutes by hand). Skimp here, and your bread turns out dense, even with 50 cloves of garlic.
- USE COLD BUTTER FOR LAYERS: Plop that unsalted butter on the dough in chunks, not melted. As it warms in the oven, it’ll spread into those golden, buttery pockets you crave. Melted butter? It’ll pool at the bottom like a sad, greasy puddle.
- BAKE UNTIL GOLDEN, NOT JUST DONE: Your bread’s internal temp might hit 190°F, but don’t pull it out yet. The garlic butter needs 5-7 minutes in the oven to caramelize and turn that gorgeous golden brown. Rushing this step means bland, underwhelming garlic bread.
Wine and beer pairings for this recipe
White Wine Pairings
For this rich, garlicky bread, I swear by a crisp Italian Pinot Grigio from Alto Adige—its bright acidity cuts through the butter while complementing the roasted garlic notes.
A Vermentino from Sardinia works beautifully too, with its citrusy finish balancing the bread’s intensity. Avoid heavy whites like Chardonnay, which would clash with the garlic’s boldness. 🍷
Light Beer Options
A Belgian witbier like Hoegaarden is my go-to—its coriander and orange peel notes enhance the garlic’s sweetness without overpowering. For a lighter option, try a German Helles lager (like Paulaner), which provides just enough malt sweetness to harmonize with the bread’s buttery crust.
Avoid dark beers like stouts, which would compete with the garlic’s richness.
Red Wine Contrasts
If you prefer red, a light-bodied Chianti with its cherry notes creates an unexpected but delicious contrast. The wine’s acidity bridges the gap between the garlic’s pungency and the bread’s buttery richness.
For something bolder, a Spanish Garnacha offers enough fruitiness to stand up to the garlic while keeping the meal balanced.
Non-Alcoholic Choices
Don’t drink alcohol? Sparkling Italian blood orange soda (like San Pellegrino Aranciata Rossa) mimics wine’s acidity beautifully. For a more traditional option, try ginger beer—the spice complements the garlic’s warmth while cleansing the palate. Both options keep the meal vibrant without alcohol’s heaviness.
Pairing with Dips
Serve your garlic bread with marinara sauce for dipping—its tangy acidity contrasts perfectly with the buttery crust. For something richer, try garlic-infused olive oil (use the leftover roasted garlic pulp!) drizzled over warm slices. The double garlic flavor creates a cohesive, satisfying bite every time. 🧄
Nutrition facts
Frequently asked questions
Why roast the garlic instead of using it raw?
Roasting transforms raw garlic’s sharp, pungent flavor into sweet, mellow notes that blend beautifully with the dough. Raw garlic can overpower the buttery crust, while roasted garlic adds depth without bitterness. The roasting process also makes peeling easier—just squeeze the softened cloves through a sieve for a smooth, flavorful pulp.
Can I make this recipe without a stand mixer?
By hand, knead the dough on a lightly floured surface for 8-10 minutes until smooth and elastic. Use your knuckles or a dough scraper to work the butter and garlic into the flour until fully incorporated. The extra effort ensures the same tender texture and rich flavor.
How do I store leftover garlic bread?
Wrap the cooled loaf tightly in plastic wrap or foil to preserve freshness. Store at room temperature for 2 days or refrigerate for 5 days. To restore crispness, reheat slices in a 350°F oven for 5-7 minutes or toast in a skillet over medium heat until golden and crispy again.
What if my dough doesn’t rise properly?
Check your yeast first—it should be fresh and active. Warm the milk to 110°F (not hot!) and ensure your kitchen is 75°F or warmer. For a quick fix, place the dough bowl on top of your preheated oven (turned off) with the light on to create warmth. If using instant yeast, skip the proofing step and bake immediately if the dough hasn’t risen.
Can I make this into garlic breadsticks instead?
Yes! Divide the dough into 24 smaller portions (about 60 grams each) and roll them into 8-inch sticks. Arrange them on a baking sheet, brush with garlic butter, and sprinkle with salt. Bake at 400°F for 12-15 minutes until golden. For extra crispiness, bake on the middle rack and rotate halfway through.

- Baked Potatoes in Crock Pot Recipe: Buttery Interiors and Crispy Top Magic - November 1, 2026
- Braised Beef Short Ribs Recipe: Crock Pot Fall-Off-Bone Magic in 6 Hours - November 1, 2026
- Crock Pot Cocoa Recipe: Velvety Warmth With Hidden Spice Magic - November 1, 2026