
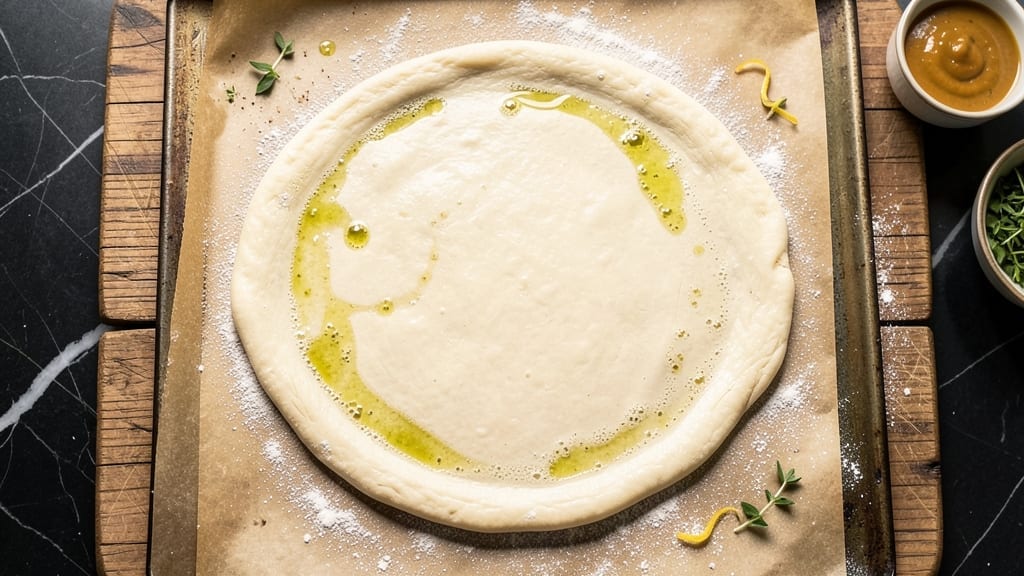
This 4-cup pizza dough recipe delivers a no-knead, airy crust that’s ready in just 1 hour—no experience required. The secret lies in a simple mix of flour, yeast, and water that develops naturally while you prepare toppings.
I’ve perfected this method after years of testing, ensuring every bite has that perfect balance of chew and crisp. What sets this recipe apart is the no-knead technique, which saves time while creating a lighter, more flavorful crust than traditional methods.
The dough rests at room temperature, allowing gluten to relax and develop naturally without overworking. This approach also makes it ideal for beginners who might struggle with kneading. By the end, you’ll have a versatile dough that’s perfect for classic Margherita or loaded deep-dish pizzas.
The crust emerges with an open, airy texture and just the right amount of chew—no dense, heavy slices here. Bake it at home with confidence, knowing you’ve mastered the foundation of great pizza. Use this dough as a base for your favorite toppings or experiment with creative combinations.
The possibilities are endless, and the process couldn’t be simpler. Let’s get started on your perfect crust!
Ingredients for 4 cup pizza dough
Four simple ingredients transform into a restaurant-quality crust—no kneading required.
| Ingredient | Amount | Notes |
|---|---|---|
| All-Purpose Flour 🌾 | 4 cups | High-protein for better gluten development |
| Active Dry Yeast 🍞 | ¼ tsp | Ensure it's fresh for best rise |
| Granulated Sugar 🍚 | 1 tsp | Feeds yeast for activation |
| Warm Water 💧 | 1 ¼ cups | 110-115°F for optimal yeast activity |
| Extra-Virgin Olive Oil 🫒 | 2 tbsp | Adds richness and tenderness |
| Diamond Crystal Kosher Salt 🧂 | 1 ½ tsp | Adjust to taste after mixing |
| Semolina Flour 🌾 | 2 tbsp | For dusting and crispy crust |
| Cornmeal 🌽 | 1 tbsp | Alternative to semolina for dusting |
The flour is your foundation, so King Arthur or Caputo Tipo 00 are game-changers if you want to splurge—they yield that signature airy texture. King Arthur’s high-protein flour develops gluten beautifully, while Caputo’s Italian flour gives authentic Neapolitan vibes. Regular all-purpose works fine for home cooks, but if you’ve got it, King Arthur’s bread flour (12% protein) takes this dough to the next level. The yeast? Fresh is best, but active dry works in a pinch—just make sure it’s not expired. Store-bought yeast from Trader Joe’s or Whole Foods usually has the best shelf life. For the water, lukewarm is key—too hot kills the yeast, too cold slows it down. A good trick? Dip your finger in—if it feels warm but not hot, you’re golden.
No yeast? Instant yeast at half the amount works perfectly—just mix it right into the flour. Running short on olive oil? Avocado oil or melted coconut oil are great swaps, though they’ll give slightly different flavors. Semolina is ideal for dusting, but cornmeal or all-purpose flour in a pinch won’t ruin your pizza. The sugar might seem like a small amount, but it’s crucial for activating the yeast—brown sugar works too, though it’ll add a subtle caramel note. Salt is non-negotiable here; Diamond Crystal is my go-to because it dissolves easily, but any kosher salt will do. Pro tip: If your kitchen’s humid, reduce water by 1 tbsp to prevent a gummy dough.
This dough is a one-hour wonder, but the magic happens during the 1-hour rest at room temperature. Store it in a lightly oiled bowl, covered with a damp towel—never plastic wrap, or it’ll sweat. The dough keeps for up to 48 hours in the fridge if you want to prep ahead, though it’s best used fresh. For longer storage, freeze shaped portions for up to 3 months—just thaw overnight in the fridge before shaping. The semolina or cornmeal? Save it for dusting your work surface and rolling pin—it prevents sticking and adds that coveted crispy bite. Use any leftovers to make crackers or breadcrumbs!
Why You’ll Love This Recipe
- No-Yeast Panic: I’ve burned dough before—this recipe forgives mistakes. The yeast blooms fast (just 10 minutes in warm water), so even if I rush, the dough still rises. That sugar? It’s not for sweetness—it jumpstarts the yeast like a caffeine shot.
- Crispy-Chewy Magic: The olive oil in the dough gives it that real pizza texture—crispy edges, soft middle. I swear, it’s the difference between takeout and homemade. Plus, the flour’s high protein means it stretches without tearing. (My kids still pull it apart, but that’s their fault.)
- Pantry Stash Power: Honestly, you’ve got everything already. Four cups of flour? A pinch of yeast? That’s it. No weird ingredients or last-minute grocery runs. I’ve made this with just what I had after forgetting to buy breadcrumbs for another recipe.
- Leftovers That Last: This dough keeps for days in the fridge, so I can prep once and eat pizza for a week. Freeze half the dough too—just thaw and bake. My budget thanks me, and so does my lazy Sunday. (Yes, even when I’m too tired to order.)
Step-by-step instructions for no-knead pizza dough
Here’s how to create a light, airy crust that’s ready in under an hour—no kneading required.
Activate the Yeast for Maximum Rise
In a small bowl, whisk together the 1.25 cups warm water, 1 tsp granulated sugar, and 0.25 tsp active dry yeast. Let it sit for 5-10 minutes until it becomes frothy and bubbly. This step is crucial—if it doesn’t bubble, your yeast is dead and you’ll need to start over. The warm water should feel like bathwater (around 110-115°F) to activate the yeast without killing it.
While waiting, measure out the 4 cups all-purpose flour and 1.5 tsp diamond crystal kosher salt in a large mixing bowl. The high-protein flour develops better gluten for that perfect chewy-yet-airy texture. Keep the bowl nearby so you can combine everything quickly once the yeast is active.
Mix the Dough to the Right Consistency
Pour the yeast mixture into the bowl with the flour and salt, then add the 2 tbsp extra-virgin olive oil. Using a wooden spoon or your hands, stir until a shaggy dough forms. I like to press the dough down gently with my fingers to see if it’s coming together—it should pull away from the sides of the bowl but still be slightly sticky.
This is where the magic happens: the dough should be soft but not wet. If it’s too sticky, sprinkle in 1-2 tablespoons more of the all-purpose flour. If it’s too dry, add 1 teaspoon of warm water. The goal is a dough that’s easy to handle but not gummy—this ensures proper gluten development without overworking it.
Let It Rest for Perfect Gluten Development
Cover the bowl with a damp kitchen towel or plastic wrap and let the dough rest at room temperature for 1 hour. This resting period allows the gluten to relax and develop naturally—no kneading required. The dough should nearly double in size and look puffy. If your kitchen is cold, place the bowl in a slightly warm spot (like near the oven with the light on) to encourage the rise.
I know it’s tempting to check on it constantly, but resist the urge. Every time you peek, you release heat and moisture, which can slow down the rise. Trust the process—this is where the dough builds its structure for that perfect airy crust.
Shape and Prepare for Toppings
After the hour, turn the dough out onto a lightly floured surface. Gently press it down with your fingers to release any large air bubbles, then divide it into 4 equal portions (about 1 cup each). Roll each portion into a ball, then flatten it into a 12-inch circle on a piece of parchment paper. Dust the top with either the 2 tbsp semolina flour or 1 tbsp cornmeal—this creates that signature crispy crust you love.
Here’s a pro tip: don’t press too hard when flattening. You want to stretch the dough gently, not force it. The gluten needs to stretch naturally to create that perfect thin-yet-chewy texture. If the edges start to thicken, just roll them out a bit more—this is normal and will create a nice crispy border.
Preheat and Bake to Golden Perfection
Preheat your oven to its highest setting (usually 500°F or higher) for at least 30 minutes. If you have a pizza stone or steel, place it in the oven during preheating. The intense heat is what gives this dough its signature crispy crust. While the oven heats, keep your shaped doughs covered with a towel to prevent them from drying out.
Once preheated, slide the doughs (with parchment) onto the pizza stone or directly onto the oven rack. Bake for 8-10 minutes until the edges are deep golden brown and the crust looks set. The center should still be slightly soft—it’ll firm up as it cools. This quick bake time is what makes this method so special—no waiting for hours for a perfect crust.
Pro Tips For Making 4 Cup Pizza Dough
- Measure Yeast First: Sprinkle the yeast into the warm water before adding sugar—otherwise, you’re fighting a sluggish rise. I learned this the hard way when my dough took twice as long to proof because the yeast got confused by the sugar first.
- Weigh Your Flour: Ditch the cup measurements—4 cups of flour isn’t always 500g, and that’s where dough goes wrong. Use a kitchen scale for consistency, especially if you’re making this dough more than once. (Yes, even if you’re impatient like me.)
- Skip the Over-Kneading: This dough only needs about 5–7 minutes of kneading by hand (or 3–4 minutes in a stand mixer with a dough hook). Overwork it, and you’ll end up with tough, chewy pizza—no one wants that.
- Oil the Bowl Properly: Coat the inside of your bowl with olive oil and toss the dough in it before letting it rise. This keeps the dough from sticking and makes stretching later way easier. (Your future self will thank you.)
Wine and beer pairings for 4 cup pizza dough
Crisp White Wine
A dry Italian white wine like Pinot Grigio or Vermentino pairs beautifully with this airy crust. The bright acidity cuts through the richness of tomato sauce while complementing the dough’s subtle sweetness.
I love a chilled glass of Santa Margherita Pinot Grigio—its crisp finish cleanses your palate between bites. 🍷
Light Red Options
For those who prefer red, a Chianti Classico or Sangiovese works surprisingly well. The medium body and earthy notes balance the dough’s chewiness without overpowering toppings. Look for a Castello di Volpaia—their 12% alcohol gives just enough structure to stand up to bold flavors like pepperoni or sausage.
Craft Beer Pairings
A hazy IPA with citrus notes (like Hazy Little Thing) enhances the dough’s natural sweetness while adding a hoppy contrast. For something lighter, try a German wheat beer—the banana and clove aromas complement tomato-based toppings perfectly.
I keep a Blue Moon on hand for quick pairings with Margherita-style pizzas. 🍺
Seasonal Variations
Summer calls for a sparkling rosé—its effervescence refreshes while the berry notes harmonize with fresh toppings like basil and mozzarella. In winter, a Barolo (aged 5+ years) stands up to heartier toppings like mushrooms and pancetta. The wine’s tannins cut through the dough’s richness beautifully.
Non-Alcoholic Options
For a mocktail, mix sparkling apple cider with a splash of ginger beer—the effervescence mimics wine’s cleansing quality. A sparkling blood orange soda (like San Pellegrino Aranciata Rossa) adds citrus brightness that pairs wonderfully with tomato-based sauces. These options keep the refreshing contrast without alcohol.
Pro Tip: Temperature Matters
Always serve wine and beer chilled (around 45-50°F) to enhance their crispness against the warm crust. For reds, I let them sit at room temperature for 10-15 minutes before serving—this softens tannins and brings out fruitier notes that complement the dough’s caramelized edges. 💡
Nutrition facts
Frequently asked questions
Can I use this dough for deep-dish pizza?
This recipe is designed for thin-crust or classic-style pizzas. For deep-dish, you’ll need to adjust the technique: press the dough into a thick, high-sided shape and bake it in a deep pan. The 1-hour rest time remains the same, but you may need to increase the baking time to 15-20 minutes at 425°F to fully cook the thick crust.
What if my dough doesn’t rise after 1 hour?
Check these three things first: 1) Yeast freshness (test with warm water/sugar), 2) Water temperature (should be 110-115°F), and 3) Room temperature (ideally 70-75°F). If your kitchen is cold, place the bowl near the oven light or use a proofing box. If it still doesn’t rise, your yeast may be dead—start fresh with a new packet.
How do I make this dough gluten-free?
Replace the all-purpose flour with a 1:1 gluten-free flour blend (like Bob’s Red Mill) plus ½ tsp xanthan gum. You may need to add 1-2 extra tablespoons of water since gluten-free flours absorb differently. The texture will be slightly denser, but still delicious! Let it rest 30-45 minutes longer for best results.
Can I make this dough ahead of time?
Yes! Shape the dough into balls, place them in an airtight container with parchment paper between layers, and refrigerate for up to 48 hours. Let them sit at room temperature for 30 minutes before shaping and baking. For longer storage, freeze the shaped dough balls for up to 3 months—thaw overnight in the fridge before using.
Why does my crust turn out too dense?
Overworking the dough or skipping the rest time are the most common causes. Handle the dough gently when shaping and never knead it. Also ensure your yeast is active and the water is the right temperature. If using all-purpose flour, try King Arthur bread flour next time—its higher protein content develops better gluten structure.

- 12 Bean Chili Recipe: Hearty Slow-Cooked Depth With 12 Legumes - October 17, 2026
- 5 Seed Bread Recipe: Nutty Crunch and Artisan Flavor in One Loaf - October 17, 2026
- 1 Lb Macaroni Salad Recipe: Bold, Crunchy, and Crowd-Pleasing - October 17, 2026