
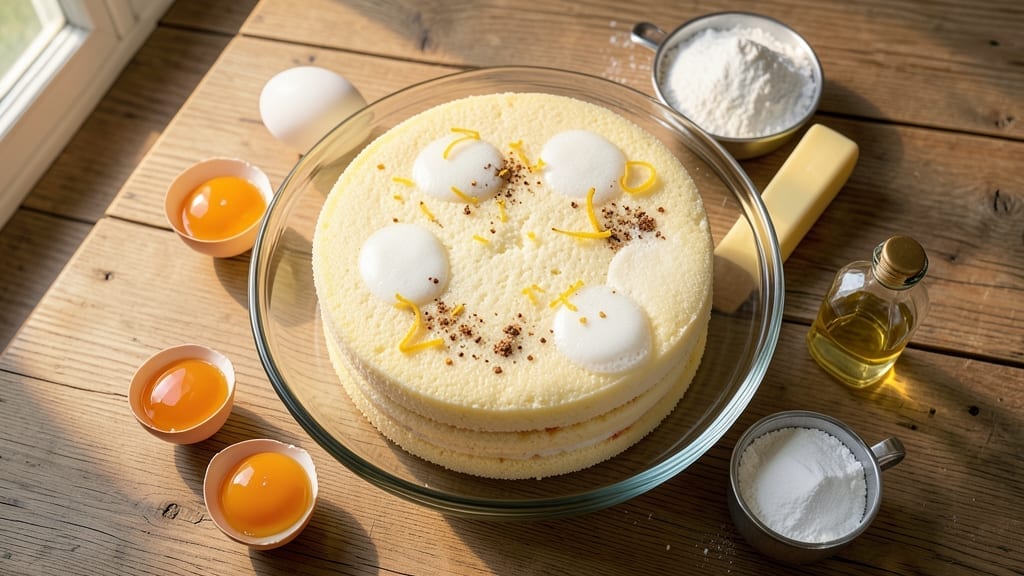
A 4-egg sponge cake delivers the perfect balance of lightness and structure, with each layer standing tall and tender—ideal for stacking with buttery whipped cream. The secret lies in properly whisked egg whites and gentle folding, creating air pockets that transform simple ingredients into a cloud-like texture.
This recipe has been refined to ensure consistent results, whether you’re baking for a celebration or satisfying a sweet craving.
The technique combines traditional Swiss meringue method precision with modern convenience, requiring just 350°F for 30-40 minutes to achieve golden layers that slice cleanly. No special equipment is needed beyond a stand mixer or hand whisk, making it accessible for home bakers.
The cake’s neutral flavor profile also makes it versatile for fillings like vanilla cream, fruit preserves, or even matcha-infused buttercream.
What you’ll end up with is a four-layer masterpiece that holds its height without collapsing, thanks to the egg-to-flour ratio and proper baking time. The finished cake has a delicate crumb, just enough structure to support generous layers of whipped cream, and a subtle sweetness that lets other flavors shine.
This is the kind of dessert that elevates any occasion—whether served at a brunch spread or as a simple afternoon treat.
For presentation, dust the layers with powdered sugar or garnish with fresh berries to add color and freshness. The cake keeps well at room temperature for up to 3 days, making it perfect for meal prep or gifting. Let’s get started on creating this elegant yet approachable dessert.
Ingredients for 4 egg sponge cake
Four eggs, precise measurements, and gentle folding create this elegant four-layer sponge cake.
| Ingredient | Amount | Notes |
|---|---|---|
| Large Eggs 🥚 | 4 whole | Room temperature, separated carefully |
| All-Purpose Flour 🌾 | 1 ½ cups | Sifted, plus extra for dusting |
| Granulated Sugar 🍚 | 1 ½ cups | Superfine preferred for even dissolving |
| Unsalted Butter 🧈 | 1 cup | Cold, cubed, European-style preferred |
| Vanilla Extract 🌿 | 1 tbsp | Pure Madagascar bourbon preferred |
| Cake Flour 🌾 | ½ cup | For lighter texture, optional |
| Baking Powder 🧂 | ½ tsp | Aluminum-free for stable rise |
| Salt 🧂 | ¼ tsp | Diamond Crystal preferred |
| Heavy Cream 🥛 | 2 cups | Cold, for whipped cream |
| Powdered Sugar 🍚 | 1 cup | Sifted for smooth texture |
| Lemon Zest 🍋 | 1 tsp | Fresh, for subtle brightness |
| Cornstarch 🌾 | 1 tbsp | For stabilizing whipped cream |
The eggs are the foundation—room temperature is non-negotiable for proper volume. Kirkland Signature or Vital Farms eggs work best due to their consistent quality. For flour, King Arthur all-purpose is ideal, but if you’re going for the lightest texture, Bob’s Red Mill cake flour makes a noticeable difference. The butter should be cold and cubed—European-style brands like Plugrá or Miyoko’s have higher fat content, which improves structure. Superfine sugar dissolves more evenly, but if you only have granulated, pulse it in a food processor for 30 seconds to break up the crystals.
No vanilla extract? Vanilla bean paste works beautifully—just use half the amount. The cake flour is optional but recommended for a lighter crumb; if you skip it, add an extra 0.25 cup all-purpose flour. For the whipped cream, heavy cream at 36-38% fat whips best—avoid ultra-pasteurized if possible. The lemon zest adds brightness without overpowering; if you prefer, orange zest works equally well. The cornstarch is key for stabilizing the whipped cream—don’t skip it, even if your cream seems stable at first.
Store the cake layers wrapped in parchment paper at room temperature for up to 3 days. The whipped cream should be made fresh but can be stored in an airtight container for 24 hours—just whip it again before using. For longer storage, freeze the cake layers (without filling) for up to 2 months. Bring to room temperature before assembling. The whipped cream can also be frozen in an airtight container for 1 month, though texture may change slightly upon thawing.
Why You’ll Love This Recipe
- No Mixer Needed: I swear by this method—just whisk eggs and sugar until thick and pale, then fold in flour like you’re tucking in a blanket. No stand mixer, no stress, no sticky countertop cleanup.
- Butter-Sugar Magic: That melted butter folded into the batter? It’s what turns this into a cake with real depth—tender crumb, subtle richness, and a whisper of vanilla that lingers like a good memory.
- Weeknight or Birthday: Slice it toasted for breakfast with jam, layer it with whipped cream for dessert, or pack slices in a lunchbox. Same recipe, endless uses—no excuses to skip it.
- Pantry Staple Power: Four eggs, a stick of butter, flour you already have—this cake costs pennies and keeps for days. Bake half, freeze the rest, and still save money compared to store-bought. Win.
Step-by-step instructions for four-layer sponge cake
Here’s how to achieve professional-level height and texture with this refined technique.
Separate and Whip Egg Whites to Stiff Peaks
Begin by separating the 4 whole large eggs, ensuring no yolk traces remain in the whites. Place the whites in a spotless, grease-free bowl—the slightest oil residue will prevent proper whipping. Using a stand mixer fitted with the whisk attachment, beat the egg whites on low speed until frothy, then gradually increase to high speed for 5-7 minutes until they form stiff, glossy peaks that hold their shape when the whisk is lifted.
This step is critical: the whites should be thick enough to hold their shape when you turn the bowl upside down. If they’re not quite there, whip for another 30 seconds. Avoid over-whipping, which can make them dry and grainy. Keep the bowl and whisk completely dry throughout this process—even a drop of water can prevent proper aeration.
Cream Butter and Sugar to Light and Fluffy
In a separate, chilled bowl, combine the 1 cup cold unsalted butter (cut into cubes) with the 1.5 cups granulated sugar. Using the paddle attachment, beat on medium speed for 3-4 minutes until the mixture is light, pale, and nearly doubled in volume. The butter should be fully incorporated, with no visible lumps, and the texture should resemble thick ribbon when the paddle is lifted.
This creaming process incorporates air, which will later create the cake’s signature lightness. If the mixture feels too warm or starts to melt, chill the bowl in the refrigerator for 5 minutes before continuing. The cold butter ensures proper emulsification with the sugar, preventing a dense final texture. Work quickly to avoid melting the butter prematurely.
Fold Dry Ingredients into Egg Yolks
In another bowl, whisk together the 1.5 cups all-purpose flour, 0.5 cup cake flour, 0.5 teaspoon baking powder, and 0.25 teaspoon salt. Sift the mixture directly into the egg yolks, then gently fold with a spatula until just combined. Add the 1 tablespoon vanilla extract and 1 teaspoon lemon zest, folding until evenly distributed. The mixture should be smooth but slightly thick.
This dry ingredient combination creates the cake’s structure while maintaining tenderness. Avoid overmixing—just until no flour streaks remain. The lemon zest adds subtle brightness that complements the buttery richness of the cake. Keep this mixture at room temperature to prevent activating the baking powder prematurely.
Combine Wet and Dry Mixtures in Three Stages
Using a large spatula, gently fold one-third of the egg white mixture into the yolk mixture in a J-shaped motion to maintain air incorporation. Repeat with another third, then finish with the remaining whites. Fold just until no white streaks remain—overmixing will deflate the batter. The final batter should be thick, glossy, and well-aerated, with no visible lumps.
This three-stage folding technique ensures maximum air retention while gently incorporating the dry ingredients. The batter should hold its shape when spooned—if it flows too easily, you may have deflated the whites. Work quickly to maintain the proper consistency before baking. Divide the batter evenly among 4 greased and floured 6-inch round cake pans for uniform layers.
Bake Layers at Precise Temperature
Preheat the oven to 350°F and position racks in the upper and lower thirds for even heat distribution. Pour the batter into the prepared pans, smoothing the tops with an offset spatula. Bake for 18-22 minutes, rotating the pans halfway through, until the cakes spring back when gently pressed and a toothpick inserted comes out clean. The edges should be light golden brown while the centers remain slightly pale.
Timing is critical here—underbaking prevents proper layer separation, while overbaking dries out the texture. The cakes should be tender yet fully set. Let them cool in the pans for 10 minutes before transferring to a wire rack to cool completely. This gradual cooling prevents cracking and maintains structural integrity for layering.
Pro Tips For Making 4 Egg Sponge Cake
- Whip Eggs to Ribbon Stage: Stop when the mixture clings to the whisk in thick, glossy strands—no streaks of yellow left. Over-whipping turns your cake dense; under-whipping means it won’t rise properly. I used to eyeball it and end up with a brick. Now I test it: lift the whisk and watch the batter hold its shape for 2 seconds.
- Sift Flour Twice: First sift removes lumps, second ensures even distribution. Pour the flour in a slow, steady stream while folding—don’t dump it. My first attempt had pockets of dry flour; now the crumb is light and uniform. Yes, it’s extra work, but it’s the thing that matters most for that cloud-like texture.
- Melt Butter Slowly: Warm the butter in the microwave in 10-second bursts, stirring between each, until just melted—not hot. Pour it into the egg mixture lukewarm, not scorching. I learned this the hard way when I microwaved it too long and ended up with a greasy, sad cake. The butter should feel like warm bathwater, not steam.
- Grease Pan and Dust Flour: Use butter for greasing, then coat the pan with flour—tap out the excess so it’s just dusted, not piled. This prevents sticking and gives you that perfect pull-apart edge. I skip the flour sometimes, and the cake either tears or gets stuck. Not worth the risk.
Storing and reheating your leftovers
Room Temperature Storage
Your freshly baked sponge cake layers stay fresh and moist at room temperature for up to 3 days when stored properly. Wrap each layer individually in parchment paper, then place them in an airtight container separated by wax paper.
The lemon zest in the batter helps preserve freshness, but avoid exposing the cake to direct sunlight or warm areas. I like to store mine in the original cake pans lined with parchment for the first 24 hours before transferring to avoid any potential sticking. 💫
Refrigerator Preservation
If you need to keep your cake longer than 3 days, refrigerate the layers wrapped in plastic wrap for up to 5 days. The cold temperature slows moisture loss, but be prepared for slightly drier texture after refrigeration.
To revive, let the cake sit at room temperature for 30 minutes before assembling. I recommend making fresh whipped cream when serving refrigerated cake, as the chilled layers pair best with freshly whipped heavy cream at 36-38% fat.
Freezing Layers
For maximum longevity, freeze your cake layers (without filling) for up to 2 months. Wrap each layer tightly in plastic wrap, then place in a freezer bag with all air removed. Label with the date using a permanent marker.
When ready to serve, thaw at room temperature for 4-6 hours—this gradual process prevents cracking. I find this method perfect for special occasions when I want to bake ahead without compromising texture. 🧊
Whipped Cream Storage
Your buttery whipped cream stays fresh in the refrigerator for 24 hours when stored in an airtight container with a splash of water on the surface to prevent drying. For longer storage, freeze the whipped cream in a freezer-safe container for up to 1 month.
To use, thaw in the refrigerator overnight, then whip again until fluffy. The cornstarch in the recipe helps maintain stability even after freezing, though texture may soften slightly. I always make fresh whipped cream for the top layer to ensure perfect presentation.
Reheating Tips
If your cake layers develop a slightly dry texture after storage, revive them with a quick reheating method. Place each layer on a baking sheet and warm in a 200°F oven for 5-8 minutes—just enough to soften without overcooking.
For a more dramatic effect, brush the tops with a light simple syrup (equal parts sugar and water, heated until dissolved) before reheating. This method works especially well for cakes stored in the refrigerator overnight. 🔥
Assembling After Storage
When ready to assemble, use a serrated knife to level any uneven tops from storage. Apply a thin layer of buttercream or whipped cream between layers to help them adhere better after potential moisture loss. For extra stability, chill the assembled cake in the refrigerator for 15 minutes before serving.
I find this chilling step prevents any potential layer shifting, especially important when serving at room temperature after storage. The cake’s delicate crumb will still surprise your guests with its lightness!
Nutrition facts
Frequently asked questions
Can I substitute cake flour with all-purpose flour?
Yes, but you’ll need to make an adjustment. Replace the 0.5 cup cake flour with 0.5 cup all-purpose flour minus 2 tablespoons (since cake flour has more starch). This keeps the texture light but slightly denser. For best results, sift the flour thoroughly to avoid lumps in the batter. The recipe still works beautifully with this swap!
Why did my cake sink in the middle?
This usually happens from overmixing the batter or opening the oven door too early. Make sure to fold the egg whites gently in three stages and avoid overbaking—remove the cake when it springs back when pressed and a toothpick comes out clean. Also, let the cake cool completely in the pan for 10 minutes before removing to prevent sudden collapse.
How do I get perfectly even layers?
Use 6-inch round cake pans that are the same size and grease them thoroughly with butter and flour. Divide the batter evenly by weight (each layer should be about 12 oz) rather than volume. Tap the pans gently on the counter before baking to settle any air bubbles. For extra precision, use a kitchen scale to measure the batter.
Can I make this cake without a stand mixer?
Whip the egg whites by hand using a whisk in a spotless bowl for 7-10 minutes until stiff peaks form. For the butter and sugar, use a hand mixer or even a sturdy fork to cream them together—just work in short bursts to avoid melting the butter. The key is patience and proper technique, not the equipment.
What’s the best way to fill and frost this cake?
For a classic look, use the included whipped cream between layers and on top. For extra stability, chill the cake for 15 minutes after assembling. You can also use vanilla buttercream or fruit preserves like raspberry jam. The neutral flavor of this sponge cake makes it perfect for any filling—just avoid overly sweet fillings to balance the delicate texture.

- 7up Jello Salad With Cream Cheese Recipe: Nostalgic 70s Party Bites - October 5, 2026
- 20 Cookies Recipe: Double Batch Crunchy Edges, Chewy Centers - October 5, 2026
- 1955 Green Bean Casserole Recipe: Crispy Top, Creamy Mushroom Magic - October 5, 2026