
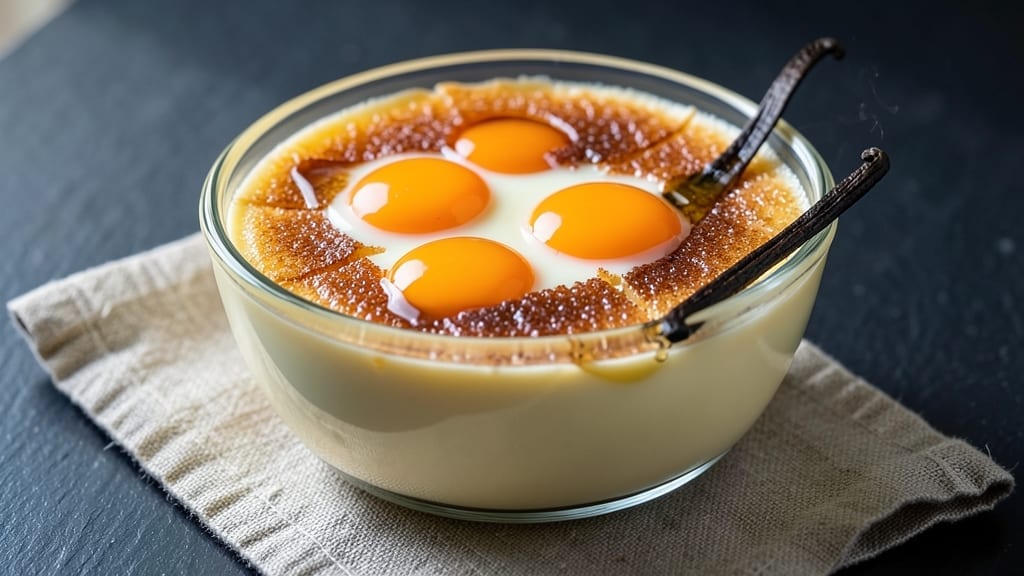
This 4-egg yolk crème brûlée recipe delivers the perfect balance of silky vanilla custard and that irresistible caramelized sugar crust—no fancy equipment needed. 💛 The secret lies in the ratio of yolks to cream and the precise baking temperature that keeps the center perfectly set while the top stays creamy.
I’ve made this version countless times, and it never fails to impress, whether you’re serving it at a dinner party or treating yourself to a luxurious dessert.
What sets this recipe apart is the rich, velvety texture that comes from using just four egg yolks—enough to create that signature custard without making it too heavy.
The vanilla bean infuses deep, warm notes, while the sugar crust caramelizes to a beautiful golden-brown with just the right amount of crackle. The key is patience: letting the custards chill thoroughly and torching the sugar at the perfect moment for that signature snap.
Imagine pulling a ramekin from the oven, revealing a smooth, pale custard topped with a mirror-like sugar crust that hardens into crackly perfection when tapped. Each spoonful delivers that silky, creamy vanilla flavor, followed by the satisfying crunch of the caramelized sugar.
It’s the kind of dessert that feels like a special occasion, even when it’s just you enjoying it on the couch.
This recipe is beginner-friendly but delivers restaurant-quality results. The custard sets beautifully, the crust caramelizes evenly, and the flavor is pure, unadulterated vanilla bliss. Ready to make your kitchen smell like a Parisian café? Let’s get started—your taste buds will thank you.
Ingredients for 4 egg yolk creme brulee
Four yolks, two cups cream, and a touch of vanilla—simple ingredients for a luxurious dessert.
| Ingredient | Amount | Notes |
|---|---|---|
| Large Egg Yolks 🥚 | 4 whole | Freshly separated from eggs |
| Heavy Whipping Cream 🥛 | 2 cups | Full-fat for best texture |
| Granulated Sugar 🍚 | ¾ cup | For custard base |
| Vanilla Bean 🌿 | 1 whole | Split lengthwise for seeds |
| Vanilla Extract 🍯 | 1 tbsp | Pure vanilla for depth |
| Pinch Salt 🧂 | ⅛ tsp | Fine sea salt |
| Granulated Sugar (for crust) 🍚 | ¼ cup | Fine grain preferred |
| Ramekins 🍽️ | 4 whole | 4-6 oz capacity |
| Whole Milk 🥛 | ¼ cup | Warmed for custard |
The yolks are the heart of this recipe—fresh, room-temperature eggs make all the difference. I grab mine from the local farm stand when I can, but the grocery store works fine too. Just make sure they’re not past their prime. The vanilla bean? Madagascar bourbon vanilla if you’re splurging, but any good-quality bean will do. Split it lengthwise, scrape out the seeds, and add both the seeds and the pod to the custard. The cream should be cold and heavy—none of that light whipping cream from the back of the fridge. And the ramekins? Oven-safe ceramic or glass—no metal, or you’ll end up with a burnt bottom.
No vanilla bean? Two teaspoons of pure vanilla extract works in a pinch, but you’ll miss that beautiful speckled look. Running low on heavy cream? Half-and-half plus a splash of whole milk gets you close, though the texture won’t be quite as rich. The sugar for the custard can be swapped for turbinado or brown sugar, but granulated is what I always use—it dissolves smoothly. And if you’re worried about the custard setting too fast, add an extra tablespoon of milk to loosen it up. The crust sugar? Superfine or powdered sugar works too, but it’ll caramelize faster—torch it right away.
This custard needs time to work its magic. Chill for at least 4 hours, overnight is even better. Once set, it’ll keep in the fridge for 3 days, but the crust is best torched fresh. For make-ahead prep, assemble the custards a day ahead—they’ll taste even more developed. And if you’re serving a crowd, double the recipe—just make sure your oven has enough space for all the ramekins. The crust should be torched right before serving, but if you torch it ahead, cover it with parchment paper to keep it from drying out.
Why You’ll Love This Recipe
- No Fuss Setup: I swear by this version because it skips the fuss of separating whites—just yolks, cream, and sugar. The custard comes together in one bowl, no whisking marathon required.
- Vanilla Kiss: That split vanilla bean (or even a splash of extract) transforms simple cream into something luxurious. You’ll taste the difference—rich, floral, and just sweet enough without being cloying.
- Date Night Ready: Serve it warm with berries or dusted with cocoa for a restaurant-worthy dessert that takes less time than ordering takeout. Honestly, my go-to when I want to impress but don’t feel like slaving away.
- Budget Luxury: Four yolks stretch further than you’d think—this recipe feeds two with room to spare, and the sugar caramelizes into crispy gold perfection. Leftovers? Reheat gently and enjoy the next day without a hint of regret.
Step-by-step instructions for 4-Egg yolk crème brûlée
Here’s how to make the creamiest custard with that perfect crackly crust—every time.
👨🍳 Step 1: Infuse the Cream with Vanilla
In a medium saucepan, combine the 2 cups heavy whipping cream, the split vanilla bean, and the 0.25 cup whole milk. Bring to a gentle simmer over medium heat, then immediately reduce to low heat. Let it steep for 10 minutes—you’ll see the liquid turn a pale golden color and smell that rich vanilla aroma.
Here’s the thing—don’t let it boil. You want just enough heat to infuse the cream without cooking the vanilla too aggressively. Remove from heat and let it sit for 5 minutes while you prepare the egg mixture. Strain out the vanilla bean seeds using a fine-mesh sieve, pressing gently on the pod to extract every last bit of flavor.
🍳 Step 2: Whisk the Egg Mixture to Perfection
In a separate bowl, whisk together the 4 whole large egg yolks, 0.75 cup granulated sugar, 1 tablespoon vanilla extract, and 0.125 teaspoon pinch salt until the mixture becomes pale yellow and slightly thickened—about 3-4 minutes of constant whisking. This step is crucial for creating that silky texture we’re after.
I like to use a wire whisk here because it incorporates more air than a fork. You’ll know it’s ready when the mixture coats the back of a spoon and leaves a slight trail when you run your finger through it. Don’t rush this—under-whisked yolks lead to grainy custard.
🥘 Step 3: Temper the Eggs and Assemble Ramekins
Slowly pour the warm vanilla cream into the egg mixture while whisking constantly. This tempering process prevents the eggs from scrambling when they hit the hot liquid. You’ll notice the mixture thicken slightly as it comes together—keep whisking until it’s completely smooth.
Divide the custard evenly among the 4 whole ramekins (about ½ cup each). Place them in a deep baking dish and pour hot water into the dish until it comes ¾ of the way up the sides of the ramekins. This water bath ensures gentle, even cooking.
⏰ Step 4: Bake Until Just Set
Preheat your oven to 325°F. Bake the custards for 40-45 minutes until they’re just set—you’ll see a slight wobble in the center when you gently shake them, but they shouldn’t be completely firm. A toothpick inserted should come out clean or with just a few moist crumbs.
Don’t overbake! The custards will continue cooking as they cool. Here’s my trick: I check the doneness at 35 minutes by inserting a toothpick. If it comes out clean, I pull them immediately. If not, I give them 5 more minutes and check again. The goal is silky, not rubbery.
🔥 Step 5: Chill and Caramelize the Sugar
Remove the ramekins from the water bath and let them cool to room temperature. Then, transfer them to the refrigerator and chill for at least 4 hours—overnight is even better. This resting period lets the custards firm up perfectly while developing their rich flavor.
Before serving, sprinkle an even layer of the 0.25 cup granulated sugar (for crust) over each custard. Use a fine-mesh sieve for an even distribution. Place the ramekins on a baking sheet and torch each one with a kitchen torch until the sugar melts and turns a deep amber color. If you don’t have a torch, broil for 1-2 minutes on high, watching closely to avoid burning.
Pro Tips For Making 4 Egg Yolk Creme Brulee
- Whisk Until Ribbon Stage: The custard’s texture depends on this—whisk those yolks and sugar until the mixture is pale, thick, and leaves a slow ribbon when the whisk is lifted. I used to stop when it looked “done,” but that’s when the custard turns grainy. Keep going until it’s glossy and holds shape for 2 seconds.
- Strain the Custard: No matter how careful you are, stray bits of vanilla bean or cooked egg will sneak in. Strain the custard through a fine-mesh sieve into the cream before pouring into ramekins—it’s the only way to guarantee a silky finish. (Yes, even if you’re in a hurry.)
- Chill the Ramekins First: Cold custard sets faster and more evenly, so pop the ramekins in the fridge for 10 minutes before baking. I learned this after watching my first batch turn rubbery in the middle—now the custard cooks through without over-setting. Pro move: Use ice water for a quicker chill.
- Skip the Vanilla Bean Scrape: If you’re short on time, use double the vanilla extract (1 tsp) instead of scraping the bean—it’s not ideal, but it works. That said, the real flavor comes from the seeds, so save this shortcut for when you’re desperate. (Your future self will notice the difference.)
Best sauces and condiments for this 4 egg yolk creme brulee
Vanilla Bean Infusion
Elevate your crème brûlée by infusing the cream with a whole vanilla bean—it adds depth that extract can’t match. Simmer 2 cups heavy cream with 1 split vanilla bean and ¼ cup whole milk for 10 minutes on low heat.
The cream should turn pale gold and smell intoxicating. Strain out the seeds using a fine-mesh sieve, pressing the pod gently to extract every last drop of flavor. 🌿
Spiced Sugar Variations
For a twist, sprinkle ½ teaspoon cinnamon or ¼ teaspoon cardamom into the custard mixture before baking. The spices blend seamlessly with the vanilla, adding warm complexity.
For the sugar crust, try turbinado sugar—it caramelizes with a deeper, molasses-like flavor. Just torch it 10% longer since it takes slightly more heat to melt.
Citrus Zest Brightness
Add 1 teaspoon lemon or orange zest to the custard for a refreshing contrast to the vanilla. The citrus brightens the rich custard, making each bite feel lighter. Pair it with a sugar crust dusted with lemon zest before torching for a stunning visual and flavor pop.
Use a microplane for fine, even zest—avoid the bitter pith!
Coffee or Chocolate Swirl
For coffee lovers, stir 1 tablespoon instant espresso powder into the warm cream before straining. For chocolate fans, melt 1 ounce dark chocolate (70% cacao) into the cream and whisk until smooth.
Divide the custard into ramekins, then swirl in 1 teaspoon chocolate sauce or espresso syrup before torching the sugar. The contrast of creamy custard with bold coffee or chocolate is pure indulgence. 💫
Herbal Infusions
Experiment with lavender, rosewater, or Earl Grey tea for floral notes. Steep 1 teaspoon dried lavender in the warm cream for 5 minutes, then strain. For rosewater, add ½ teaspoon to the custard mixture.
Earl Grey lovers can steep 1 tea bag in the cream for 5 minutes—the bergamot shines through beautifully. These infusions add sophistication without overpowering the vanilla.
Fruit Compote Pairings
Serve your crème brûlée alongside warm berry compote or caramelized peaches to cut through the richness. Simmer 1 cup mixed berries with 2 tablespoons sugar and 1 teaspoon lemon juice for 10 minutes until thickened.
For peaches, poach 2 sliced peaches in ½ cup sugar syrup until tender, then caramelize in a pan with 1 tablespoon butter. The acidity balances the custard’s sweetness perfectly. 🍓
Nutrition facts
Frequently asked questions
Can I use whole eggs instead of just yolks?
No, this recipe specifically uses 4 egg yolks for the perfect balance of richness and silkiness. Whole eggs would make the custard too heavy and prone to curdling. The yolks give you that luxurious, velvety texture without overpowering the vanilla flavor. If you’re curious, classic crème brûlée often uses 5-6 yolks for a richer result, but this version keeps it light and elegant.
What if my custard doesn’t set properly?
If your custard is still too soft after baking, it likely wasn’t baked long enough or didn’t chill properly. Make sure to bake at 325°F for 40-45 minutes until just set (a slight wobble in the center), then chill for at least 4 hours. If it’s still runny, try baking it 5 more minutes next time or reduce the milk by 1 tablespoon to make it thicker.
How do I fix a sugar crust that’s too dark or burnt?
Torching is all about patience—work in small circles and keep the flame 2-3 inches away from the sugar. If it burns, try broiling instead: sprinkle the sugar, then broil on high for 1-2 minutes, watching closely. For a lighter color, use superfine sugar (it caramelizes faster) or torch for 10-15 seconds per ramekin. The goal is a deep amber, not black!
Can I make this ahead of time?
Assemble the custards up to 1 day ahead and refrigerate uncovered. The sugar crust is best torched fresh, but if you torch ahead, cover it with parchment paper to prevent drying. For longer storage, bake the custards, then refrigerate them in their ramekins (without sugar) for up to 3 days. Torch right before serving for the best texture.
Why is my crème brûlée watery?
Watery custard usually means it wasn’t baked long enough or the eggs weren’t tempered properly. Always whisk the egg mixture until it’s pale and thick before adding the warm cream. Bake until just set (40-45 minutes at 325°F), then chill thoroughly. If it’s still too soft, try reducing the milk by 1 tablespoon next time or baking 5 minutes longer.

- Pea Soup Instant Pot Recipe: Velvety Green Smoothness in 20 Minutes - November 1, 2026
- Pork Loin Pulled Pork Crock Pot Recipe: Slow-Smoked Tenderness With Zero Dryness - November 1, 2026
- Baked Potatoes in Crock Pot Recipe: Buttery Interiors and Crispy Top Magic - November 1, 2026