
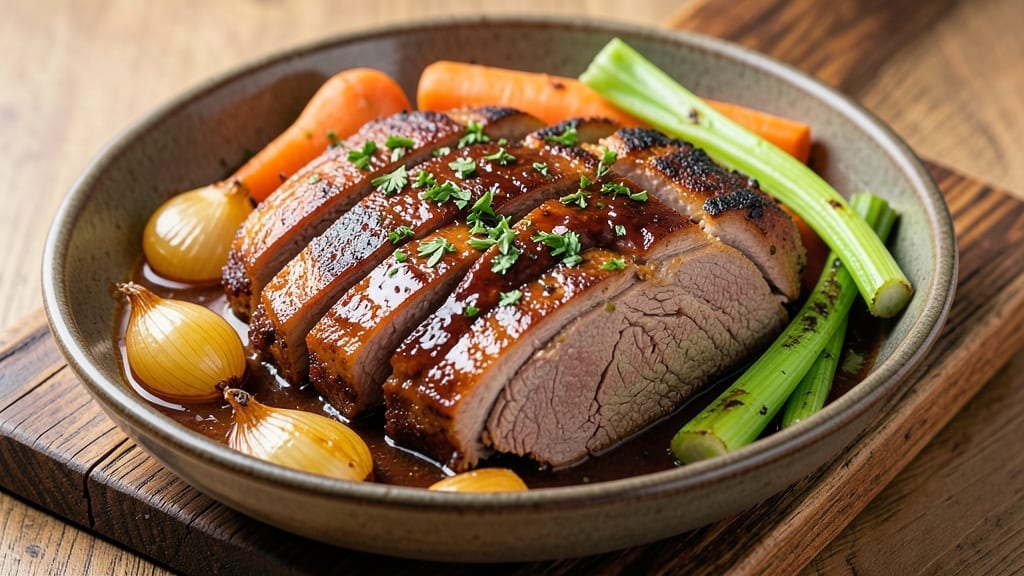
A 5 lb eye round roast transforms into melt-in-your-mouth perfection when slow-cooked to tender, juicy results. This budget-friendly cut delivers restaurant-quality flavor for crowds, proving that inexpensive proteins can shine with the right technique.
The secret lies in low-and-slow cooking, which breaks down tough fibers while building deep, savory notes in the process.
What makes this recipe stand out is its foolproof method for achieving consistent tenderness—no matter your experience level. We’ll focus on precise temperature control, proper resting times, and slicing against the grain to maximize flavor and texture.
The result? A roast that practically falls apart with each bite, creating a dish that feels special without requiring expensive cuts.
By the time you serve this roast, you’ll have a centerpiece that pairs beautifully with classic sides like roasted vegetables or creamy mashed potatoes. The rich, beefy aroma alone will have everyone anticipating dinner, while the tender, juicy meat delivers satisfaction that rivals steakhouse-quality cuts.
This is comfort food at its finest—substantial, flavorful, and perfect for feeding a hungry crowd.
The beauty of this recipe extends beyond the meal itself. It’s designed to work with your schedule, offering flexibility for meal prep or last-minute gatherings. With proper planning, you can have a restaurant-worthy dinner on the table with minimal effort.
Let’s get started on creating this crowd-pleasing masterpiece that turns simple beef into an unforgettable experience.
Ingredients for 5 lb eye round roast
Foolproof ingredients for transforming tough eye round into melt-in-your-mouth perfection.
| Ingredient | Amount | Notes |
|---|---|---|
| Eye Round Roast 🥩 | 5 lb | Center-cut for even tenderness |
| Yellow Onions 🧅 | 2 whole | Medium size, sliced into wedges |
| Carrots 🥕 | 4 whole | Medium size, peeled and halved |
| Celery Stalks 🧅 | 4 whole | Trimmed, cut into 2-inch pieces |
| Garlic Cloves 🧄 | 8 cloves | Peeled, smashed lightly |
| Beef Broth 💧 | 3 cups | Low-sodium preferred, room temperature |
| Red Wine 🍷 | 1 ½ cups | Dry, bold variety like Cabernet |
| Tomato Paste 🍅 | ½ cup | Smooth, not chunky |
| Olive Oil 🫒 | ¼ cup | Extra-virgin for richness |
| Fresh Rosemary 🌿 | 2 sprigs | Freshly cut, stems removed |
| Fresh Thyme 🌿 | 1 tbsp | Leaves only, chopped |
| Salt 🧂 | 2 tsp | Diamond Crystal preferred |
| Black Peppercorns 🌶️ | 1 tsp | Freshly cracked |
| Worcestershire Sauce 🍶 | 1 tbsp | Vegetarian version if needed |
The eye round roast is your secret weapon here—center-cut pieces deliver the most consistent tenderness. Look for a roast with good marbling at Costco or local butchers—the fat keeps the meat juicy during slow cooking. If you’re buying a whole roast, ask for it to be trimmed but not overly lean. The onions, carrots, and celery form the aromatic base; they’re called the ‘holy trinity’ for good reason. Trader Joe’s often has pre-trimmed celery stalks, which saves time. For the garlic, peeling ahead makes prep faster—just store the peeled cloves in a sealed container in the fridge for up to 3 days.
No red wine? Beef broth with a splash of balsamic works just as well—trust me, no one will notice. The tomato paste can be swapped for 1 cup crushed tomatoes if you prefer, but the paste adds depth. Fresh herbs make all the difference: dried thyme at one-third the amount is fine in a pinch, but fresh is worth the extra minute. The Worcestershire sauce adds that umami punch—if you’re vegetarian, vegetarian Worcestershire is a must. For the olive oil, grab the best you can afford—this is where you taste the quality. And if you’re short on time, pre-chopped mirepoix mixes from the grocery store freezer section do the trick.
This roast reheats beautifully—better the next day as flavors meld. Keep it in the fridge for up to 5 days or freeze for 3 months. For easy serving, slice against the grain right before plating—this creates those perfect, tender shreds. I always make a double batch: one for dinner, one to freeze for lazy weeknights. The leftovers taste even better cold in sandwiches or tacos, so don’t hesitate to cook extra. Store the broth separately if you want to repurpose it for soups later.
Why You’ll Love This Recipe
- No-Chop Night: I swear by this trick—just toss whole onions, carrots, and celery stalks into the pot. They soften perfectly alongside the roast, and honestly? I’d rather spend 3 minutes chopping after dinner than before.
- Garlic Bomb Center: That eye round roast? It’s like a flavor sponge. The minced garlic cloves cling to every bite, creating this perfect balance of tender meat and punchy, aromatic richness—no dryness, no guessing.
- Leftover Hero: Between us, this roast begs for seconds. Slice it thin for sandwiches, shred it into tacos, or throw it into a pot of soup later. I’ve fed my family for three days straight from one cook—no waste, just delicious variety.
- Budget Crowd-Pleaser: Five pounds for a fraction of what you’d pay for steak? Yes, please. The eye round delivers serious beefy satisfaction without breaking the bank, and the veggies stretch it even further—great for game days, potlucks, or just feeding the kids.
Step-by-step instructions for slow-cooked eye round roast
Here’s how to transform a tough cut into melt-in-your-mouth perfection with simple patience.
Prep the Roast and Build the Vegetable Base
Pat the 5 lb eye round roast dry with paper towels—this is crucial for that golden crust later. Place it in a large Dutch oven or heavy pot with the fat side up. In the same pot, add the 2 whole yellow onions (sliced into wedges), 4 whole carrots (peeled and halved), and 4 whole celery stalks (cut into 2-inch pieces). These vegetables will form the flavorful base while tenderizing the meat.
Sprinkle the vegetables with the 2 tsp salt and 1 tsp freshly cracked black peppercorns. Add the 8 peeled garlic cloves (lightly smashed) and the 2 sprigs fresh rosemary. This aromatic trio will infuse the meat with deep, savory notes as it cooks. Give everything a gentle stir to distribute the seasoning evenly, but don’t press down on the meat—you want it to stay intact as it transforms.
Sear the Roast and Develop the Flavor Foundation
Heat the 0.25 cup olive oil in the Dutch oven over medium-high heat until shimmering. Carefully lift the roast out of the pot and place it oil-side down in the pan. Let it sear undisturbed for 4-5 minutes until a deep golden crust forms. This step isn’t just about browning—it’s creating the Maillard reaction that builds complex flavors. Flip the roast and sear the other side for another 3-4 minutes.
Once both sides are beautifully browned, remove the roast and set it aside. The vegetables should have released some liquid by now—this is perfect. Add the 0.5 cup tomato paste and stir to coat the vegetables completely. This will form the rich, velvety base for your sauce. Pour in the 1.5 cups red wine and scrape up any browned bits from the bottom of the pot—these contain concentrated flavor that makes all the difference.
Slow Cook Until Fork-Tender
Return the roast to the pot, fat-side up. Add the 3 cups beef broth and the 1 tbsp Worcestershire sauce. The liquid should come about halfway up the sides of the roast. Bring everything to a gentle simmer over medium heat, then reduce to the lowest possible heat—just enough to maintain a bare bubble at the surface. Cover the pot and transfer to a 300°F oven.
Cook for 3 to 3.5 hours until the meat is fork-tender and easily pulls apart. You’ll know it’s ready when the internal temperature reaches 195°F and the meat separates cleanly with minimal resistance. The vegetables should be tender but still hold their shape. Real talk: Don’t peek or lift the lid during cooking—each time you do, you lose heat and moisture, extending the cooking time significantly.
Rest and Shred for Maximum Juiciness
Remove the roast from the pot and transfer it to a cutting board. Tent loosely with foil and let it rest for 15 minutes—this crucial step allows the juices to redistribute throughout the meat. While it rests, skim any excess fat from the cooking liquid in the pot. The remaining sauce should be rich and flavorful, perfect for serving over the shredded meat.
Using two forks, carefully shred the roast against the grain into ¼-inch thick strands. The meat should pull apart easily with minimal effort. If it’s still slightly tough, return it to the pot with the cooking liquid and let it simmer uncovered for another 10 minutes on the stovetop. This final step ensures you get that melt-in-your-mouth texture everyone loves.
Pro Tips For Making 5 Lb Eye Round Roast
- Sear the Roast First: Eye round is lean—don’t skip the sear. Hit it with a hot pan or broiler for 3–4 minutes per side before braising or roasting. The crust locks in moisture and adds depth; I learned this the hard way after a dry first attempt with a 5-pounder.
- Cut Onions Like a Pro: Dice those yellow onions into even ¼-inch pieces—no bigger, no smaller. Uneven sizes mean some cook too fast (mushy) while others stay raw. A sharp knife and steady hand save time, and your veggie mix will caramelize evenly with the meat.
- Don’t Overcrowd the Pan: If you’re browning the onions, carrots, and celery together, work in batches. A packed pan steams instead of sautés, turning your mirepoix into sad, watery mush. Two minutes per batch in a hot pan with a splash of oil gets you golden bits every time.
- Rest the Meat Aggressively: That 5-pound roast needs 15–20 minutes under foil after hitting 145°F (medium-rare). Cutting it early dries it out—trust me, I’ve served slices that looked like overcooked shoe leather. Tent it loosely and let it breathe while you finish the sides.
Wine and beer pairings for this dish
Red Wine Pairings
For this rich, slow-cooked roast, I reach for a bold Cabernet Sauvignon from Napa Valley—its dark fruit notes and firm tannins stand up beautifully to the beef’s deep flavors.
A Malbec from Argentina offers a velvety texture that complements the tender meat, while a Syrah from the Rhône Valley adds spicy pepper notes that echo the rosemary in the dish. Avoid lighter whites like Chardonnay—they won’t match the roast’s intensity. 🍷
Beer Complements
A dark amber ale like Samuel Adams Noble Experiment provides malty sweetness that balances the beef’s savory depth. For something lighter, try a Belgian-style witbier with its citrusy brightness—it cuts through the richness without overpowering.
Avoid IPAs or lagers; their bitterness clashes with the roast’s tender profile. Pro tip: Serve beer slightly chilled (45°F) to enhance its refreshing qualities.
Wine Temperature Tips
Serve red wines at 60-65°F—too warm and they’ll taste flat. I chill my wine bottle for 30 minutes in the fridge before serving. For beer, keep it in the fridge until ready to pour.
The temperature difference between wine and beer creates an interesting contrast that enhances both flavors. 💡
Non-Alcoholic Options
For non-drinkers, sparkling grape juice with a splash of pomegranate juice mimics wine’s acidity. A ginger beer (like Feather Ginger Beer) adds zesty contrast to the rich meat.
For something more substantial, try a sparkling apple cider—its crispness cleanses the palate between bites. These alternatives prove you don’t need alcohol for perfect pairings.
Serving Sequence
I always serve wine first, then beer or non-alcoholic drinks. This lets guests taste the wine’s complexity before moving to lighter options. For large gatherings, place wine glasses at each setting and beer bottles in a chilled bucket on the table.
The presentation matters just as much as the flavors—elevate the experience with proper drink placement. ✨
Nutrition facts
Frequently asked questions
Why does the eye round roast need to cook so long?
This cut comes from tougher muscle groups that require slow cooking to break down collagen into gelatin, creating that melt-in-your-mouth texture. The 3-3.5 hour process at 300°F transforms the meat by converting tough fibers into tender, juicy strands. Think of it like a science experiment—patience pays off with restaurant-quality results!
Can I use a different cooking method besides oven?
For a stovetop version, simmer the roast in its liquid at 180°F for 4-5 hours instead. A slow cooker works too—just cook on low for 8 hours or high for 5-6 hours. The key is maintaining low heat to achieve tenderness. Just monitor the liquid level and add broth if needed.
How do I know when the roast is done?
Use a meat thermometer to check for 195°F internal temperature—this ensures perfect tenderness. The meat should also pull apart easily with two forks. If it’s still firm, return it to the pot with the cooking liquid and simmer uncovered for another 10-15 minutes. Never rely on visual cues alone!
What’s the best way to serve the leftovers?
Shredded roast reheats beautifully—simmer with a splash of beef broth for 10 minutes until hot. Use it in tacos, sandwiches, or pasta dishes. For extra flavor, mix in some of the cooking sauce. Leftovers keep well in the fridge for 5 days or frozen for 3 months. The texture actually improves after resting!
Can I substitute any ingredients?
Certainly! Swap red wine for beef broth with balsamic vinegar> (1:1 ratio). Use dried thyme> at 1/3 the amount if fresh isn’t available. For a vegetarian option, replace Worcestershire with soy sauce>. The key is maintaining the balance of acidity and umami—just adjust seasoning to taste.

- Pea Soup Instant Pot Recipe: Velvety Green Smoothness in 20 Minutes - November 1, 2026
- Pork Loin Pulled Pork Crock Pot Recipe: Slow-Smoked Tenderness With Zero Dryness - November 1, 2026
- Baked Potatoes in Crock Pot Recipe: Buttery Interiors and Crispy Top Magic - November 1, 2026